Apple's new Mac Pro isn't stuck with what you buy at initial purchase. A SSD upgrade kit from the company can quickly add one to eight terabytes of storage to your professional workstation by following these steps.
Mac Pro owners now have three options for more storage on their device — they can choose an external storage drive such that connects over USB or Thunderbolt 3, they can choose an internal option such as the Promise Pegasus R4i or OWC Accelsior 4M2, or they can upgrade the stock internal SSD thanks to newly released upgrade kits from Apple.
Use cases determine which of those solutions is best, but there are benefits to upgrading the primary drive. Many apps, scratch disks, and other components are stored on the primary drive by default and sometimes users may need access to all of the PCIe slots. Whatever the reason, upgrading the primary drive is now possible.
As Apple's machines have become more complicated — and more secure — what used to be a near-trivial procedure is now a multi-step, labor-intensive process. It isn't as easy as swapping out a drive sled and restoring from a backup. Rather, it now involves not just more work to swap the parts, but a second Mac to aid in the restore.
That said, the process is entirely manageable. We will walk you through the process of removing the old module or modules, installing the new ones, restoring the T2 firmware, and reinstalling macOS before finally moving your data back.

Assuming you've picked up Apple's new upgrade kit, here is how to install them on your Mac Pro.
Before we start
Before you begin the task of upgrading the SSD in your Mac Pro (2019) there are a few things to touch on.
Once done, your old SSD module will be unusable. Apple uses its own proprietary SSD so it won't fit in any enclosure and once the new SSD has the T2 firmware restored, the old SSD's data will be inaccessible.
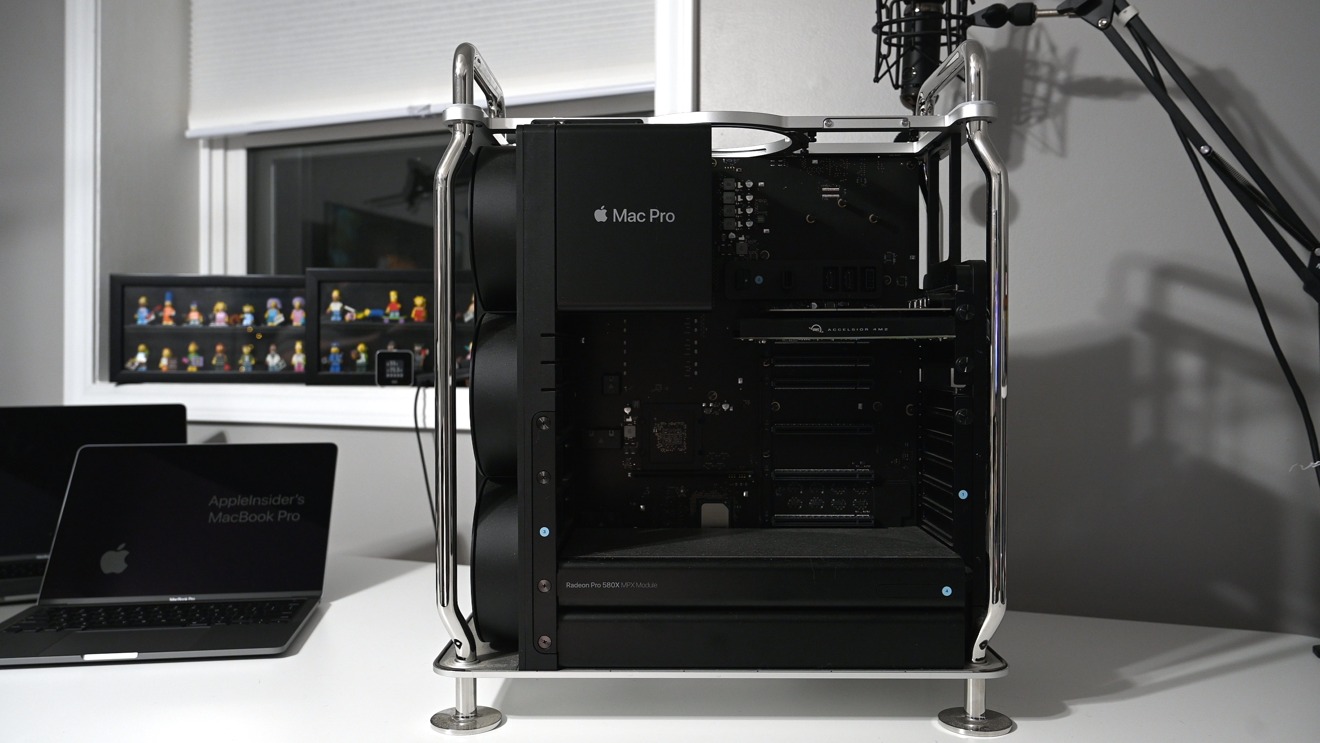
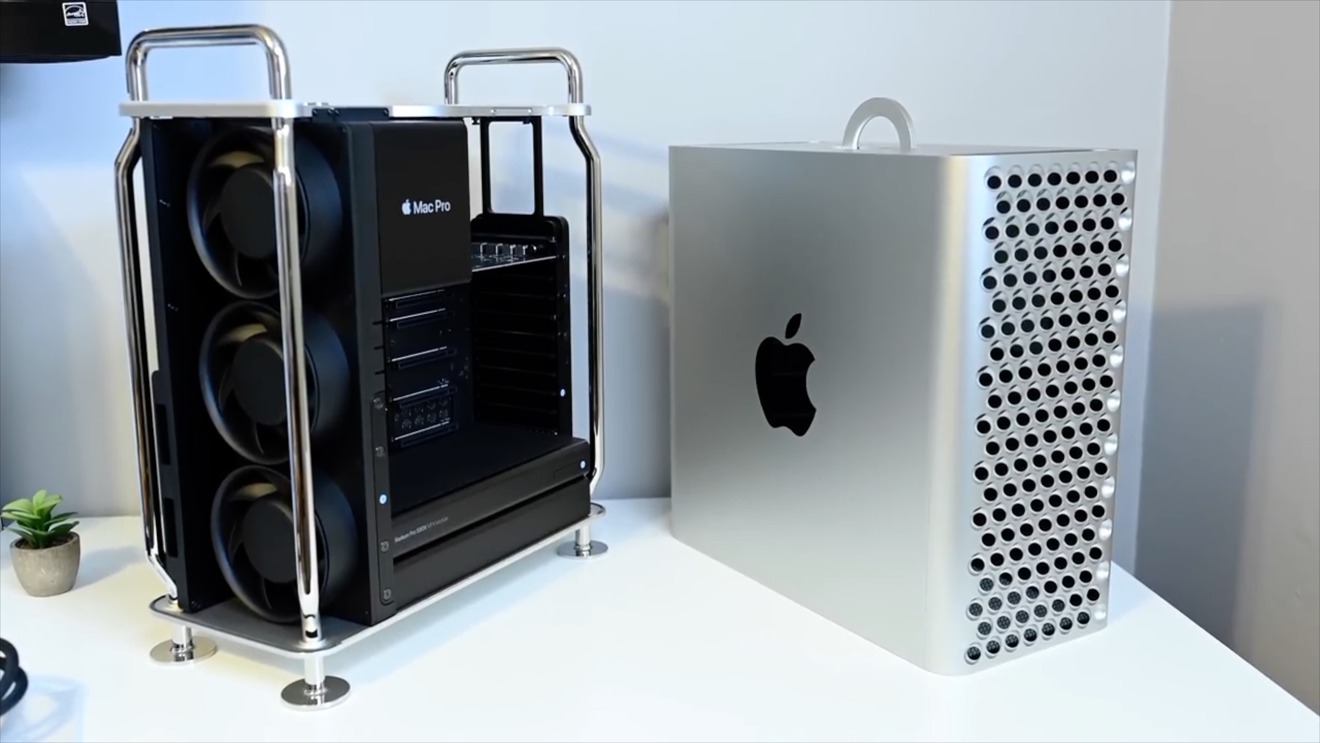
2019 Mac Pro with case removed
And speaking of data, if you are planning to restore from the previous drive, it is important to ensure you have a recent backup that you are able to use.
Mac Pro SSD kit upgrade requirements
- T8 screwdriver
- USB-C to USB-C cable — must support data as well as power
- A secondary Mac with 10.14.6 or later
- Apple COnfigurator 2.12 or later on the second Mac
- Apple Mac Pro SSD upgrade kit
- A recent backup if restoring user data
Uninstalling old SSD and installing new SSD modules
Once you've checked the requirements above you are ready to proceed.
How to install the Mac Pro SSD upgrade kit
- Properly shut down the Mac Pro from the Apple menu
- Disconnect all cables from the Mac Pro and remove the external case Always be sure to discharge any static electricity when working inside the Mac Pro
- Carefully place the Mac Pro horizontally, ensuring that the Mac won't damage your work area and vice versa
- Push down on the SSD cover and slide it away from the Mac
Note: The PCIe baffle clips can be delicate. Don't force these apart or clips will break. If you have issues removing PCIe baffle, remove the DIMM baffle above first
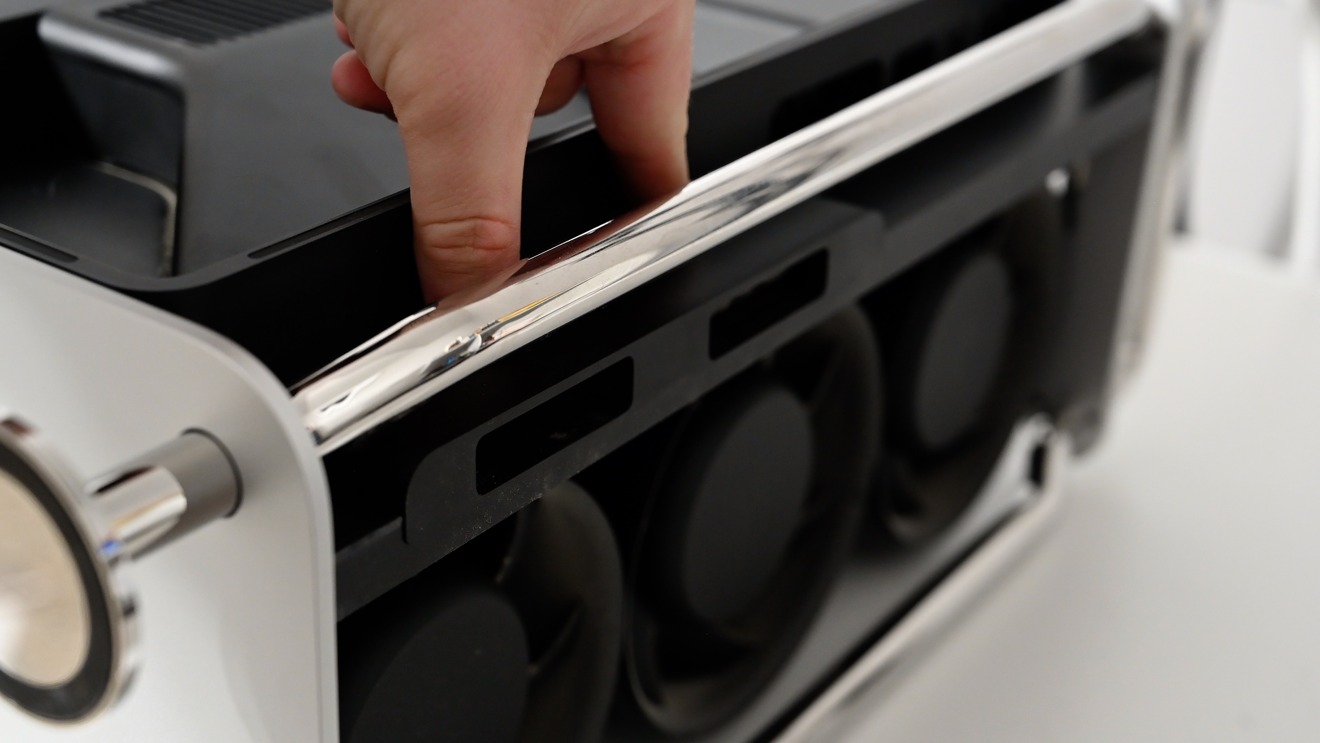 Carefully remove SSD baffle
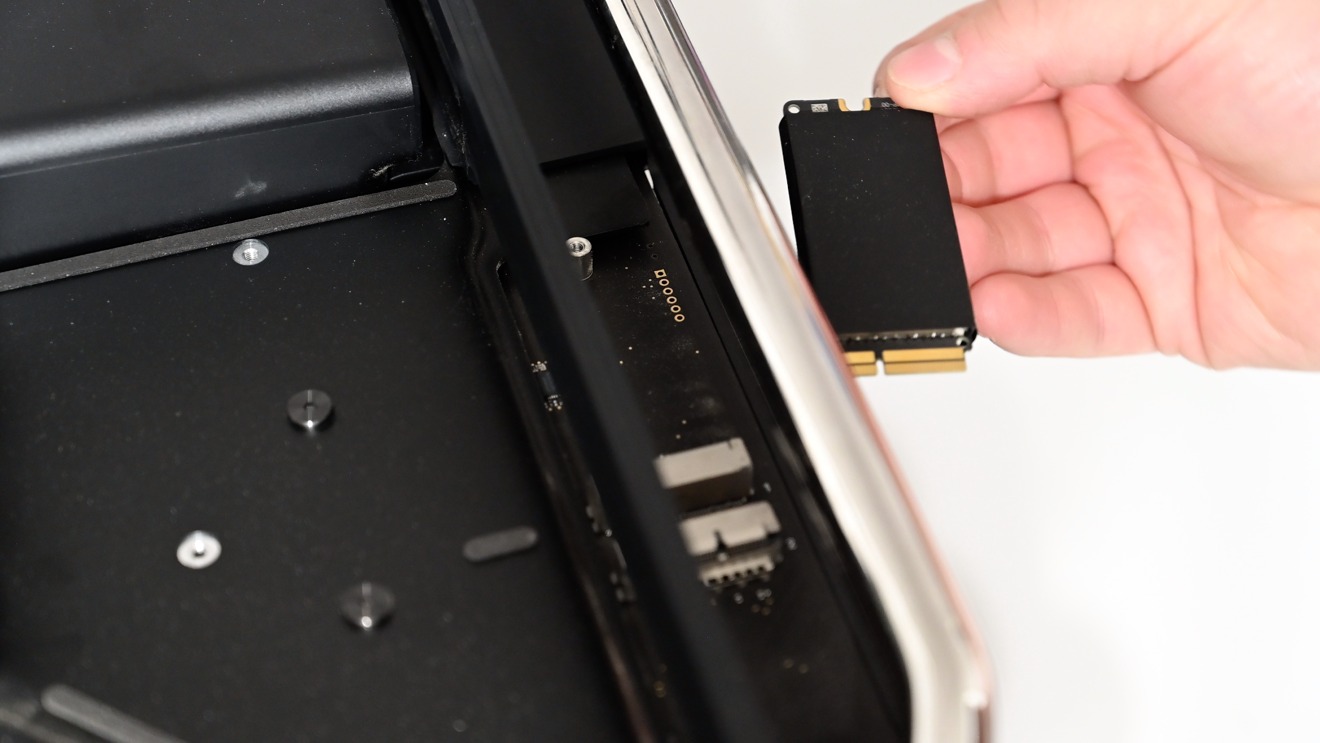
 - Use your T8 Torx screwdriver to remove the screws on the existing SSD modules and pull them straight out from the clip
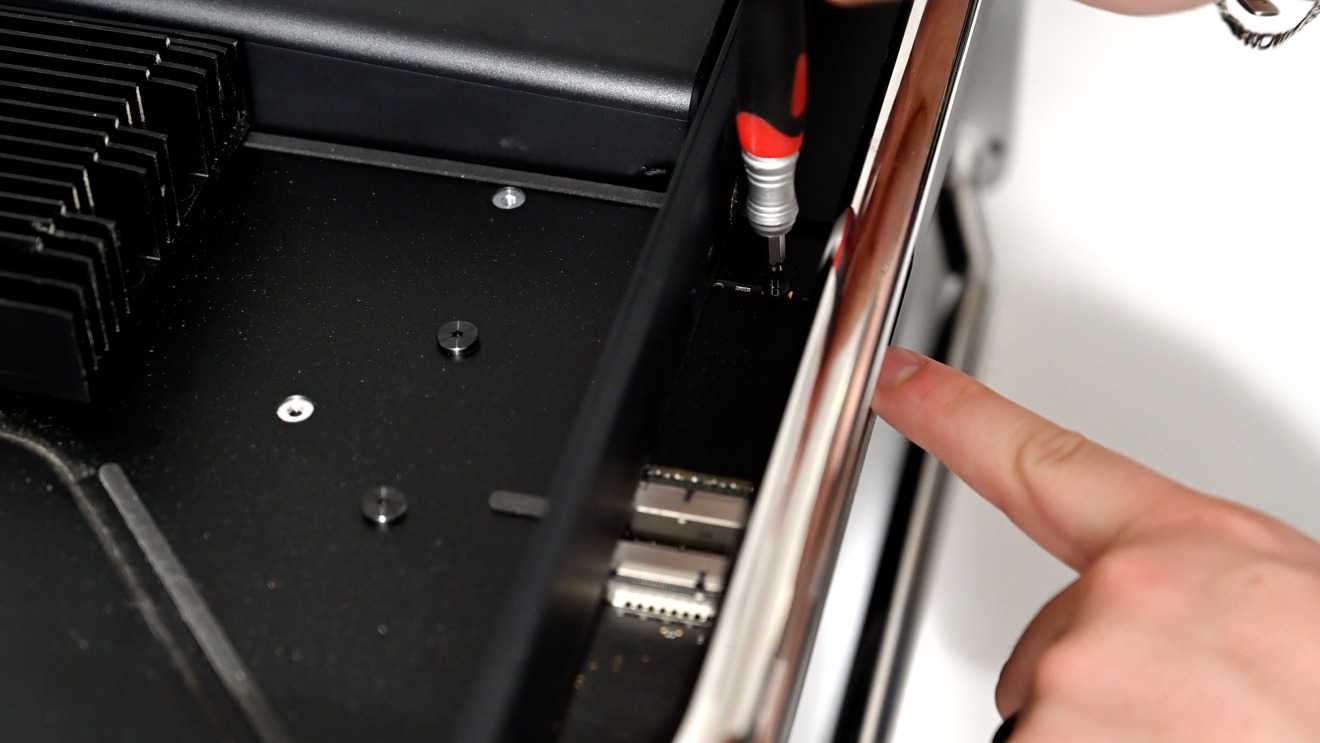 Removing T8 Torx screw from SSD
 - Remove the new SSD modules from their protective foil wrappers, ensuring you've discharged any static electricity prior to doing so
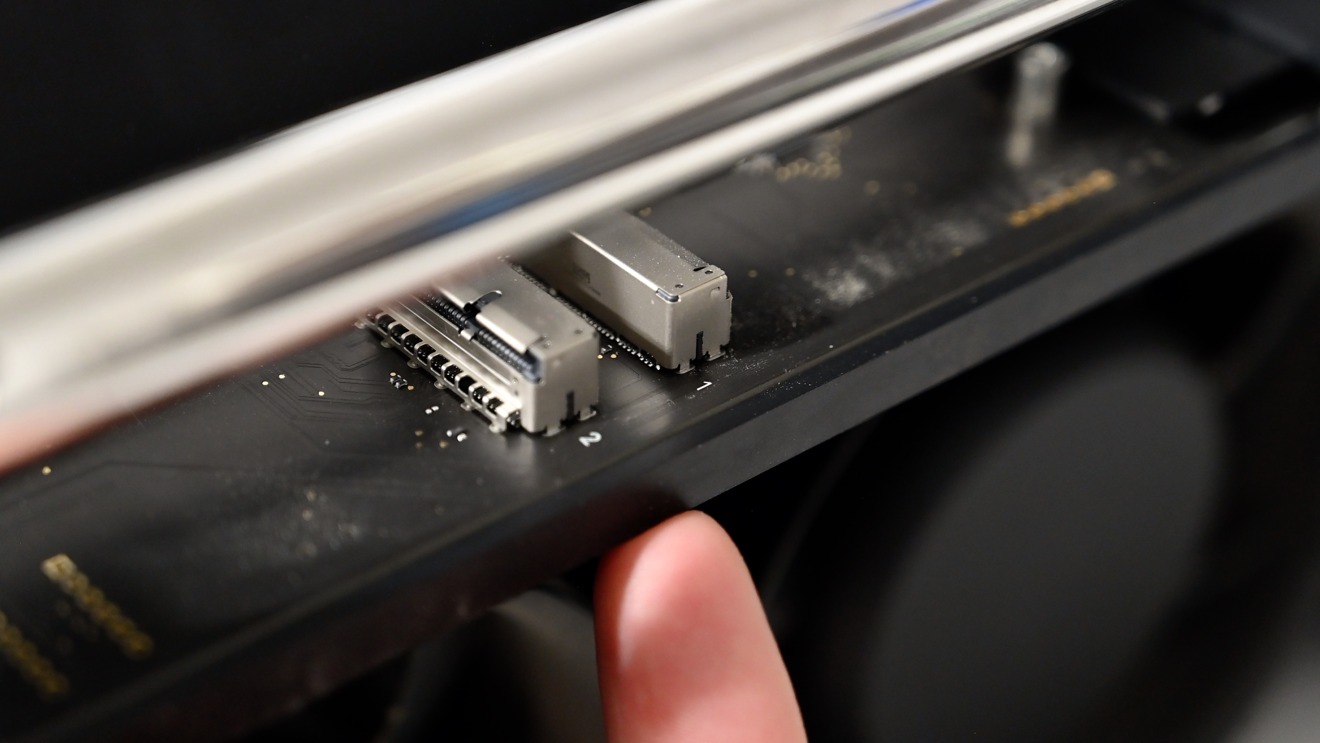
- Side the new modules into the clips and secure with T8 Torx screws
Be sure module one goes into the top slot labeled "1" and two goes into slot labeled "2"
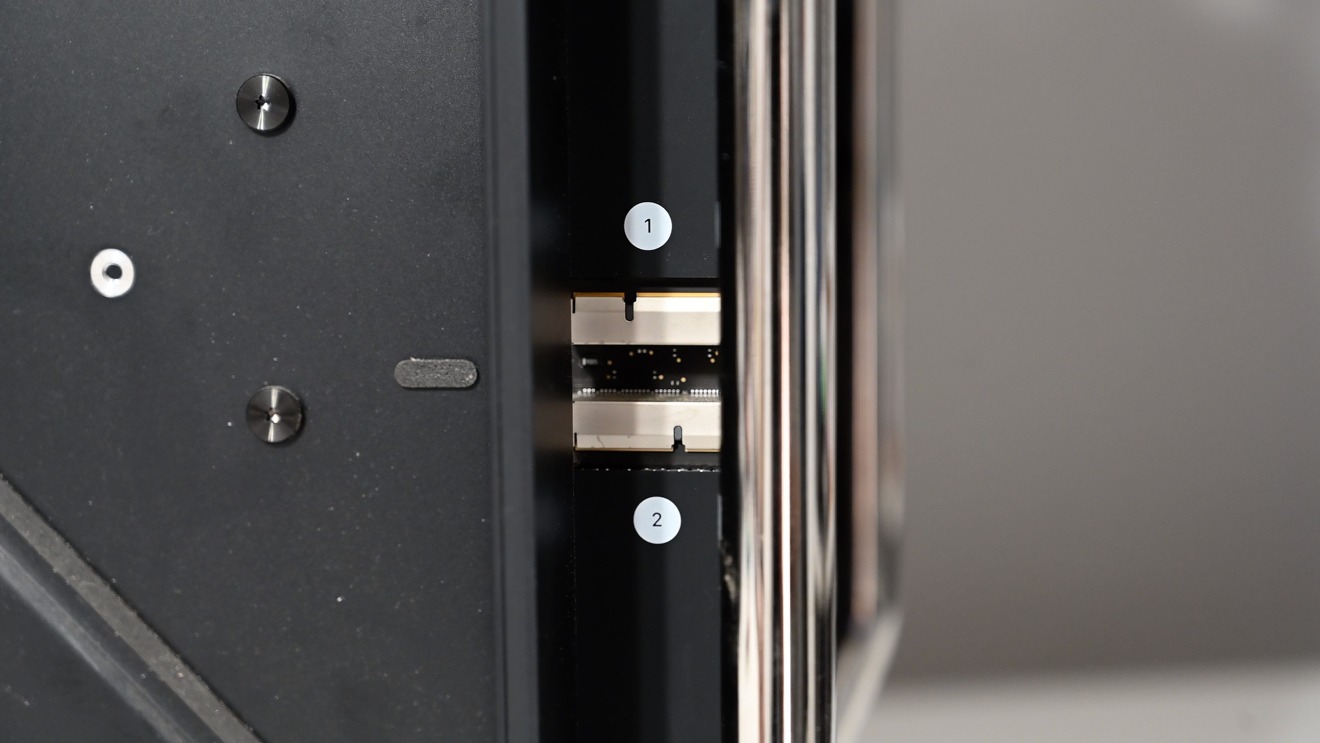
 The Mac Pro's labeled SSD slots
 - Slide covers back into place over top of new SSD modules and put the case back onto the Mac Pro
The new pair of SSDs installed on the Mac Pro
Once you complete the steps above, the new SSD modules are fully installed, but still not usable. If you try to power on the Mac Pro, the status light atop will flash orange.
Before you can use the Mac, we will need to restore the T2 chip's firmware to pair with the new SSDs.
Restoring the T2
- Optionally connect a monitor to your Mac Pro to keep an eye on the process
- With the power still unplugged, connect a USB-C cable to the top Thunderbolt 3 port that is farthest from the power button and connect to your second Mac
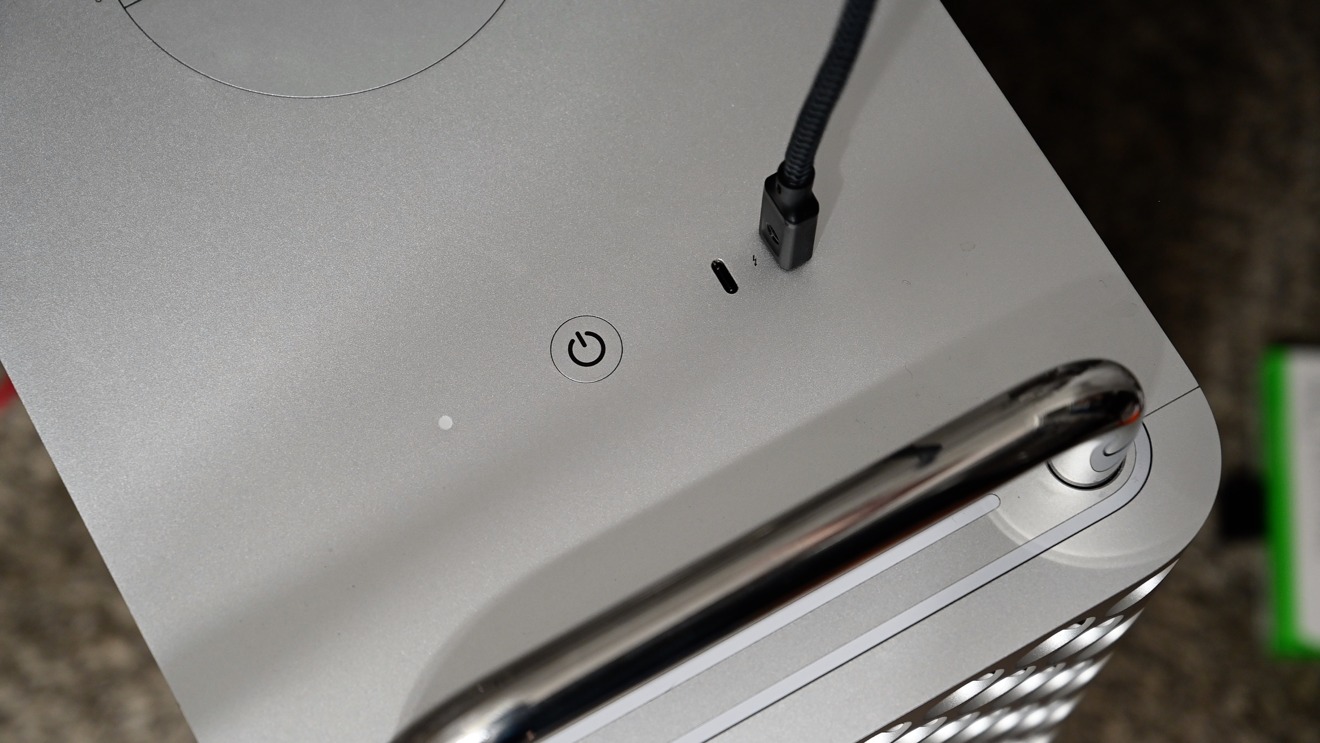 Connect your USB-C cable to the furtheest Thunderbolt 3 port
 - While holding the power button, connect the Mac Pro's power cable. Hold the button for at least three seconds
- In Apple Configurator 2, select the Mac which will show as "DFU" and listed as "Apple Controller"
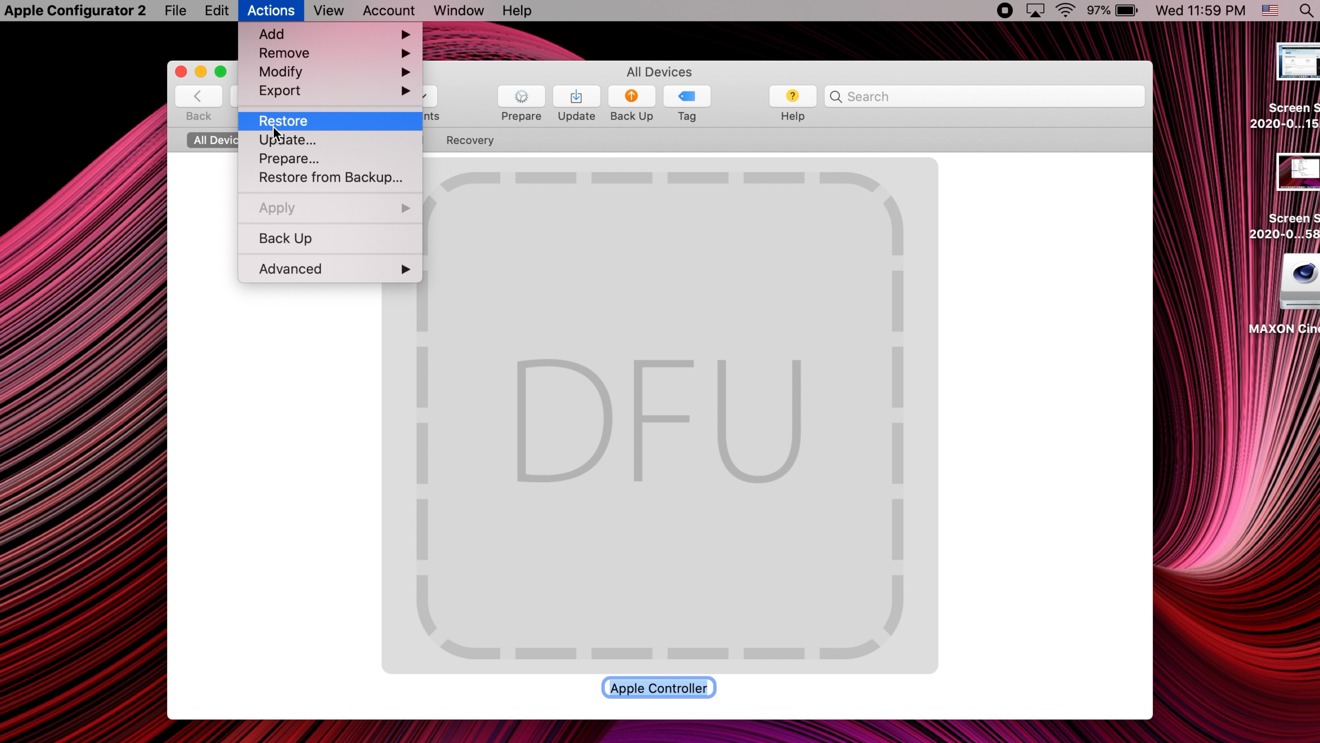 Restoring the T2 firmware in Apple Configurator 2
 - From the menu bar, choose Actions > Restore
- Wait for the process to complete
- If the Mac doesn't automatically reboot, press the power button to automatically boot into recovery mode
Install macOS
The Apple Mac Pro SSD
From here, it is a more familiar affair. Reinstall macOS and restore your data.
- Wait for Mac to boot into macOS Recovery
- Choose "Reinstall macOS from list of utilities
- Go through the prompts and wait for macOS to install
- Once it reboots, walk through the new Mac onboarding process
- If restoring from a backup, choose that option when prompted
A new Mac
Once you've completed all steps above, you will have successfully removed the old SSD modules, installed the new ones, restored the T2 firmware to the new modules, reinstalled macOS, and finally restored your data.
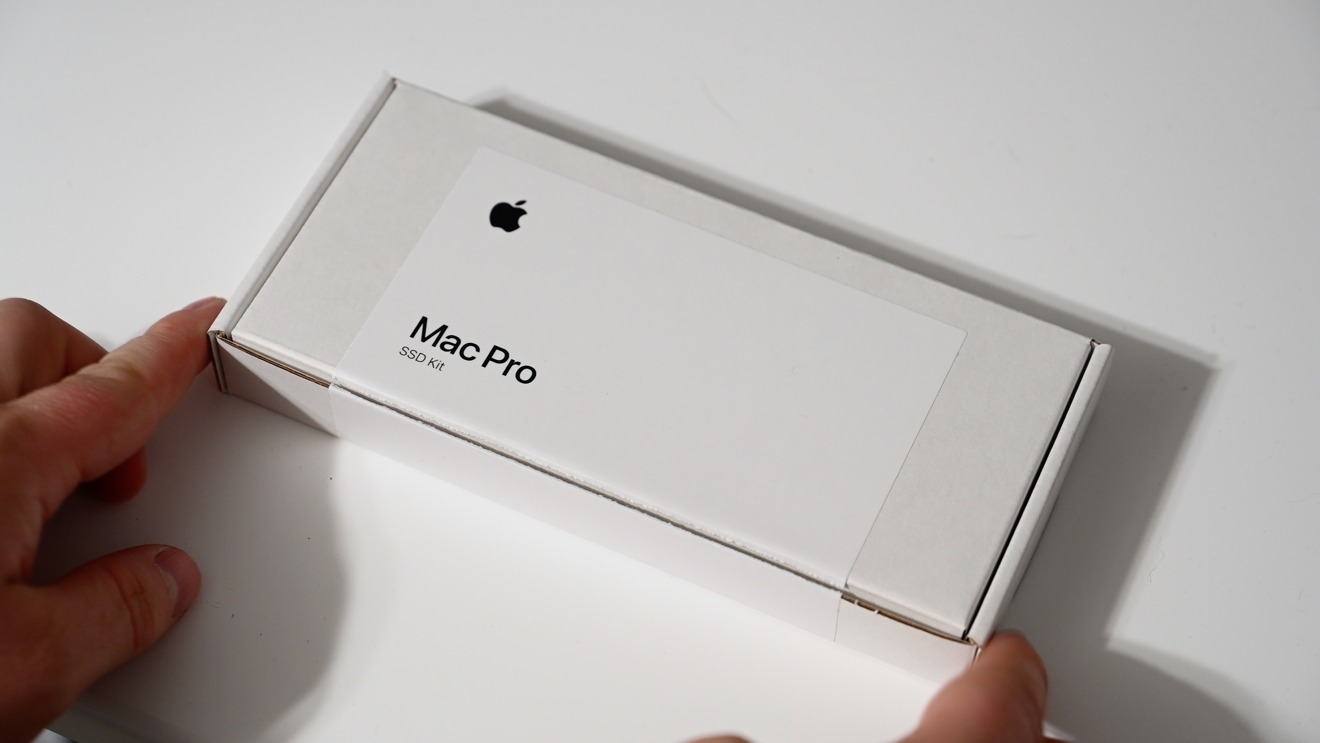
Mac Pro SSD kit
It may seem daunting, but it not far off from a normal SSD replacement sans the necessity for a second Mac. The process is relatively quick all things considered and it is a huge step forward for swapping storge on T2-enabled devices.
Where to buy the Mac Pro SSD Kit
Apple's Mac Pro SSD Kit is availabe to purchase at B&H Photo, with prices starting at $600 where it is available in 1TB, 2TB, 4TB, and 8TB sizes.
Deals on Apple's Mac Pro are also in effect now, with exclusive savings on a variety of configurations with or without the Afterburner card. Find the lowest Mac Pro prices in the AppleInsider Mac Price Guide.
Alternative options