There are few names as recognizable as Hunter Douglas when it comes to custom interior home shades. We found the company's PowerView line is about as luxe as it gets with a dizzying array of designs and materials as well as top-notch HomeKit support.
We've continued to grow our smart home, both as Apple has added new categories to HomeKit as well as more and more products become available. After buying a new home, we installed our first set of custom HomeKit-enabled shades. We're back at it again, just weeks later, for a new set to outfit our production studio.
In this case, we went with Hunter Douglas. Hunter Douglas has an excellent reputation, so we expected great things out of the company's connected offering, PowerView.
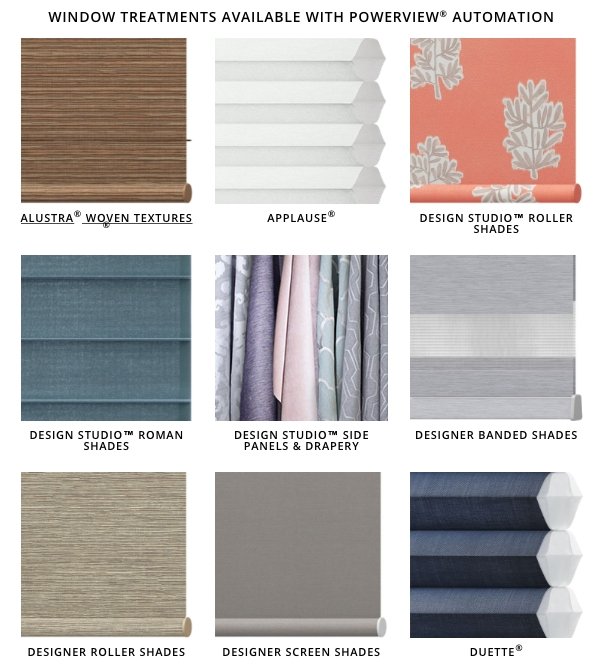
Just some of the PowerView window treatment options
Hunter Douglas has a mind-boggling selection of options to choose from when designing your shades. When perusing the PowerView site, we noted 22 different window treatment styles to choose from. Each window treatment has options on its own, including various shapes, fabrics, colors, and opacities.
Other than just fabrics, there are wood options as well. Your shades can be as personalized to you as you can imagine.
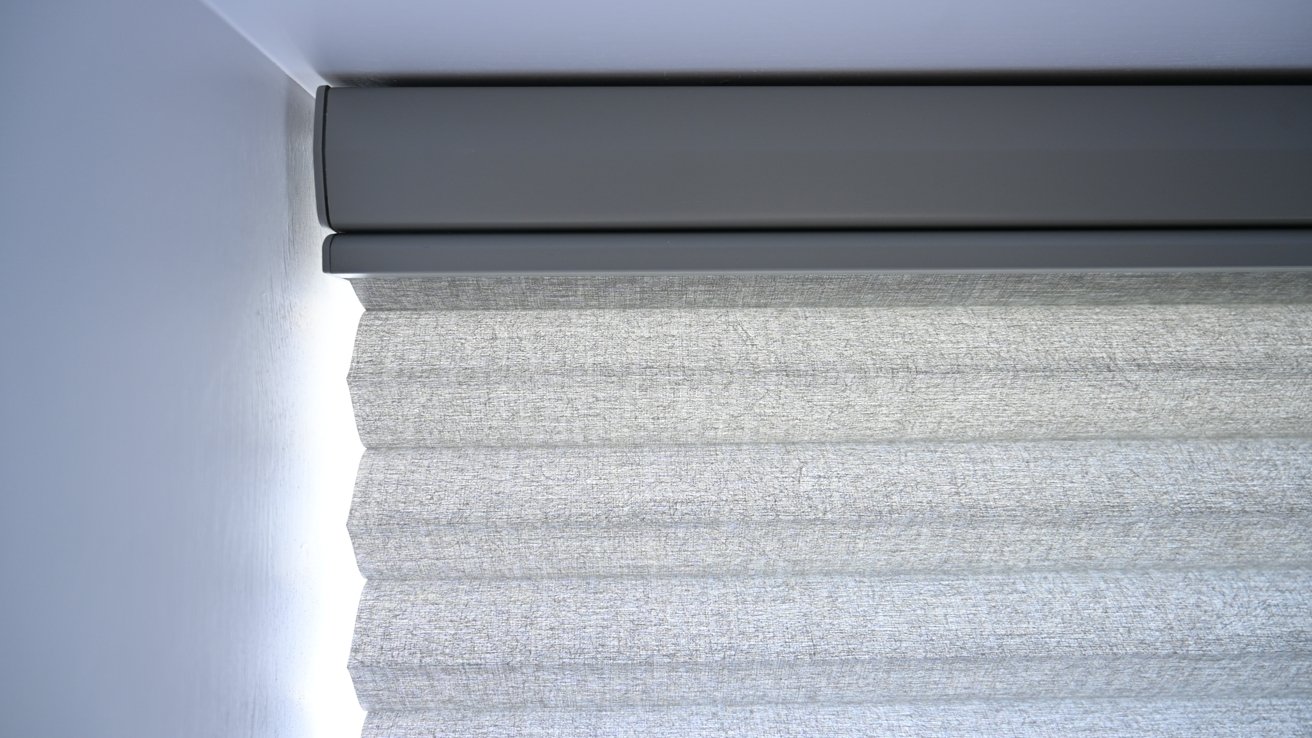
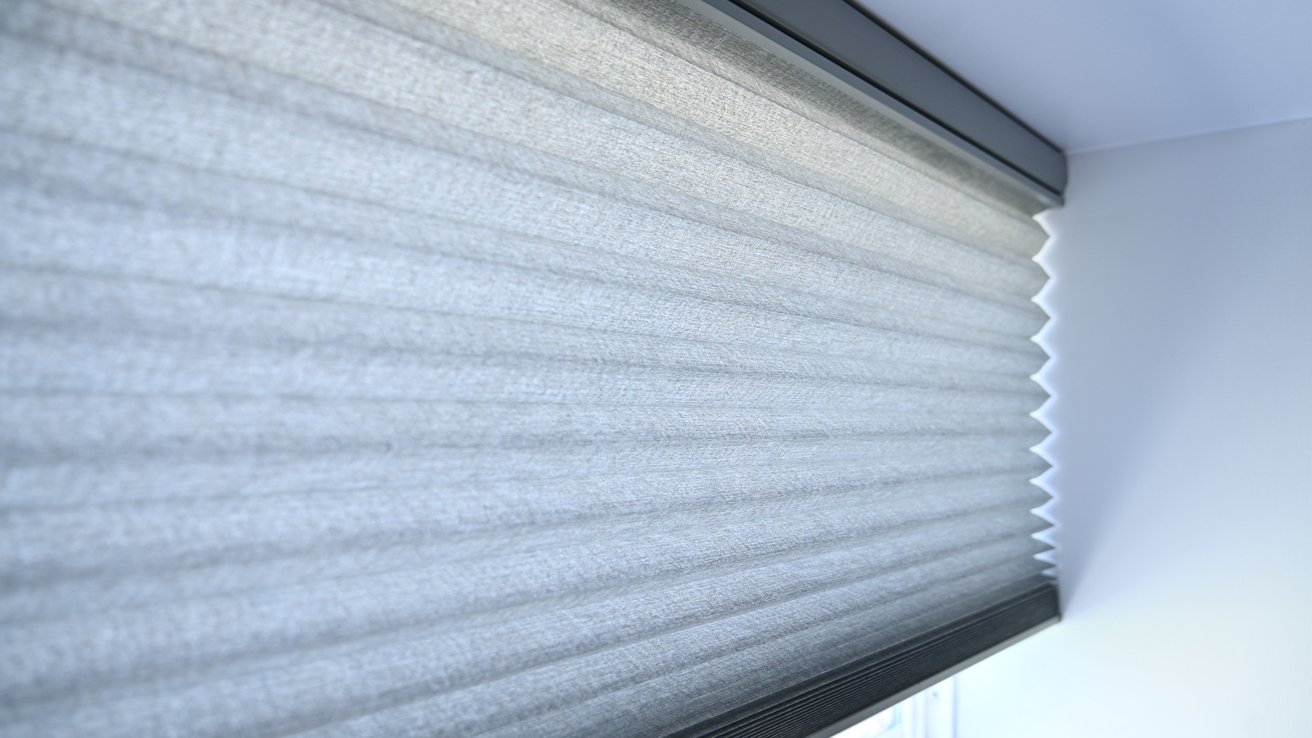
Closeup of our honeycomb fabric
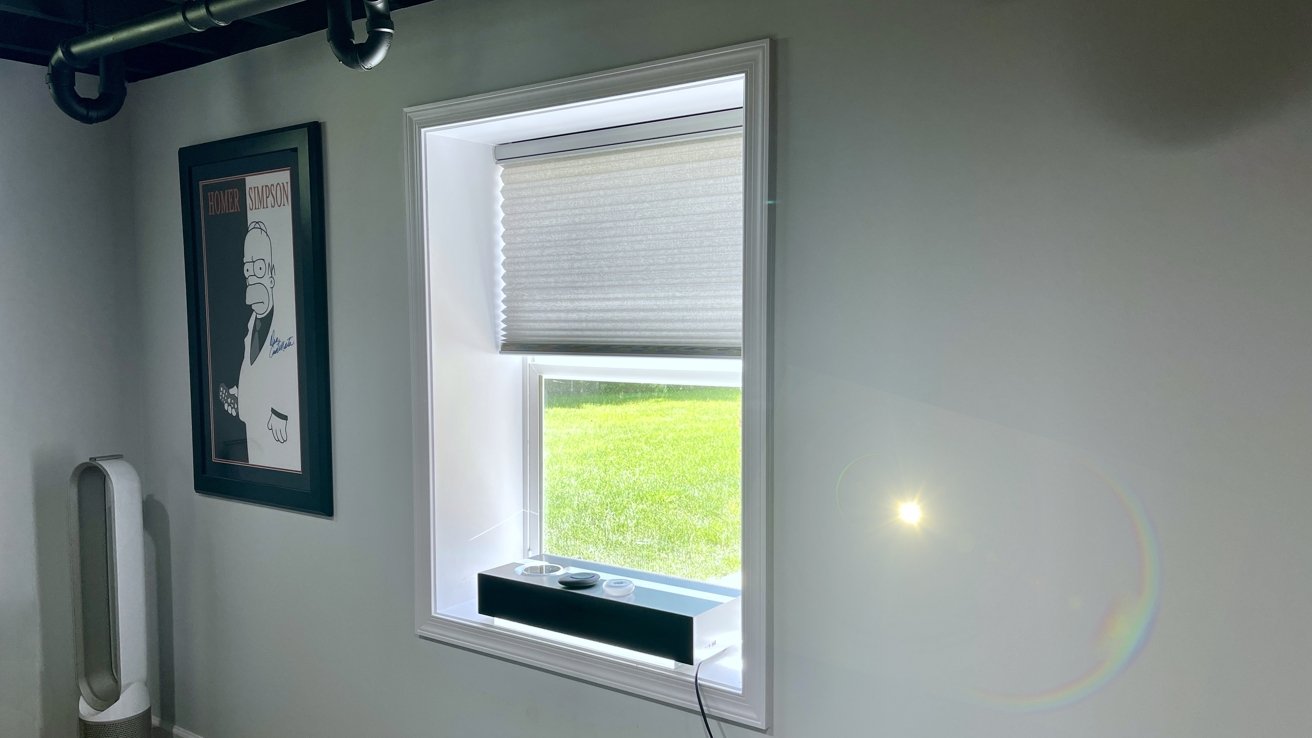
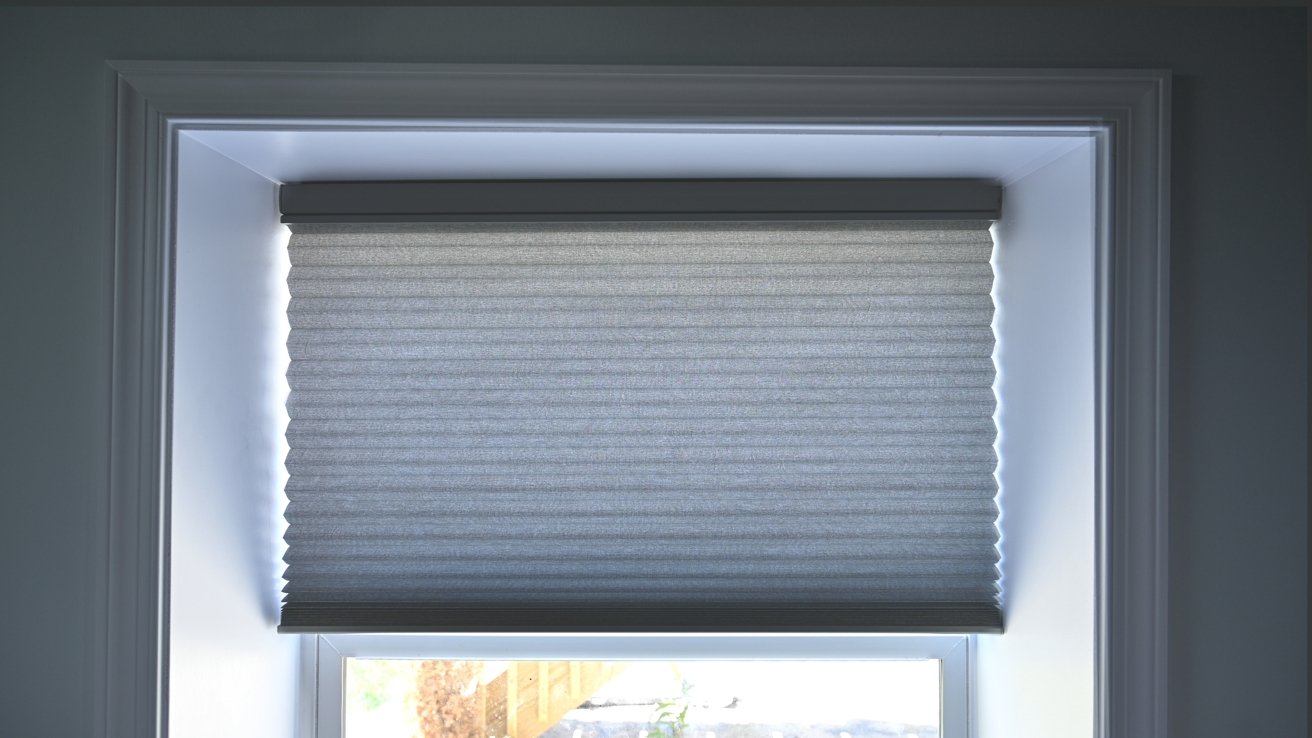
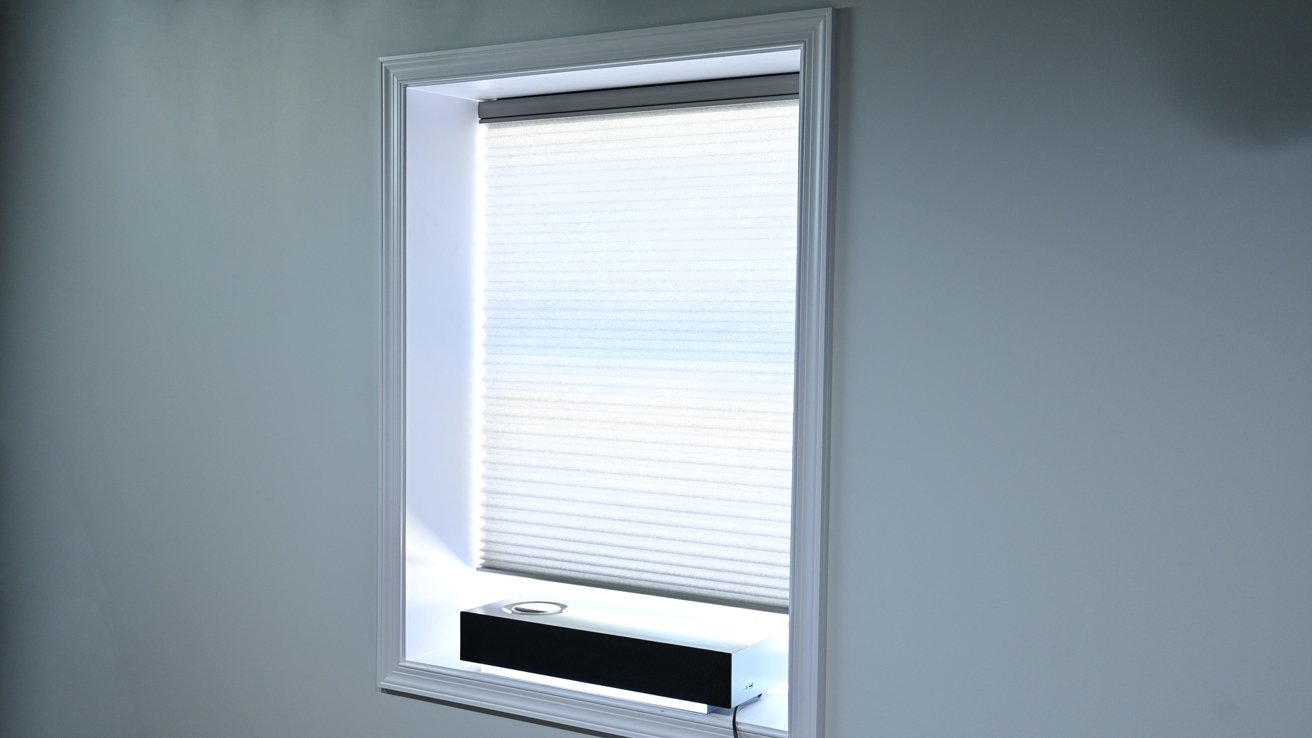
The fabric we chose was a light grey heathered fabric of the Duette & Applause honeycomb shades. They are semi-light blocking, so they don't fully blackout the room but filter the light and provide privacy at the same time.
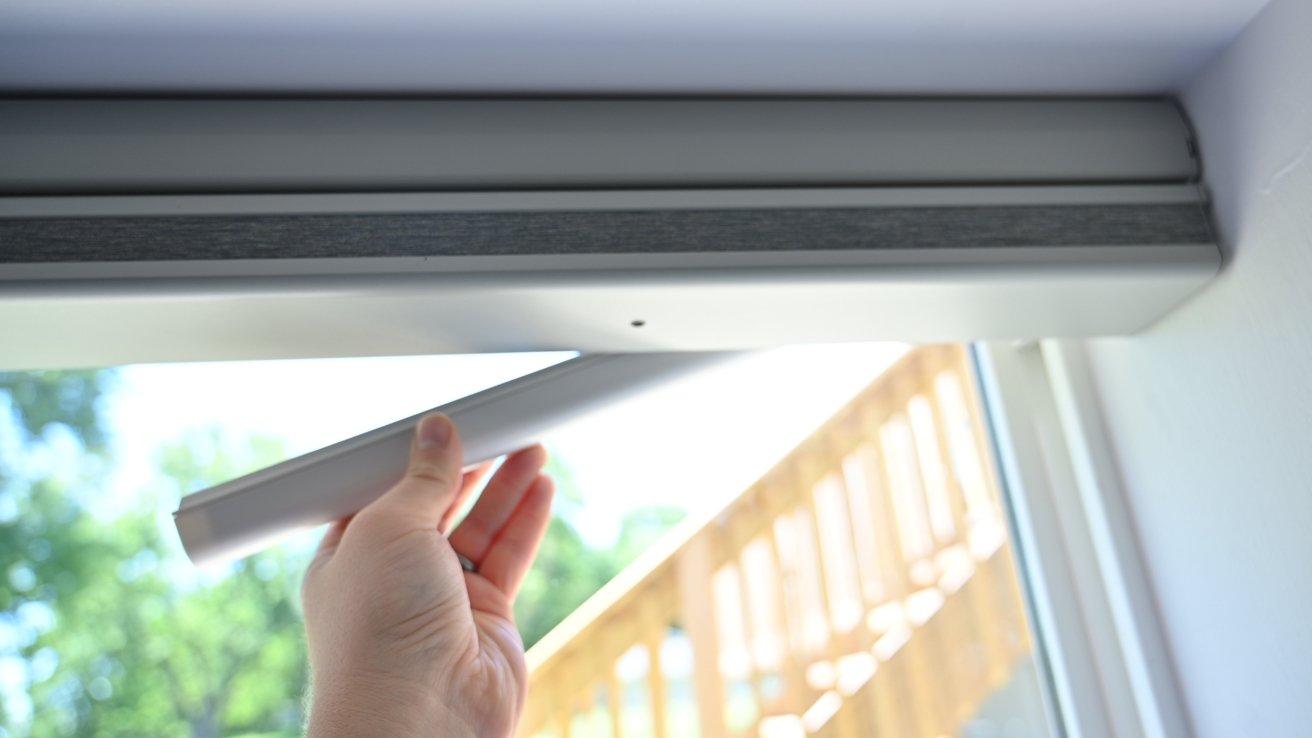
We also opted for the Duette shade top-down, bottom-up variety. This allows the top of the shades to drop and the bottom to rise, allowing for more discrete control of light in our home.
We installed the shades in our studio, which sits at the bottom of a hill. By having the top move down, we can get some privacy with the bottom of the window covered but still see up the hill to our deck.
Our installation is mounted inside our recessed window frame, but different options are available based on the window type you have. Our window is in a foot-deep recessed portion of the wall, so by mounting them close to the window, we still have the window sill for putting decorations, plants, or, more often than not — our cat.
Overall, it sounds like a little bit of a funky layout. However, in practice, having the Roman shades helps with privacy and view and adjusting to the changing light conditions as the day wears on.
Hunter Douglas PowerView shades — Installation
For our installation, Hunter Douglas handled everything for us. They advertise a white glove service where aside from you putting in the order, they come and measure to ensure the exact fit, have your shades custom made for you, then return to install them as well as set up all the connectivity features.
Our tech was prompt, professional, and did an outstanding job throughout the process. Some people want a DIY approach, and others want to sit back and have the assurance that everything is being taken care of and appropriately installed. Hunter Douglas offers both — but recommends the latter.
It is one thing to order standard shades independently, but smart shades are much more expensive. Should you measure wrong or make a mistake during the installation, you'll be out a good chunk of dough.
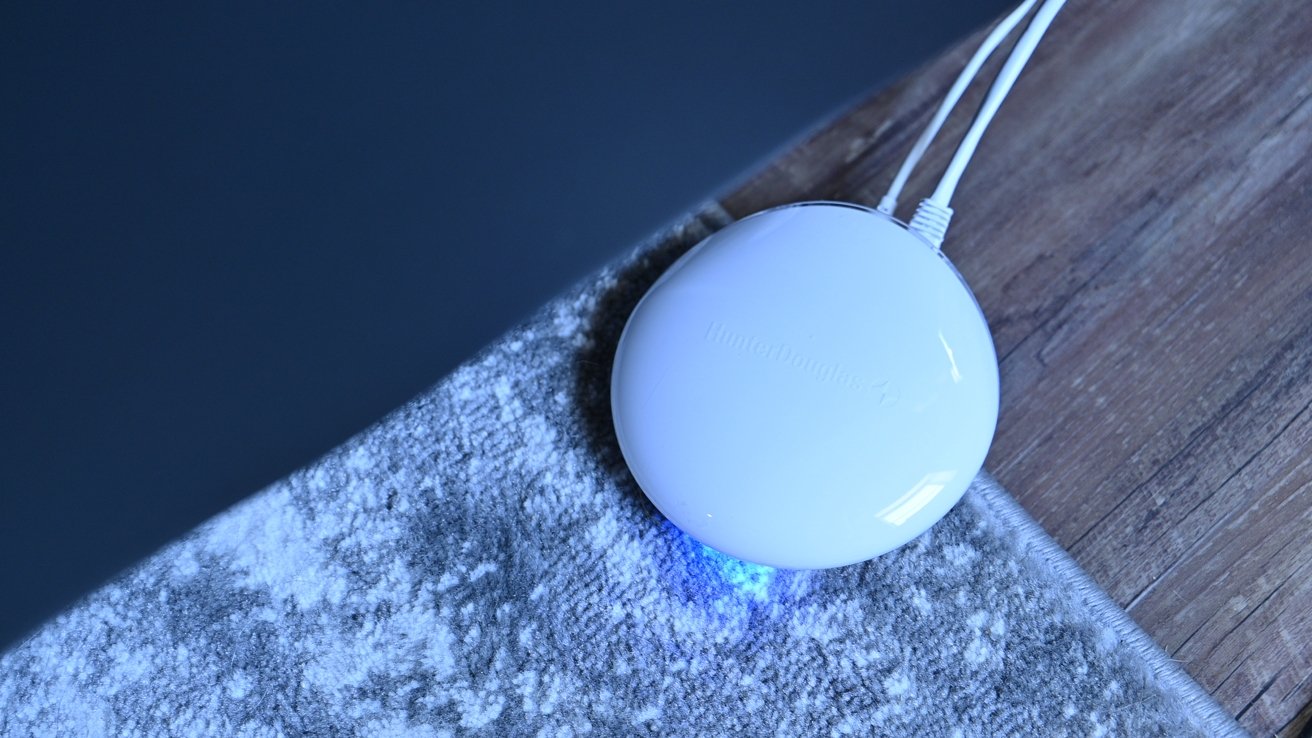
The Hunter Douglas PowerView Hub
The installation didn't take long once the shades were ordered. The tech mounted some brackets, added the shades, connected the bridge, set them up in the Hunter Douglas app, and programmed the remotes.
Finally, he helped us add them to HomeKit.
Hunter Douglas PowerView shades — Control with HomeKit and the app
In our setup, we have three ways of controlling the Hunter Douglas shades. We can use the Hunter Douglas app, we can use HomeKit, or we can use the physical pebble controllers that we added on.
Pebbles
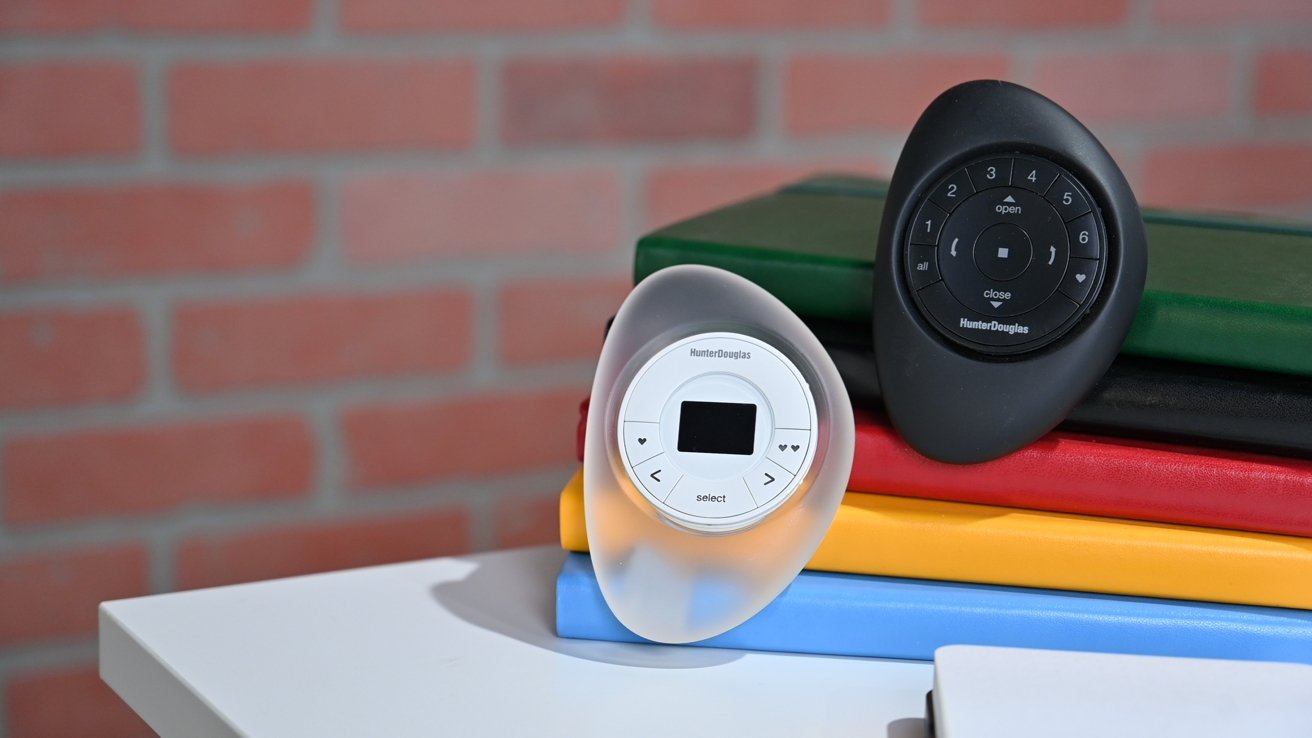
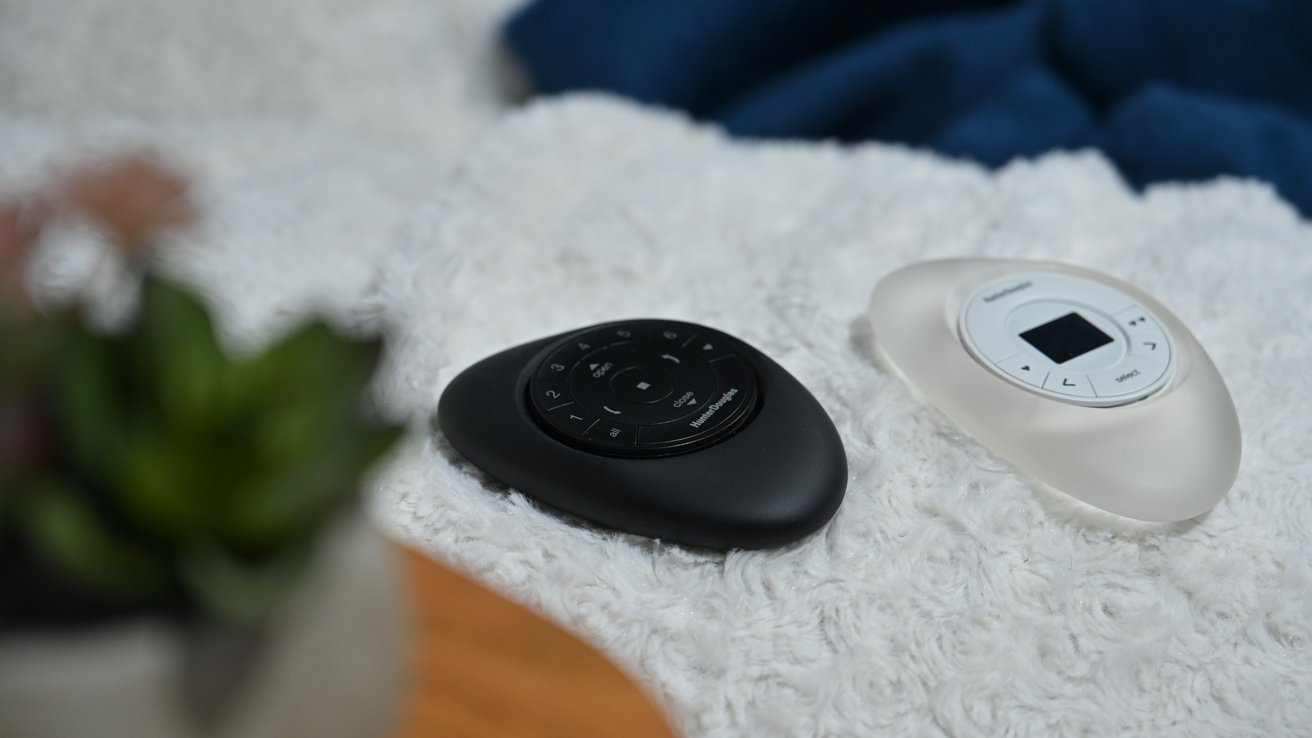
Our two Hunter Douglas Pebble controllers
Pebbles are what Hunter Douglas calls their physical remotes. With oval-like shapes and a smooth matte exterior, the pebble name seems to fit. Our Pebbles are clear and black though many other colors are available to help fit your home's aesthetic. This shows how much Hunter Douglas pays attention to detail. Not only do they create shades that blend into your home, but they also do the same for the remote controls.
These remotes look a little "techy," but the lack of sharp edges and warm feel in hand is more grounded than many smart home products.
Pebble controller
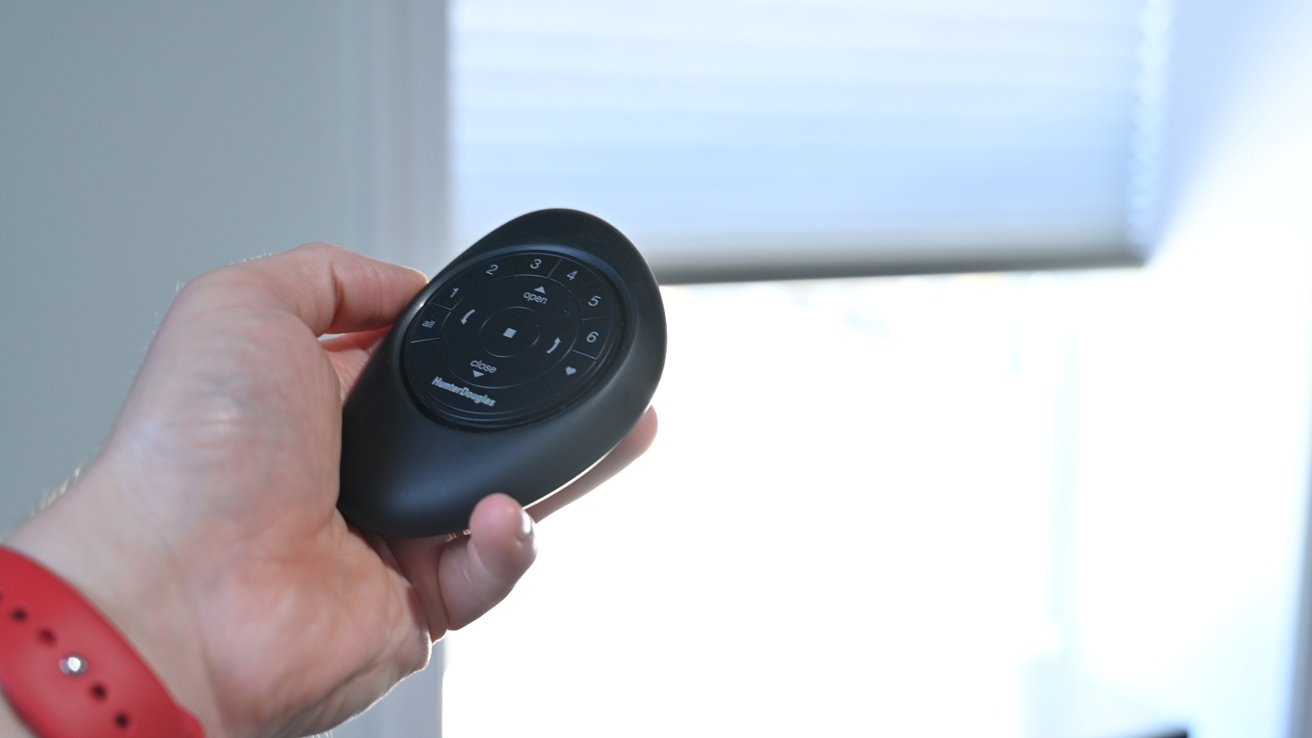
One remote is a standard control. It can be programmed to control many different window shades, and you can select a specific shade or just press "all."
Each of the six numbers on the remote can represent one shade or a group of shades. You can then control them by having them open or close to any degree you'd like.
Whenever you pick up the remote, the buttons automatically illuminate, making it easy to see at night. This is ideal if you're setting up the PowerView shades in a bedroom.
Pebble scene controller
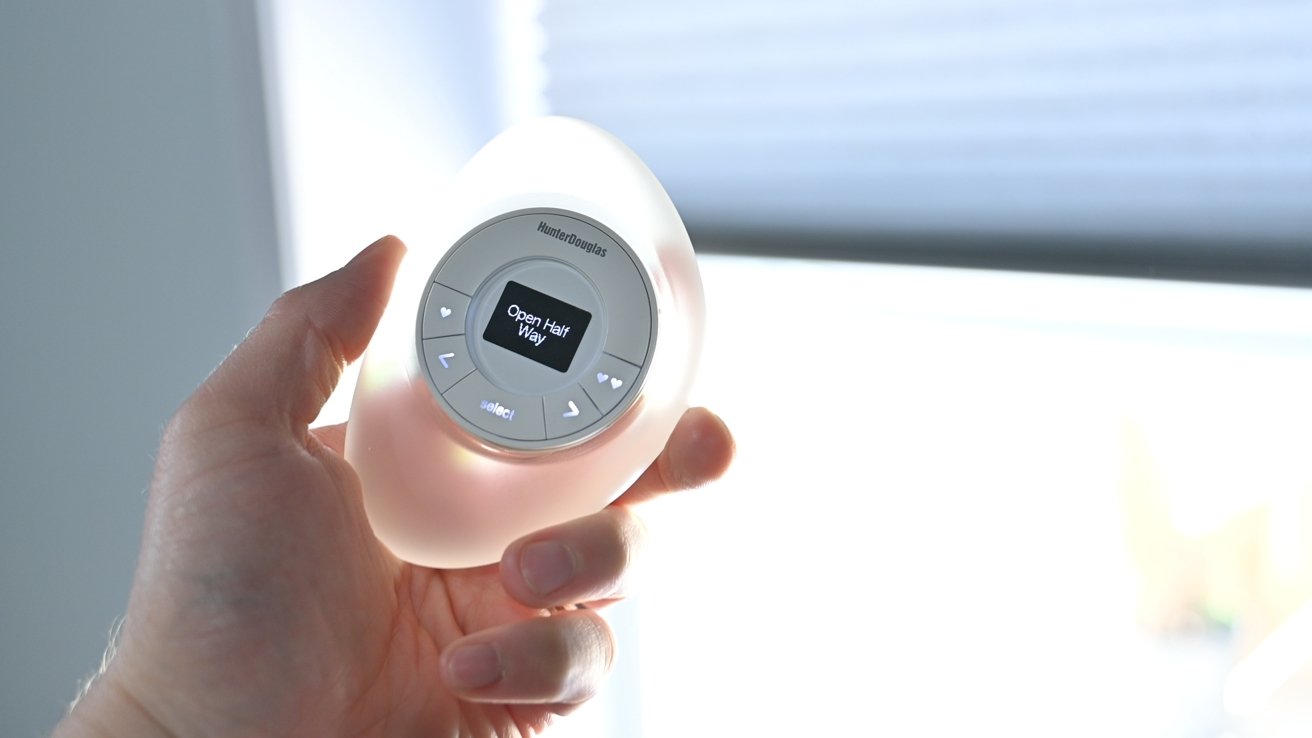
The other controller is a scene controller. You can save your favorite scenes to this controller and view them on the tiny integrated display. Just select the scene you want — maybe a movie scene — and press "select." There is a favorite button to quickly invoke a specific scene.
Our two Hunter Douglas Pebble controllers
We've always said how critical physical controls are, and window shades are no different. You may not always want to grab your phone or yell at Siri to control the shades. You also may have kids, guests, or older family members that aren't tech-savvy and require physical means to control things around your house.
Unless it is truly just you in the home, it is irresponsible not to have physical controls for devices in your home.
Powerview app
The manufacturer's Powerview app and can be used for more granular control, configuring your remotes, setting up alternative voice assistants like Alexa or Google, and more.
But, we've had the shades for a few months, and once we did our initial configuration, we haven't had to use this app at all. When at all possible, we use HomeKit.
Hunter Douglas PowerView shades half open
What we do like about this app is the visual representation of the shade. HomeKit's representation of an open or closed window shade can be obtuse. This is not the case in the Powerview app, because it clearly shows a visual representation of your shades at that very moment.
And, in the app, you can drag both the top bar and the bottom bar anywhere you'd like. So, you can see in the app which part of the window is covered and which is letting the daylight come through.
HomeKit control
While we prefer HomeKit, we can confirm that these shades work with other smart home systems, including Google Assistant, Amazon Alexa, and IFTTT.
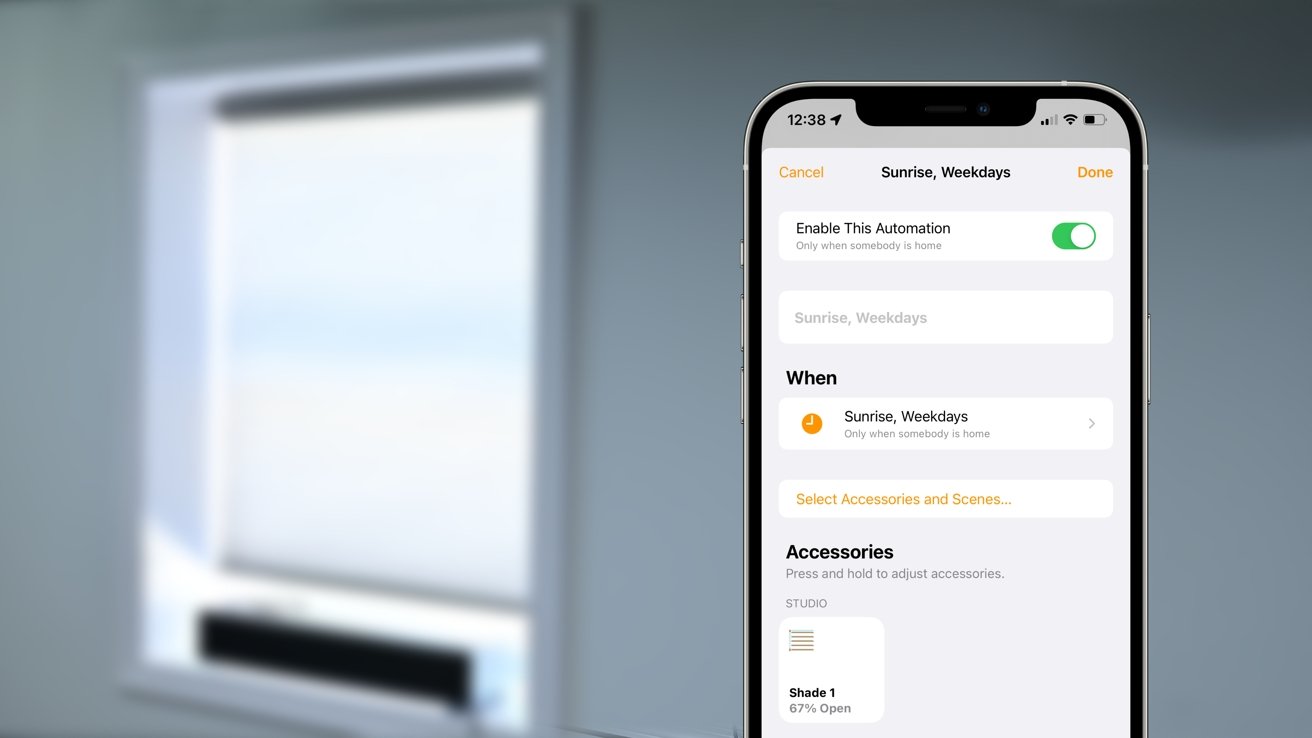
About that HomeKit confusion — our Roman shades have two moving bars. There is the bottom rail and what Hunter Douglas called the "middle rail," with the fixed mounting bar presumably being the "top" rail.
In HomeKit, by default, it shows our Studio Shade as well as Studio Shade Middle Rail. The bottom rail, just Studio Shade, operates as expected. You tell or command it to open it 20 percent, and it will rise from the bottom sill by 20 percent of your overall window height.
Likewise, you tell it to open, and it will zoom to the top. Say "close," and it will promptly move back to just above the bottom sill.
Where things get tricky is the middle rail.
Since the middle rail opens from the top and moves down, the controls in HomeKit are essentially reversed. For example, if you open the top rail 60 percent, it will move from the top, towards the bottom, opening the top 60 percent of your window. But, in the Home app, it shows the top 40 percent closed and the bottom 40 percent open — the opposite of reality.
To help you visualize this, here are the shades set at various stages and how it shows in both the PowerView app and the Home app.
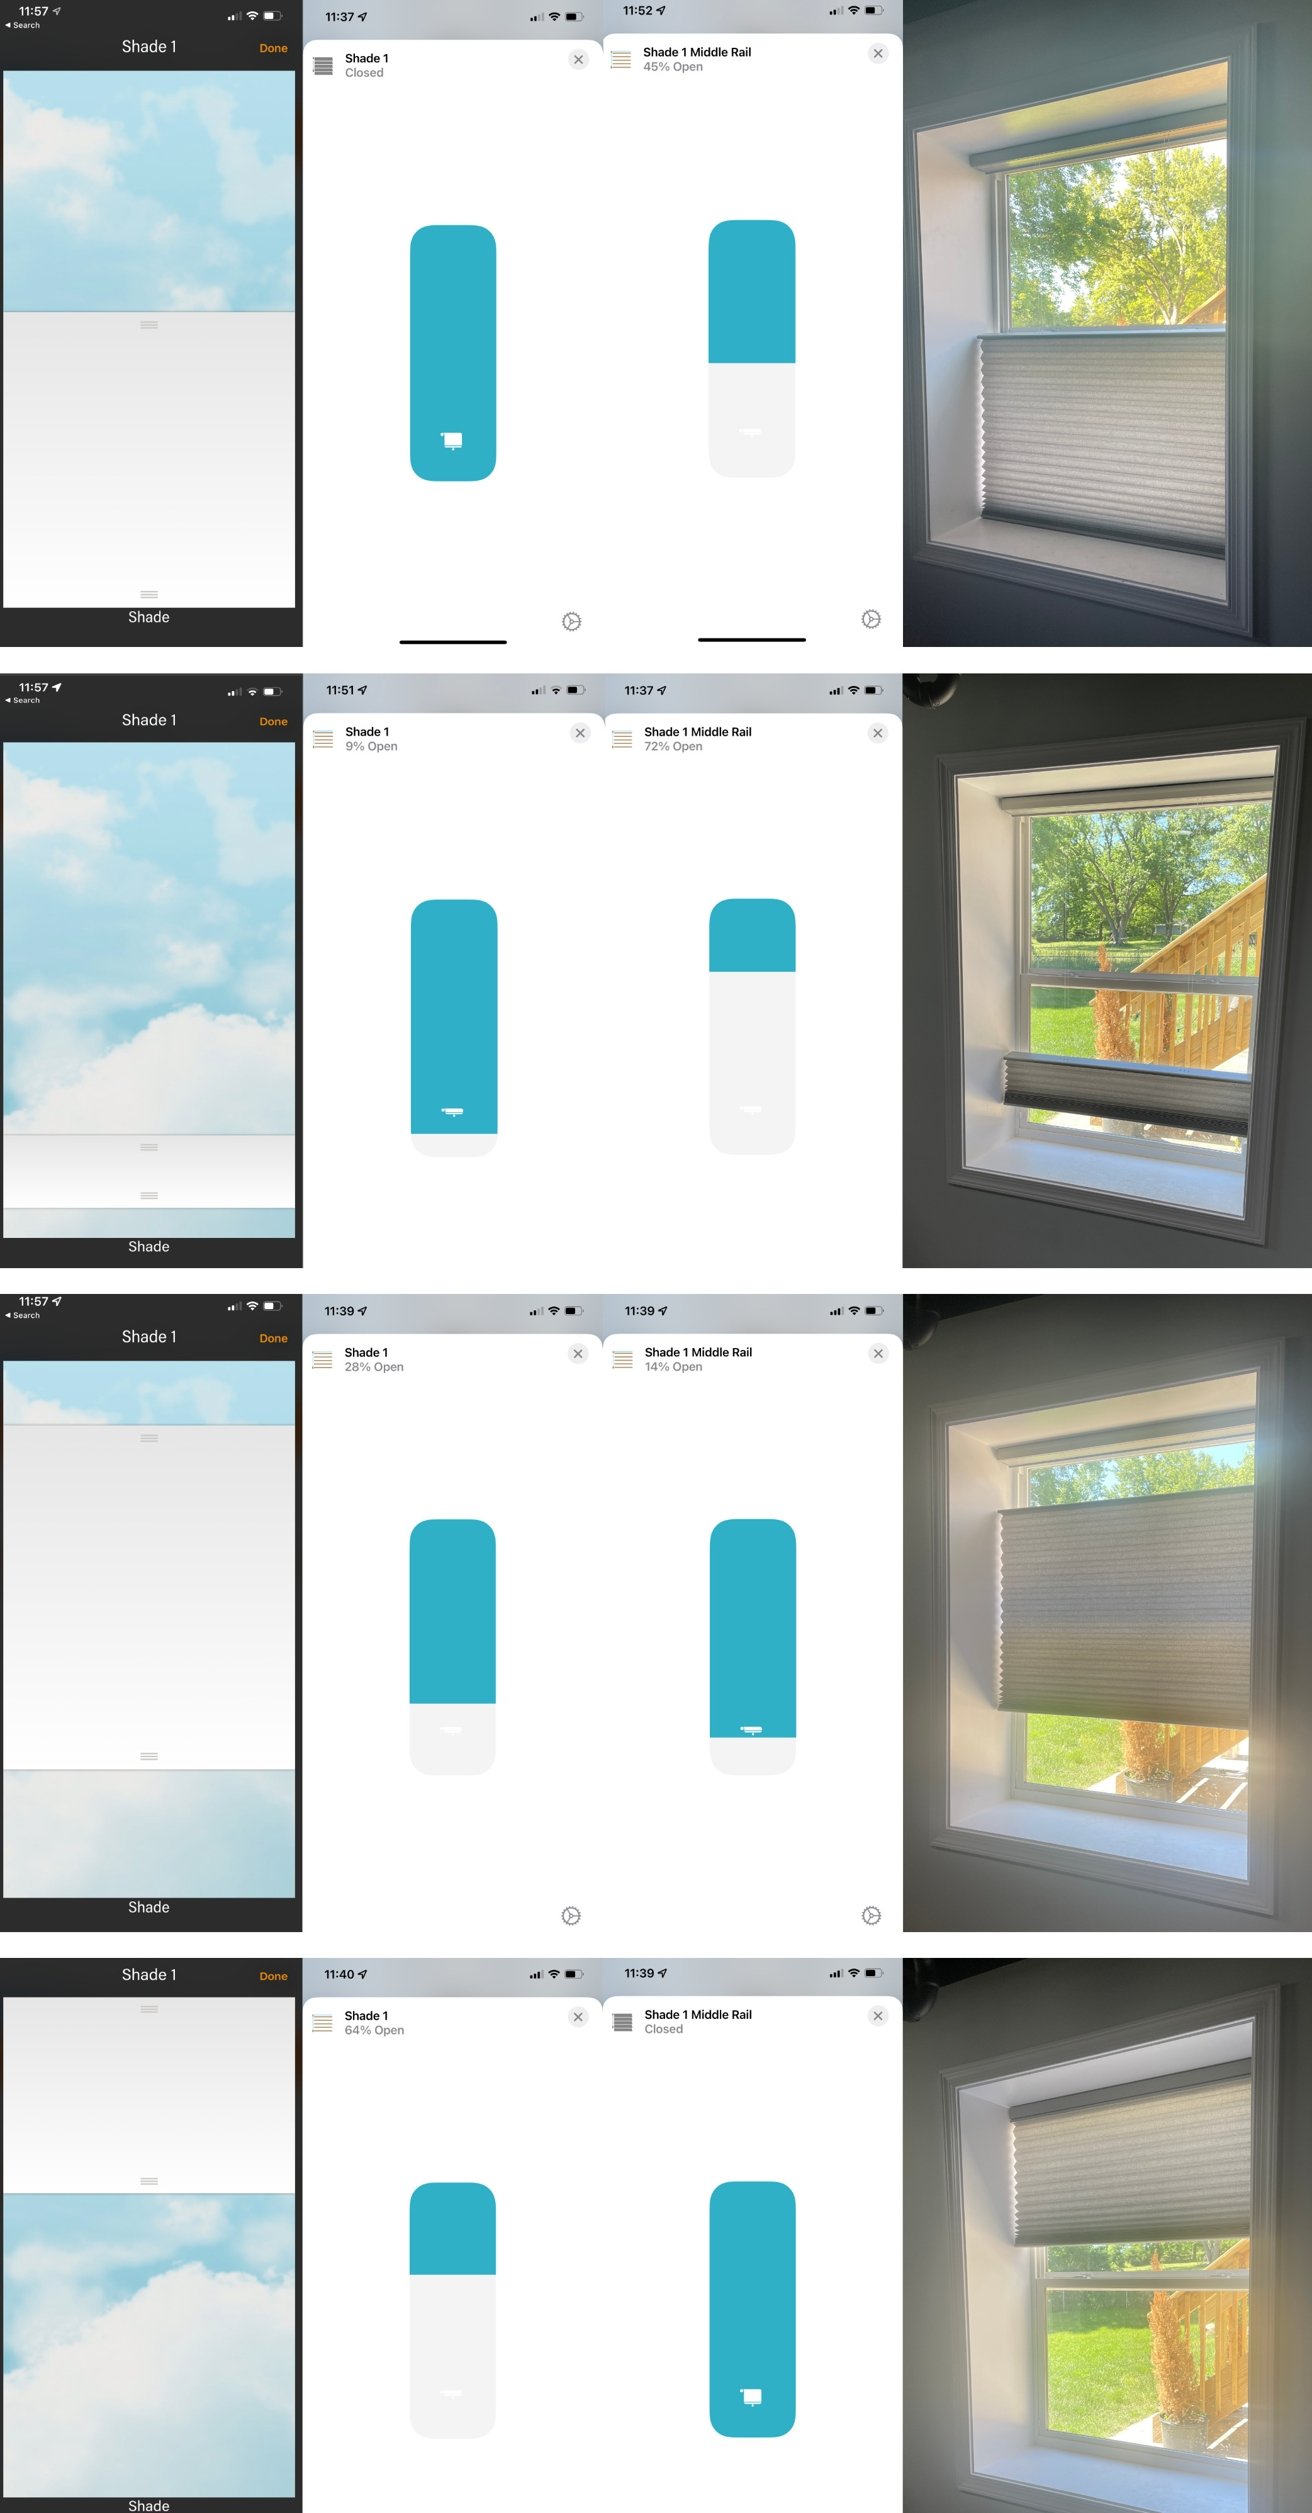
Examples of the PowerView app and Home app and how the shades look in real life
You have to do some math when operating these in HomeKit. You can't open the bottom bar 40 percent and the top bar 70 percent. They would run into one another.
We tested this exact scenario. If you have the middle bar down and try to open the bottom bar in HomeKit, it will just move the other bar into the air. If you try to move the middle bar down past the bottom bar, it will stop you. While confusing, there is no possible way to damage your shades by running the bars into one another.
It can also be confusing when trying to open or close your windows. If we were to say "Open the studio shades," Siri would try to open both the top and middle bars and leave you with them meeting each other in the middle. This is probably not what you were shooting for.
There are ways to get around these headaches.
One thing you can do is use proper names. Name your lower bar something like "patio window" or another descriptive term. And name the middle bar "patio window middle bar." Then when you go to control them with your voice, you can say "Open the patio window shade 60 percent." That way, it ignores the other bar. But if you do want to lower it, you can address it appropriately.
Automation of the PowerView shades in the Home app
You can also rely on scenes based on the time of day or around their function. Then you can invoke the scenes rather than needing to adjust the shades manually.
We have several scenes set up, such as opening the shades just before sunrise and closing them just as the sun sets.
To be extra clear, the "issues" here are only due to the middle bar, and if you don't opt for the top/down variety, they will be a non-issue. Even though HomeKit does flip the shade around, we still think these shades are the best choice for our installation.
Of course, like always, your mileage will vary.
Hunter Douglas PowerView shades — Connectivity, reliability, and use
In our home, we have smart shades in a few rooms. Our living room window is outfitted with a set of Lutron Serena Shades, and then we also have a basic set of automated shades in our bedroom.
For starters, there is the convenience factor. Each day we bustle around, readying for the day, and head to the studio with at least an iPad Pro, iPhone, and coffee in hand, if not some new products we're reviewing or some early AM chow. It's a lot to carry as you walk into a dark room.
So, we have a handy couple of scenes set up. "Hey Siri, it's a workday" comes out of our mouths as we walk in the door — which will automatically turn on the office lights, the set lights, open the shades, and start our morning playlist on our HomePod.
Every time, without fail, the shades will quickly, after only a second or two delay, begin to act. We've only had the shades go unresponsive when using the Home app and try to adjust both bars quickly.
If we adjust the middle rail and then quickly — while the shades are still moving — try to move the bottom rail, it will say unresponsive for just a moment. Otherwise, they've been rock-solid, and reliable.
That is all due to the PowerView hub that bridges your shades onto your Wi-Fi network. Our PowerView hub is in the same room as the shades, so we may have a best-case scenario here.
Hunter Douglas offers a repeater to extend the hubs control throughout your home if you're having a range problem. This will be necessary for larger homes with a lot of windows.
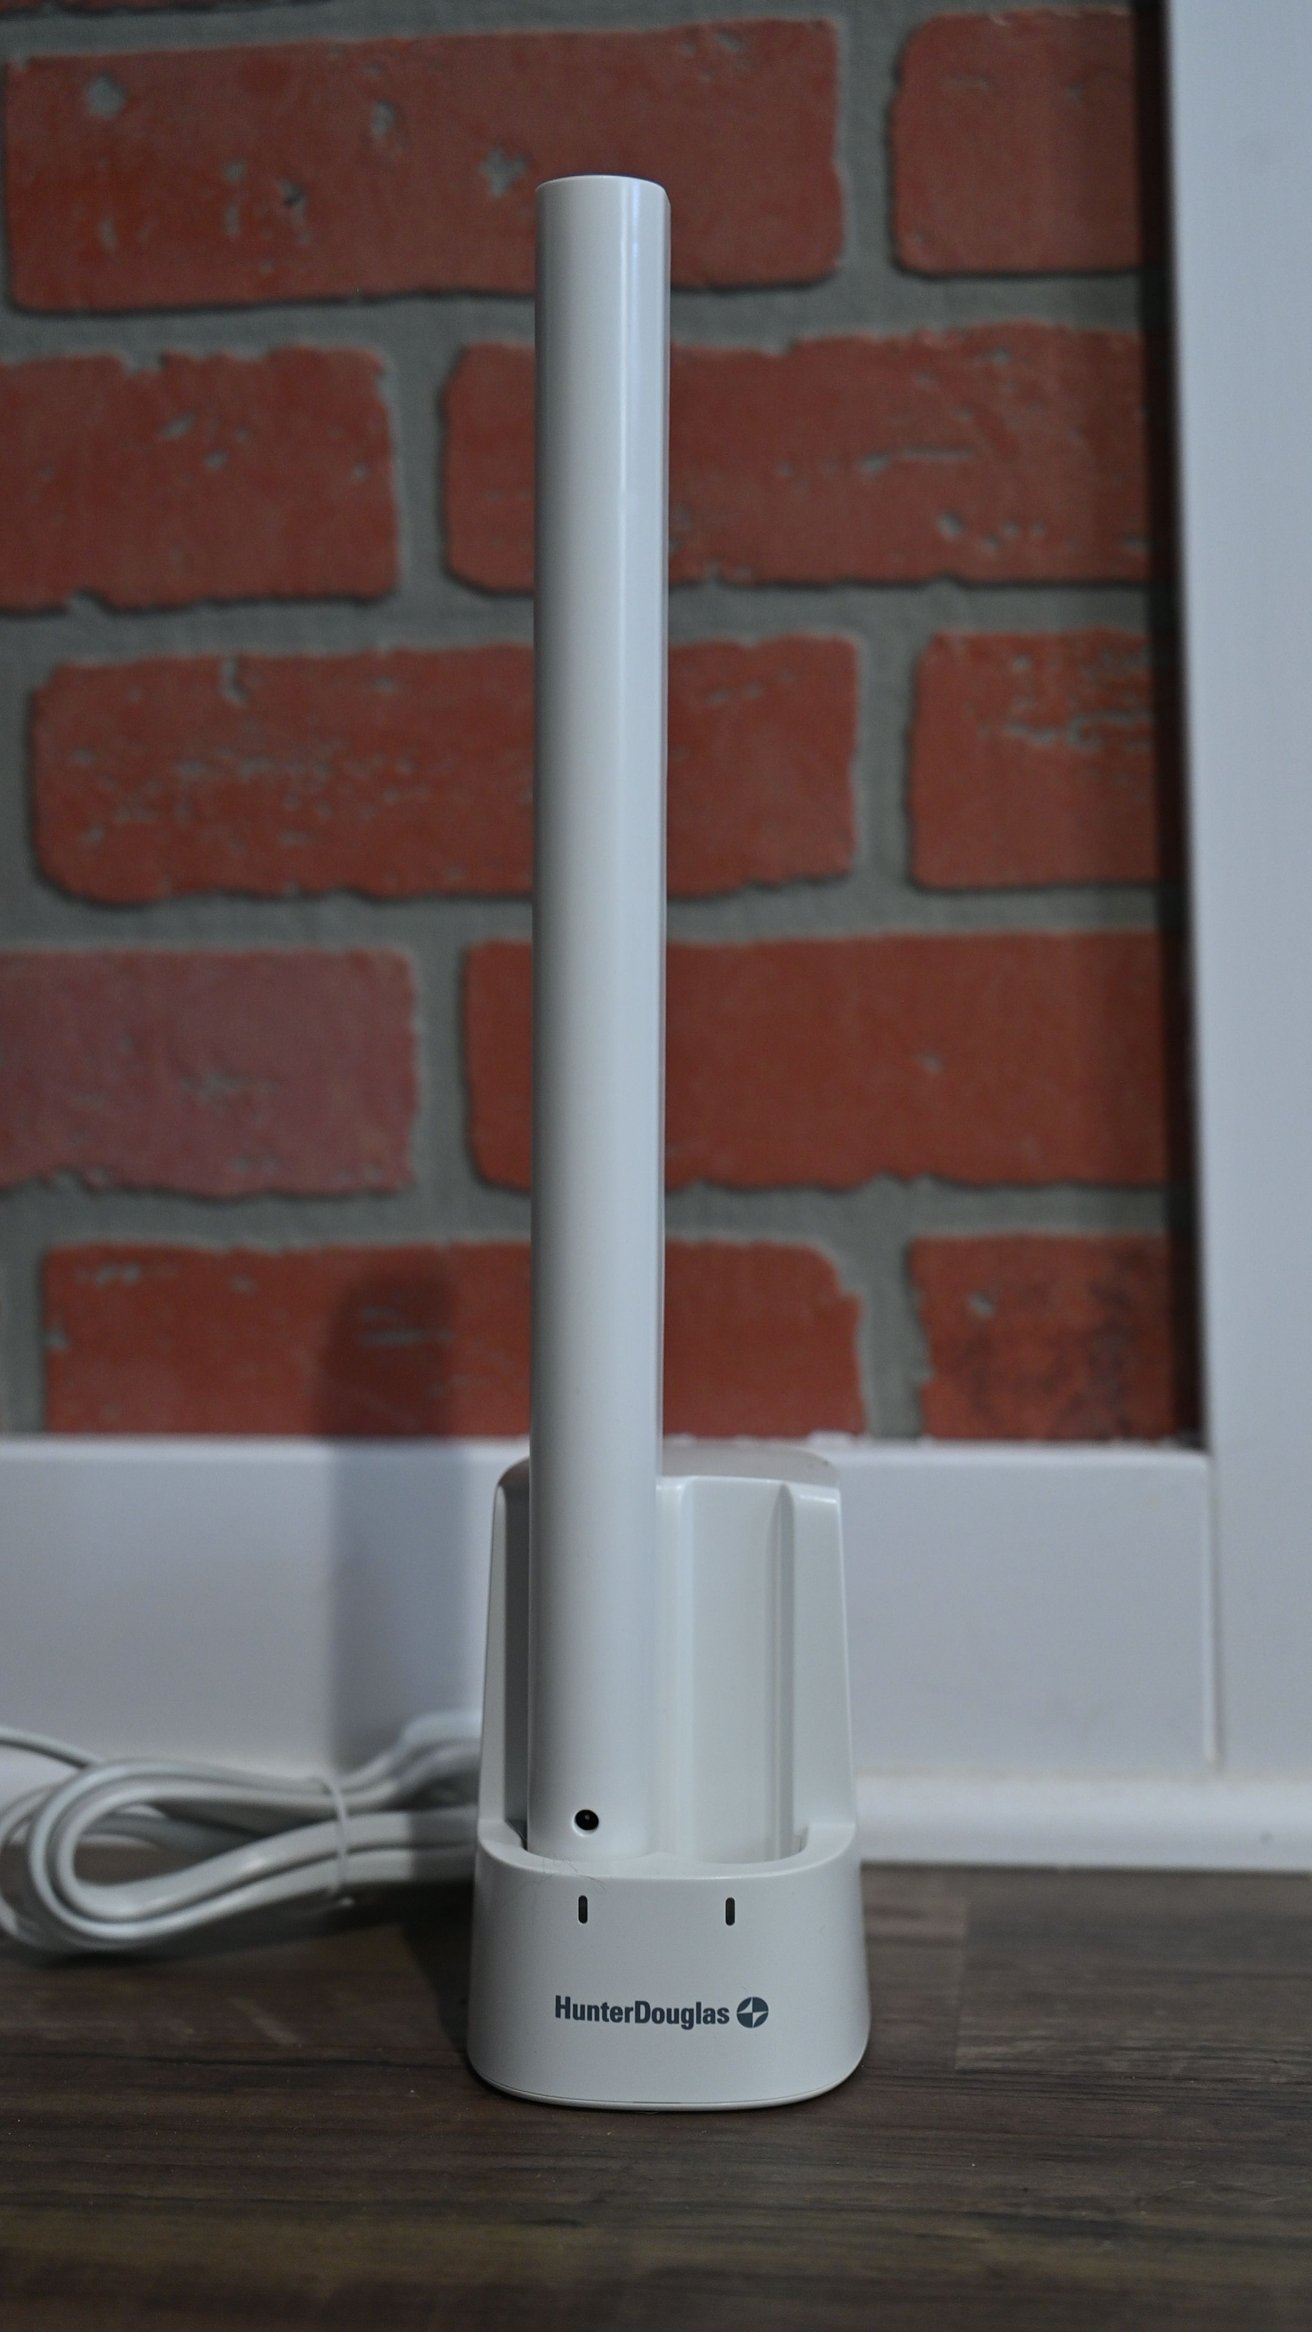
Our set runs off of a rechargeable battery though there are hardwired options available. With the swappable battery — which should last about a year with regular use — there are no wires to worry about around your window.
Battery for the Hunter Douglas PowerView shades
The battery pack stays completely hidden and connected to the mounting bracket. When the shades are all the way open, they neatly hide behind the collapsed honeycomb shades. It is easy to press the button and remove the battery once the battery does start to die.
Dual battery charger for the Hunter Douglas PowerView shades
Charging the batteries is accomplished via a charging dock that plugs into your wall. We just tucked this behind our couch, so it wasn't an eyesore but was easily accessible.
The dock has two charging bays, so a pair of batteries can be refueled at once. However, if you have one window — this is overkill. If you have many windows, two slots will be helpful to make sure your shades will be up and working quickly.
Hunter Douglas versus Lutron Serena Shades
The other big name in HomeKit-enabled shades is going to be Lutron's Serena line. We've used both, and there are a few distinct differences between the two.
Our biggest differentiator is going to be the styles of shades available from each. Serena Shades offers a large variety of materials, opacities, and colors. There are multiple fascia and mounting options too.
Hunter Douglas has many options, but it has one unique style that Serena Shades doesn't offer. That is the top-down/bottom-up style we've come to love so much.
Another difference is installation. Hunter Douglas offers no retail or direct purchase option but requires you to go through a referred partner or installer. Serena Shades can be purchased directly through the company's website.
Should you buy the Hunter Douglas smart shades?
Investing in the Hunter Douglas shades isn't a cheap or quick endeavor. Of course, you can pursue installation yourself, but they still aren't cheap — especially if covering multiple windows.
Hunter Douglas PowerView shades
We're huge believers in natural light, and to get that, we opened and closed our shades on our own each day. By adding automation to our shades, they open and close for us, allowing natural light to flood our home.
Aside from convenience, there is also the security factor. These shades can be automated or controlled from anywhere, allowing you to give the illusion you're home safe and sound and leaving would-be intruders to think twice. And, combining this with smart lighting, will provide a more convincing illusion.
Hunter Douglas PowerView shades
Lights are useful, as are fans, locks, and so many other HomeKit categories. Shades we believe are just as helpful — but carry a much higher price tag. Outfitting your whole home can be pricey for sure, but certain rooms make more sense than others.
If we had it our way, we'd outfit every room with custom smart shades. But being realistic, we're limiting the expensive option to the primary rooms. Our production studio, bedroom, guest bedroom, and living room all get HomeKit control while ancillary rooms are stuck with off-the-shelf self-cut options. It certainly was an investment and an adjustment given HomeKit's handling, but we don't regret it one single bit after living with them for a while.
Pros
- Vast array of styles and fabrics
- Top/down bottom/up allows full control of privacy and light
- Great battery life and easy replacement
- Look fantastic
- White-glove installation is entirely hands-off
- Great integration with HomeKit
- Pebble controls are a great physical control
Cons
- Can be quite pricey
- Homekit integration can be a little confusing for top/down bottom/up shades
Rating: 4.5 out of 5
Where to buy
You can learn more about the Hunter Douglas PowerView lineup from the Hunter Douglas website where you can also request a consultation with a specialist in your area.