If you're having trouble seeing elements of your Mac's desktop, take advantage of its Zoom accessibility tool to magnify the part of the screen you need.
Apple's accessibility features in macOS provide many different ways to customize the experience, all to allow as many people as possible to use the Mac. Of the tools available, one of the most useful is Zoom, which magnifies the display.
This is essential for people with visual impairments, but it's also handy for people with perfect vision for day-to-day tasks. With high-resolution monitors on the market, sometimes the text and other parts may be too small to easily read, making the magnification of the display very useful.
Here's how to take advantage of Zoom in your workflow.
Enabling Zoom
Zoom is not enabled by default in macOS, with users needing to enable it within the Accessibility menu.

Zoom is held in the Accessibility menu in System Preferences.
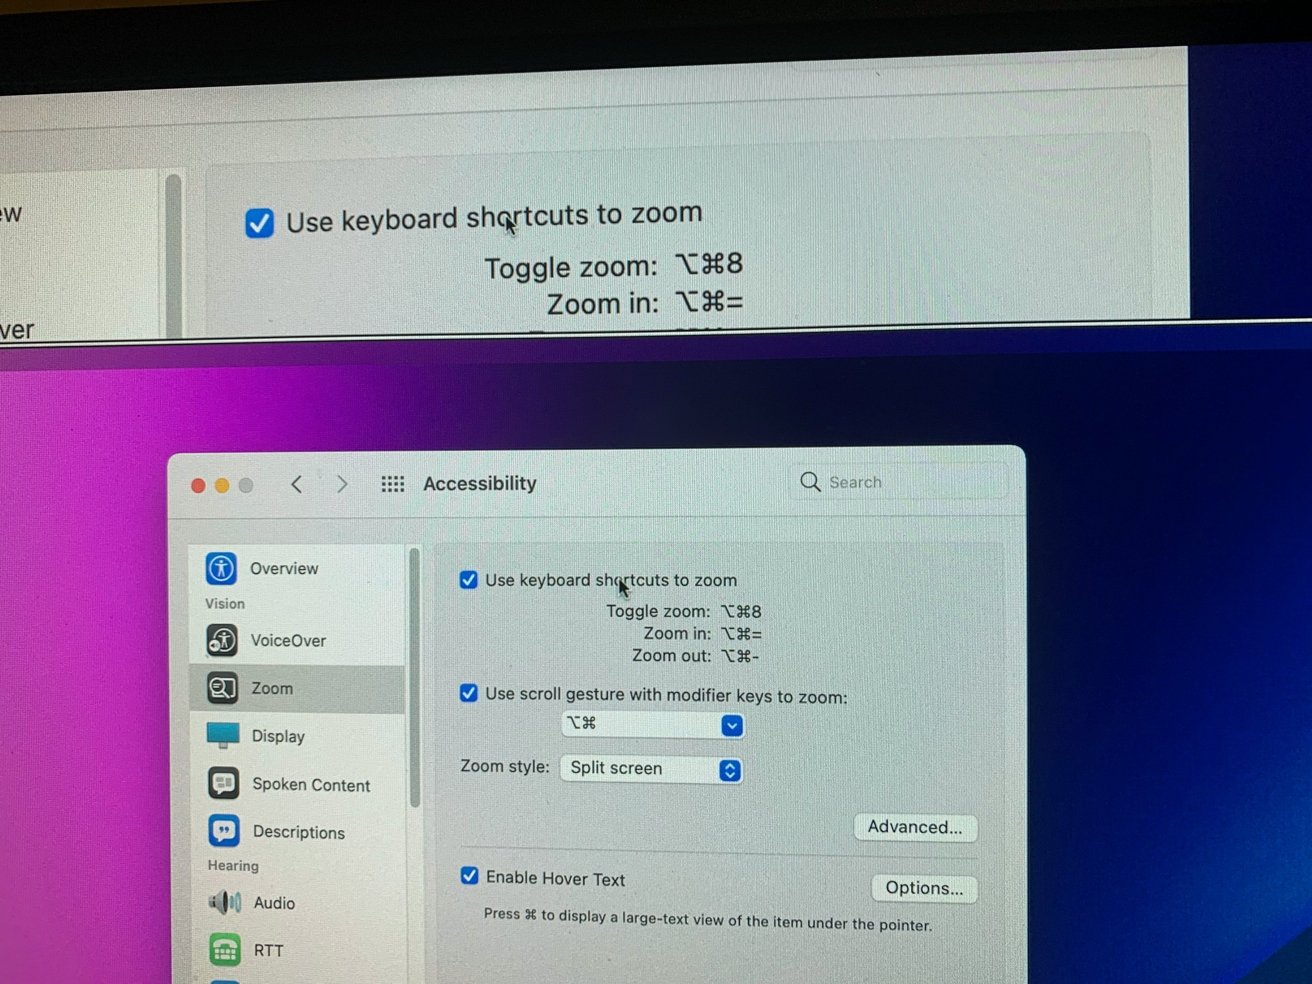
How to enable Zoom magnification in macOS
- Click the Apple logo in the Menu Bar, and select System Preferences.
- Click on Accessibility.
- In the left-hand column, select Zoom. It will be under the Vision section, near the top of the list.
- Tick the checkbox next to Use keyboard shortcuts to zoom.
- Alternately, click Use scroll gesture with modifier keys to zoom.
- Once enabled, the feature is available immediately.
To turn off the features, simply reach the same menu and uncheck the relevant boxes.
Basic Zoom control
Depending on the checkboxes you selected, there are two main ways to start using Zoom.
If you selected to enable keyboard shortcuts, you have three commands at your disposal:
- Press Control-Option-8 to toggle Zoom on and off.
- Press Control-Option-= to zoom in or increase magnification.
- Press Control-Option-Minus to zoom out or to decrease magnification.
If you selected to use the scroll gesture, you could select from several modifier keys to hold down to enable Zoom, then you can change the magnification using a mouse scroll wheel or a one-finger vertical scroll gesture on a trackpad.
You can customize the modifier key from the dropdown box, with Control, Option, and Command available to use. While not labeled, you can also click in the box and press multiple modifier keys to create a custom shortcut combination.
Zoom Styles
There are three Zoom styles to choose from, with each having its strengths and weaknesses.
Full screen
Selecting Full screen will magnify the entire screen, with the cursor used as the focal point for magnification.
Full screen zoom uses the entire display. This pointer is measurable in centimeters.
If multiple monitors are in use, the Choose Display option will bring up the ability to choose between the currently active displays on a Mac. Selecting a display will mean that it will be used to show the magnified version of the other screen.
If you select All, you retain the use of multiple monitors, with all zooming in as if they are one screen, at one point on the desktop.
Split screen
Opting for Split Screen will cut the main display into two regions, with the lower area showing the desktop, and the upper area displaying the magnified screen, again focused on the cursor.
Split screen uses only part of the display, while leaving the rest of the screen devoted to the macOS desktop.
The lower desktop section will scroll up and down to give full use of the desktop space.
Picture-in-picture
The third option provides a highly localized magnification than the other two, in that it is a rectangular overlay that follows the cursor around the screen. Changing magnification affects the zoom of just the overlay rectangle, not the entire display.
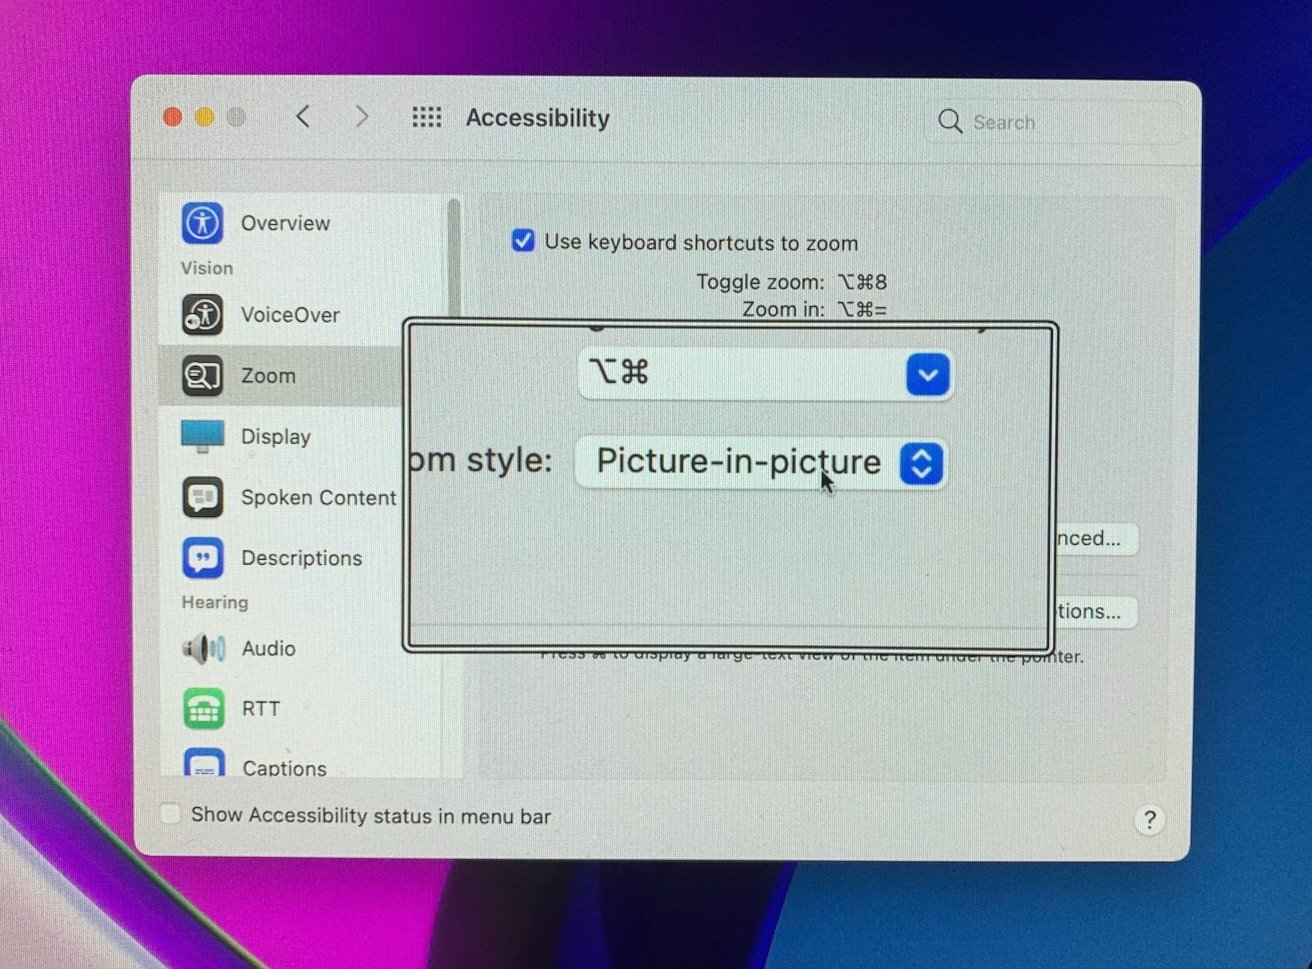
Picture-in-picture zooms in a small movable section of the screen, wherever the pointer is.
This is a really useful option for occasional fine detail work, such as correctly positioning a cursor when editing a document.
Advanced Options
Apple provides many further customization settings under the Advanced Options pop-up, with many of the items here can change all three Zoom versions, and some are limited to fewer.
Under Appearance, the top section provides options for how the zoomed-in screen image moves, with users able to set it to move continuously with the pointer, only when the pointer reaches the edge of the zoomed-in section, and ensuring that the pointer remains relatively near to the center of the zoomed image.
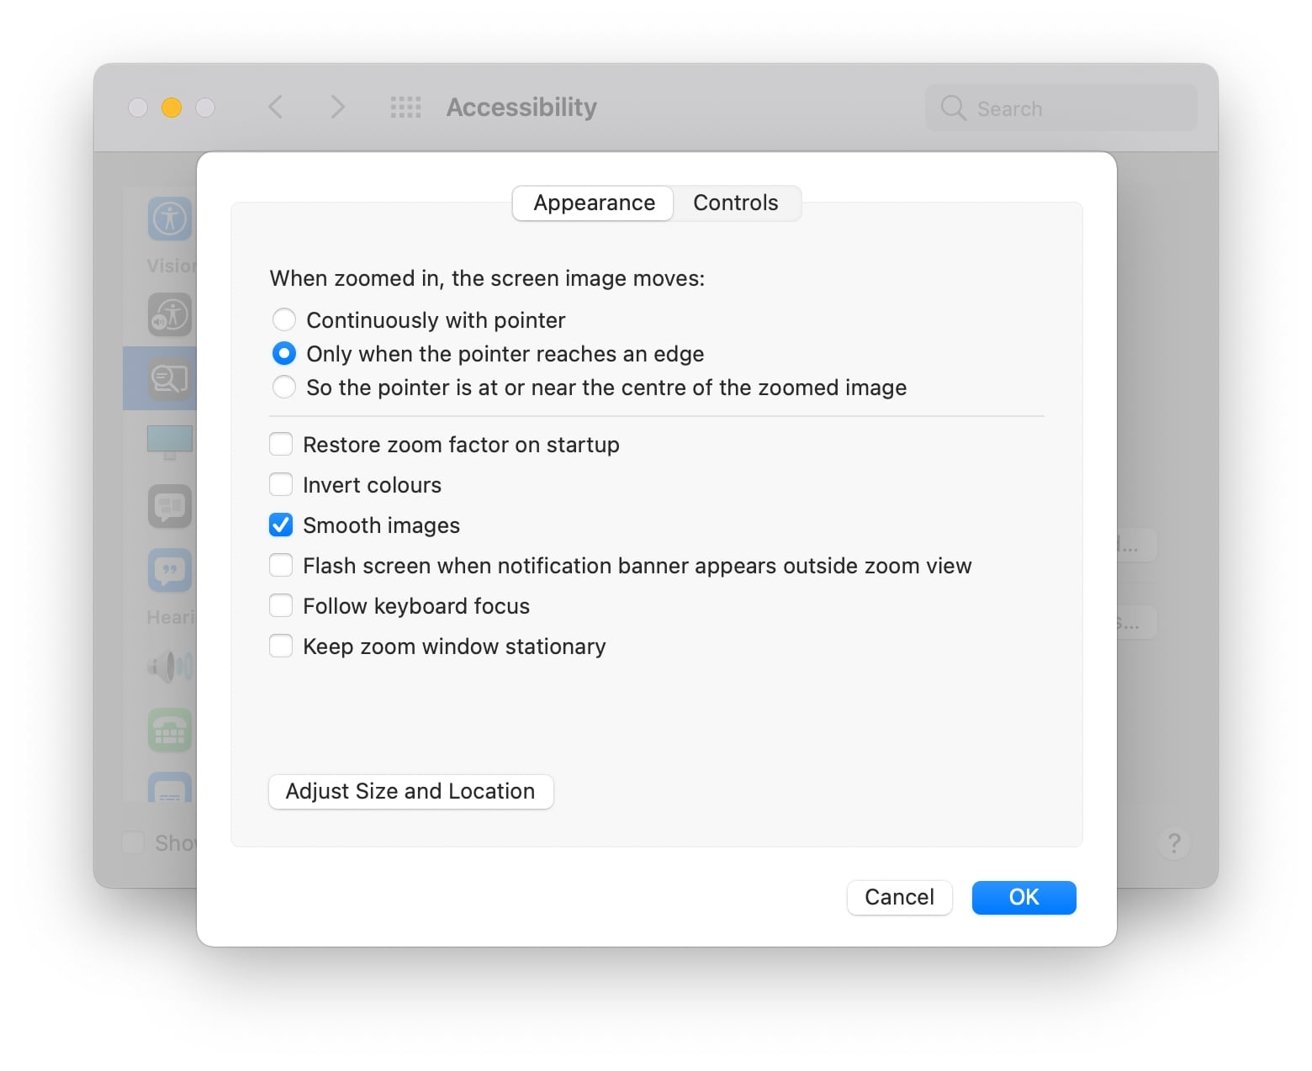
You can tweak how the zoomed-in section acts.
Further options cover features such as restoring the zoom level on startup, keeping the zoom window stationary rather than moving it around, following the keyboard focus, and smoothing zoomed-in images.
It is also possible to set the zoomed-in section to have inverted colors. You can even set the screen to flash when a notification banner appears outside of the zoomed view.
The Adjust Size and Location button appears for both Split screen and Picture-in-picture and gives you the chance to change how big the zoomed-in screen is during use.
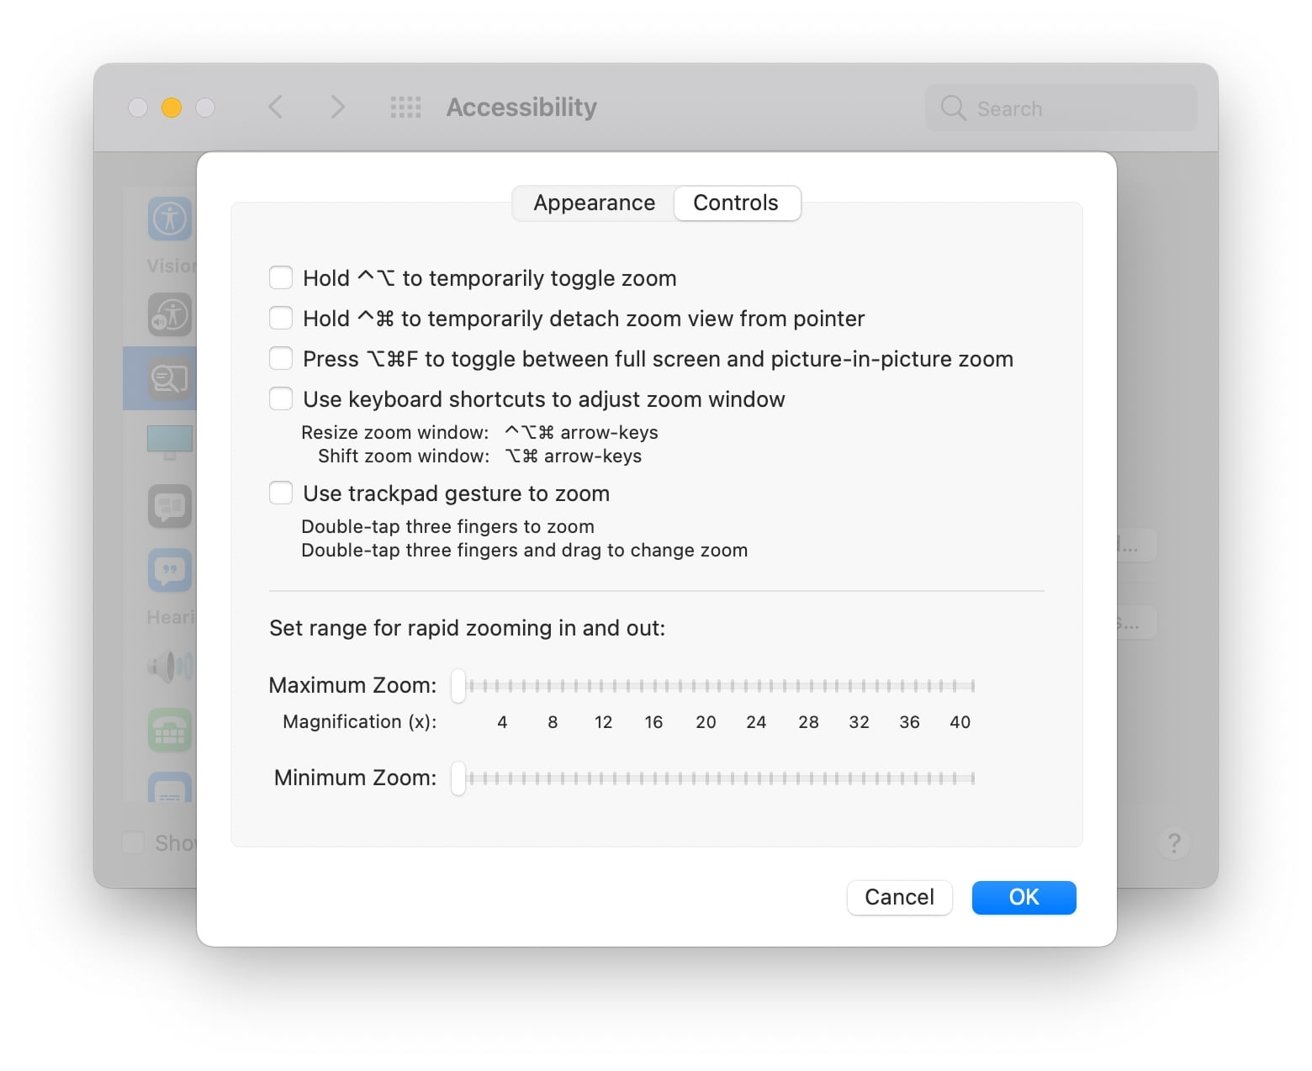
More shortcut options are available, including adding more trackpad controls and adjusting the zoom limits.
The Controls tab offers extra keyboard and trackpad-based options, including the ability to temporarily toggle zoom with a keyboard shortcut, holding another to temporarily detach the zoom view from the pointer, and even to toggle between Full screen and Picture-in-picture modes.
Keyboard shortcuts can also be enabled to adjust the zoom window size and enable trackpad gestures to zoom and change options.
Controls are also presented to set the zoom range, namely the maximum magnification and the minimum magnification.
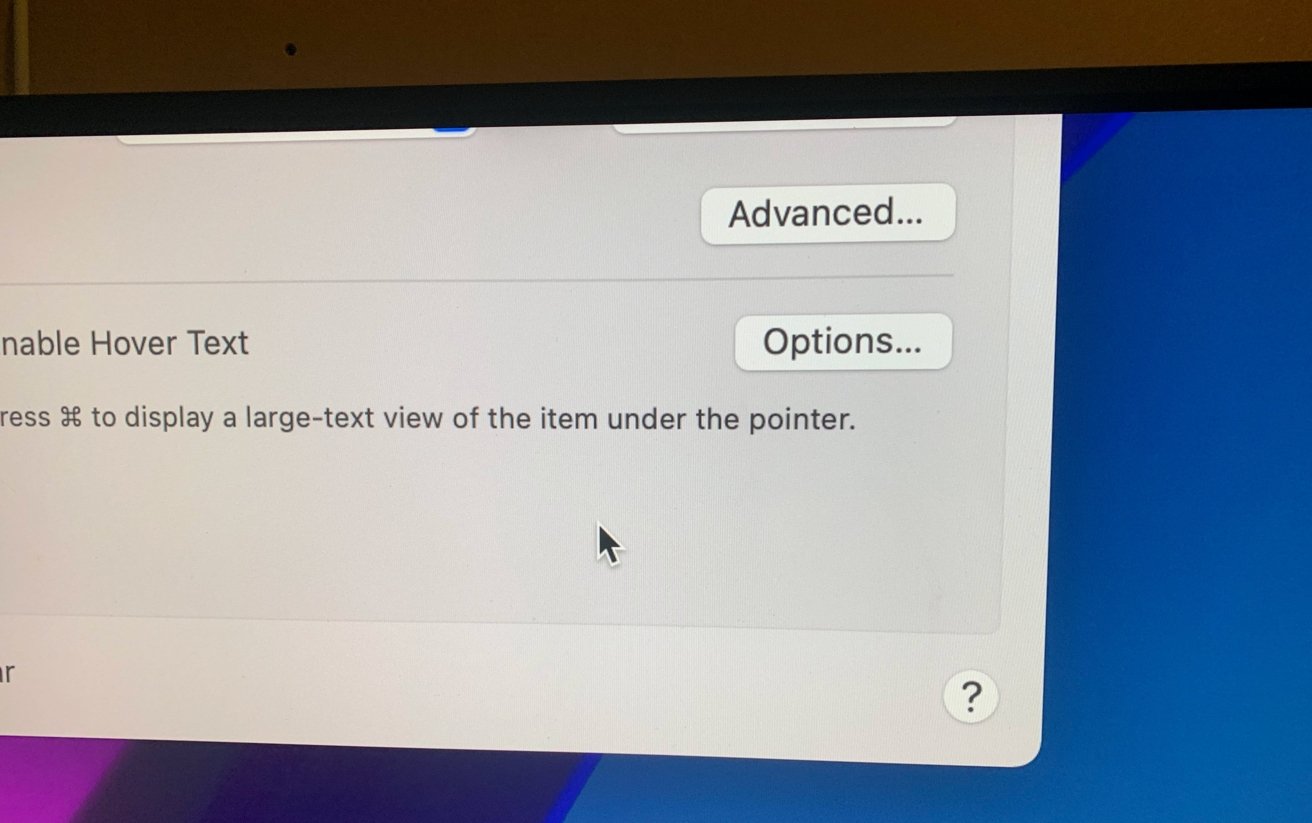
Hover Text
While not specifically magnifying the display, the Zoom menu also includes an option for "Enable Hover Text." Available without needing Zoom to be enabled, the feature lets users press the Command key to temporarily magnify just the text under the pointer.

As the name suggests, hover over text and Hover Text will make it larger.
An Options menu offers extra personalization, including changing the size of the zoomed-in text to between 14pt and 128pt, the font, how the text appears around the cursor, and what modifier key triggers the feature.
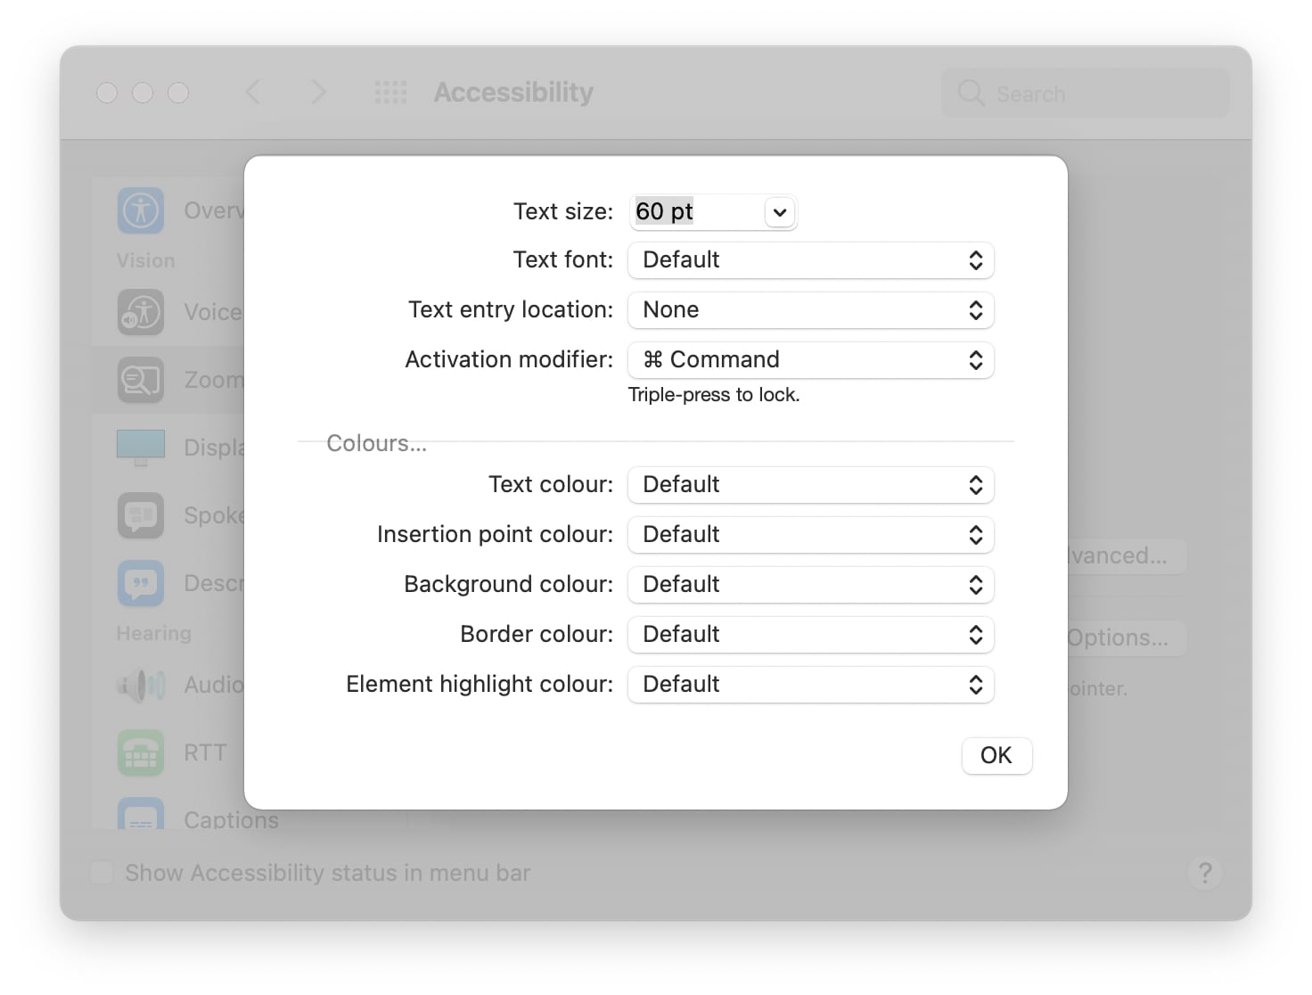
You can change how Hover Text works, and appears.
Further configuration options are available for colors, including text colors, the insertion point color, background, border, and element highlights.
Keep up with everything Apple in the weekly AppleInsider Podcast — and get a fast news update from AppleInsider Daily. Just say, "Hey, Siri," to your HomePod mini and ask for these podcasts, and our latest HomeKit Insider episode too. If you want an ad-free main AppleInsider Podcast experience, you can support the AppleInsider podcast by subscribing for $5 per month through Apple's Podcasts app, or via Patreon if you prefer any other podcast player.