Use iCloud to give Apple Mail on iOS some much-needed, if still basic, rules to automatically handle your emails.
If you get a lot of email, anything that helps you stay on top of it, is a good thing. So even though it's hardly very powerful, you have to give a shout out to the Filter option on Apple Mail for iOS.
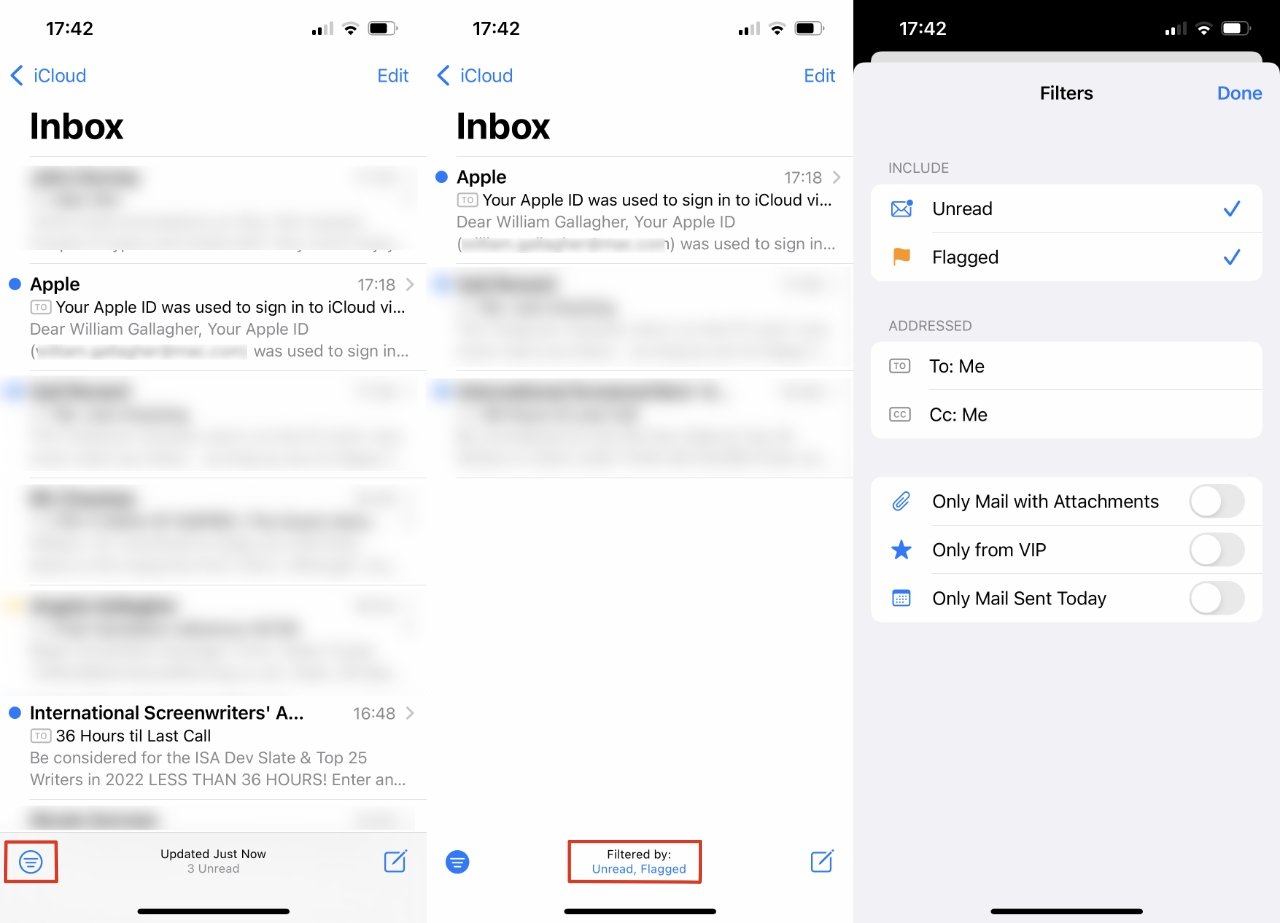
If you open Apple Mail on iPhone, and are in any mailbox, there is a Filter button at bottom left. Tap that and by default, suddenly you're only seeing unread messages.
There is more you can do, but managing your email perhaps starts with that, and then continues with wringing more features out of iCloud.
Using the iOS Mail Filter options
To only show unread messages in your inbox, you don't have to do anything more than tap on Filter. Once you have, though, a description appears in the center of the bottom row, saying Filtered by Unread.
Tap on that and you open up a whole pane of different options. Instead of just showing unread messages, you can have it display only ones you've flagged, for instance.
In total, you can have Mail show you messages that are:
- Unread
- Flagged
- Sent directly to you (i.e. you're in the To: field)
- CCd to you
- Have attachments
- Are from your VIPs
- Only ones that arrived today
And the word "total" is key. You can set any one of these, you can set every one of these, or you can set any combination. If you just want today's emails from your VIP that you've flagged and have attachments, you can do it.
It's a useful and under-used feature, but it's also profoundly limited. This Filter option solely works on the current mailbox, you can't apply it across your archive, your trash, or sent items, all at the same time.
And for it to be any use at all, you have to keep so many emails in your inboxes that you need filtering to cut through them. It's much more efficient and frankly better for your soul if you can deal with an email and then archive it off out of your site.
It's not as powerful as using iCloud Mail rules, but iOS Mail has an under appreciated Filter option
So while it does help the chronically untidy, and it can help all of us at times, Apple Mail's Filter option on iOS is really encouraging email overload more than it is helping alleviate it.
Which is why it's good that there are other options — and a bit bad that they're not on the iPhone or iPad. Not directly. They are, however, on the Mac.
Use the Mac's Mail rules
- On your Mac, open Mail, then Preferences
- Click on the Rules tab
- Choose Add Rule
- Fill out the form that appears
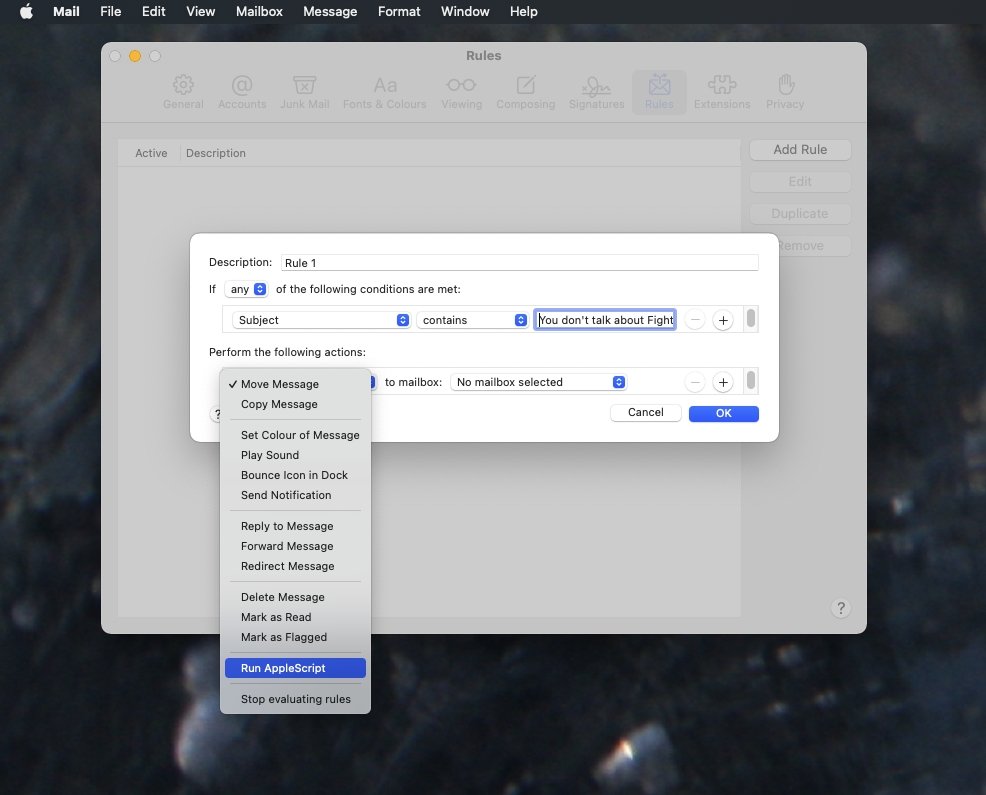
That form lets you do a similar thing to Filter, in that you can make a rule that selects a flagged message, with attachment, and sent today from a particular person. The difference is that the Mac can then do more than just display it.
On the Mac, a rule like this can send an automatic reply that is different depending on who the incoming email is from. So you can be obsequious to your boss and brusque with anyone else, for instance.
Or you can move a message into a new mailbox, forward it to someone else to deal with, or delete it. And you can even trigger an AppleScript which means, if you can write AppleScript, that you can have an incoming email kick off just about anything your Mac can do.
Almost none of this is on the iPhone or iPad — except iCloud gives you certain key elements.
Use iCloud's Mail rules
- Go to icloud.com on your iPhone, iPad, or Mac, and login
- Now choose Mail
- On a Mac, click on the small cog icon toward top left, just under where it says iCloud Mail
- On an iPhone, tap the Mailboxes button at top left, then tap the small cog icon that now appears toward the top right
- In the pop up that appears, choose Rules
- Tap on Add Rule
- Set conditions such as message being from a certain person
- Set what Mail should do, such as forward the message
- Tap Add
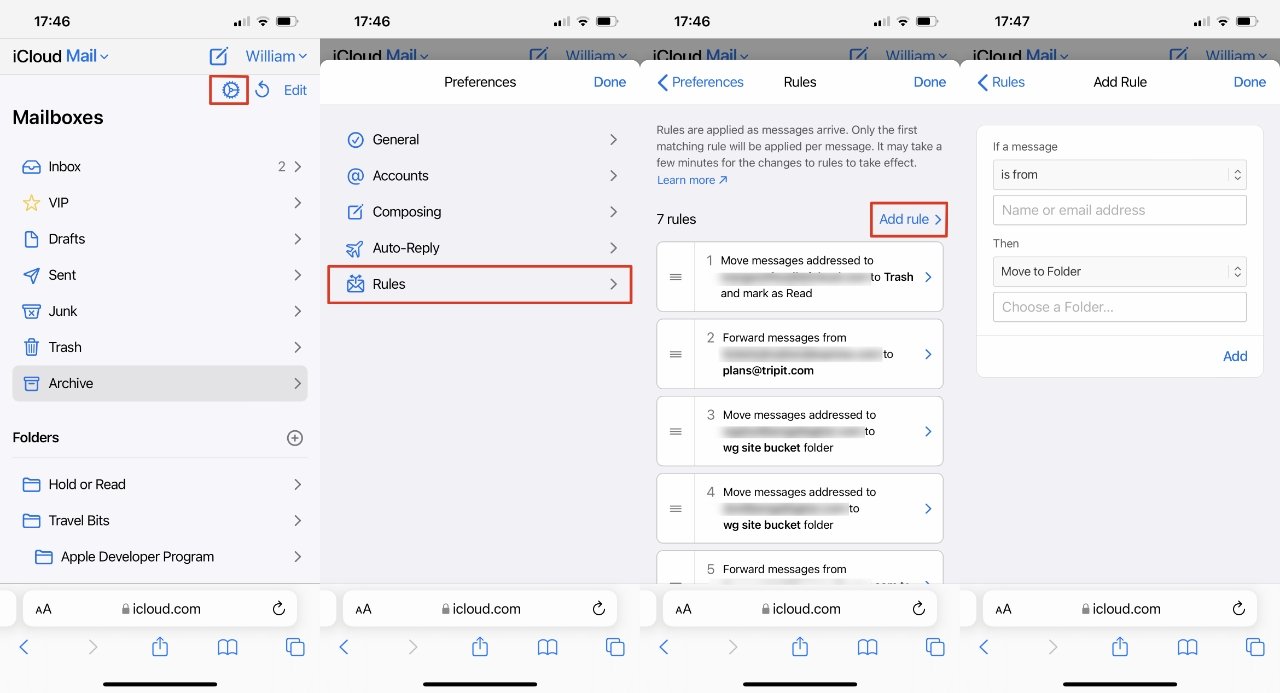
Go to iCloud.com on your iPhone and you can set up more powerful Mail rules
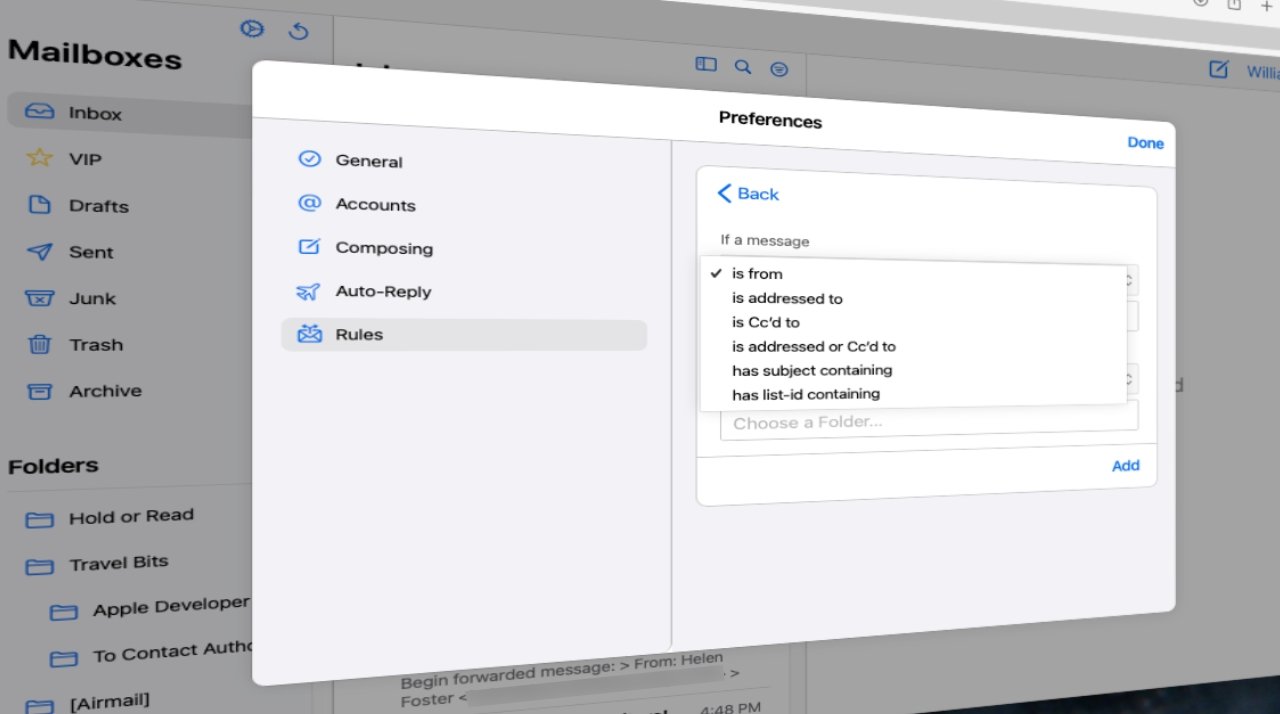
The conditions you can set here are that the incoming message:
- is from a specific person or address
- is addressed to a specific person or address
- is CCd to a specific person or address
- Is addressed or CCd to them
- has a specific subject heading
- has a List-ID that contains text you specify
That last may be how you can say you want all email from the Acme Cartoon Company to be dealt with the same way. But it's more fiddly than the rest: you need to get the list-ID from an email someone has sent you.
The actions Mail in iCloud can take on the message are:
- Move to a particular folder
- Move it to Trash
- Forward to someone you specify
- Mark as read
- Move to folder and also mark as read
- Move to trash and also mark as read
- Forward to an email address and mark as read
It looks like a long list of options and it isn't compared to the Mac. It also isn't at all when compared to Gmail, which famously has powerful email sorting automation.
But it is much better than letting everything arrive on your iPhone and then either reading it all, or using the Filter option.
The problem with iCloud mail rules
The trouble is that iCloud Mail works differently to something like Gmail. Both are cloud-based, but when a message comes to Gmail, that service will process it and any rules before it even shows you the email exists.
Apple's iCloud Mail will pop the message into your iCloud Mail inbox, but also your iPhone's inbox, your Mac's, and your iPad's. It's not quite all at the same time, but for practical purposes, it is.
Which means that even if you set up rules, mail messages are going to arrive on your iPhone and they are going to ping at you. More than still being as distracting as they were before, they can even be worse.
Because iCloud will process those rules. It can very well be that you hear the ping of a new email arriving on your iPhone, and by the time you pick up the device, iCloud has deleted, or moved, or forwarded it.
Mac Mail has more options than iOS on device, but iCloud rules still improve it
How to benefit from iCloud mail rules without continuing the distraction
Give iCloud Mail a minute to do its job. Rather than having your Mail arrive on your iPhone the moment it's sent, or as near as possible, delay it.
Tell Mail to only check for messages every 15, 30, or 60 minutes instead. That could be good for your concentration, anyway, but it also means iCloud will definitely have received mail and processed it.
Unless you're unlucky enough to have set Mail to look for messages every 15 minutes, and one you want automatically deleted happens to arrive on the 14 minutes and 55 seconds mark.
- On your iPhone, go to Settings, Mail
- Tap on Accounts
- Choose Fetch New Data
- Scroll down to the Fetch heading
- Choose Hourly, Every 30 Minutes, or Every 60 Minutes
Improving Mail with iCloud
Apple Mail is a fine email app that's very robust and has more than enough features that the majority of users never think to try something else. It is weak on rules, though, which means the more you rely on email, the more it's worth exploring what ways there are of automating it.
But Apple Mail with iCloud rules is better.