Your iPhone may have low storage because it's been consumed by System Data, which can potentially consume all available capacity. Here's how to regain space when things get too bloated to function.
Storage capacity is a significant issue for mobile device users. The available space on an iPhone, iPad, and even a Mac a sensitive concern for everyone.
Users with expansive storage capacities have less trouble with it than most. Those saving money with more modest storage may be more hard-pressed.
Usually, you can manage apps by offloading or deleting them to save storage. Maintaining stored videos and files, using cloud storage more, and other techniques can also help to tame storage usage.
Sure, deleting files and wiping the cache of apps can help, but it won't help an occasional problem involving System Data. Sometimes, System Data can grow to a massive size, and there's very little you can do to fix it.
Here's what you can do to get back to a more usable amount of free storage.
What's System Data on an iPhone?
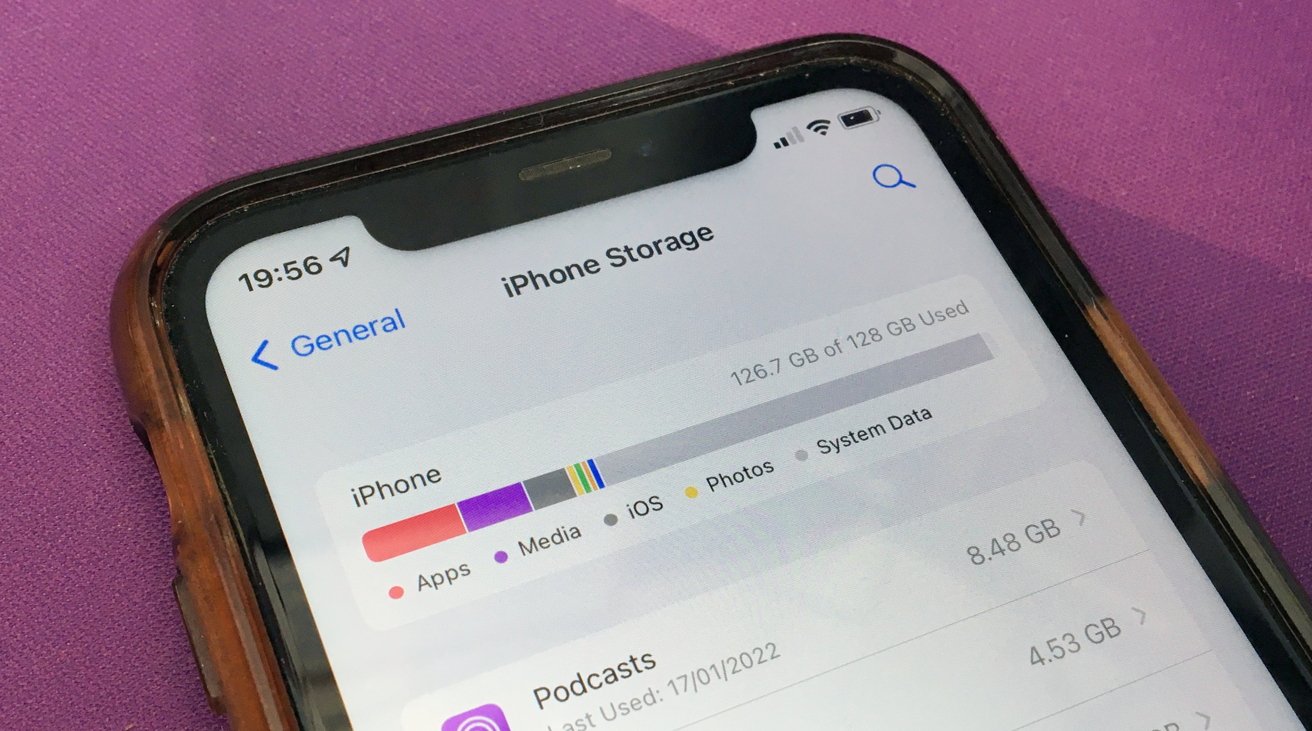
By checking your iPhone's storage usage, you will find that iOS handily sorts out its data usage into several categories, including Apps, Photos, Media, iOS, and System Data.
These are all self-explanatory, with Photos and Media consisting of images, videos, and other typical media-style files. Apps refer to apps downloaded from the App Store and caches of data for each, while iOS is the storage consumed by the operating system itself.
How to check storage usage in iOS
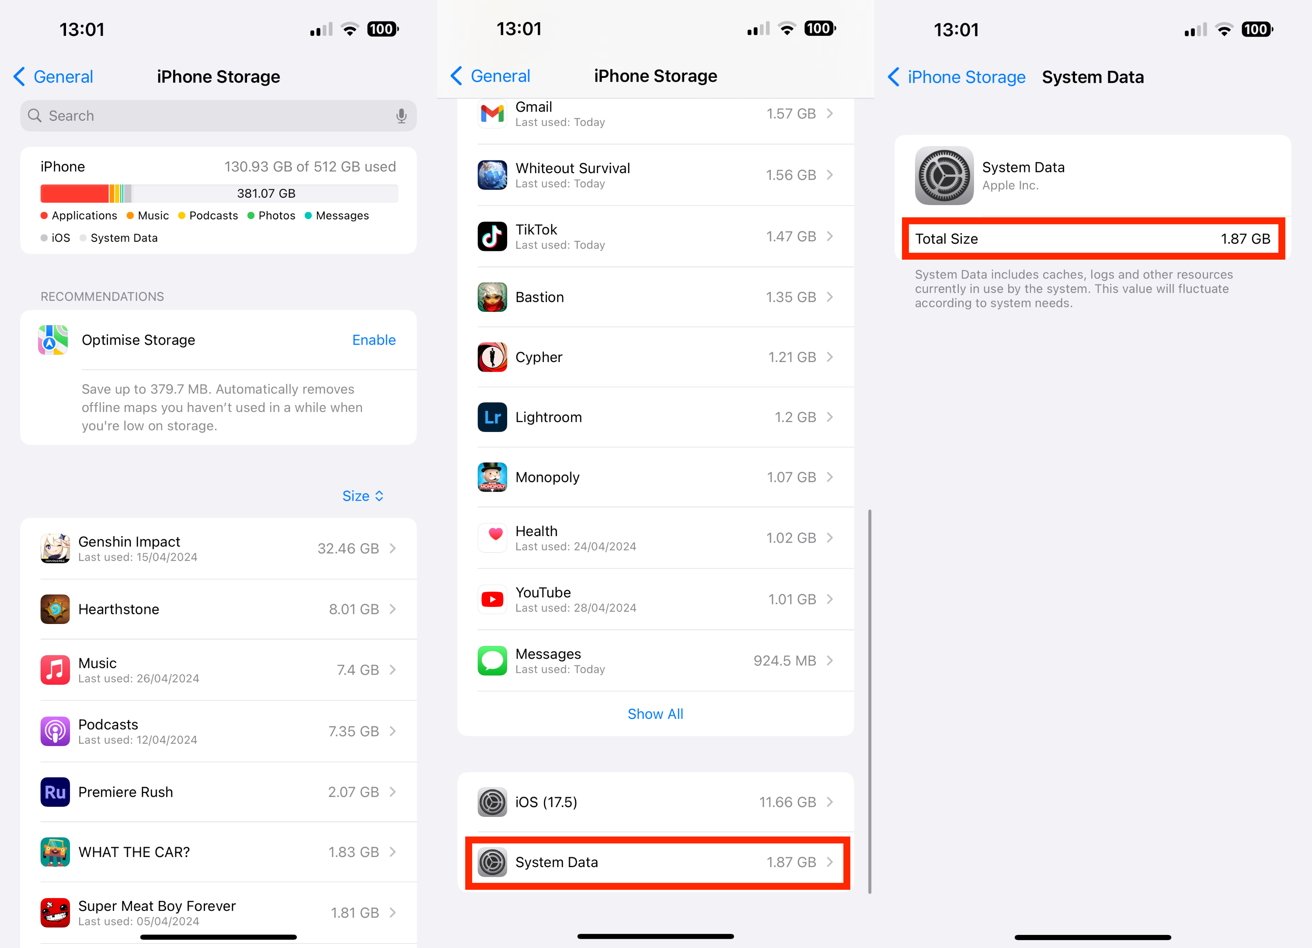
- Open Settings.
- Tap General, then iPhone Storage.
- The bar at the top will graphically show you what storage is being used.
- The list of apps below shows individual app storage usage. Tap each to see the app size and consumption of related files and options to offload the app and delete the data.
- At the bottom of the list are listings for iOS and System Data.
System Data, and what the Settings app refers to as "Other System Data," includes many files not covered by other categories.
System Data doesn't usually take tens of gigabytes of storage, but problems happen.
The definition within iOS is that System Data "includes caches, logs, and other resources currently in use by the system." This doesn't state what the data is, but it can consist of various logs, temporary data stores, and other elements that aren't strictly considered part of any of the listed apps.
Then some elements are used by iOS but aren't owned by a particular app. For example, downloading different Siri voices or installing fonts can expand this section, but they aren't defined as being used by just one app or the operating system itself.
Why is System Data using all of my iPhone storage?
This data will also "fluctuate according to the system needs." This means that temporary data can be written to the storage as System Data, removed when iOS doesn't need it anymore.
However, the problem is that you can't see what the types of data used in this category consist of, nor can you delete it.
Generally speaking, Other System Data can be a few gigabytes in size at first. Depending on how you use the iPhone, it can grow and shrink by several gigabytes over time.
The bloating problem comes into play if that change in the size of Other System Data continues on an upward trajectory. Over time, some users may see that their iPhone's System Data takes up a lot of space, possibly tens of gigabytes.
In the case of one AppleInsider writer, Other System Data grew to almost 85 gigabytes, consuming virtually all of the available remaining storage and causing device problems.
It is unknown exactly why this occurs, but it is likely from one or more caches or logs being continually added to over time. Crucially, these logs may not be deleted at a pace to keep up with writes.
Left for too long, this can be all-consuming.
Since there's no way to see what caused it directly or selectively delete problematic System Data elements, users may be left with very few options available.
How to cut down on System Data usage
You can do a few things to cut down the amount of System Data being used, and they vary in severity of what you have to do to your iPhone and its data. This guide will start with the least intensive option.
Remember that these are intended to be taken after other reasonable measures, such as deleting unwanted videos or other files to free up space.
Also, remember to back up your iPhone before continuing. The last thing you want to do is delete precious data when trying to recover space.
Safari and Messages
The first way is to try and cut down on cache usage by a select number of Apple-produced apps. This can include caches by Safari and Messages, which can sometimes take up the System Data category.

You can manage Messages and Safari's cache to try and cut down System Data usage.
For Messages, this could be as simple as opening Settings, then tapping Messages, and scrolling down to Message History. Here you can change how long you "Keep Messages" from "Forever" to a lower figure such as one year or 30 days.
Clearing the Safari Cache is a little bit more involving but still useful.
How to clear the Safari cache in iOS
- Open Settings.
- Tap Safari.
- Scroll down and tap Clear History and Website Data.
- On the warning pop-up, select a timeframe and then tap Clear History.
Per-app caches
On the off chance it is a particular app causing the problem, you could try to delete the app if you have a clue as to what app is being wasteful with space. For example, apps that use a lot of videos can potentially use such caching, but without necessarily deleting the caches afterward.
Offloading and deleting apps may wipe some errant caches.
There's no guarantee this will delete the problematic cache capacity you want to be removed. But it should still reduce how much of it is in active use.
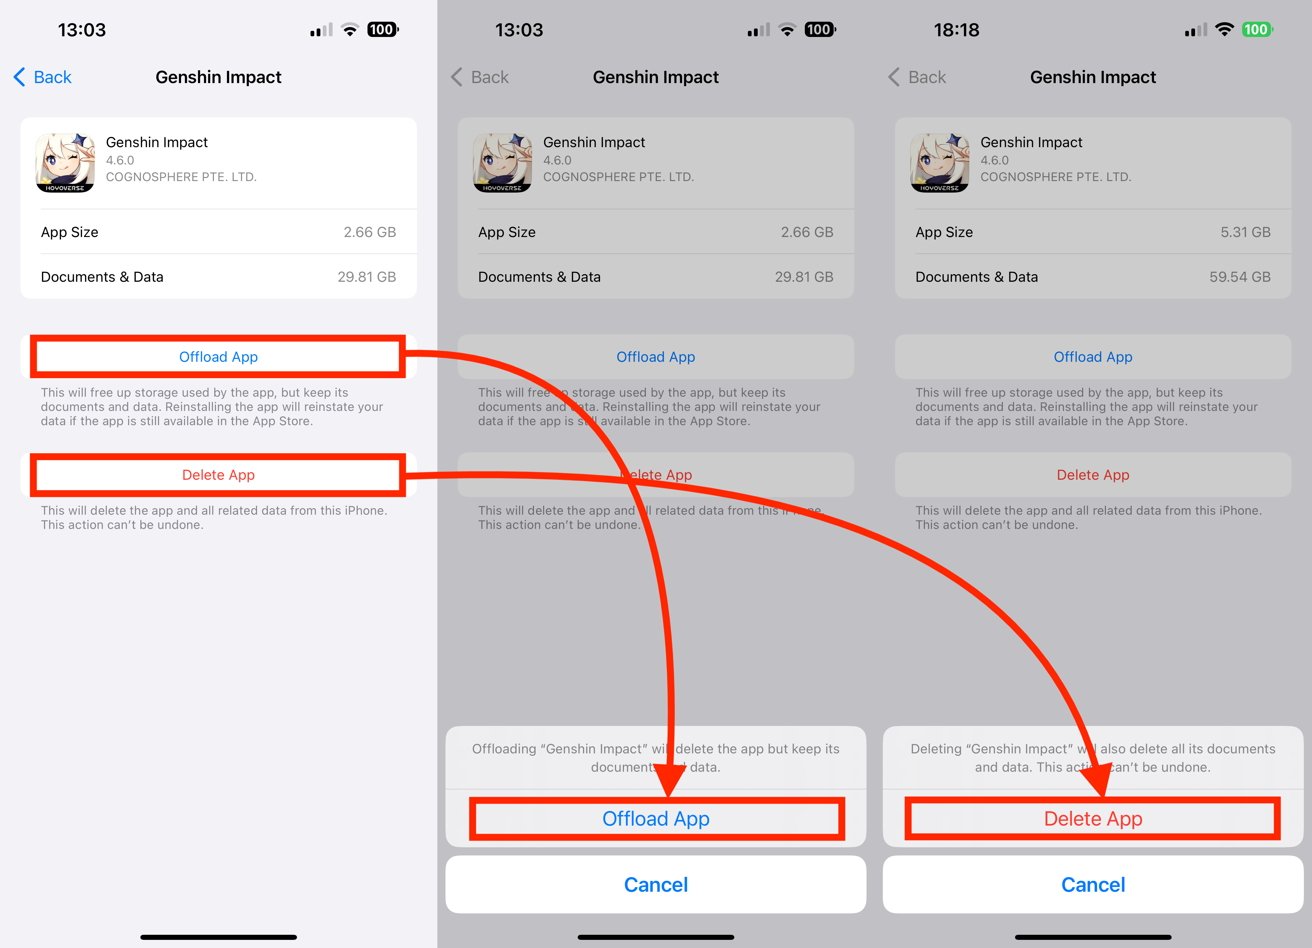
It is advisable to try offloading the app before a full delete, namely removing the app but retaining your related documents and data.
How to offload or delete apps in iOS
- Open Settings.
- Tap General.
- Tap iPhone Storage.
- Scroll and tap the relevant app.
- Tap Offload App, then Offload App to confirm.
- Alternately, tap Delete App, then Delete App to confirm.
Backup Restoration
The nuclear option is to restore your iPhone from a backup. This entails backing up all data on the iPhone, factory resetting the iPhone, then restoring from the backup.
While you will get back all of your user data and continue to use apps, you may have issues involving two-factor authentication apps and other related problems following a device setup.
Backing up and resetting the iPhone is the last real option available.
In the AppleInsider editorial staffer's case, restoring from a backup did solve the problem, so it is worth taking the time to do this if you can.
How to backup an iPhone and restore from backup.
- To backup the data, connect the iPhone to your Mac or PC, and open either Finder or iTunes.
- Select the iPhone, then select the General tab.
- Select "Back up all the data on your iPhone to this Mac."
- Tick "Encrypt local backup" to preserve account passwords and any Health data.
- Select Back Up Now and wait for it to complete.
- Disconnect the iPhone.
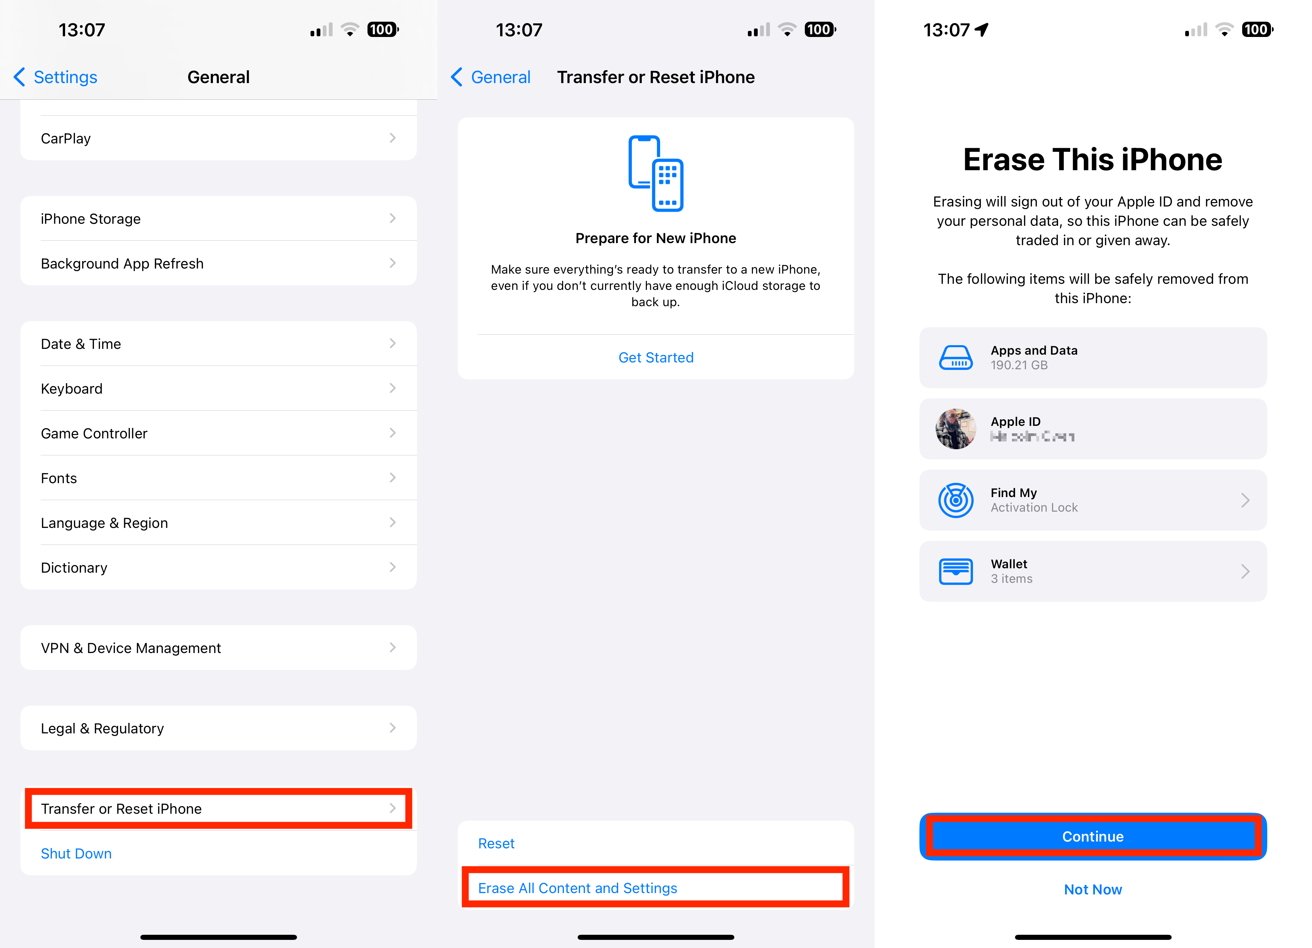
- Open Settings and select General then Transfer or Reset iPhone.
- Tap Erase All Content and Settings. Tap Continue and follow the prompts to complete.
- After it is wiped, connect the iPhone back to the Mac or PC, open Finder or iTunes, and select the iPhone.
- Under General, click Restore Backup.
- Select the most recent backup you just created, then click Restore. Follow the on-screen prompts.