With the release of macOS Sonoma, Apple has also updated the current versions of Metal developer tools for use in Windows. Here's how to get and use them.
Metal is Apple's graphics framework for macOS. Metal allows you to create rich, performant 2D and 3D graphics using Apple's graphics engine optimized for all Apple devices.
While Metal runs on Apple devices, you can also use Microsoft Windows as a platform for creating assets, images, shaders, and textures for use in Metal.
Apple has two Metal for Windows downloads on its developer tools site: Metal Developer Tools 4.0 for Windows and Metal Shader Converter for Windows. You can download both by logging in to your Apple developer account online.
Getting the tools
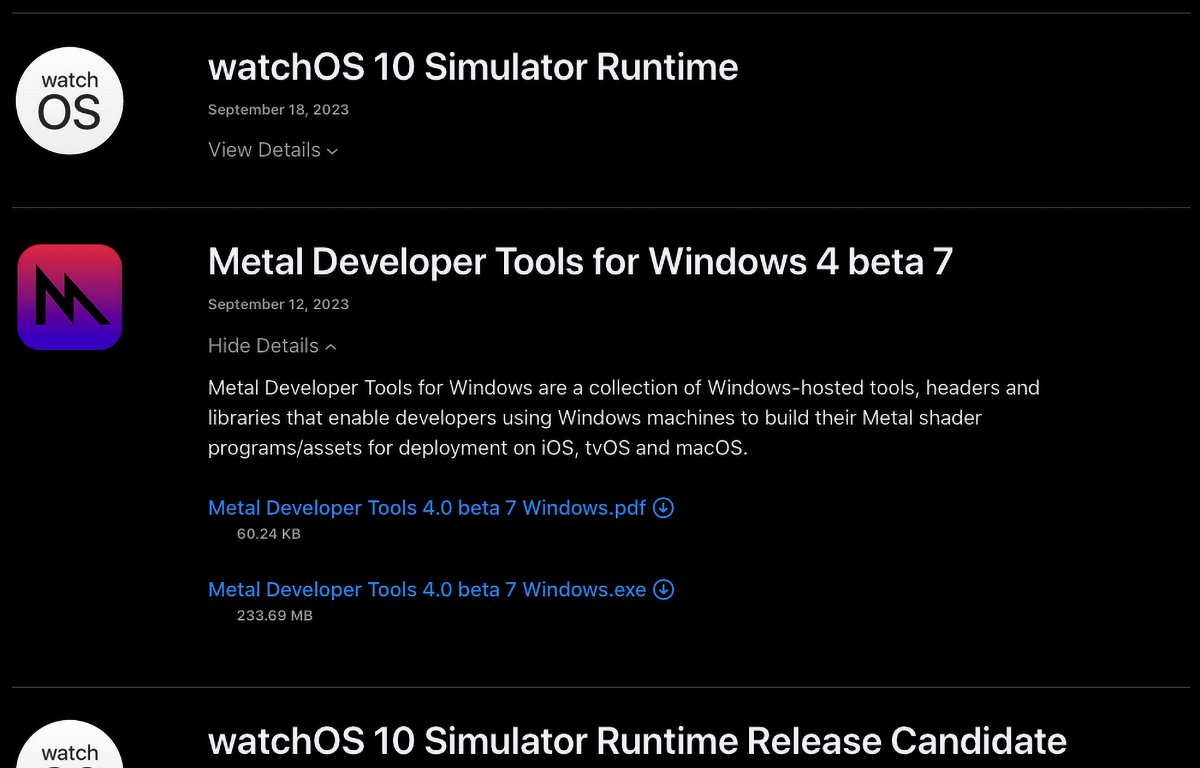
To download the Metal Developer Tools for Windows, log in to your Apple developer account, go to the Downloads page in your web browser and scroll down to Metal Developer Tools for Windows:
Click the Show Details arrow, then click on the Metal Developer Tools 4.0 Windows.pdf and Metal Developer Tools 4.0 Windows.exe to download them to your computer's storage.
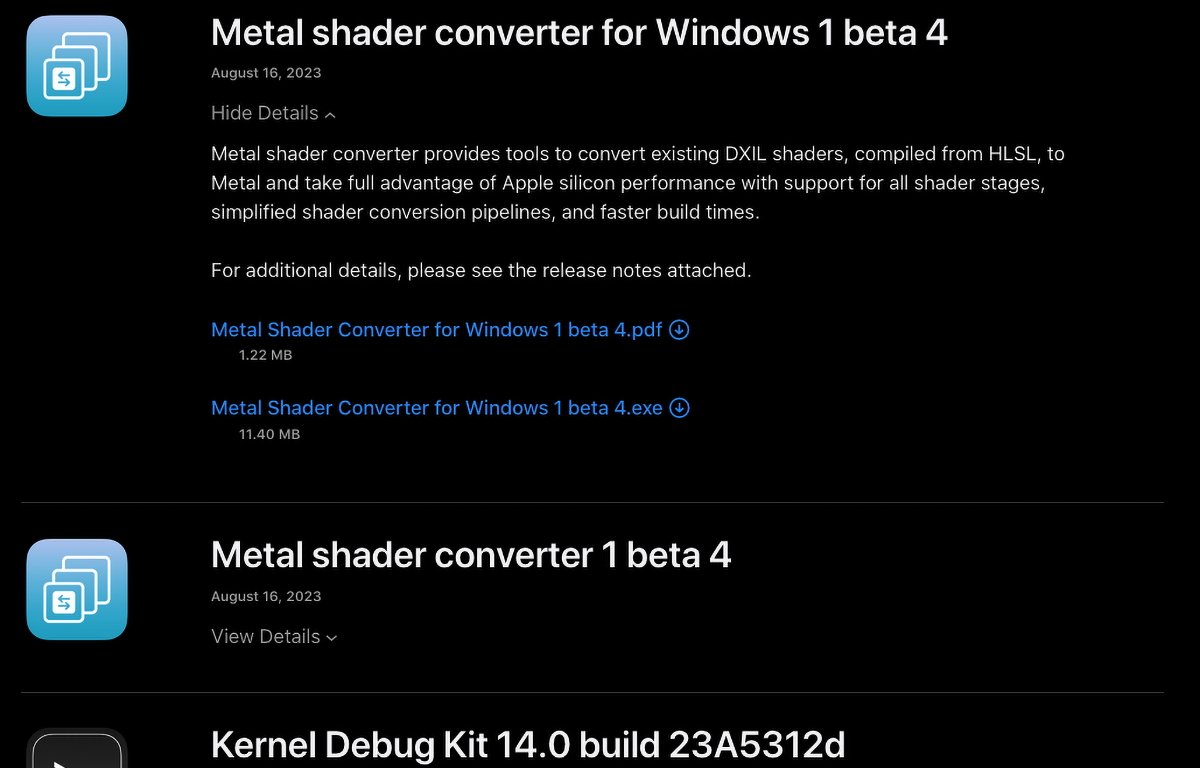
Next, scroll down a bit to Metal shader converter for Windows and click the Show Details arrow, then click on the Metal Shader Converter for Windows.pdf and Metal Shader Converter for Windows.exe to download them to your computer's storage:
Installation
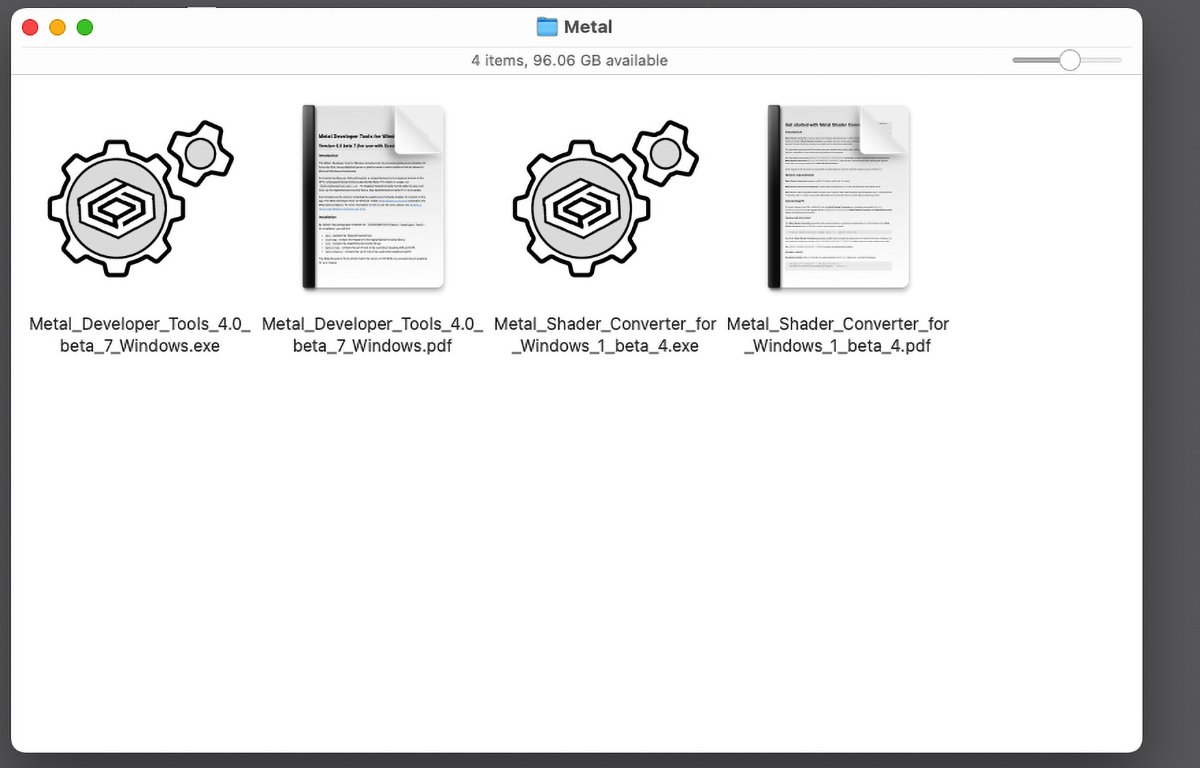
Move all downloaded items into a new folder. You should now have four items. You may want to read through both PDF files before installing:
Next, if you downloaded the files on your Mac, plug in a Windows-compatible USB thumb drive or other disk and copy the four items to it. You'll use the thumb drive to copy the files over to your Windows 10 or 11 machine.
Once the copy is finished, plug the USB drive into your Windows computer and copy the four files over. Run both .exe installer files to install the tools on your Windows machine.
As the Metal Developer Tools for Windows PDF states:
"By default, the package gets installed into %PROGRAMFILES%\Metal Developer Tools. On installation, you will find:
bin contains the TextureConverter tool.
include contains the headers for the AppleTextureConverter library.
lib contains the AppleTextureConverter library.
metal\ios contains the set of tools to be used when targeting iOS and tvOS. metal\macos contains the set of tools to be used when targeting macOS.
The Metal Developer Tools should match the version of OS SDKs you are planning on targeting for your release."
It also states that, beside the GUI installs, the installer can also support command-line installations as:
"Metal Developer Tools-Windows.exe" /S /D=C:\Users\My Name\Sandbox\Tools
Using the tools
Once installed, you can use the tools to convert shaders and assets on your Windows computer into formats Metal uses.
The first tool, TextureConverter converts Windows-created textures to GPU-compressed texture formats Metal accepts. To see details and run options for TextureConverter, type:
TextureConverter.exe --h into a command prompt in Windows and press Return or Enter.
As the developer note indicates, to incorporate TextureConverter into your own Windows texture tools, use the provided AppleTextureConverter library, and read the AppleTextureConverter.h header file for more info.
Also included are tools for compiling graphics and compute shaders from Windows into Metal Library Objects using the Apple Metal Shading Language.
There's no note provided with the Windows tools on how to do this, so you'll need to read Building a Shader Library by Precompiling Source Files in the Shader Library section of Documentation->Metal area of Apple's online Metal documentation.
In effect you'll use the tools to go from Windows DXIL formats to the intermediate .air format, then to a .metalar and .metallib file that can be loaded into Xcode and run from your app at runtime. From the documentation:
"The metal compiler tool converts each shader source file into an intermediate representation file. The metallib and metal-ar tools then compile intermediate representation files into a library and a binary archive, respectively".
As the documentation states, the Metal command-line tools for Windows use the same options and arguments as their macOS counterparts.
Metal Shader Converter
The other tool for Windows that gets installed is the Metal Shader Converter for Windows.
This tool converts intermediate representations in LLVM IR bytecode form into bytecode suitable to be loaded into Metal.
LLVM is the open-source compiler infrastructure used by Xcode during the compilation of projects.
You can read more about LLVM at llvm.org and the bytecode format (LLVM calls it "bitcode") on the bitcode page on that site.
The bytecode format is also covered in the book LLVM Cookbook from PACKT Publishing.
The Metal Shader Converter is provided as both a standalone tool and a library you can incorporate into your own tools if you wish.
Also, see the provided header file metal_irconverter_runtime.h.
Metal Shader Converter for Windows requires Microsoft Windows 10 or later, as well as Microsoft Visual Studio 2019 or later.
Libraries built using the Metal Shader Converter for Windows only work with macOS 14 Sonoma, and iOS 17. If they're built for earlier OS versions, some features may not be available.
Running Metal Shader Converter
The first, and simplest use of Metal Shader Converter for Windows is to convert a Windows DirectX DXIL (DirectX Intermediate Language) shader to a Metal shader library. This can be done using the metal-shaderconverter command line tool.
For example:
metal-shaderconverter shader.dxil -o ./shader.metallib
You can get more info about metal-shaderconverter on Windows by running metal-shaderconverter --help in a command prompt.
Metal Shader Converter library
There is also a libmetalirconverter dynamic code library (dylib) provided which works with C, C++, Objective-C, and Swift projects which let you convert DXIL to Metal using the provided IRCompiler class.
Such conversion code is fairly straightforward and sample code of less than a page is provided in the Metal Shader Converter PDF.
Essentially to use the provided IRCompiler class, you first create an instance of the object, set an entry point name, convert a DXIL object into an IR object using the IRObject class, compile it to Metal using the IRCompilerAllocCompileAndLink() function, and inspect the output.
The provided
The rather lengthy thirty-page Metal Shader Compiler for Windows PDF goes into a host of other options you can use for conversion from Windows to Apple Metal including vertex attributes, sampler state objects, argument buffers, ray tracing, and more.
There are also tips on achieving optimal Metal performance and tips for handling complex shader pipelines including geometry and tessellation.
The PDF also recommends taking a look at Apple's Metal sample code project Learn Metal with C++ on the Metal Sample Code page.
Additional resources
If you don't know C++, you'll want to start with a simple classic book on C first such as the definitive C book The C Programming Language by Brian Kernighan and the late Dennis Ritchie both of whom wrote the C language at Bell Labs in the 1970's in order to create the UNIX operating system.
C++, created by Bjarne Stroustrup, is based on C but provides object-oriented (OOP) features such as classes, objects, a Standard Template Library (STL) and other modern features. Stroustrup's text The C++ Programming Language 4th Edition is a must-read.
Stroustrup also has a website at and several additional useful C++ books and tutorials.
An annual C++ conference, CppCon is held every year in Oct. - this year being held Oct. 1-6 in Aurora, CO. CppCon also has a YouTube channel with quite a number of great C++ tutorials.
C++ came to popularity in 1994 when the limits of procedural-based languages such as C became apparent. There are several standards for C including C99, C11, C14, C17, and C22. APRESS had some good books on each of the standards.
You can set which of these standards the Xcode compiler uses in Xcode's build settings pane.
At NeXT Computer in 1989, the NeXT team created Objective-C, which is a similar OOP language based on C, but which has additional benefits such as dynamic linking and object introspection.
When Apple bought NeXT in 1997, it also acquired all of the NeXT technology including Objective-C. A great, definitive book on Objective-C is Big Nerd Ranch's Objective-C Programming: The Big Nerd Ranch Guide.
It's also worth noting that some third-party 3D standards also have some requirements, many of which are based on Windows DirectX/Direct3D DXIL standards.
Steam, for example, has certain DirectX requirements that must be met - so you if you're publishing to Steam and Apple platforms at the same time, you'll want to be aware of these requirements. Steam has a page which details the requirements.
Microsoft hosts a DirectXShaderCompiler repository and Wiki at GitHub.
Microsoft also has a DirectX-Specs page and DirectX Shader Model 6 in its DirectX-Specs and DirectXTK12 repos on GitHub.
The Windows DXIL debugging and tuning PIX tool is also available.
There's also a DirectX Developer Blog at Microsoft.
Finally, NVIDIA has a Windows-based DirectX debugging tool called Nsight Graphics, if you're up for braving the quite complex documentation.
Apple's addition of Windows Metal tools in macOS Sonoma means it's now much easier to port existing game graphics pipelines to Metal so they can run optimally on Apple platforms. As time goes by we can expect Apple to improve its Metal tools making cross-platform game development much less painful.
 Chip Loder





 Wesley Hilliard
 Oliver Haslam
 Christine McKee
 Amber Neely
 Andrew Orr

 Sponsored Content