There are a few less obvious features for managing and manipulating your storage devices in the macOS Disk Utility. In the third part of our deep dive into Disk Utility, here's how to find and use them.
In part 1 and part 2 of this series, we looked at how to manage and manipulate storage devices and volumes on your Mac using Apple's Disk Utility app built-in to macOS. There are a few extra features you might want to be aware of, so we'll cover those here.
Resizing disk images
To resize a disk image, first make sure it's unmounted either by dragging its volume from the macOS Desktop in Finder to the Trash in the Dock, or else click the small Eject symbol next to its name in Disk Utility's sidebar.
Once unmounted, choose Images->Resize... from the main menu in Disk Utility. This brings up the standard file open panel, from which you can select a disk image file from the disk.
Select an image, then enter the new size in the sheet that appears:
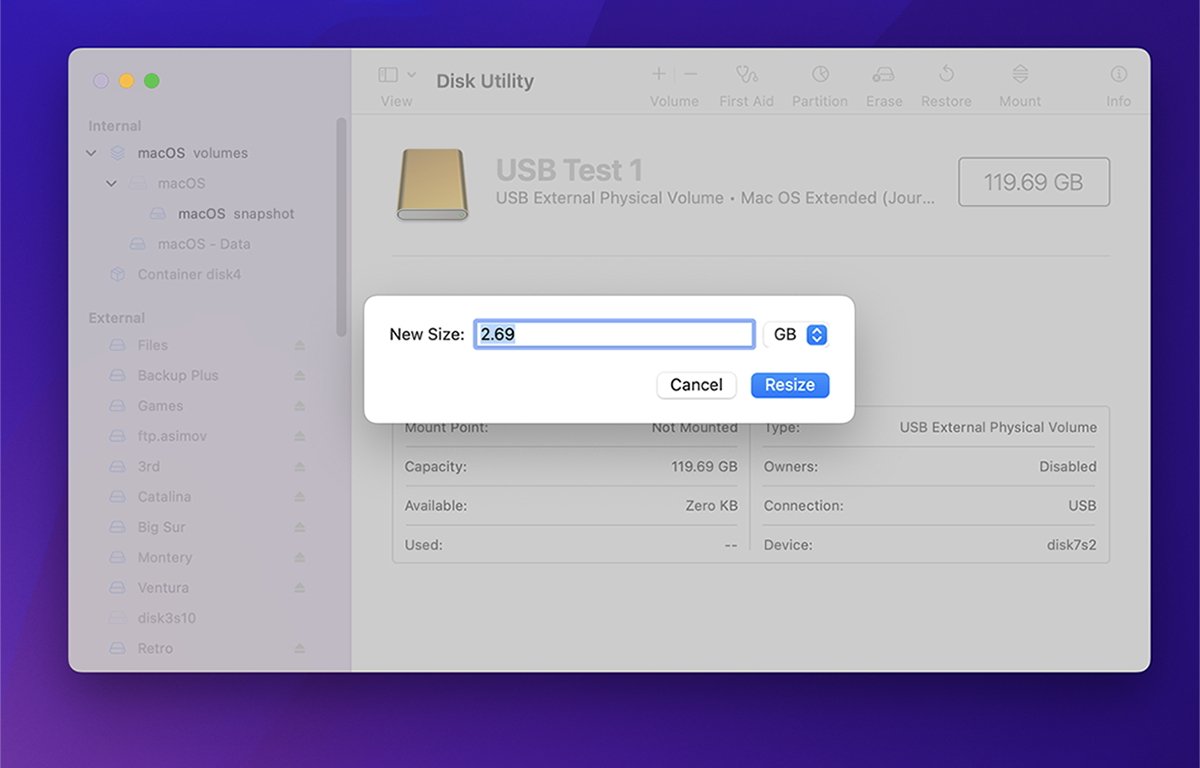
Enter a new disk image size and click "Resize".
Convert a disk image to another format
Using the convert image feature of Disk Utility you can change an image's format, and its encryption, if any. The formats supported are any of the four initial formats used when the image was created, as mentioned in Part 2 of this series.
For example, if you had a read-only disk image saved, you could change its format to read-write, or vice versa by using the convert image feature.
To convert an image, select Images->Convert from the main menu. This brings up the standard file open pane where you can select any existing disk image file previously saved to disk.
A fifth format is also presented in this case: Hybrid image (HFS+/ISO/UDF).
This format is a multi-volume format that can combine multiple other formats into a single image.
HFS+ is Apple's legacy file system format, while ISO is the International Standards Organization format commonly used on PCs and Linux machines, but can contain any one of a variety of different filesystems. UDF, or Universal Data Format is a standard commonly used for optical disks such as DVD-R, DVD-RAM, and others.
If you also want to change the encryption of the opened disk image, click the Encryption popup menu and select an encryption format.
Be aware that changing encryption formats may take some time. This is especially true if the disk image already used an encryption format - the old data has to be decrypted first, then re-encrypted and saved with the new format.
Enter a new name for the disk image, click Save, then click Done.
View APFS snapshots
If you're using the APFS filesystem on a volume, you can view periodic snapshots the Apple File System makes at certain intervals. Snapshots are a redundancy feature and help ensure recovery if a volume becomes damaged.
APFS has the ability to sometimes recover damaged volumes by comparing data on a volume with previously saved snapshots, to try to determine what the damaged data is. You can view these snapshots from within Disk Utility.
To do so, in Disk Utility's main menu bar select View->Show APFS Snapshots to open the snapshot viewer window. Note this menu item only works on mountable APFS volumes and not on their parent container volumes.
APFS uses container volumes as meta-volumes which makes adding, deleting, and resizing mountable volumes easier. In most cases, container volumes aren't visible in Finder on the Desktop.
Time Machine also uses the snapshots feature to make backups.
In the Disk Utility snapshots browser, you can rename, delete, and copy snapshots. See the APFS Snapshots page in the Disk Utility User Guide for more info.
Convert volumes to APFS
If you have an existing volume in some other format Disk Utility supports (such as HFS+), you can convert it in place to an APFS volume. Be aware, however, this task is risky because if the conversion fails in the middle of the operation for any reason, you might lose all the data on the volume.
Definitely make a complete backup of the volume, and if possible the entire device before proceeding.
To convert an existing HFS+ volume to APFS, first select the volume in Disk Utility's sidebar, then either select Edit->Convert to APFS from the main menu, or else Control-click or right-click the volume in the sidebar and select "Convert to APFS from the popup menu.
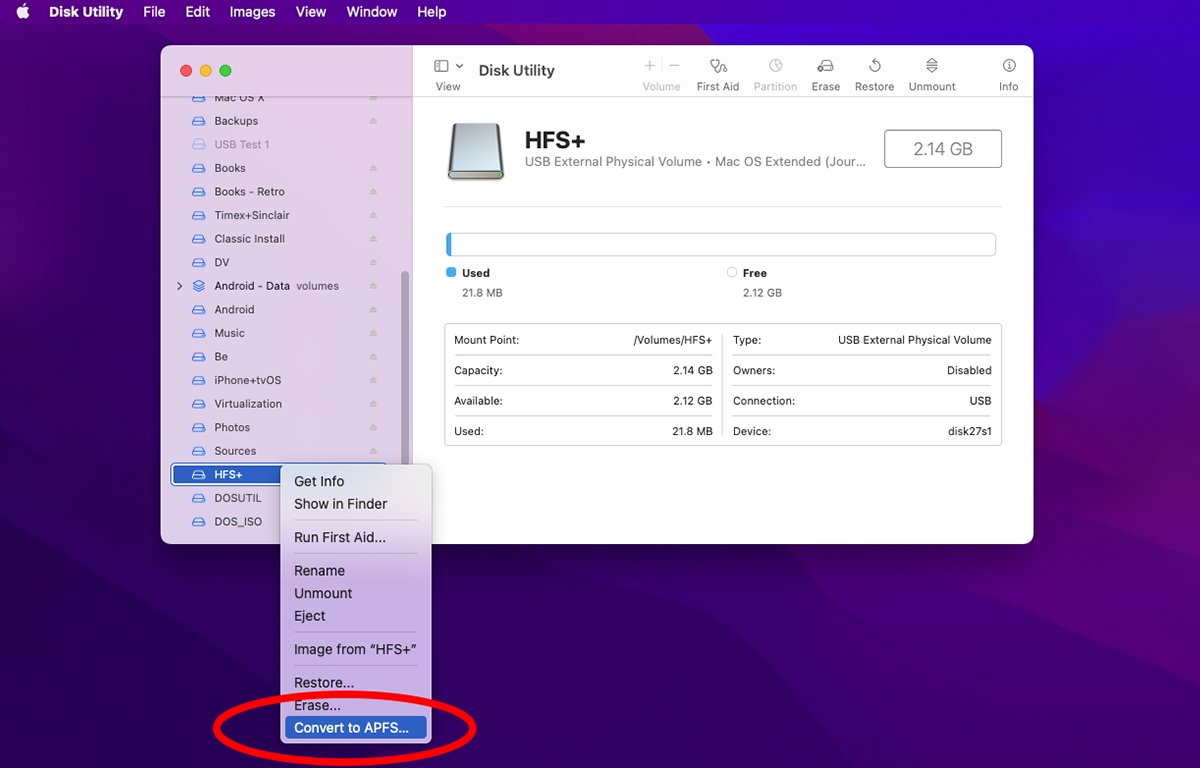
Select "Convert to APFS...".
You'll get a confirmation warning asking if you're sure you want to do this, that APFS volumes can't be used with older versions of macOS, and you can't undo the conversion. If you want to proceed, click the Convert button to start the conversion.
It may take a while, but if everything worked, you'll now have a new APFS volume where your HFS+ volume existed earlier. If it fails, your data will likely be gone and you'll need to Erase the volume and copy all your files back to it from the backup you made.
In order to convert a volume to APFS using Disk Utility, it must already be formatted with a GUID partition scheme.
You can read more about the file system formats supported in macOS in the Disk Utility User Guide.
Enabling Journaling
In filesystems, Journaling refers to keeping extra copies of volume file and folder info, and catalogs separate from the main filesystem directory hierarchy. If data gets lost, the volume can sometimes be repaired and files recovered by using the extra info stored in the Journal.
The First Aid feature of Disk Utility uses some of the Journaling info when it attempts to repair a damaged volume.
In macOS Extended (HFS+) volumes, when you first erase the volume you can specify whether you want Journaling or not. In APFS volumes, Journaling is always on.
If you have existing volumes that weren't formatted with Journaling turned on, you can enable it later using Disk Utility.
To do so, select a volume in Disk Utility's sidebar, then choose File->Enable Journaling. Disk Utility will attempt to turn Journaling on for that volume, and if successful will indicate such in the result sheet that is displayed.
There is a very slight performance penalty when using Journaling, but it's small enough that it's usually not noticeable.
Password protecting a device
In order to password protect a storage device in Disk Utility you must first erase it, formatting it as "APFS Encrypted". This both encrypts the data on the device and protects it with a password.
Once an encrypted device is connected to your Mac you must enter the password in order to use it.
If the device is an internal device, you'll need to enter the password to boot your Mac if it contains the Startup Disk. You can erase and password-protect an internal device, but be aware if you forget the password you won't be able to boot the computer.
To create an encrypted, password-protected device in Disk Utility, select it in the sidebar, then click the Erase icon in the main window's toolbar. You'll be prompted for a new volume name, then click the Format: popup menu and select APFS (Encrypted).
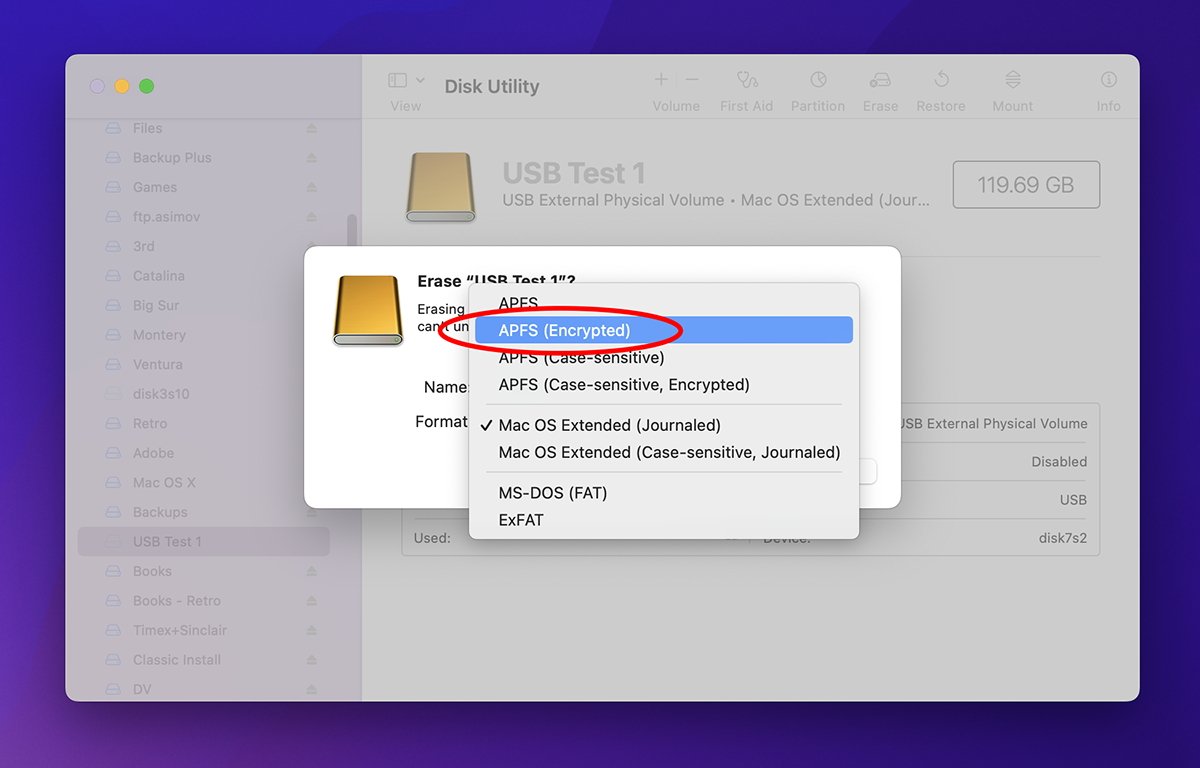
Select "APFS Encrypted" from the Format: menu.
You'll be prompted again with another sheet to enter the new password. Once entered, click the oddly-named Choose button. Once back in the previous sheet, click Erase.
Disk Utility will attempt to erase the device and the Erase sheet will indicate success or failure. Once you have a password-protected device, you can later change its password by selecting it in the sidebar, then selecting File->Change Password... from the main menu.
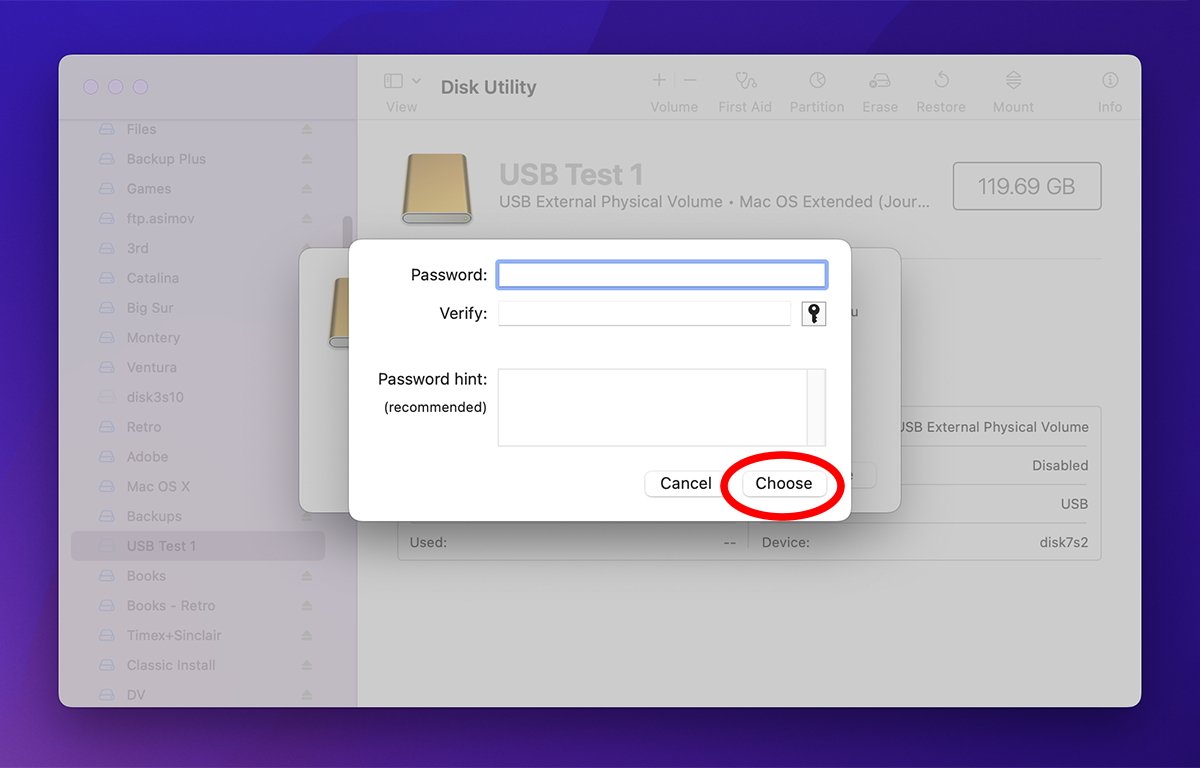
Enter and confirm the password for the device.
You can also rename an existing volume by selecting it in Disk Utility's sidebar, then selecting File->Rename from the main menu.
There are a lot of extra little features in Disk Utility, far beyond what has been covered in the first three parts.
In the final part of this series, we'll look at how to create bootable macOS installer disks, how to repair hybrid Apple Fusion Drives, and how to use the command-line disk utilities in Terminal.