Chip Loder
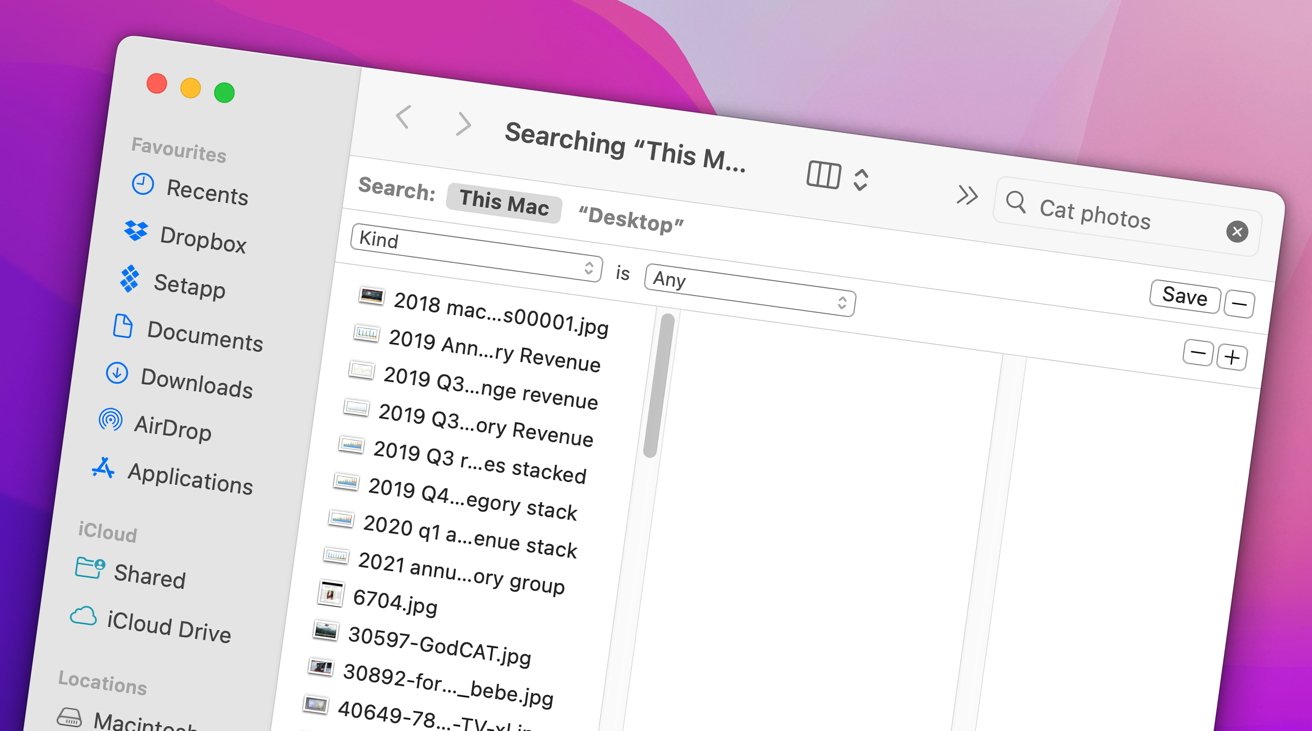
When Mac users think about search in macOS, they often think about Spotlight, but there's another way. Here's how to use the Finder's built-in search instead.
Spotlight is Apple's file indexing and search feature. It runs in the background indexing the contents of your files so that when you type something into its search field it knows exactly where to find the information you're looking for.
But macOS has had its own built-in search feature for decades. You can use the Finder's File->Find menu item or press Command-F on the Mac's keyboard to open Finder's main search window.
Getting started
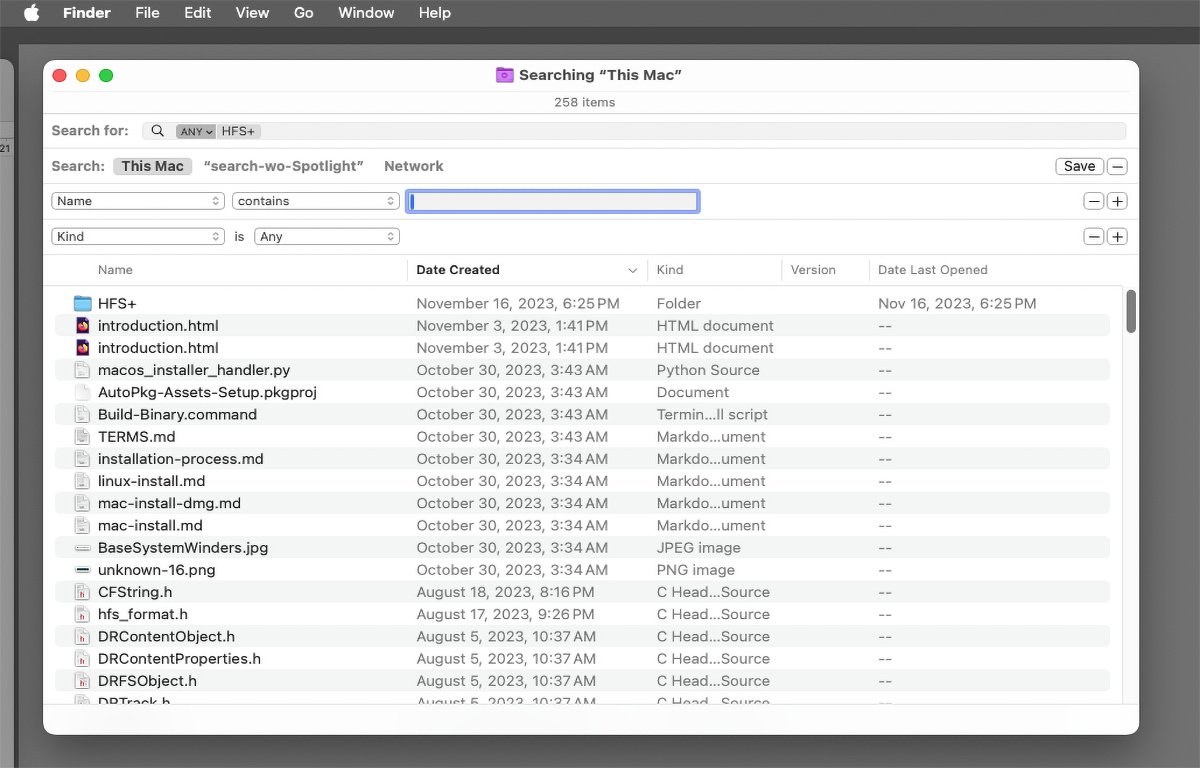
Once you open the Finder's search window, you're presented with a search field at the top and several controls to set how the search is performed:
 The "Find" search window in Finder.
Underneath the "Search for:" field where you type text, is a row of buttons to tell Finder what to search. Clicking one of these buttons, you can search your entire Mac, specific folders, or the Network.
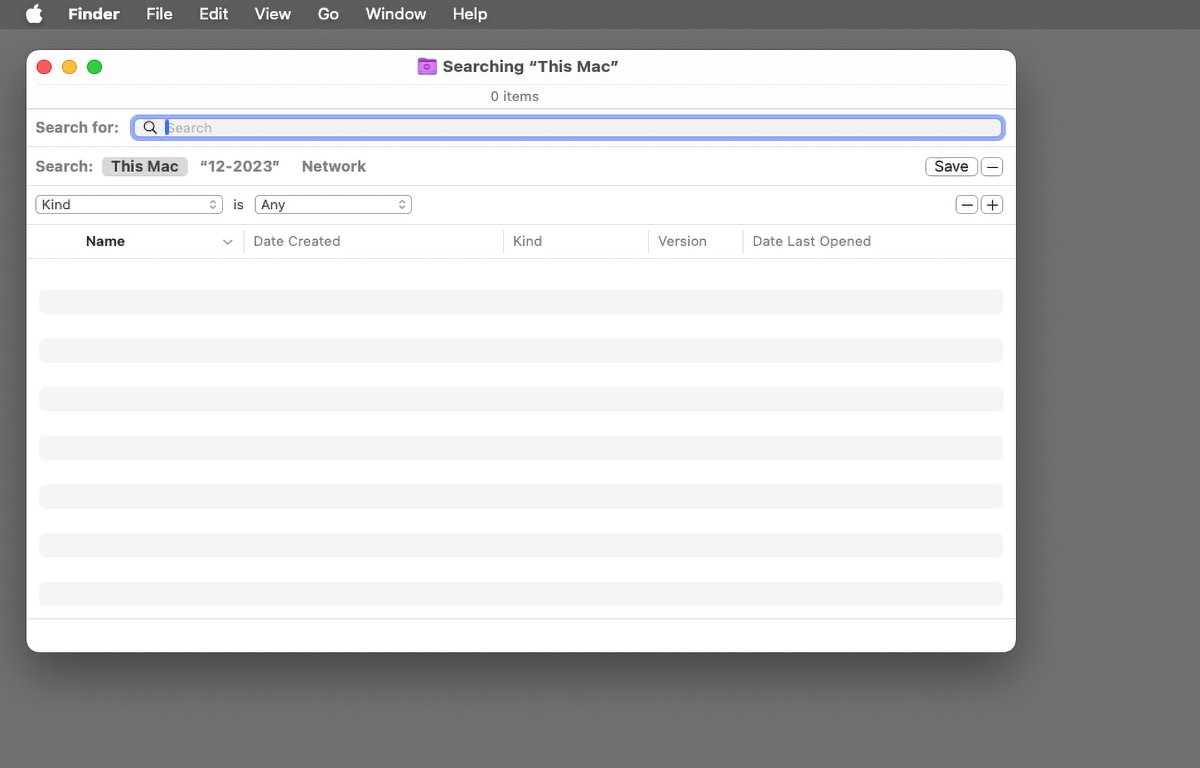
Clicking the "+" button on the right adds another row of criteria to further refine the search. You can also click the Save button to save the search criteria as a set to use later.
Doing so saves each search into the /Library/Saved Searches folder in your User folder.
If you set no criteria except for the text to be searched, Finder searches both content and filenames.
 Click the "+" buttons on the right side of the search window to add search criteria.
Adding search criteria
After clicking the "+" button, Finder adds a file criteria row at the top of the window which includes an attributes and kind popup menu.
On the attributes menu, you can set what parts of each filesystem object you want searched: kind, date, name, contents, or if you select the Other menu item, a host of dozens of other criteria.
What you select in the attributes menu determines what appears on the second item next to it.
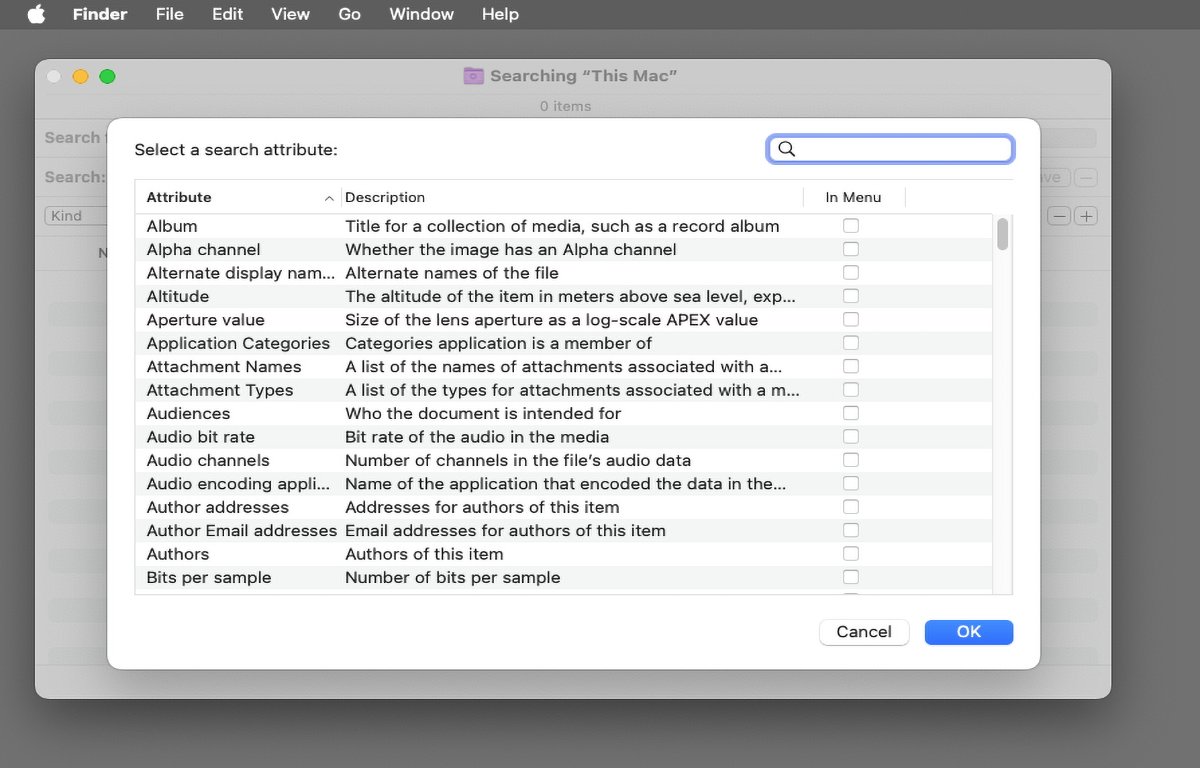 Additional search attributes sheet.
For example, if you set the attributes menu to Kind, the second menu displays file types: Application, Document, PDF, Text, image, etc. But if you select Name from the attributes menu, the items on the second menu change and another search field appears to the right:
 Use the attributes menus to set search criteria.
Now you can set the file criteria you want Finder to search for. Options include "matches", "contains", "begins with", "ends with", etc.
Clicking the "+" button again adds another row of search criteria, which you can set differently. For example, if you set the first bit of criteria to be "Name", you can set the second set to be one of the other options, for example, "Kind".
The Finder's search window will display all file system objects that match the set criteria. There is no "Search" button: all search results appear in real time as you change the search criteria.
If you single-click an item in the search window to select it, the bottom of the search window displays the filesystem path to the item. You can Control-click any part of the path to get a popup menu containing menu items such as "Open", "Show in Enclosing Folder", "Get Info", and others.
You can double-click items in the search results window directly to open them in the Finder. If you select items in the search results window and drag them to another folder, disk volume, or the Desktop, Finder will make copies of the dragged items.
You can also Control-click items in the search results window to get the same standard Finder contextual popup menu that you'd get if you had Control-clicked the items directly in the Finder.
Using the hover shortcut
Instead of setting criteria, when you first open the search window, you can type a term into the "Search for:" field, and then hover over the field with the cursor.
This pops up a menu over the search field which contains two shortcut items: a "Filenames" and a "Content" section. From here you can select to search just filenames or content. What you choose determines the search results.
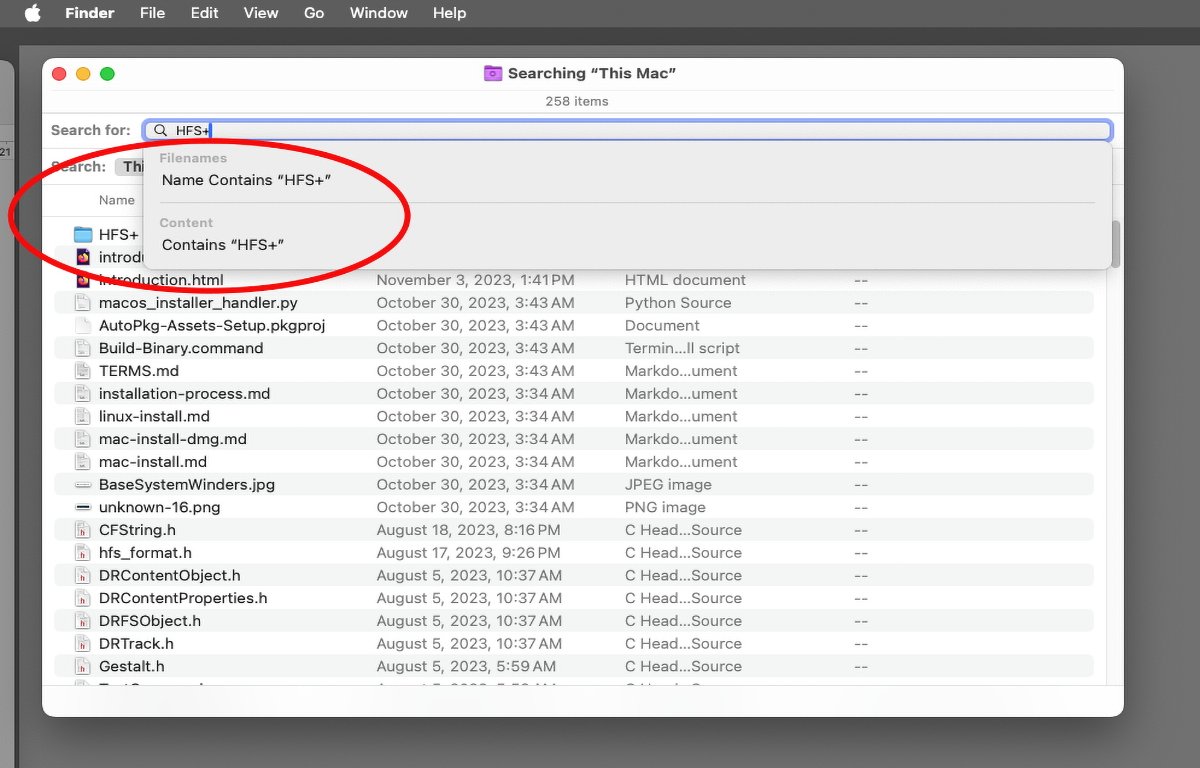 Hover over the Search for: field when you type for a shortcuts menu.
Using Quick Look
Once the search window displays its results, you can use Quick Look to preview each item's contents. To do so select one or more filesystem items in the search window and press the Spacebar on your Mac's keyboard.
You can select multiple items and cycle through them in the Quick Look window by clicking the " or ">" arrows at the top of the QuickLook window:
 Select items in search results and press the Spacebar on the keyboard to open Quick Look.
Using the search window toolbar
At the top of the search results window is a standard toolbar. You can use most of the items in the toolbar to perform actions on selected files and folders, or on the entire contents of the search results.
You can also use most of the standard Finder menu items on the "View" menu to control how search results are displayed.
For example, in the toolbar, there's a standard Share Sheet button, tags, context menu, icon menu, and icon size slider. If you select the grid icon on the left of the toolbar you can set to view the search results window as icons, list, columns, or a gallery:
Once you know how to use the Find command's search options, finding what you want on your Mac is easy. Its powerful search options allow you to specify as much or as little search criteria as you like.


 Malcolm Owen
 Amber Neely

 Wesley Hilliard


 William Gallagher