How to set up HomeKit security camera activity zones in macOS Big Sur
 William Gallagher
Use Activity Zones to have your camera ignore a busy neighbor's garden and only react to motion in yours.
With macOS Big Sur, you can make your HomeKit Secure Video camera notify you of movement only in selected portions of its field of view.
As convenient and reassuring as security cameras are, it's also hard to position them in exactly the right place. You need them to cover certain areas, but you don't want them covering others.
So for instance, maybe the security camera on the back of your house can see your neighbor's garden, and they are forever having barbecues there. Or perhaps the one on the front of your house has to be tilted to see the end of your drive, but then can't help but include where the school bus stops.
Now with macOS Big Sur, HomeKit cameras can have the option to set what are called activity zones. The cameras will still show their entire field of view, and if they are recording then will still capture everything.
What they won't do, though, is react to motion anywhere in view. You can set it so that it only reacts to movement up to the end of your drive, for instance, or only within your garden.
Certain cameras will already have activity zones, or a similar process, which you may be able to set through their own apps. What macOS Big Sur has done is add this functionality to the Home app — for cameras that support HomeKit Secure Video.
How to set up activity zones
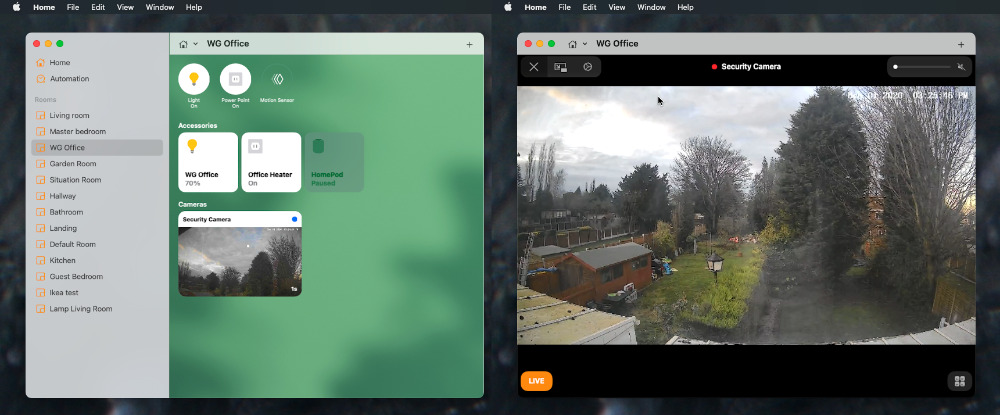
- Once your compatible camera is added to the Home app, launch that app
- Select the "room" your camera is assigned to
- Click on the security camera's thumbnail image
- When that's displayed full screen in the Home app, hover your mouse over it
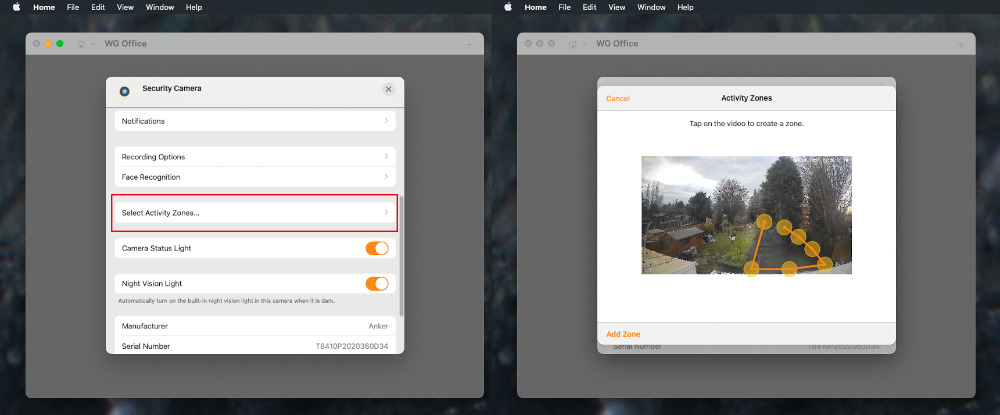
- Click on the Settings gear icon that appears toward top left
- Scroll to Select Activity Zones
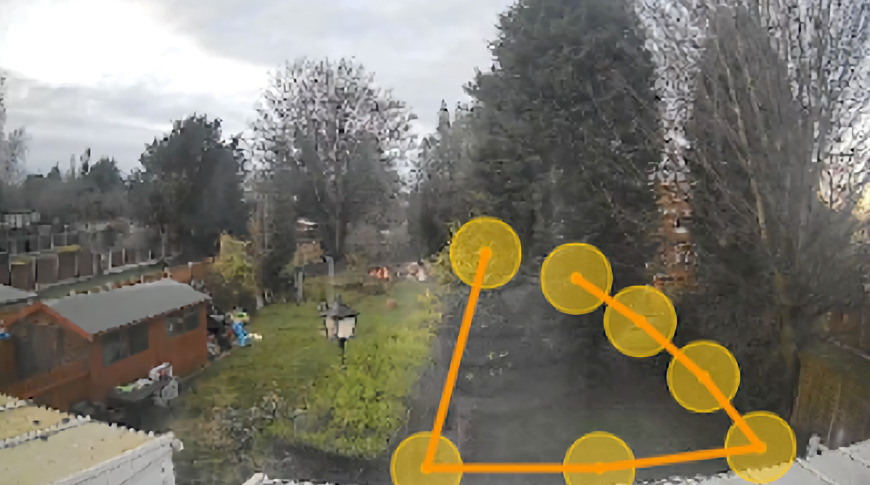
- Mark out one activity area by clicking at the edges of where you want covered
- Ignore the Done button unless you only want one zone
- To mark out a second or third zone, click again on the points you want
- Click Done
Clicking to define the activity zone you want will be very familiar to you if you've used selection tools in image editing apps. Except the Home app doesn't offer the usual visual clue that you're marking out an area, it just responds to each time you click on the screen.
Also, Home requires a minimum of three points to be clicked, so when you've clicked for the third time, you get an option to Add Zone. This will automatically close the area by drawing your activity zone between just those three points.
That's not likely to be very useful, unless you have a peculiarly triangular shaped area you want to cover. What's more likely to be handy for you is how you are not limited to three points, you can keep clicking to define very precise areas of the camera frame that you want.
What to do with activity zones
When you set up an activity zone on your HomeKit security camera, you are defining which parts of its field of view it will monitor. You've still got to tell it what you want it to do when it detects motion in that area — and what kinds of motion, too.
So in the Home app, you can select the camera and begin setting options. Typically this includes setting whether the camera monitors for motion at all when you're at home, or monitoring for pets when you're away.
If the camera supports activity zones, though, then there is one other option you need to know about. You need to know how to change your mind and cancel or reset the zones.
How to clear a activity zone
- Open the Home app on your Mac
- Select the "room" your camera is assigned to
- Click on the security camera's thumbnail image
- When that's displayed full screen in the Home app, hover your mouse over it
- Click on the Settings gear icon that appears toward top left
- Scroll to Select Activity Zones
- Click inside the activity zone you want to remove
- Click on the Clear button that appears
- Click on Done
Controlling activity zones on iOS
The Home app on macOS Big Sur is a Catalyst one, so really it's the same Home app as on the iPhone and iPad. You can tell this more than ever with setting activity zones because the Mac's on-screen instructions say, "tap on the video to create a zone," not "click."
This does mean, though, that setting up an activity zone is identical on iPhone and iPad as it is the Mac. If you set one up on your Mac and later realise it's not quite what you need, you can remove or replace it from the Home app on iOS too.
Keep up with AppleInsider by downloading the AppleInsider app for iOS, and follow us on YouTube, Twitter @appleinsider and Facebook for live, late-breaking coverage. You can also check out our official Instagram account for exclusive photos.


 Chip Loder
 Andrew Orr
 Marko Zivkovic
 David Schloss

 Malcolm Owen