How to use Optimize Storage and clear space on your Mac
 Malcolm Owen
Need a bit more space? Use Optimize Storage to generate some automatically.
Feeling the pinch of your Mac's storage? Free up some of that capacity by taking advantage of the Optimize Storage tools built into macOS.
One of the common problems with modern computing is the continuing growth of data that accumulates on a Mac. As users listen to more music, take more photographs, or generally create more files, the storage requirements for that person grows over time.
The problem is that storage on a Mac is finite, and for those who don't pay the hefty fees for extra internal storage, very claustrophobic. Once you run out of free space, you've got to do something before you can add more files onto the drive.
There are various ways you can accomplish this, such as by adding more physical storage to your Mac. This could be as simple as plugging an external drive into a USB or Thunderbolt port or using an external drive enclosure, though you could also go to the trouble of getting the Mac to boot from an external drive.
There's always the option of deleting files, though you may have some tough decisions ahead. Is it worth keeping a collection of 500 photos from that trip to Paris a decade ago when you only look at one or two? Do you need gigabytes of videos of your cat?
While there are many ways to cut down the collection, you may want to take a few minutes to look at Apple's built-in options for managing data stored on your Mac, under what Apple refers to as the Optimized Storage menu.
How to access Optimized Storage in macOS
Click the Apple icon in the top-left corner of your Mac's screen.
Click About This Mac to bring up the System information menu.
Click Storage.
Click Manage.
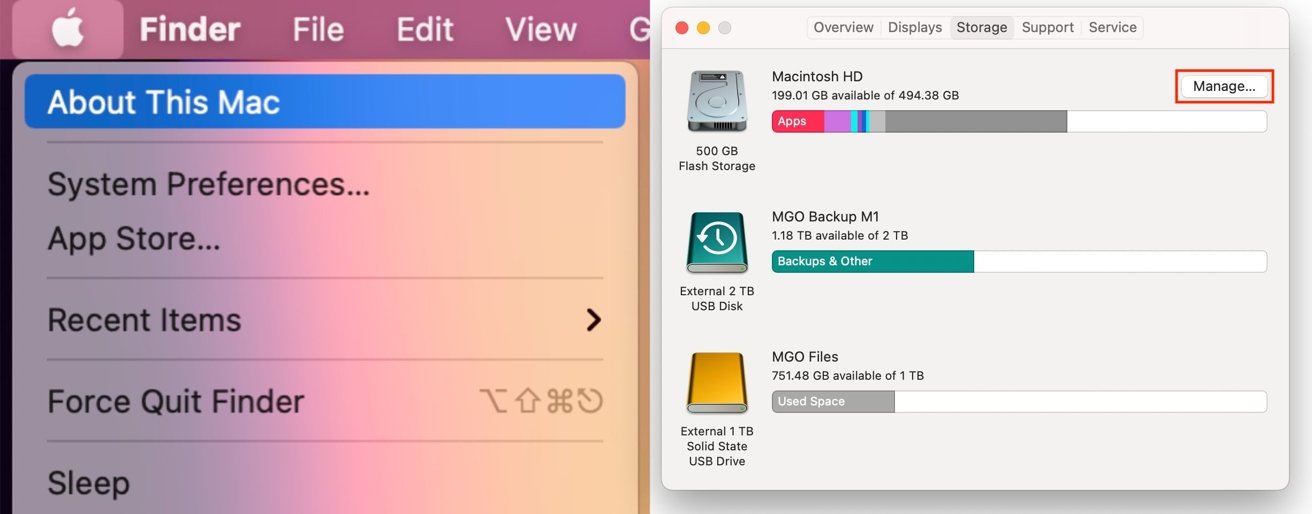
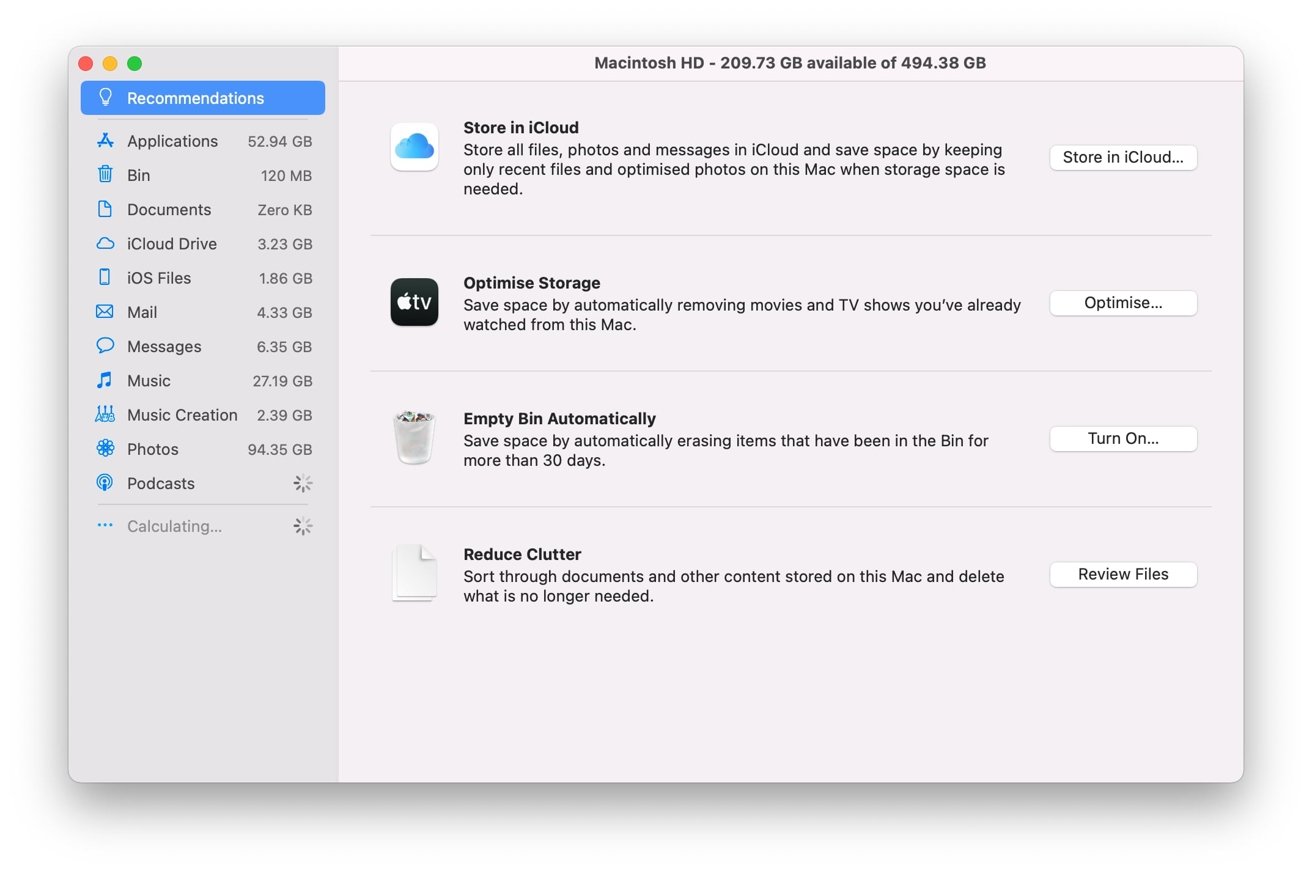
Following this process will bring up a new screen for your primary drive, which will take a moment to determine what kinds of files are taking up space on the Mac. On the left-hand menu, the list starts with Recommendations, then a list of file types.
Recommended Actions
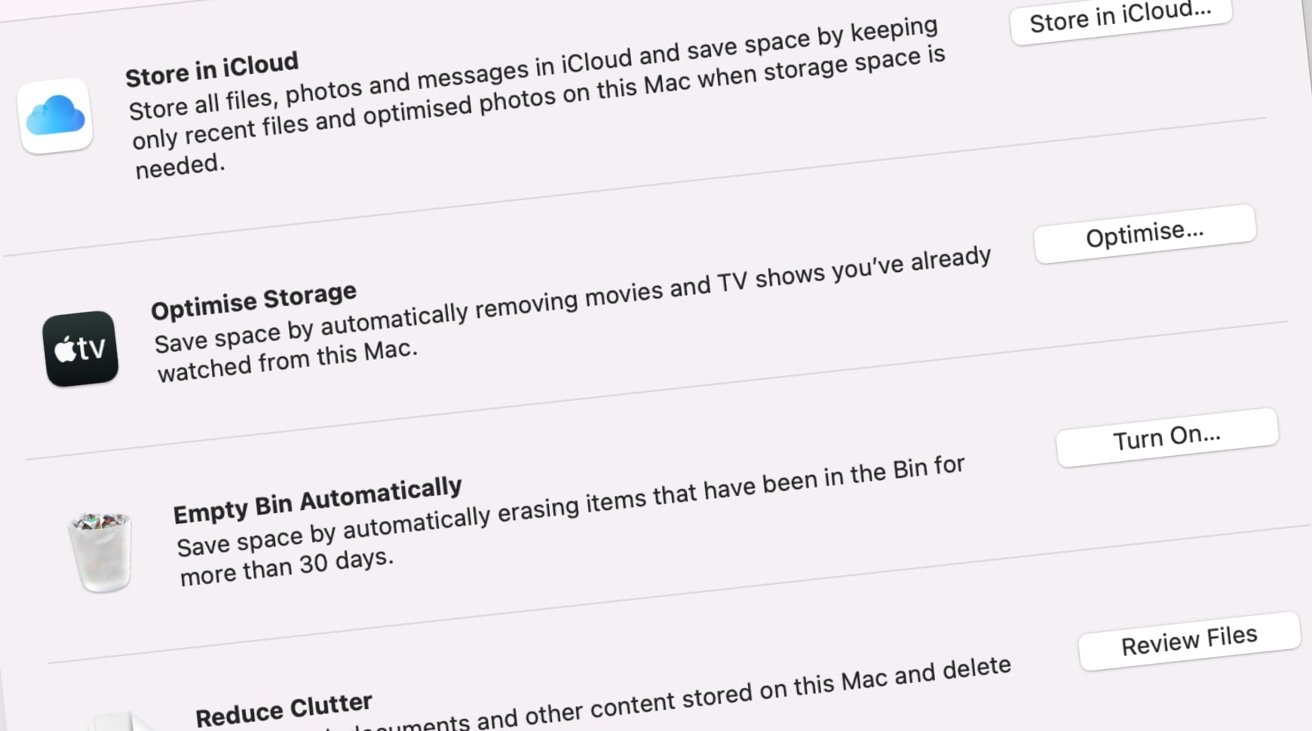
The list of recommended actions covers four areas: Store in iCloud, the confusingly named Optimize Storage, Empty Bin Automatically, and Reduce Clutter. If you already have optimal settings for the first three options, you will see a tick; otherwise you will see buttons with titles such as "Store in iCloud," "Optimize," and "Turn on."
Store in iCloud
As the name suggests, Store in iCloud will help save space by taking advantage of a user's iCloud subscription to store their files online. This includes documents, messages, and photographs in the Photos app, with the latter being potentially a hefty source of storage problems.
In short, the option uploads files in specific folders to iCloud and deletes the lesser-used files from the Mac's storage. When a file is opened by a user that isn't stored locally, macOS will retrieve the file from iCloud before opening it.
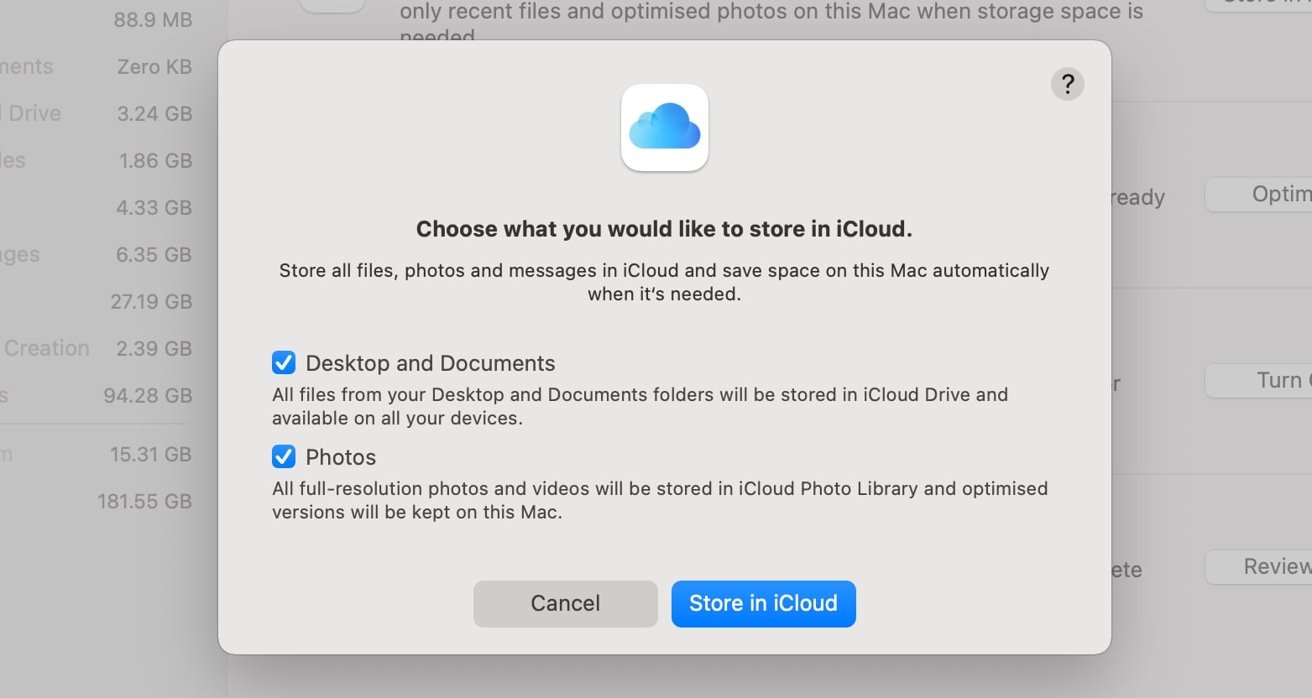
In the case of Photos, full-resolution images and videos will be stored in iCloud Photo Library, while optimized versions of each will be held on the Mac. This will reduce the storage by using smaller file sizes, which is excellent for reviewing purposes.
Still, you will have to wait for the full version to be restored if you want to do editing or something more involving than browsing through your collection.
Clicking the "Store in iCloud" button brings up a popup explaining the feature further, as well as two options: store files on the Desktop and Documents folders in iCloud Drive, and store Photos on iCloud Drive. Click the checkboxes next to each you want to enable, then Store in iCloud.
You can disable the synchronization within System Preferences.
How to stop Desktop, Document, and Photo sync with iCloud on macOS
Click the Apple icon in the top-left corner of the desktop.
Click System Preferences.
Click Apple ID.
Select iCloud.
For Desktop and Document, click Options next to iCloud Drive, then uncheck Desktop & Document Folders,
For Photos, click Photos.
Enter your account credentials to make changes if asked.
Optimize Storage
The second option, Optimize Storage, is more to do with video media you have acquired. This could be through purchases and rentals from Apple's digital storefront and content from the Apple TV+ service.
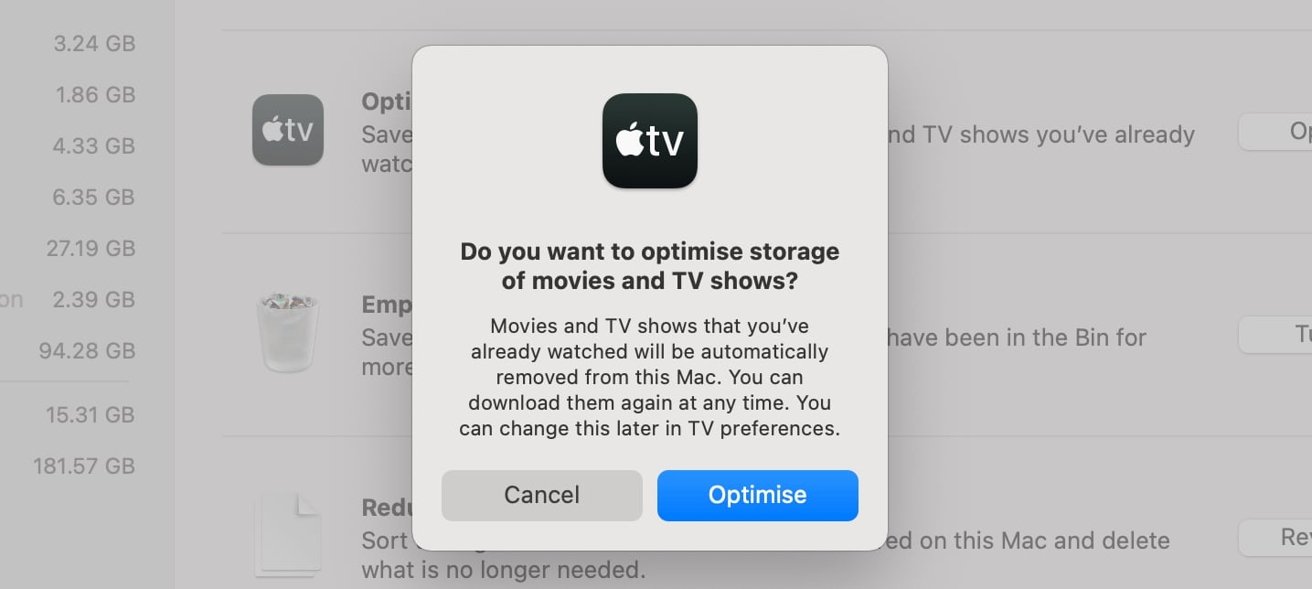
Rather than using iCloud Drive, the option relies on Apple TV+ and the store to retain the movies and TV shows. Once enabled, content you've watched will be automatically removed from the Mac, but it can be re-downloaded at any time.
To enable this feature, click the "Optimize" button followed by Optimize on the pop-up.
How to stop automatic TV show and movie deletion in macOS
Open the TV app.
Click TV in the menu followed by Preferences.
Click Files.
Untick the checkbox next to "Automatically delete watched movies and TV shows."
Empty Trash Automatically
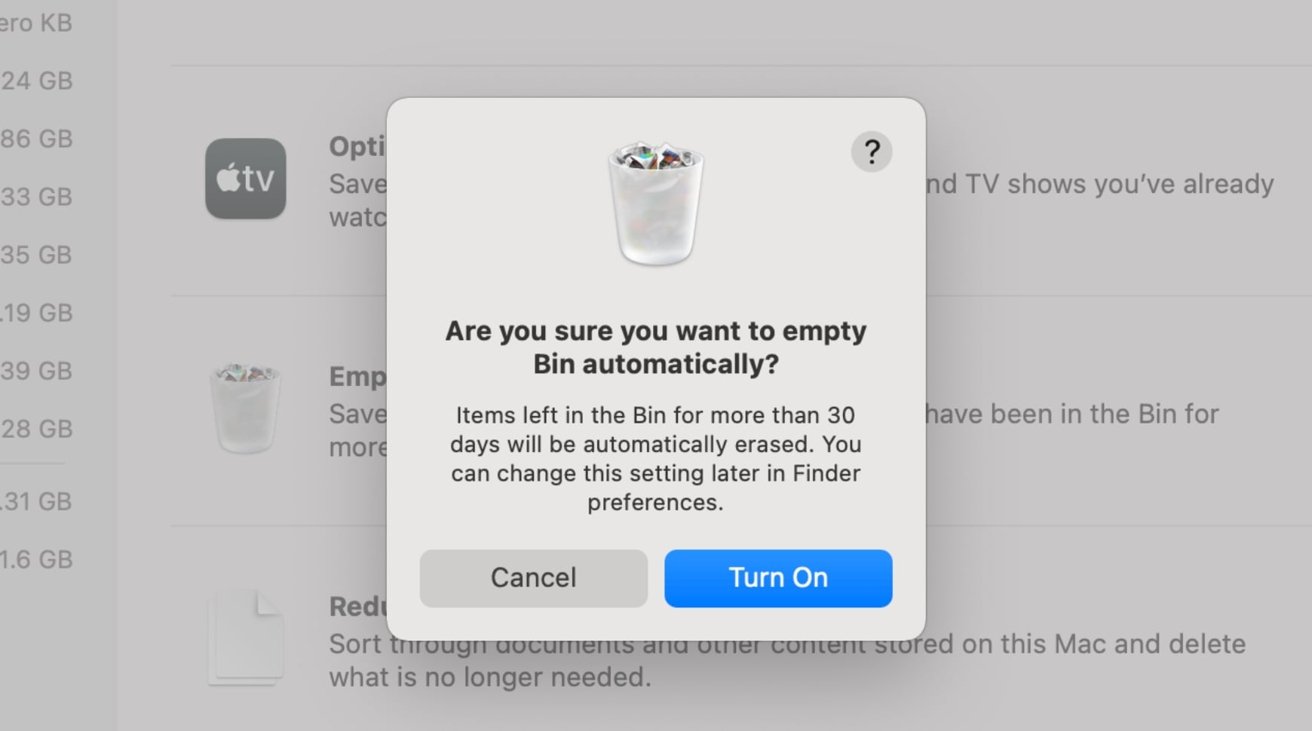
One of the easiest to understand options is the Empty Trash Automatically option, which may also be referred to as Empty Bin Automatically under some language settings. This deals with the trash feature of the Mac, where deleted files are usually sent to when the user wants them removed.
While the trash is handy to rescue mistakenly deleted files rather than losing them completely, not everyone takes a moment to empty the trash.
Enabling the option by clicking the "Turn On" button then Turn On in the pop-up will set trash to automatically erase any files that are left in it after 30 days.
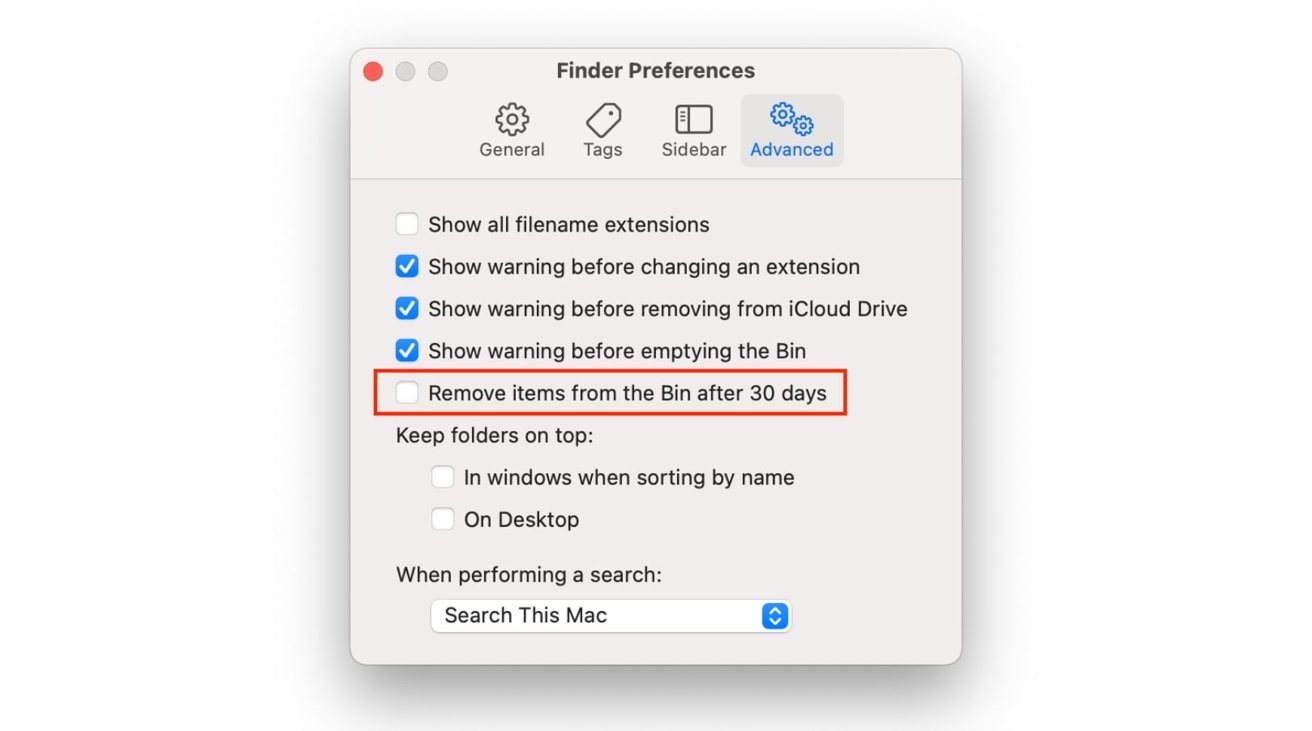
How to stop automatic trash deletion in macOS
Open a Finder Window.
Click Finder in the menu followed by Preferences.
Click Advanced.
Untick the checkbox next to "Remove items from the Trash after 30 days.
Reduce Clutter
When you click on the Review Files button, macOS will automatically take you to the Documents section from the left-hand list. This will bring up options to see files that could be clogging up your Mac, including large files, downloads, apps that have been downloaded but are unsupported, app data containers you don't need, and a general file browser.
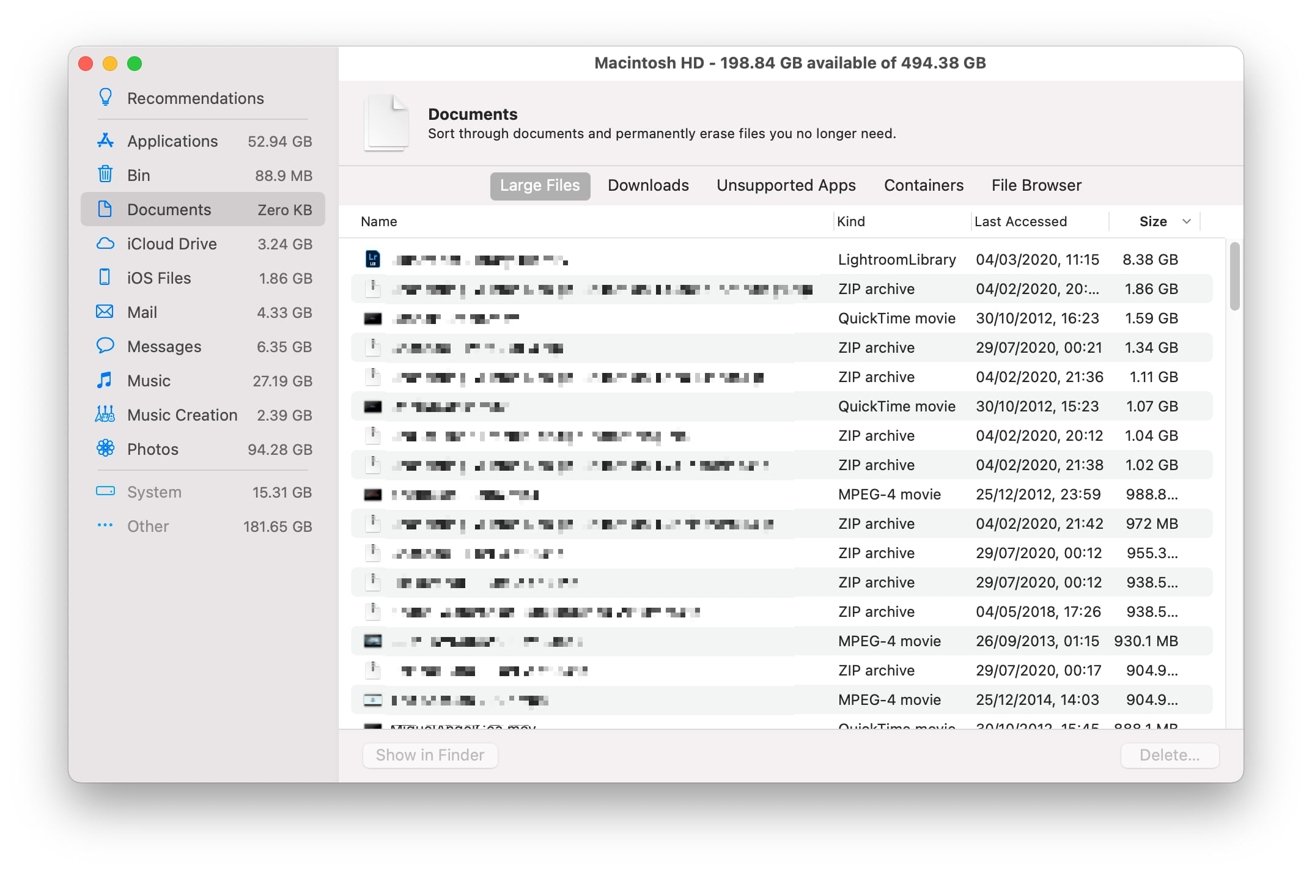
If you click on other list areas, you will, for the most part, get a list of files within that category sorted by size, with the largest at the top. If you recognize the file as one you don't need anymore, click it, then press Delete. Use the shift and Command keys to perform selections of multiple files at once if you want to perform mass deletions.
Some options will bring up a button to perform a general task rather than a list, such as Photos offering to "Optimize Photo Library" using iCloud, or to "Enable iCloud Desktop and Documents." For Music Creation, you will get the option to delete downloaded instruments, songs, and lessons.


 Chip Loder

 William Gallagher
 Christine McKee
 Michael Stroup
 William Gallagher and Mike Wuerthele