
Apple's Time Machine is an essential file backup tool for macOS, but it too has a backup that works off your Mac's primary drive. Here's how Time Machine's local snapshots work, and how to get rid of them if you want them gone.
Most Mac users are very familiar with Time Machine, Apple's fantastic utility for keeping multiple copies of files backed up and accessible within minutes. Many will have favorable opinions of the tool, especially after using it to rescue an accidentally deleted, edited, or corrupted file that's urgently needed for a task.
It's likely that many people think that Time Machine also only uses an external drive to house the files, but this isn't quite true. In fact, part of its functionality takes place on the primary storage of the Mac, in a feature called local snapshots.
This use of local storage may be concerning to those who juggle large files regularly, but it's far from a concern for the vast majority of the users.
Here's how Time Machine local snapshots work and use storage.
What are Time Machine local snapshots?
The usual explanation for how Time Machine works is that it makes a copy of all files, or files that have changed since the last recorded backup, and save them to a backup drive. With successive backups of changed files, this can create an adjustable snapshot of the files on the Mac at various times in the past, which can be accessed and used if required.
On top of this main backup to the external drive, Time Machine creates a second version, referred to as local snapshots, which are stored on the primary drive of the Mac instead of the external drive.
The local snapshots are effectively the same hourly backups, in that they retain file changes that occurred over the last hour. Typically this locally stored backup consists of hourly snapshots of the primary drive for the last 24 hours, but it also keeps a snapshot of the last successful Time Machine backup performed with the external backup drive.
Local snapshops will still give you some backups, even if a backup drive is unavailable.
Time Machine local snapshots are a backup system's backup system
The main reason for Time Machine storing hourly local snapshots on the user's drive is for connectivity. While using an external drive for backups makes sense, there's no guarantee that the drive will be available to use.
If the cable's been pulled, the drive needs to be powered off and on to get out of a funk, is stolen, or stops working entirely, the Mac's simply not going to be able to make its regular Time Machine backup.
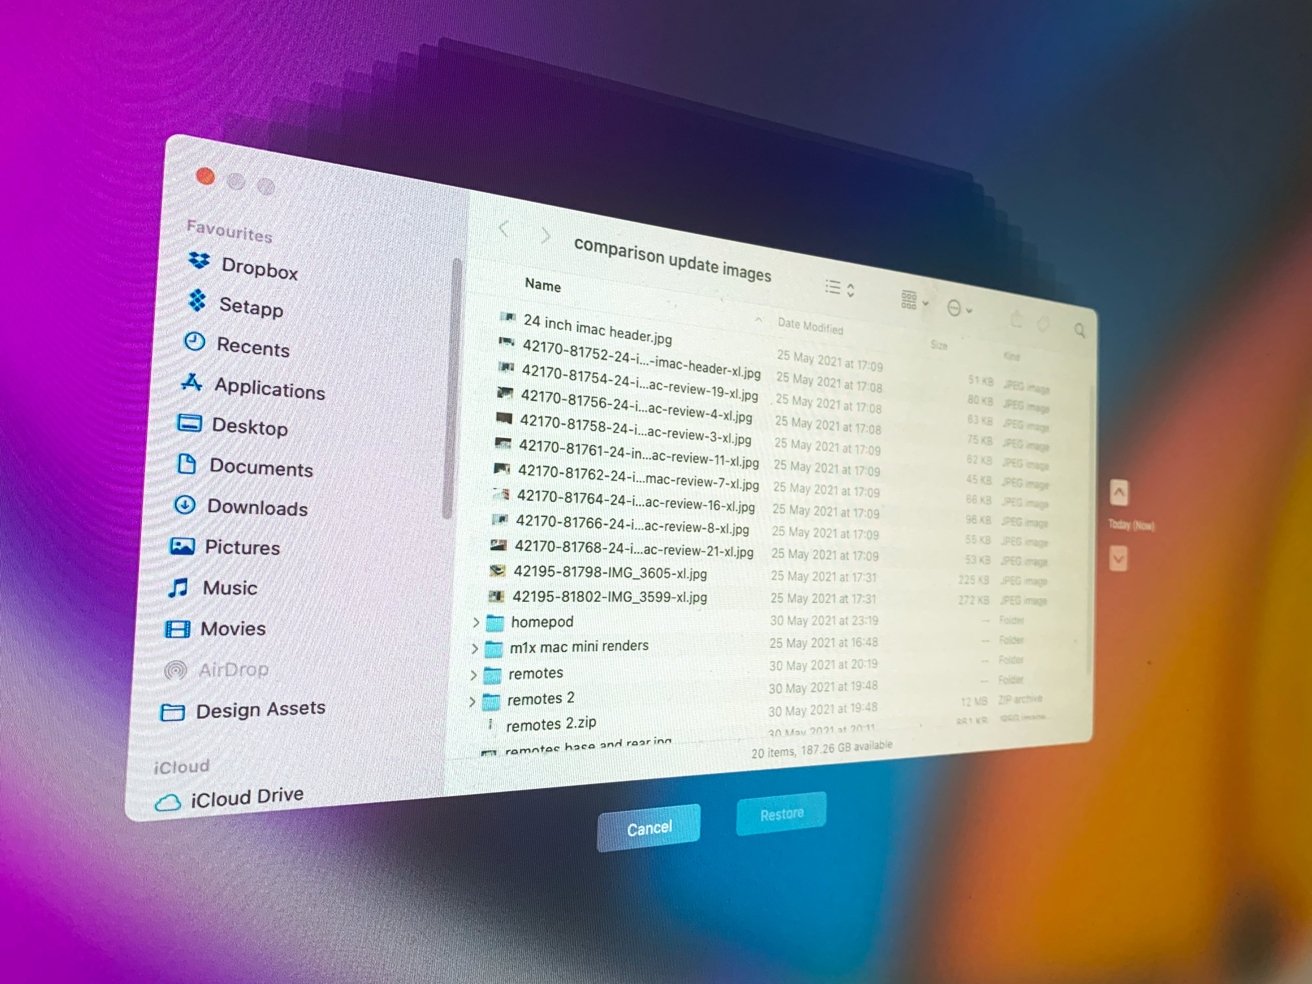
If you were to try and access Time Machine's backups when the external disk is unavailable, you're not going to have the full catalog of backups to view or search through. Instead, Time Machine will just show the hourly local snapshots, and leave out the older backups from the list.
To end-users, this basically means there's a persistent hourly backup available covering a 24-hour period. This may not be as useful as the full catalog, but if you're in a pinch over a file that you need to resurrect from a few hours ago, you're still covered.
When the Mac is able to reestablish a connection to its backup drive, the full backup catalog will be available once again.
Do Time Machine local snapshots consume space?
Since Time Machine uses the internal disk to store its local snapshots, it's worth asking if this can affect your usable storage capacity on your Mac. Sure, storage does get consumed, but to users, it's done in such a way as to be as unobtrusive as possible.
The hourly backups and the last proper backup will only exist on a Mac if there's storage capacity available. If there's no storage capacity available to use, then Time Machine will retain the most recent snapshots and automatically get rid of the older ones.
However, for the purposes of how it is stored on the Mac itself, macOS categorizes the local snapshots as available storage. That is, the operating system considers the capacity used for local snapshots to be spare capacity that could be used by the user to store files since it can delete older snapshots.
If you're constantly changing large files or high quantities of documents, then each of these snapshots will take up more space individually. While this will mean a smaller number of snapshots in instances where there's limited remaining storage capacity, they're still all files that can be removed if the system needs the space.
Getting rid of Time Machine local snapshots
As an essential element of how Time Machine works, you can't stop it from creating local snapshots, short of turning off Time Machine completely. That being said, you can get rid of the local snapshots manually.
Getting rid of local snapshots is as easy as temporarily turning off Time Machine.
This isn't really necessary as the way that macOS deletes local snapshots will still keep storage free, but the option is still there.
If you want to get rid of all local snapshots, the process is quite simple.
How to delete all Time Machine local snapshots
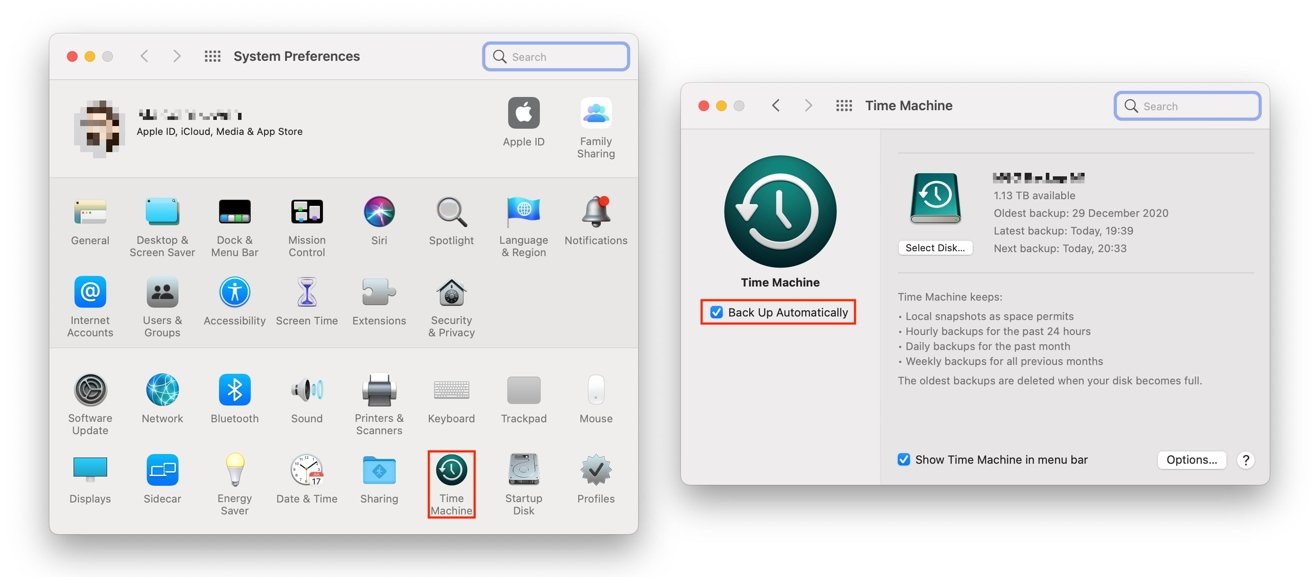
- Open Time Machine preferences. You can do this via System Preferences then Time Machine, or by clicking the Time Machine clock then Open Time Machine Preferences.
- Within Time Machine Preferences, uncheck the option to Back Up Automatically.
- Wait a few minutes for macOS to delete the no longer required local snapshots, then re-enable the Back Up Automatically option.
This will remove all currently accessible local snapshots, but it will take some time for macOS to complete the process. There's also no interface to tell you if the local files are deleted, so you can only try to access the backup with the external drive disconnected to check their status
You can view a list of all stored local snapshots in Terminal, and even delete them individually.
You can also go through the same process in a more manual fashion, but this requires using Terminal.
How to manually delete Time Machine local snapshots
- Open Terminal.
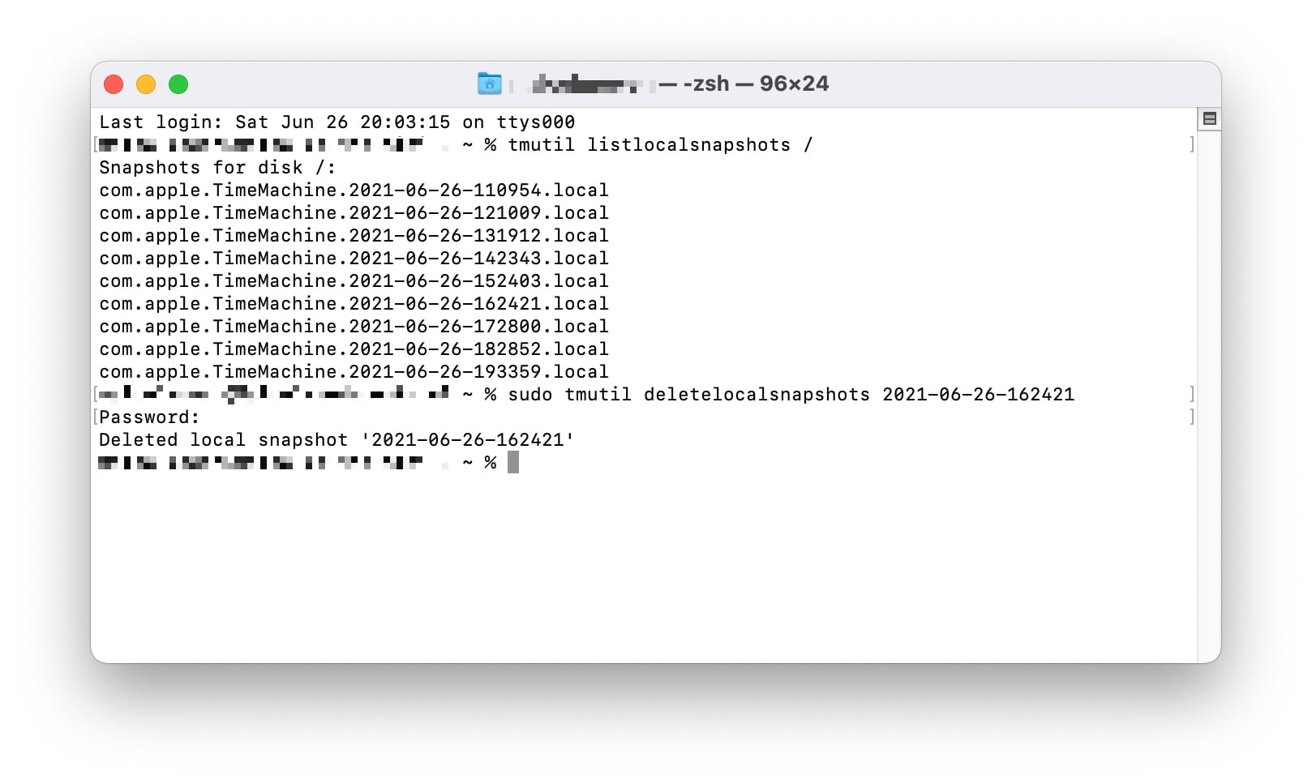
- Enter the command tmutil listlocalsnapshots /
- Press enter. This will bring up a list of all snapshots on the disk, date and time-stamped.
- For each snapshot, enter the command sudo tmutil deletelocalsnapshots followed by the date and timestamp. For example, sudo tmutil deletelocalsnapshots 2021-06-26-123740
- if asked, enter your password for the user account, and press enter.
- Once you see the statement "Delete local snapshot" followed by the date and time stamp, the local snapshot has been deleted.
If you want to delete many or all snapshots, the best option is to use the first method, then use the listlocalsnapshots Terminal command to check they're gone.
Keep up with everything Apple in the weekly AppleInsider Podcast — and get a fast news update from AppleInsider Daily. Just say, "Hey, Siri," to your HomePod mini and ask for these podcasts, and our latest HomeKit Insider episode too. If you want an ad-free main AppleInsider Podcast experience, you can support the AppleInsider podcast by subscribing for $5 per month through Apple's Podcasts app, or via Patreon if you prefer any other podcast player.