Privacy is becoming more of a priority of users, and that includes increased use of encryption. Here's how to set Apple's backup systems for Mac, iPhone, and iPad devices to encrypt the copies of your data.
User privacy is a big deal for Apple, which has gone to considerable lengths to enable encryption and minimize personal data use in its products and services. The focus on such security means Apple's customers can be reasonably sure that their personal data has a good level of protection in general.
While actual device security is quite strong, one area that can be weak is in backups. These copies of a user's data and other associated files have the potential to be stored without encryption protecting the data at all.
In the case of backups stored to an external disk, this could effectively create a highly portable and easily accessible repository of a user's data.
If you use Apple's own backup tools, such as Time Machine, this is the case if you don't get the settings right. Since Apple's services and tools are relatively easy to get going, with Time Machine especially being a set-and-forget system, it's also relatively easy to change settings to enable encryption.
If you follow these guides, you'll be ensuring your personal data is encrypted and more protected from prying eyes than left unguarded.
macOS and Time Machine
Apple's Time Machine for macOS has relatively few things a user can change within its menu system. This makes it very easy to use, but similarly, it doesn't open itself up to much customization.
Annoyingly for Time Machine users, there's no way to set existing backups to be encrypted at all. As the setting only appears at the time of setting up the backup in the first place, you will have to effectively start from scratch with your backups.
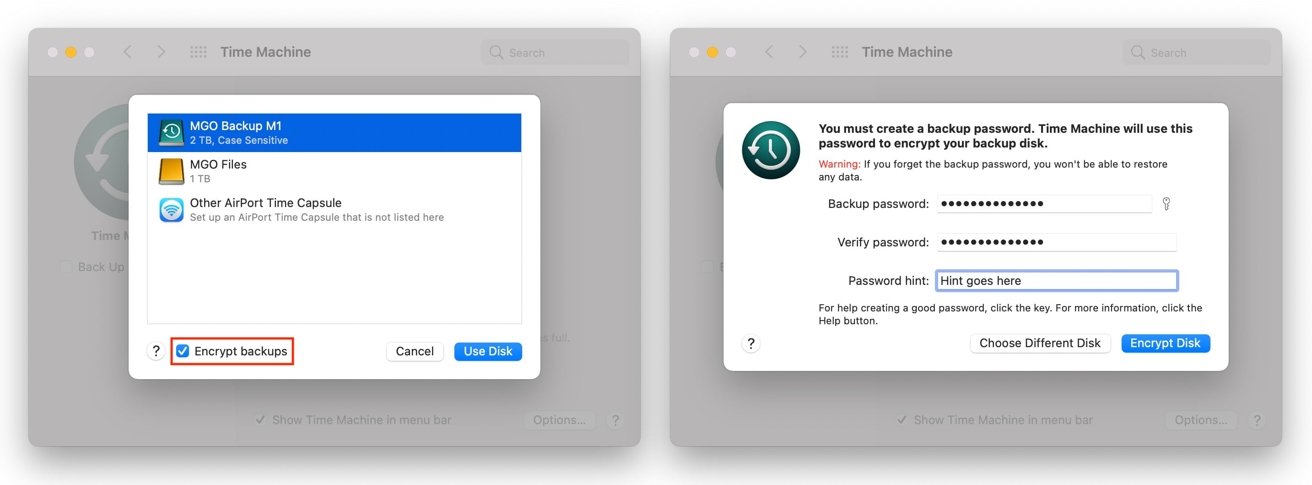
The option to encrypt a backup only appears when you're setting up a disk in Time Machine.
If you're using the same drive, this will effectively wipe the disk of existing backups, so you cannot view previous backup snapshots once you do this. If you want to keep the existing backups available, it's advised to use a different drive as external storage.
Remember that you will also have backups of the last 24 hours of hourly snapshots stored locally, so there is a level of Time Machine still available to you in such cases.
How to enable encrypted Mac backups in Time Machine.
- Open Time Machine Preferences. This is accessible from the Time Machine menu in the Menu Bar, or from System Preferences.
- Click Select Backup Disk
- Select the drive you want to use for Time Machine backups.
- Make sure the checkbox next to Encrypt Backups is ticked.
- Click Use Disk.
- Enter your Backup password.
- Verify your password.
- Enter a password hint. Click Encrypt Disk.
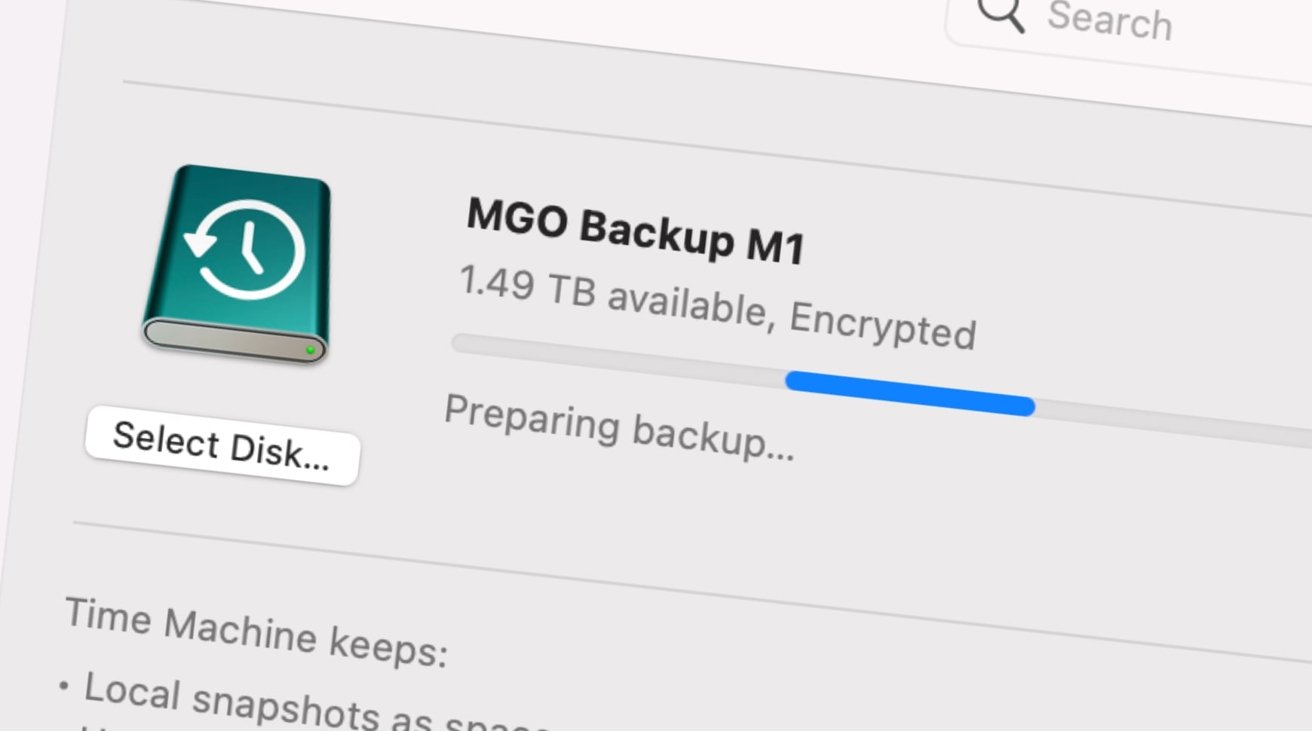
- Wait for macOS to get the drive ready, followed by its first full encrypted backup.
iPhone and iPad
While you may have already set up backups for your iPhone to a Mac, you may want to consider the encrypted version since it can actually store a lot more data than the unencrypted version.
Encrypted iPhone and iPad backups also include storage of your saved passwords, Wi-Fi settings, your website history, health data, and call history.
Of course, this all applies if you're performing local backups to a Mac. If you're making backups to iCloud, your data is automatically encrypted.
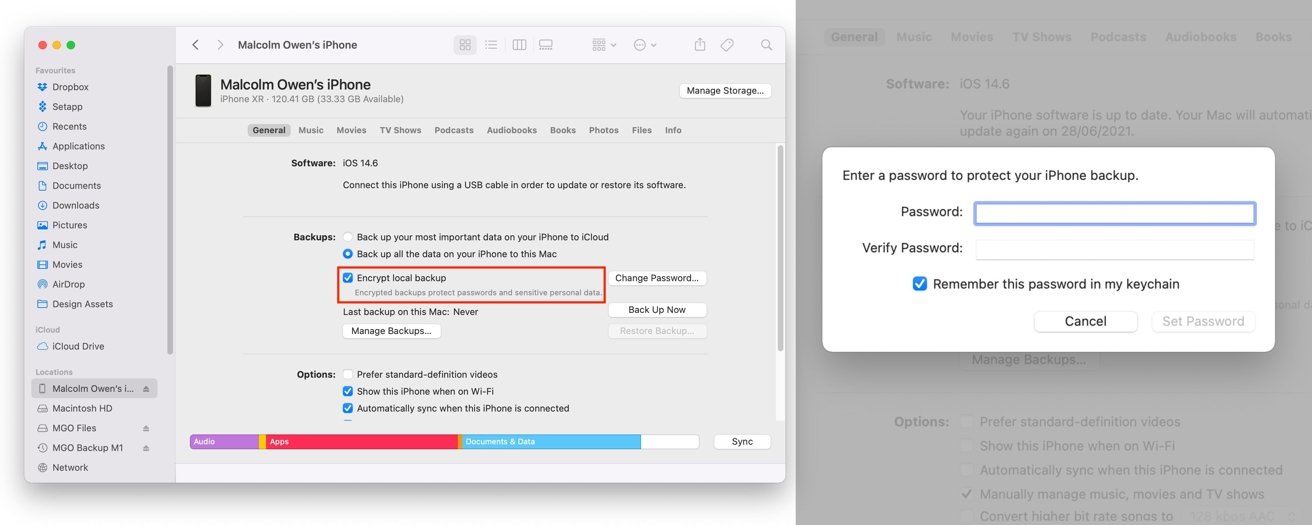
You need to tick this box to enable encrypted iPhone backups on your Mac.
How to enable encrypted iPhone and iPad backups in Finder on macOS
- Connect your iPhone or iPad to the Mac using a Lightning or USB-C cable.
- Open the Finder.
- Under Locations, select your device.
- On the General tab, under Backups, check the box next to Encrypt Local Backup.
- Enter and verify a password to protect the backup. Optionally check the box next to Remember this password in my keychain.
- Click Set Password.
Once the first backup has been completed, click Manage Backups to show a list of device backups on that Mac. If there is a padlock next to the latest backup of the device, that means you have successfully set up an encrypted backup.
If you're using an older Mac that uses iTunes to sync with your devices, the process is basically the same, except performed within the iTunes app instead of Finder.
Remember your passwords
We must stress that you really should keep track of what password you are using for your backups. It may seem like a no-brainer for some to remember it, but it is an essential part of the process.
If you ever need to access the encrypted backups in the future, you will be asked for the password associated with the backup itself. The problem here is that if you can't remember the password, you won't be able to access the data at all.
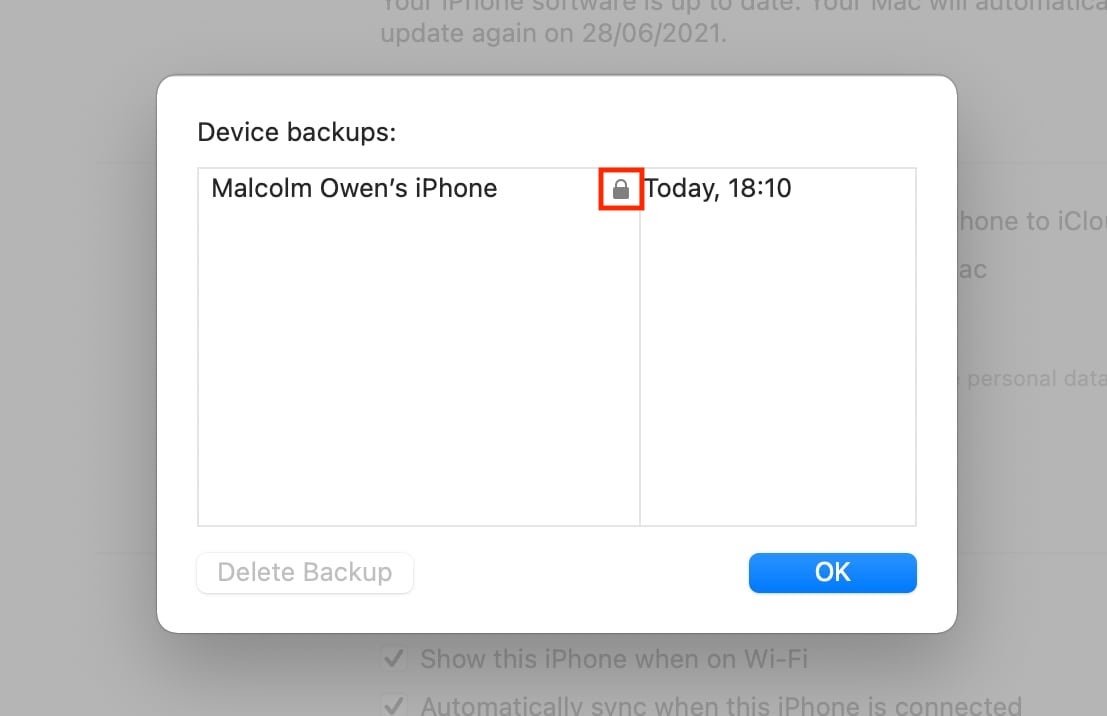
This padlock confirms the backup is encrypted.
As the password for the backup can be set independently of what you may use to access your user account, it may be possible that this rarely-used password could be harder to remember.
In such cases, you may want to use a password manager to retain the new password for that time when you may need it.
Starting from scratch on iPhone
If you have forgotten your password and want to start using encrypted backups again with a new password you'll remember, it's fairly simple to do so for Time Machine backups. You basically end up deleting the contents of the backup drive, and you set it all up again.
On iPhone and iPad running iOS 11 or later, it's not as simple, as there are some steps you have to take on the device first.
How to start a new encrypted backup on iPhone and iPad
- Open Settings on your iPhone or iPad, then select General and Reset.
- Select Reset All Settings and authenticate yourself.
- Follow the on-screen instructions.
- Once complete, connect your device to the Mac and set up encrypted backups again.
Doing this will make some changes to your device, including resetting the Home screen layout and wallpaper and changing some settings like your display brightness.
Keep up with everything Apple in the weekly AppleInsider Podcast — and get a fast news update from AppleInsider Daily. Just say, "Hey, Siri," to your HomePod mini and ask for these podcasts, and our latest HomeKit Insider episode too. If you want an ad-free main AppleInsider Podcast experience, you can support the AppleInsider podcast by subscribing for $5 per month through Apple's Podcasts app, or via Patreon if you prefer any other podcast player.