If you keep on changing TextEdit from rich text mode to plain text each time you open the app, here's how you can change the default settings in the often-used text-editing tool.
TextEdit is arguably one of the unsung heroes of macOS. Like its Windows compatriot, Notepad, TextEdit is a great basic text editor for quickly typing up sentences or stretches of code without needing to worry too much about formatting or presentation.
However, like many other text entry tools, there are some options to format text. While not as elaborate as Pages, you can still make changes to the text to make it more presentable or readable.
Not everyone uses TextEdit in this way. In cases where formatting certainly doesn't matter, such as holding code snippets or often-used paragraphs on standby, you don't necessarily want the ability to make text bold or to underline terms.
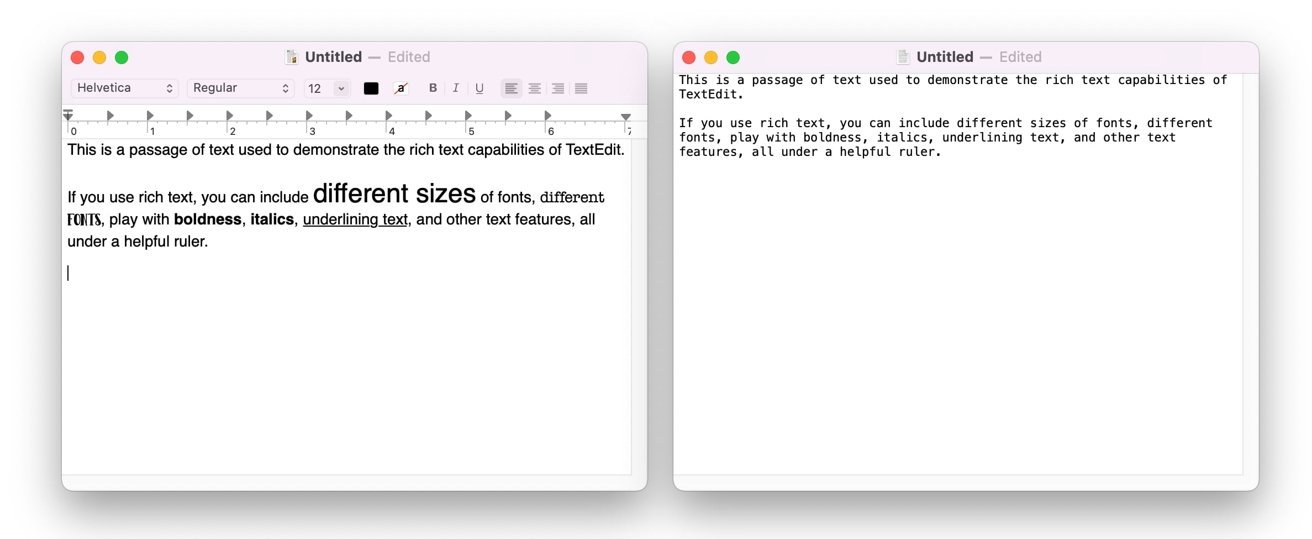
Rich text formatting lets you change the way the words appear. Plain text eliminates this entirely.
In such cases, users often have to adjust how TextEdit functions each time they open the app to create a new document. For these users, an exploration of the TextEdit menus may be worth a try, as you can easily set the app to function in specific ways every time you open it, saving precious seconds in your workflow.
Here's how to shape TextEdit into the text-editing tool you need and deserve.
TextEdit Preferences
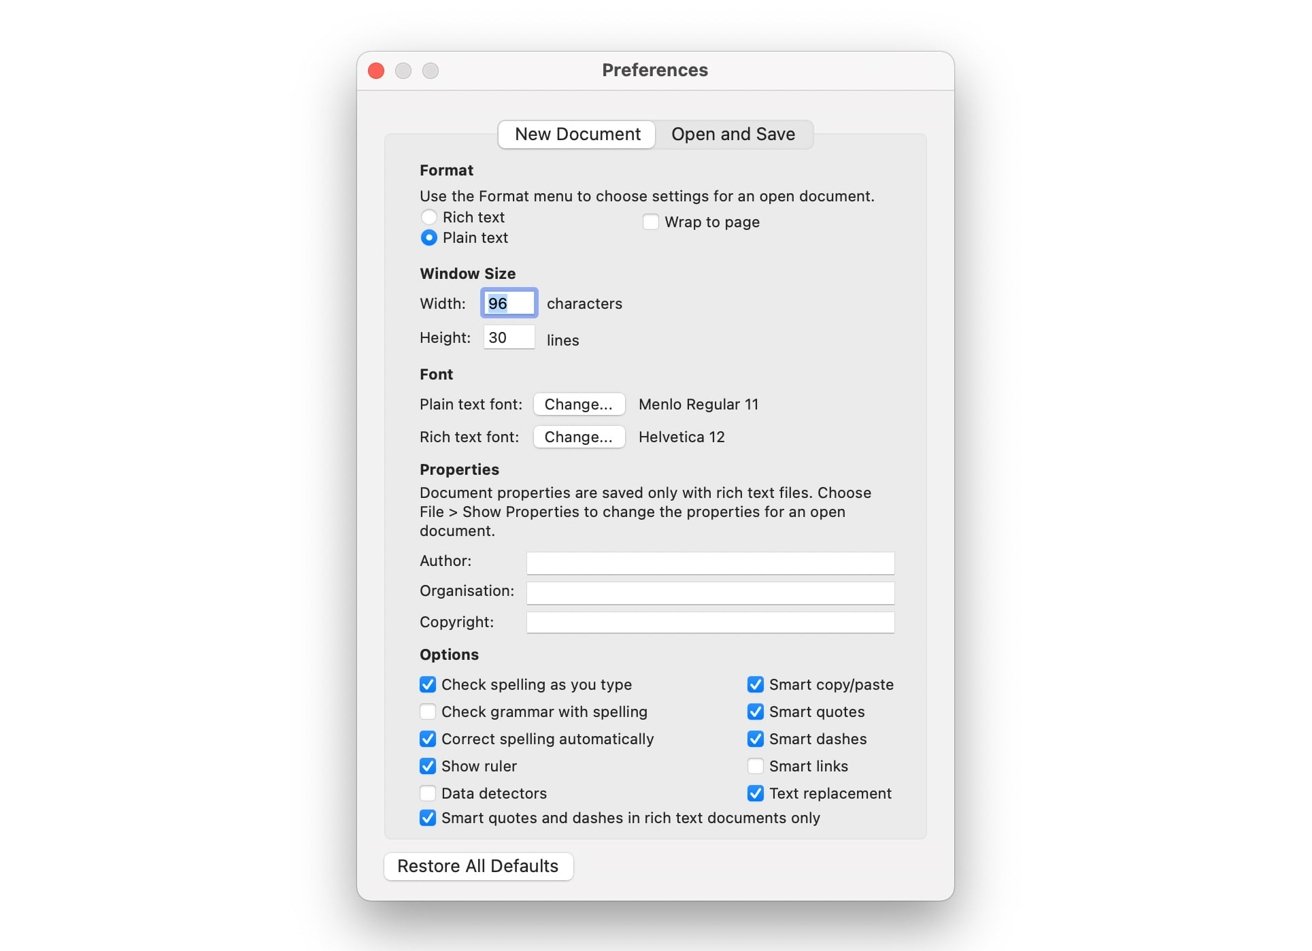
The heart of all changes you will want to make is the Preferences menu. Once accessed, it contains all of the possible options you will want to change.
How to access TextEdit Preferences in macOS
- Open TextEdit.
- In the Menu bar, click TextEdit.
- Click Preferences.
- Change the options in the new window.
- Once all changes are made, close the Preferences window.
The Preferences menu is divided into two sections, covering New Document and Open and Save. At the bottom of both sections is a button to Restore All Defaults, which can be clicked to revert settings to how they were the very first time you opened the application.
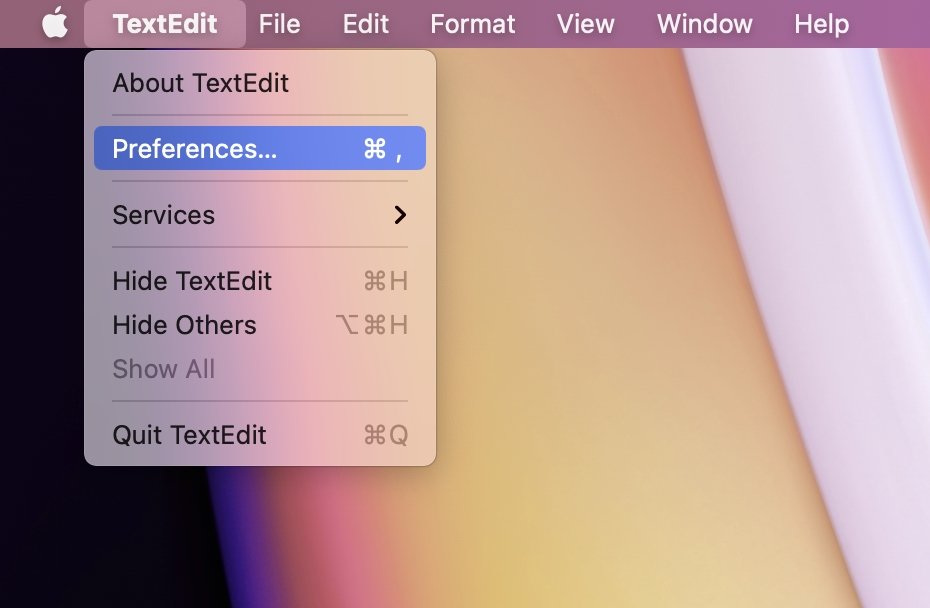
The preferences for TextEdit are available from the Menu bar.
New Documents
As the name suggests, the New Documents section deals with how TextEdit sets itself up when you create a new file from scratch. This is divided down into many different subcategories.
Remember that all of the options are for the default settings of a file and can be changed in the menu after the file has been opened.
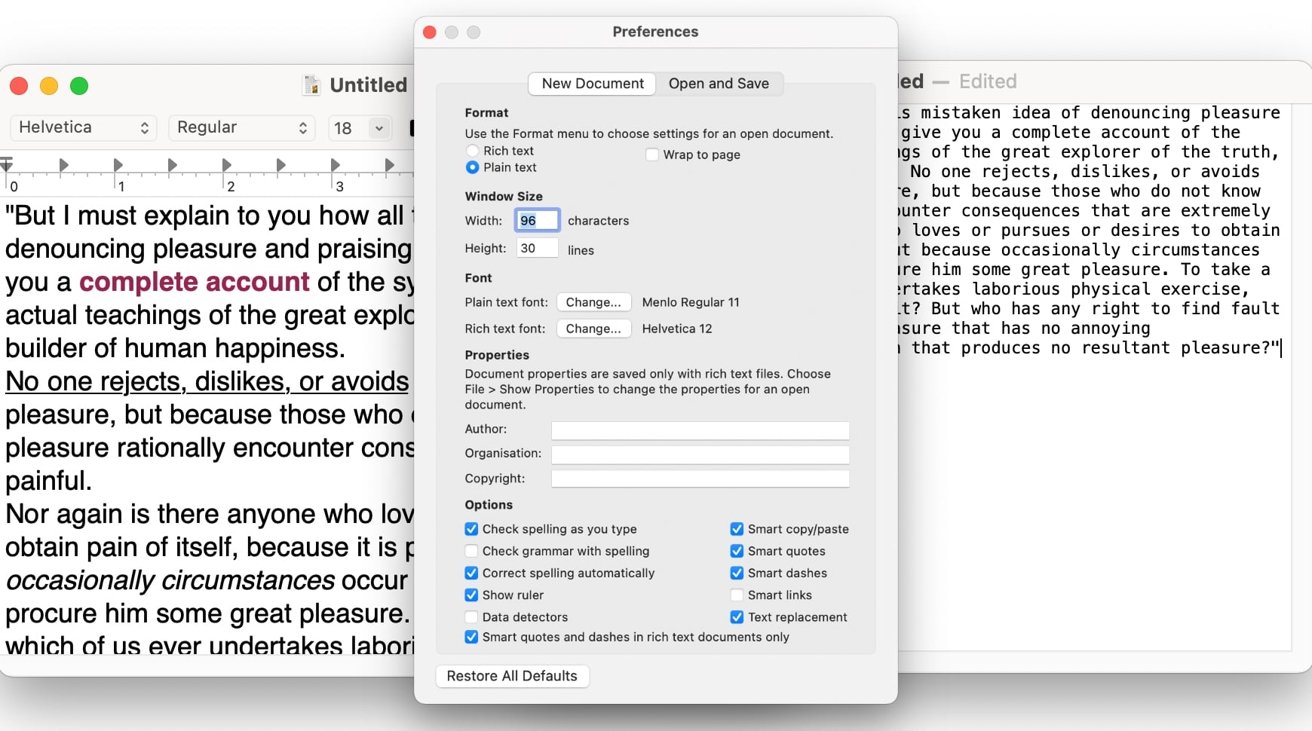
Format
A toggle will allow you to change between a new document opening in Rich text or Plain text. Select the former if you want the ability to format text, or select Plain text if you don't want formatting from the very start.
There is also a checkbox to Wrap to page. This controls whether a text string longer than the width of a defined page area within the window will wrap around to the following line. If unchecked, TextEdit will instead default to Wrap to Window, without the defined page area.
Window Size
This option defines how big the TextEdit window will be at the start. It is set by a number of characters for the width, and a number of text lines in height.
Change the numbers of each to alter the starting window size.
Bear in mind that this is relative to the default font size in use for the selected format. If you change font sizes, you may want to revisit the Window Size section.
The preferences panel for when you create new documents. The rich text and plain text option is right at the top.
Fonts
You can set the default font for both Plain text and Rich text modes. The font for each is independent of the other, so you may want to set them differently to visually confirm the mode that the document opened in.
To change each font, click the Change button, then select the family, typeface, and font size you want to use.
Properties
In the case of rich text files, you can set up default text for three lines relating to the document. You can configure the author, organization, and copyright text applied to the document by default here.
This does not affect plain text files, which do not save this information.
Options
This section contains a lot of checkboxes that apply to quite a few different features, including:
- Checking the spelling as you type.
- Checking the grammar alongside spelling.
- Automatic spelling correction.
- Displaying the ruler.
- Enabling Data Detectors, which automatically detects dates, times, and contact information.
- Enabling smart quotes, in automatically substituting curly quotation marks for straight marks.
- Enabling smart dashes, where an em dash is changed to a double-hyphen automatically.
- Setting smart quotes and dashes to be applied to rich text documents only, and not plain text files.
- Smart copy/paste can automatically retain the correct spacing when you copy and paste text into documents.
- Smart links will automatically convert website addresses to clickable links in rich text documents.
- Text replacement will automatically use changes in the main macOS Text Replacement options to change the document.
Open and Save
The Open and Save section applies largely to documents that already exist or to the saving of a document to a file.
When Opening a File
There are two checkbox options here, which are quite straightforward. The first handles the display of HTML files, where you can view the text as HTML code rather than formatted text. The other does the same but for RTF files.
If unselected, TextEdit will do its best to format the text in the Rich text view.
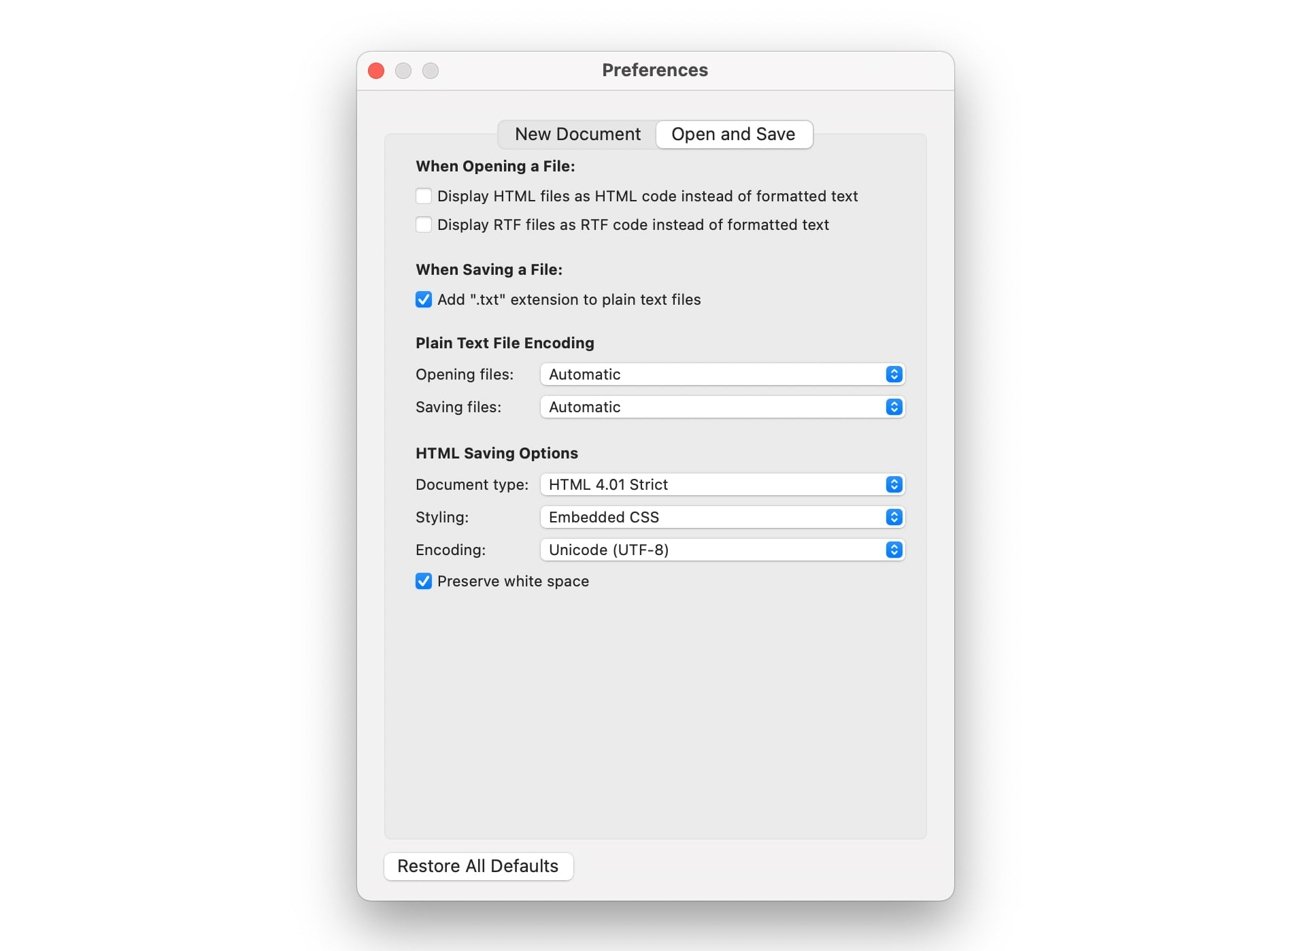
Open and Save is especially handy when dealing with file encoding.
When Saving a File
There's only one option here, which will simply force the use of .txt as the extension for a plain text file when saved in the app. Outside of creating code snippets, this is usually a good idea to keep enabled.
Plain Text File Encoding
This dictates how TextEdit handles the encoding of files you open or save. It is usually set to automatic for both opening and saving, but it can be manually changed to a different encoding if automatic encoding fails to open a file correctly, or if you have to save a document in a specific encoding.
HTML Saving Options
If you use TextEdit to edit source code for websites, you will want to pay attention to this section. Document Type is set to HTML 4.01 Strict by default, though you can change it to XHTML 1.0 if required. In both cases, you can also select Strict or Transitional versions.
Styling sets the default cascading style sheets (CSS) to be applied to the HTML file. This can be set to Embedded CSS, Inline CSS, or No CSS, depending on your needs. Encoding allows you to set how the page is encoded when saving to a file.
A checkbox for Preserve white space will maintain any white space or breaks between lines if ticked.