For an iOS 15 feature that's meant to be incredibly easy to use, Hide My Email comes with a lot of options. Here's what you can - and as yet, can't - do.
The new Hide My Email feature in iOS 15 is not meant to replace Sign In with Apple, but it's a clear evolution of that idea. Rather than give a company your actual email address, you give them one that works perfectly well — but which you can switch off when you need.
Maybe the company just keeps spamming you, and takes "unsubscribe" as a challenge. Perhaps they've sold your email address to other companies and they're the ones spamming you.
Whatever the reason, when you want to get rid of the problem, it takes just a couple of clicks. If, that is, you've used Hide My Email.
How to set up Hide My Email
You don't. There is a section for Hide My Email in Settings on iOS, but that's not even for turning it on and off.
Instead, it's more for later, when you want to turn off a fake email address. Or when you need to see what that fake address actually is so that you can login somewhere with it.
How to use Hide My Email
- Go to a site you haven't registered with , and start the sign-up process
- Be sure to choose the option to register with your email address, not, say, Sign in With Apple
- Tap to make the email text box active
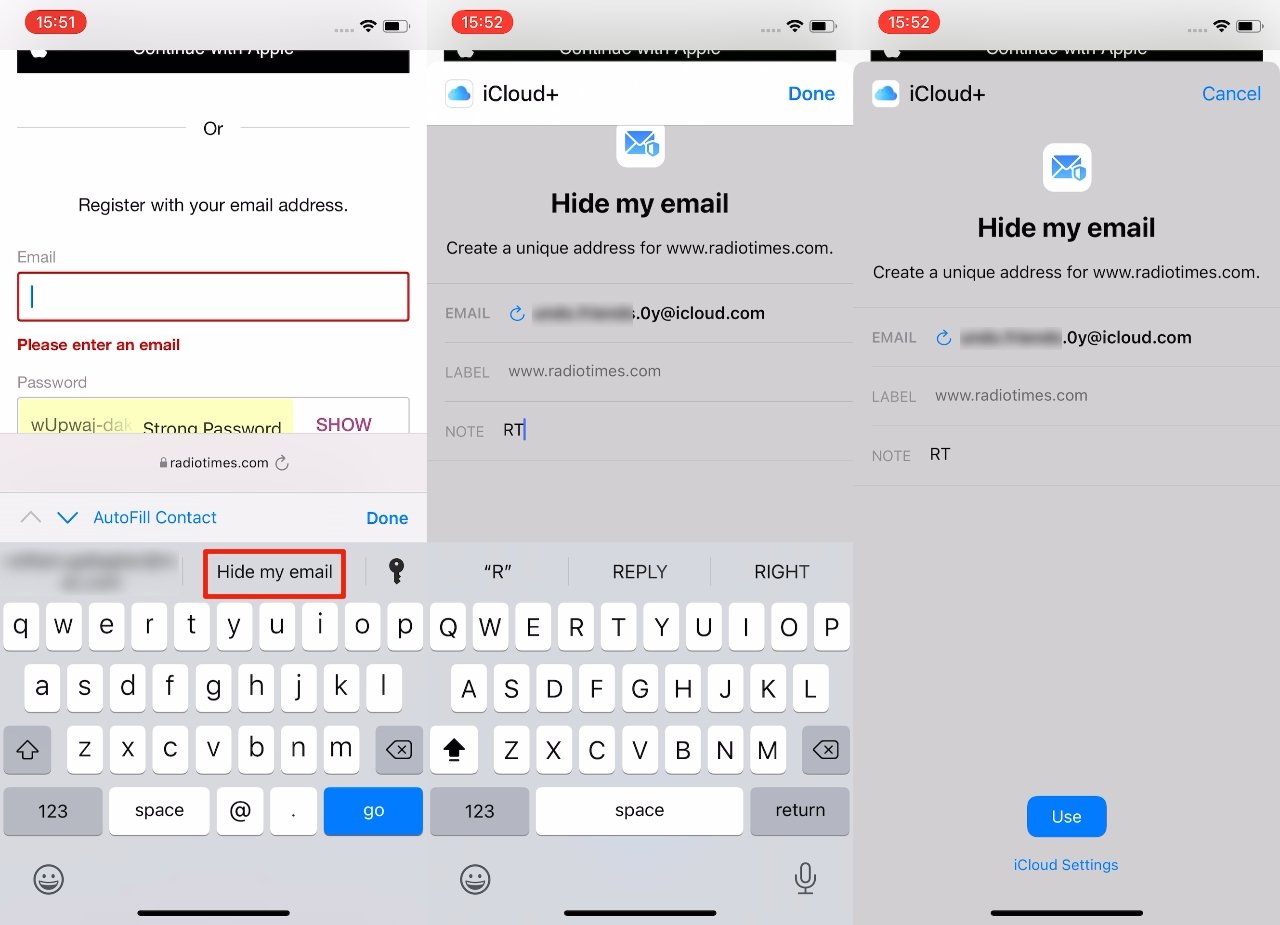
- On the row above the onscreen keyboard, tap Hide My Email
- On the screen that appears, you can optionally make a note about the site or fake address, or
- You can tap a refresh button to change the fake email address
- Tap on the Use button to finish
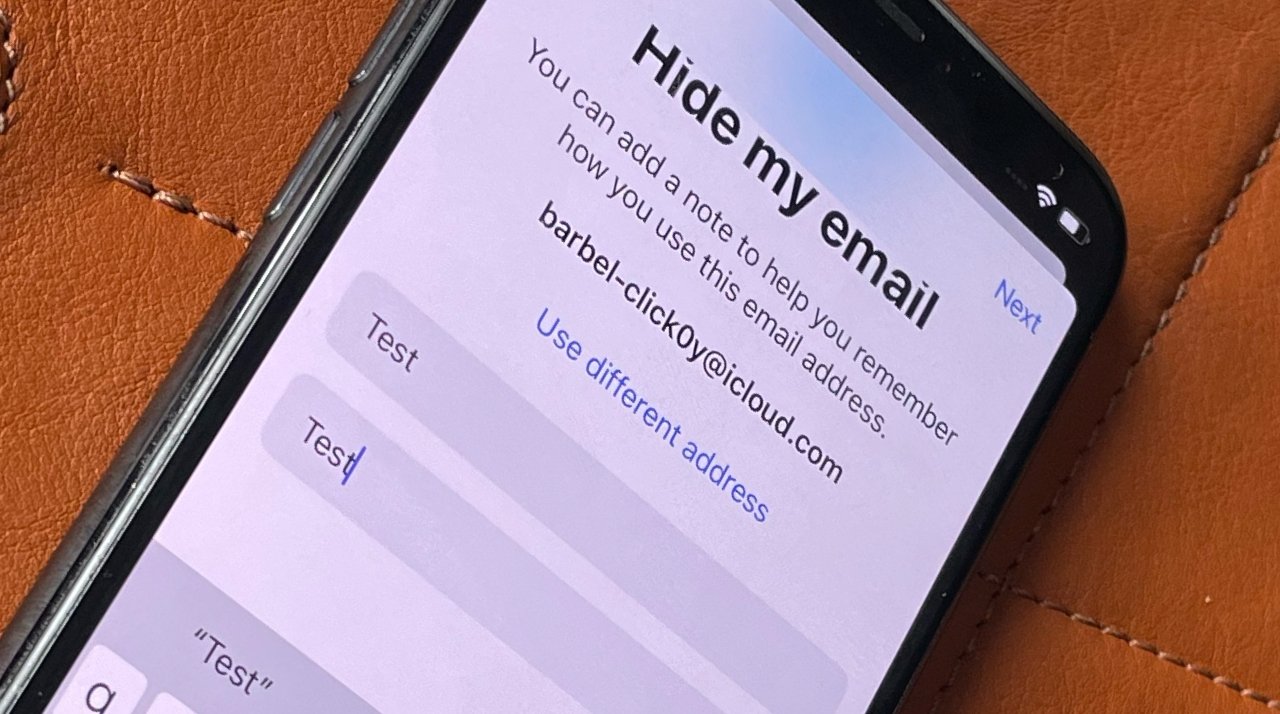
When you're registering for the first time, you are immediately shown a proposed fake email address. There is the option to change it, but not by editing.
You cannot tap to rewrite or retype the address into something else, you can solely choose to replace it with another automatically generated one.
Apple recommends that you use the Note field to make some comment about the site you're registering, to help you find it later.
But there is also a Label field and it shows the URL of the website you're registering for. You cannot change this here.
So unless it's a really obscure site with an even more obscure name, the URL maybe all you need to remember what site this is. There is, though, a way to change it later.
Note that under the Use button, there is an iCloud Settings one. Don't tap on it.
If you do, you're taken to the Hide My Email settings page where you can see previous fake addresses, or begin the process or creating a new one. But you also lose the one you started entering in the Hide My Email screen, and any notes you made there are gone too.
There are benefits to going to the iCloud Settings page for Hide My Email, but none when you're on a website and setting up. Instead, that settings page is most useful later.
It's how you can see all your addresses, switch any off, and also alter where they all forward emails to.
Any time you need to register or sign up to a site, you can use Hide My Email
How to see all your addresses, and work with them
- Open Settings and tap on your name at the top of the screen
- Tap on iCloud
- Choose Hide My Email
- After a moment, the Hide My Email settings page appears
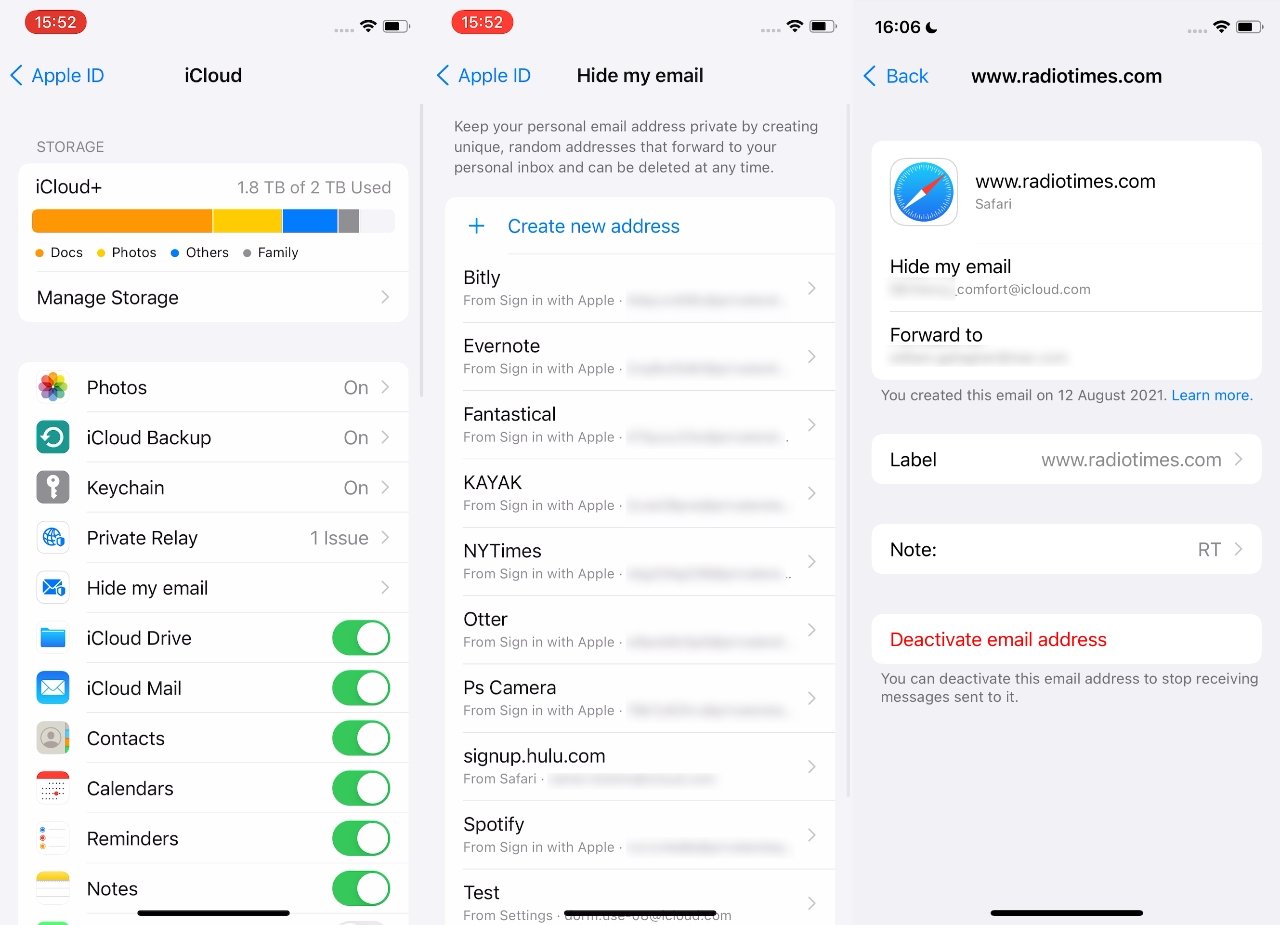
One key part of this page lies almost at the bottom. It's the Forward To option. You can't reach it from anywhere else but this Settings page — or rather, you can't reach it to make changes anywhere else.
Forward To lists your real email address. Tap on it and after a moment, you're presented with a list of other real addresses you've got. Those will include any from other email accounts, like your company one.
And depending on how long you've been an Apple user, it may also offer you an address that is your name followed by @icloud.com, or even @me.com.
Tap the one you want to select it, then tap on the Done button.
It takes a moment for these settings page to open because iOS is gathering up all of the real and all of the fake email addresses to present them to you in lists.
The fake address list makes up the bulk of this settings page. Every site you've used Hide My Email address is listed here, and that can already be a longer list than you expect.
Because any sites you used Sign in With Apple on are also in the list. Those sites are labelled with the fact that's where they came from. Any sites you use the new Hide My Email feature with are likely to be labelled From Safari.
The listing shows the title of the site or its address, and what your fake email address for it is. Tap on any site in the list to make changes.
Except, there aren't a lot of changes you can make. Tapping on a site in the list brings you a page with the details of the site and the fake address, but it's almost all just for reference.
So you can see the site address, you can see the fake address, and you can see which real address messages will be forwarded to.
There's also the same Label field as when you registered, but this time you can change it to anything you like. Similarly, there's a repeat of the Notes field, and that's editable too.
Lastly, there's a Deactivate Email Address button. You'll never guess what that does.
How to use the Settings page to create a new address
Right now, it's hard to be sure why this feature is available, but it is. You can open the Hide My Email settings page and tap on Create New Address.
If you do this, you are offered a randomly-generated address and the option to Use Different Address, which generates a new one. You can label this fake address, and you can make a note about it.
Once you've done that, this new fake email address is in your list of addresses. You can tap on it in the list, go to the full page about it, and then tap-and-hold on the address to copy it.
What you can't do, as yet, is select that particular fake address when you're filling out an online form. The only way to get to it is via the Settings page.
So since you can create a brand new one on the spot when you're signing up to a site, it's hard to see the benefit of going over to the Settings page and then coming back with this address.
Still, if you can find a benefit, then this is another way to do the same thing of creating a fake address. And it can be controlled, edited, or deactivated like any other Hide My Email address.
You can manage your Hide My Email addresses, and your Sign In with Apple ones
How to turn off a Hide My Email fake address
There's no way to change a fake address into your real one. So if you've decided that a site is trustworthy and you want to skip all of this Hide My Email stuff, you can't.
You have to instead re-register with the site using your real email address. And to save getting two of every email message, you should deactivate the fake one.
In the detail page for any given Hide My Email you've set up, you can tap the Deactivate Email Address button. Tap it, then tap Deactivate to confirm, and it's switched off.
Changing your mind about deactivating an address
The list of fake email addresses in the Hide My Email settings page is followed by the Forward To option, and then finally by an Inactive Addresses button.
Tap on that and you're taken to a list of all the fake addresses you've deactivated.
Choose one, tap on it, and you're presented with a page detailing the fake address and any notes you've made. To recall this address to life, tap on Reactivate Address.
Or if you definitely want rid of this thing, tap Delete Address. Then tap Delete again to confirm.
Sounds more involved than it is
It takes dramatically longer to describe Hide My Email than it does to use it. That is partly because of how buggy it has been throughout the beta process, but it's more because there are so many options.
Or rather, there are just a few options, but multiple ways to get to them.
In practice, once you have iOS 15, when you come to sign on to a new website, you'll be using Hide My Email with a tap and without a thought.