Affiliate Disclosure
If you buy through our links, we may get a commission. Read our ethics policy.

How to quickly share & manage file paths in macOS Finder

How to quickly share & manage file paths in macOS Finder

Knowing how to obtain a file path in macOS Sonoma quickly is a significant time-saver, particularly for professionals who regularly manage files and folders. Here's how to do it.

File paths are essential for tasks like referencing files in scripts and command lines, which is crucial for developers and programmers. Additionally, graphic designers and video editors benefit from sharing precise file locations with their teams to ensure accurate version control.

Academics and researchers may also find file paths invaluable for organizing and citing data files in publications and collaborative efforts.

Mac users can set up Finder to display the file or folder's directory path. There are two methods for copying it to the clipboard for future use.

How to view macOS file paths without copying

Before diving into the steps for copying file paths, it's essential to know how to view them without the need for copying. In the Finder, follow these simple steps:

  1. Open Finder and navigate to the desired file or folder.
  2. In the Finder menu, choose "View."
  3. Select "Show Path Bar."
  4. Enabling the Path Bar will display the complete file path at the bottom of every Finder window, allowing users to see it without copying anything.

How to copy a file path in macOS Finder

  1. Open Finder and navigate to your desired file or folder.
  2. Right-click on the item to see a range of options.
  3. Press the "Option" key to modify the menu, revealing new choices.
  4. Select "Copy [filename] as Pathname" to copy the item's file path.

Once copied, you can easily paste the file path where needed, whether it's into a text editor, a script, or a file upload field.

How to automate getting a file path in macOS with Shortcuts

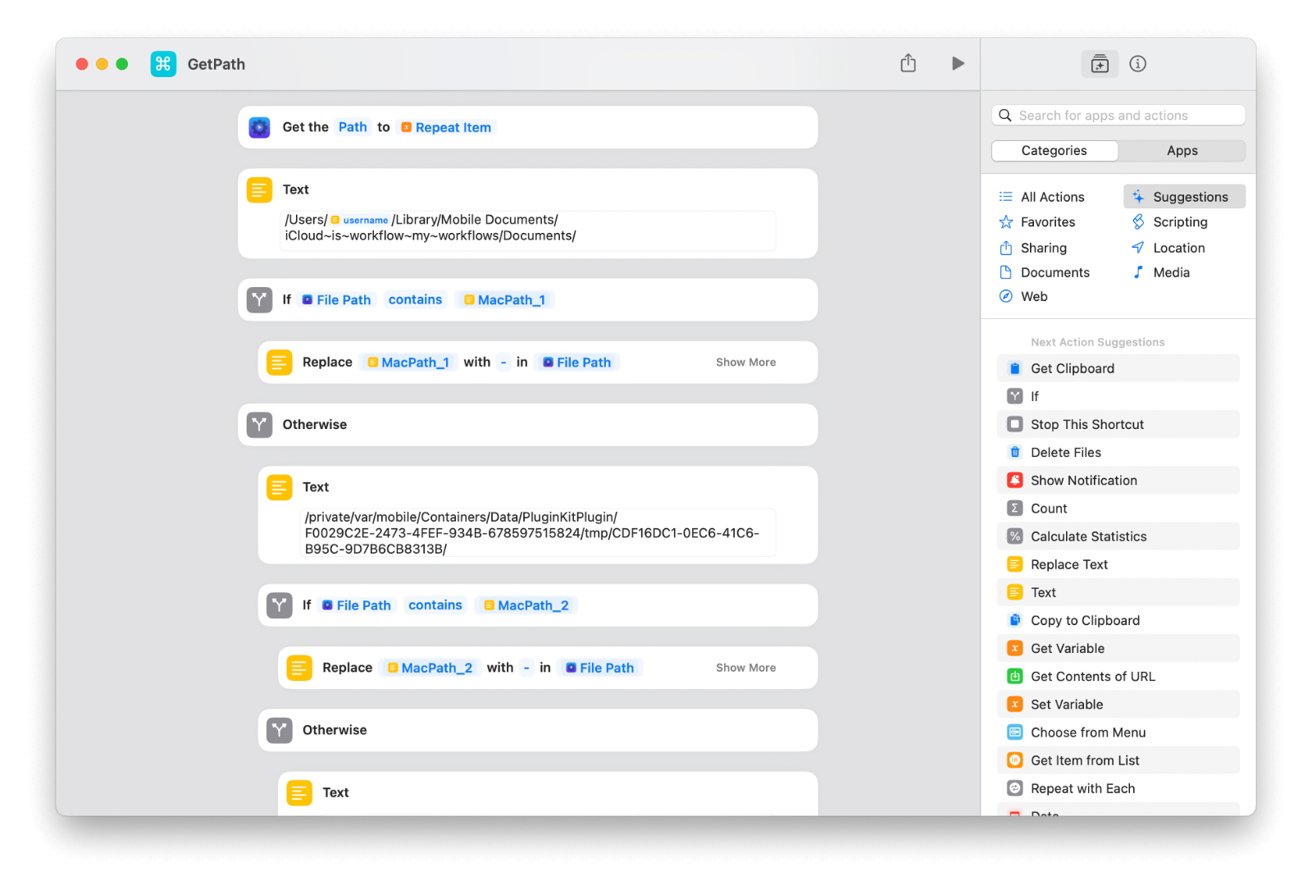
There is also a shortcut that accomplishes the same task of getting a file path. It uses a free app called Actions and could be used for automation, such as making a list of files or folders that need to be backed up.

The app requires macOS 14.0 or later for Mac, iOS 17.0 or later for iPhone, and iPadOS 17.0 or later for iPad.


5 Comments

mknelson 9 Years · 1148 comments

Or, select the file and "Get-info" via command-i, right click, from the File menu, or the (not sure of the name) drop down menu in a Finder window.

Look for the "Where:" Field. Select the path with your mouse, command-c to copy.

appleinsideruser 5 Years · 663 comments

mknelson said:
Or, select the file and "Get-info" via command-i, right click, from the File menu, or the (not sure of the name) drop down menu in a Finder window.

Look for the "Where:" Field. Select the path with your mouse, command-c to copy.

Or just right click on the “where” and choose copy as pathname. No need to select.

i do like the option trick in the contextual menu from this tip. Thanks.

maury markowitz 17 Years · 370 comments

I can't believe I'm saying this, but Windows handily beats macOS in this regard. You click on the folder name and the path appears in an editable field and already selected so you can copy it immediately, or type in a new path to move to a different folder.

I'd be happy if they had a right-click-on-name in macOS that let you Copy.

paxman 17 Years · 4729 comments

I can't believe I'm saying this, but Windows handily beats macOS in this regard. You click on the folder name and the path appears in an editable field and already selected so you can copy it immediately, or type in a new path to move to a different folder.

I'd be happy if they had a right-click-on-name in macOS that let you Copy.

Windows was always better in file management imo. But there is a very simple way to right click in combination with the first option listed in the article

  1. Open Finder and navigate to the desired file or folder.
  2. In the Finder menu, choose "View."
  3. Select "Show Path Bar."
  4. Enabling the Path Bar will display the complete file path at the bottom of every Finder window, allowing users to see it without copying anything.

Once you have file path displayed at the bottom of your finder window (who doesn't? I have had this option set for as long as I can remember. Literally years if not decades), you can now right click anywhere in the file path and copy the file path to wherever you clicked.

Alternatively you can just Option Right Click on any file. You can do that in any view anywhere

You may also have some luck by checking this link out. I only just discovered it and it looks intriguing.

appleinsideruser 5 Years · 663 comments

paxman said:
I can't believe I'm saying this, but Windows handily beats macOS in this regard. You click on the folder name and the path appears in an editable field and already selected so you can copy it immediately, or type in a new path to move to a different folder.

I'd be happy if they had a right-click-on-name in macOS that let you Copy.
Windows was always better in file management imo. But there is a very simple way to right click in combination with the first option listed in the article
  1. Open Finder and navigate to the desired file or folder.
  2. In the Finder menu, choose "View."
  3. Select "Show Path Bar."
  4. Enabling the Path Bar will display the complete file path at the bottom of every Finder window, allowing users to see it without copying anything.
Once you have file path displayed at the bottom of your finder window (who doesn't? I have had this option set for as long as I can remember. Literally years if not decades), you can now right click anywhere in the file path and copy the file path to wherever you clicked.
Alternatively you can just Option Right Click on any file. You can do that in any view anywhere

You may also have some luck by checking this link out. I only just discovered it and it looks intriguing.

Great summary!

Now if only copying pathname worked better for files in iCloud Drive. We work on a shared Drive and often copy references to collaborate between colleagues. However, the Finder ignores the neat pathname it displays and reveals the actual behind the scenes path /Users/user/Library/Mobile Documents/com~apple~CloudDocs/pathname instead of the displayed iCloud Drive > pathname.

I guess I could investigate that shortcut in the main article to write a script to parse this, but it hasn't annoyed me sufficiently yet...