The best disk clone apps for Mac in 2023
 Chip Loder
A handful of macOS apps let you make near-exact copies of your Mac's storage devices, which can be handy for backing up in case of a data emergency.
Sometimes it's handy to make a full, complete, exact copy of one of your Mac's drives - especially the Startup Disk. Due to the complexity of macOS's UNIX underpinnings and the huge number of files installed with macOS, making a disk clone can be a daunting task.
There are several apps you can use to make a disk clone or to back up and restore your Mac's drives and volumes. These include, but are not limited to:
- Apple Disk Utility
- SuperDuper!
- Carbon Copy Cloner
- balena Etcher
- Clonezilla
- ChronoSync and ChronoSync Express
- Disk Drill
- Get Backup Pro 3
- EaseUS Todo Backup
- dd
- rsync
- Raspberry Pi Imager
There's a difference between cloning a drive or partition, and backing it up.
Backing up means copying files and folders in the same hierarchy as the source drive or volume, and possibly storing the backup in a proprietary format for later restoration using the same software.
Proprietary backups are OK, but you may want to make an exact copy of a drive or volume at the block level.
Most drives store data in blocks on disk - and data is usually read and written in block-sized chunks. Most drive blocks are 512 bytes in size, but can also be 1024, 2048, or 4096 bytes.
Drive mechanisms, or "mechs" usually have internal buffers which make disk I/O faster by storing recently used blocks in a drive cache for faster I/O. Using certain commands it's possible to bypass disk caches and do "raw" I/O which reads or writes data on disk immediately.
For true and exact disk clones, a block-by-block copy is necessary.
There are also many cloud-based backup services online, and while useful, they're not real device cloners, so we won't cover them here.
Apple Disk Utility
The simplest way to make a block copy of a drive or volume on macOS is to use Apple's Disk Utility. Apple's utility has the ability to make exact block-level disk clones and save them in disk image (.dmg) format.
The .dmgs can then be restored to another device later.
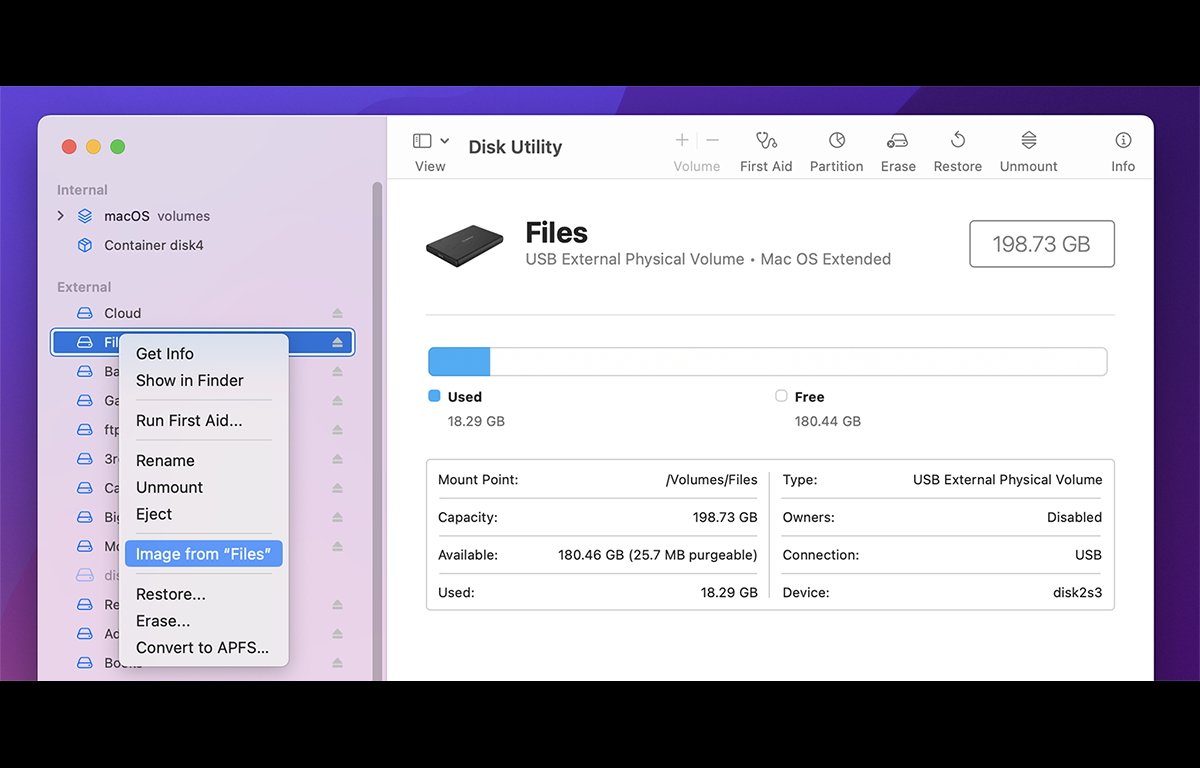
To make a disk image with Drive Utility, open it in /Applications/Utilities/, and select a volume from the list on the left. Control-click or right-click the volume, and select "Image from" from the popup menu.
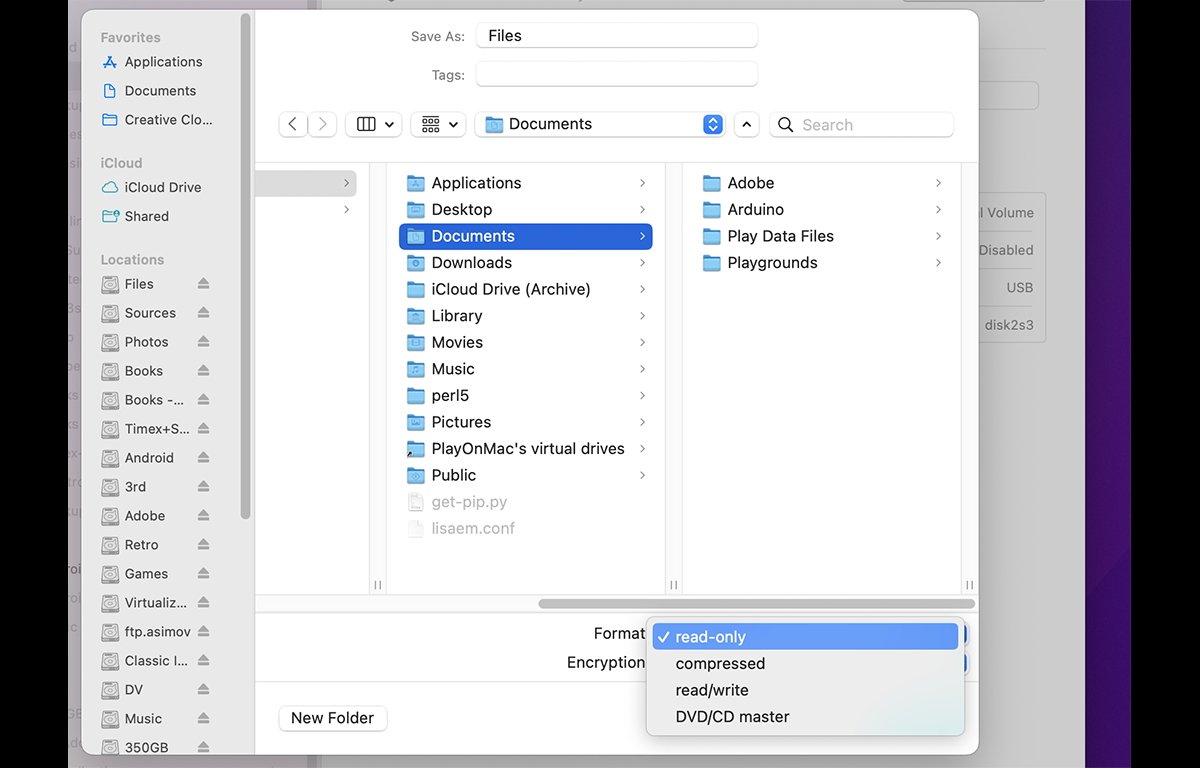
Select a destination to create the .dmg file at, and select either "read-only" or "DVD/CD Master" from the popup menu in the lower-right corner of the Save panel.
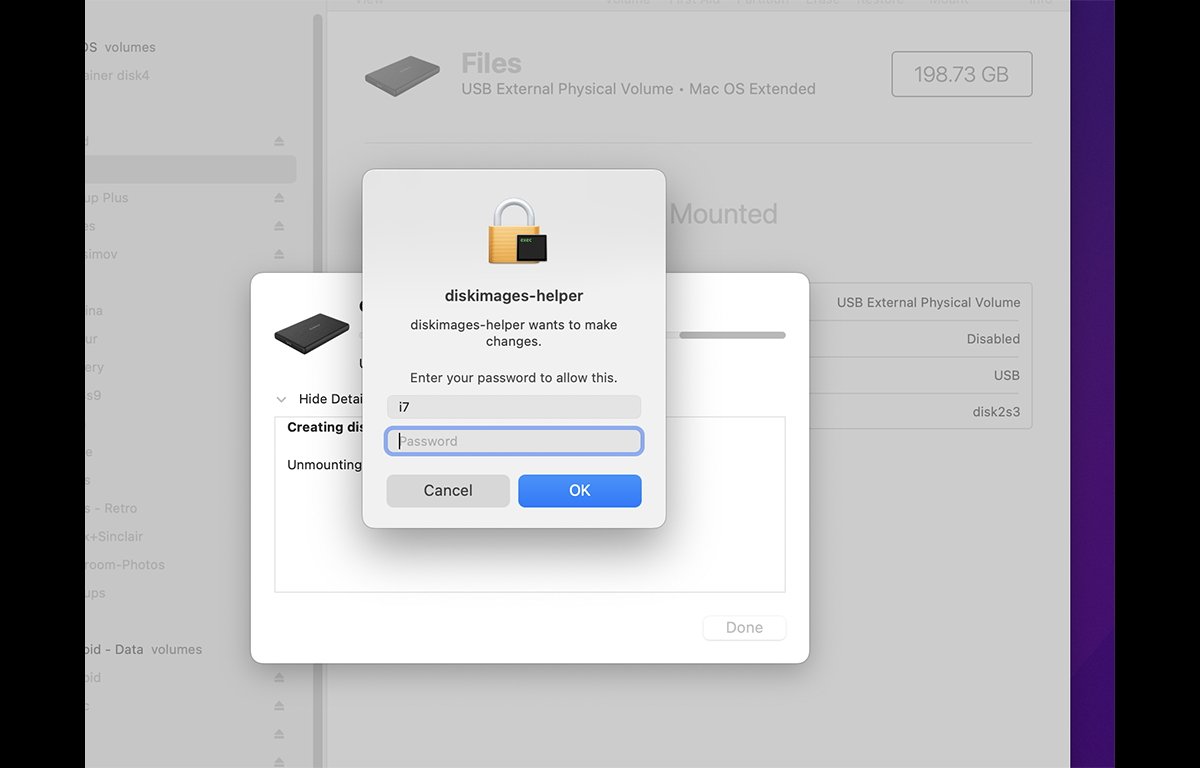
Click "Save" and enter an admin password when prompted for the disk images-helper tool. This privileged helper tool is part of macOS and requires special permissions to make the copy.
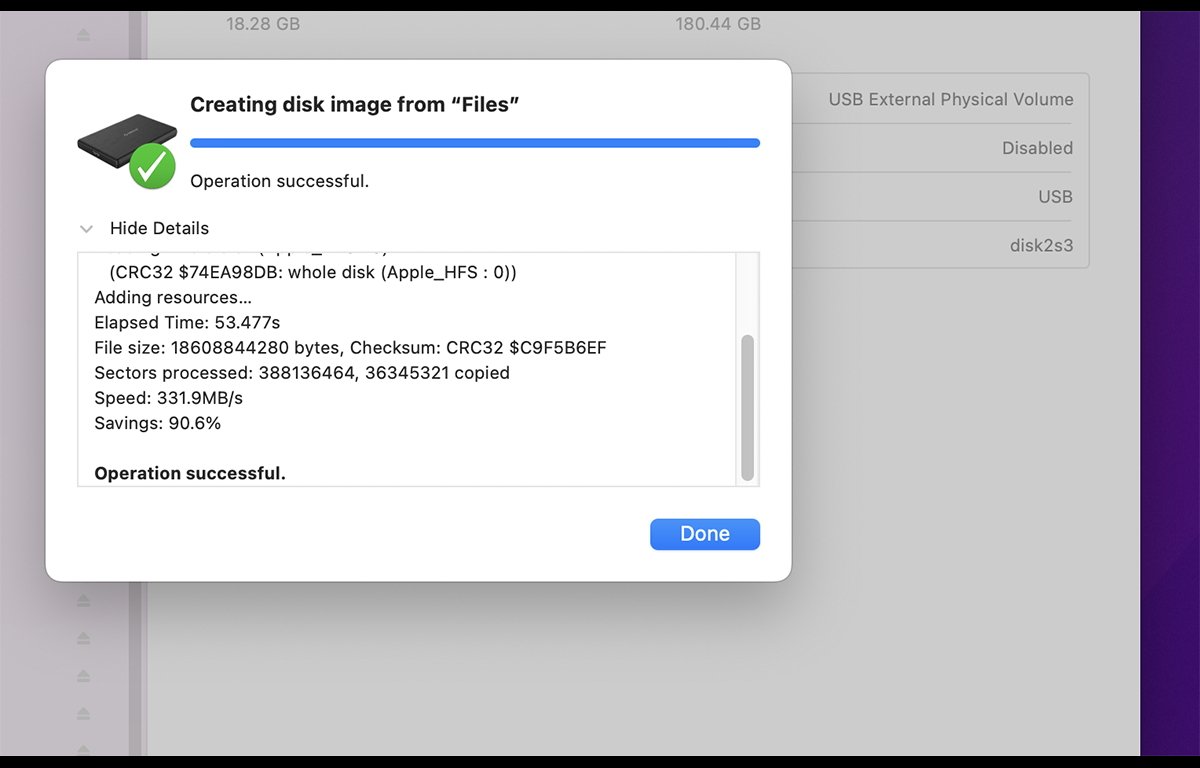
Once you enter an admin password, Disk Utility will begin copying the selected volume to the destination, storing an exact block-level copy inside the .dmg file. Once the copy completes, Disk Utility will notify you of success or failure.
Note that the current macOS Startup Disk volume can't be cloned or copied using Disk Utility.
To copy a Startup Disk, you'll need to boot into some other macOS volume, run Disk Utility from there, then clone the macOS boot disk you want to copy. Or you can boot into macOS Recovery by rebooting and holding down the "R" key on the keyboard.
Restoring from Apple Disk Utility
To restore a macOS volume from a disk clone .dmg file, start up into any macOS bootable volume other than the one you want to restore to, run Disk Utility from there, then select "Scan Image for Restore" from the Images menu in the menubar.
Select the .dmg file you want to restore in the Open panel, enter an admin password, and let Disk Utility scan it. This is necessary so Disk Utility can verify that the image can be restored to a physical disk.
Once the scan completes, click "Done" in the progress window.
Next, Control-click, or right-click the physical disk volume you want to restore the .dmg to, and choose "Restore" from the popup menu.
Note you're choosing the destination volume first, not the .dmg. Most volumes that are writable and listed in Disk Utility can be restored to.
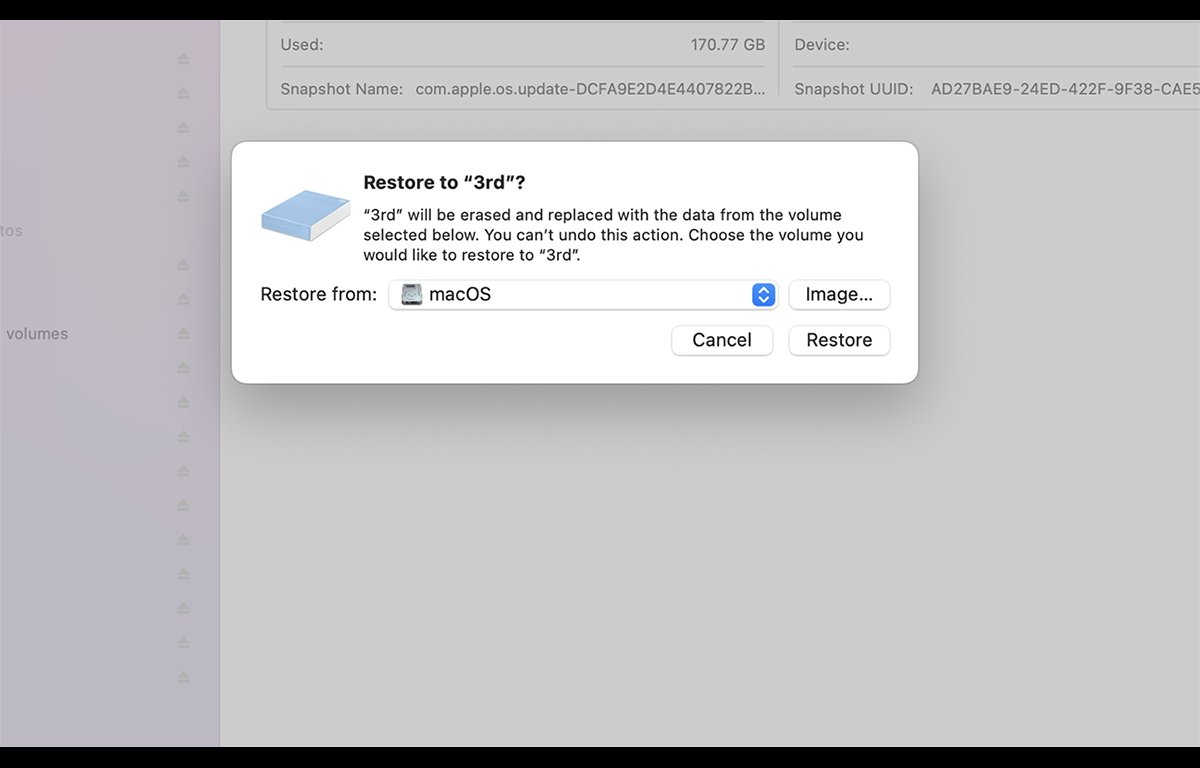
In the sheet that pops up, click the "Image" button to the right of the "Restore from:" popup menu, and select the .dmg file you created previously. Essentially this is the reverse of the process you used when you created the .dmg.
The volume selected to restore to will be completely erased and the .dmg's contents copied in its place - so be careful before clicking the "Restore" button in the sheet. Once you do, the reverse copy process will begin and the .dmg will be restored to the selected volume.
Note you can also essentially clone directly from one volume to another by selecting any volume except the Startup Disk from the "Restore from:" popup menu - instead of selecting a .dmg to restore from.
In Disk Utility, "Restoring" essentially means cloning - whether the source of the clone is a saved .dmg file, or a physical volume.
One major advantage of doing block copies is that all the metadata from the source volume gets copied exactly to the destination along with the data itself. This is particularly important when cloning bootable drives since parts of macOS's UNIX underpinnings require certain UNIX permissions to be set on some system files in order for the OS to work properly.
SuperDuper!
SuperDuper! from Shirt Pocket is perhaps the most beloved of all macOS disk cloning apps. Released shortly after Mac OS X's initial introduction in 2000, SuperDuper! has been around for decades and is highly reliable.
It's also fast, has lots of options, and is free for basic disk copying. The paid version adds features such as scheduling, Smart Update, Sandboxing, and scripting.
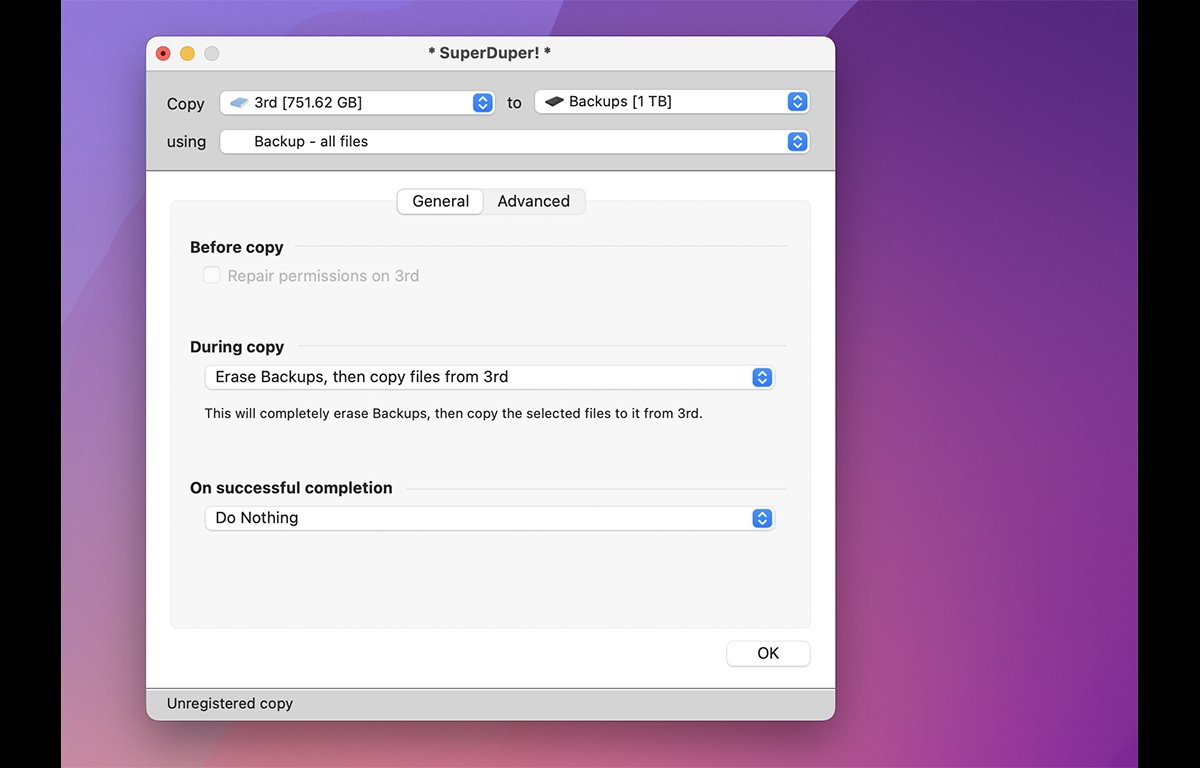
SuperDuper! isn't a block copier, but it is intelligent about how it copies drives - it knows how to correctly set file permissions and other metadata to insure copied volumes are bootable when restored.
The paid version also knows how to do incremental copies so if your source disk changes, SuperDuper! can save time by only copying over the new changes to the destination disk.
Additional cool features of SuperDuper! include the ability to run shell scripts and install .pkgs before and after copy, repair disk permissions before copying, and choosing whether to backup all files on a volume or just user files.
SuperDuper! costs $28 on the Shirt Pocket website to fully unlock, but includes free elements.
Carbon Copy Cloner
Another long-time disk clone tool for macOS is Carbon Copy Cloner from Bombich Software.
Also one of the oldest disk copiers for macOS, CCC as it is better known can make copies of drives and volumes in full or incrementally, using schedules, and using snapshots that archive disks at moments in time for later restoration/recovery.
The latter feature is useful to recover files if they go missing, get deleted, or if you just want to go back to an older version from a certain date. CCC can also make intelligent incremental copies from NAS sources quickly by using indexing.
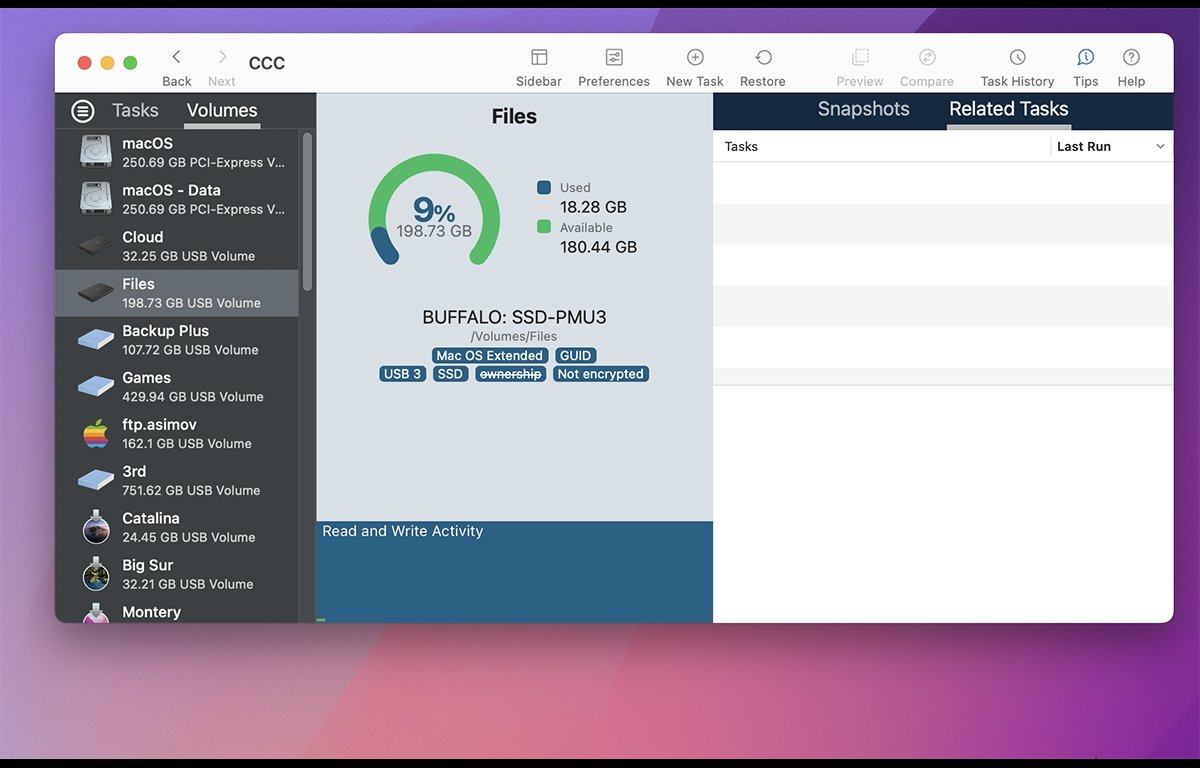
CCC works using Tasks, which are sets of backup or restore procedures to run on specific volumes.
Tasks can be grouped and scheduled, and you can view Tasks individually, by groups, or by volumes they are associated with. A simple tabbed interface makes switching views easy.
There are a host of other features such as pausing and resuming backups, a dashboard, simple mode, and watching folders to induce incremental backups automatically any time the content of a folder changes.
Another very useful feature is the ability to search copied backups.
CCC also includes an optional menubar icon for quick access to tasks, the ability to run preflight scripts, email notifications for backup tasks, and battery options for laptops.
There's also a macOS Media Installer Assistant which helps you make bootable macOS installer disks.
It should be noted that CCC can make block copies of some volumes, but only if certain conditions are met, and only on the initial backup. All subsequent incremental backups of the same volume are on a file-by-file basis.
Carbon Copy Cloner costs $50 from the official website, but there is a 30-day free trial available.
Etcher
Etcher from balena is a simple and elegant disk clone app that is simple to use.
The UI is easy: set a source to copy from, a target storage device, and click the Flash! button.
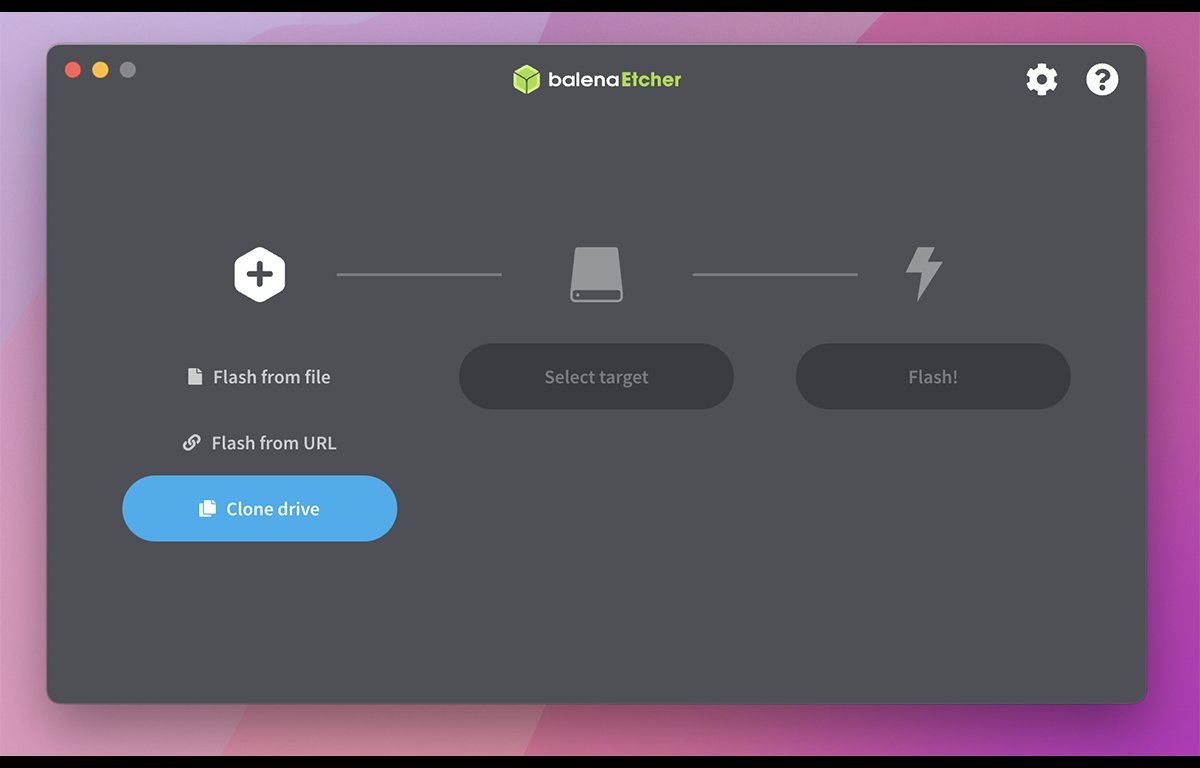
Sources can include bootable .iso OS image files, an image file stored in balenaCloud, or for block-exact copies an attached storage device.
Clicking Flash from file displays a standard Open pane, from which you can select a .iso image file. Once selected, click Select Target to select a physical local storage device to flash the image file to.
The device can be any disk, a USB thumb drive, or other read/write media.
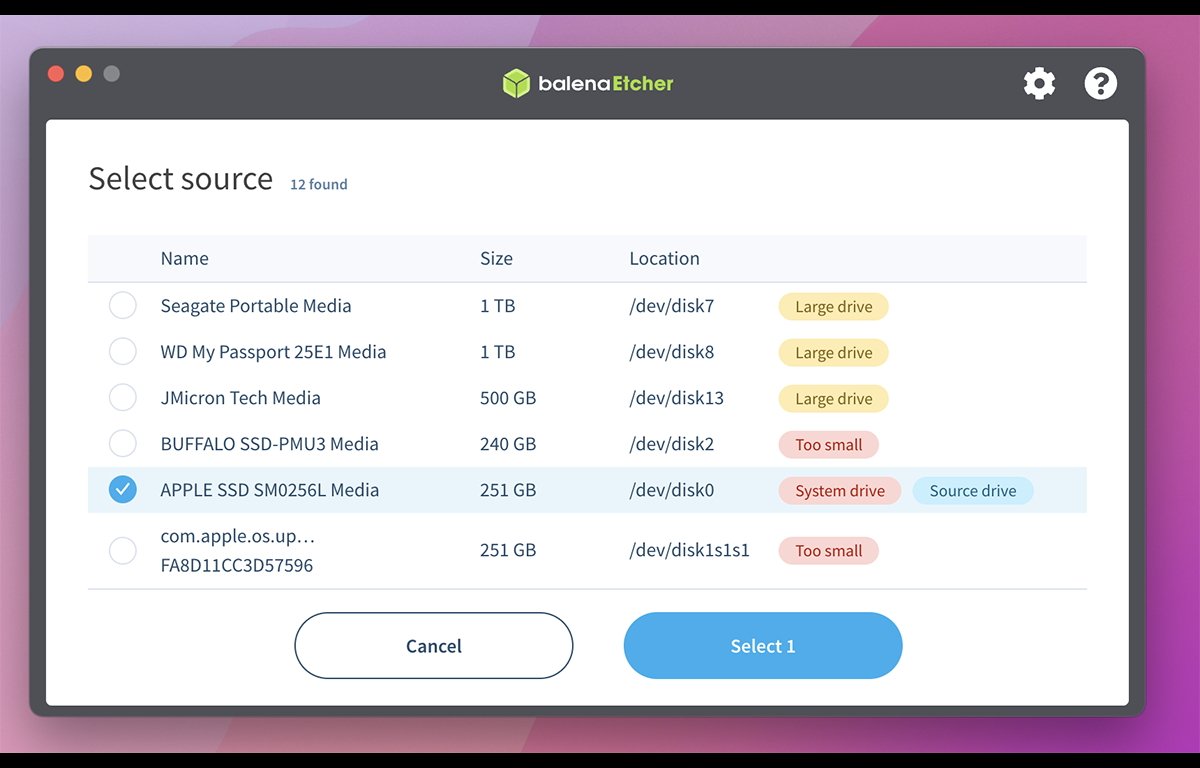
Unlike most other cloning apps, you select a raw physical disk at the device level in Etcher. These are listed by device name (embedded firmware name, actually), and BSD disk number, which you can view in Terminal by typing:
diskutil list
and pressing Return.
For example:
/dev/disk9
is physical BSD disk number 9, mounted in the dev/ (device) directory. Most BSD physical devices are connected to macOS via its BSD underpinnings in the /dev directory.
Beware that when selecting a physical device as a destination in Etcher, you're selecting the entire device, not just one volume on the device.
When you click the Flash! button, you're erasing the entire device - including all volumes of all types that may be on it.
So be careful before clicking Flash!. It's easy to destroy multiple volumes with a single click.
You will be prompted for an admin password after clicking Flash!, but once you enter the password and click OK, there's no going back - everything on the device will be destroyed instantly.
Instead of flashing from a file, you can clone one physical device to another directly by clicking the Clone drive button, including the device containing the Startup Disk by clicking the "Show hidden" item at the bottom of the scrolling list:
Etcher is brilliantly simple and small, and is one of the easiest ways to make raw physical copies of storage devices on your Mac.
Unfortunately there's no Apple Silicon-native version of Etcher yet, but it runs just fine in the Rosetta 2 emulator, and we expect balena will create a Silicon version soon.
Etcher is free to download from Balena's website.
Clonezilla is a text-based disk clone app that allows you to make exact copies of disks by flashing its downloadable image to a USB thumb drive, or burning it to a CD and then booting into it. Full usage is beyond the scope of this review, but it's fairly technical so novice users that are not comfortable with a text-based UI may want to avoid it.
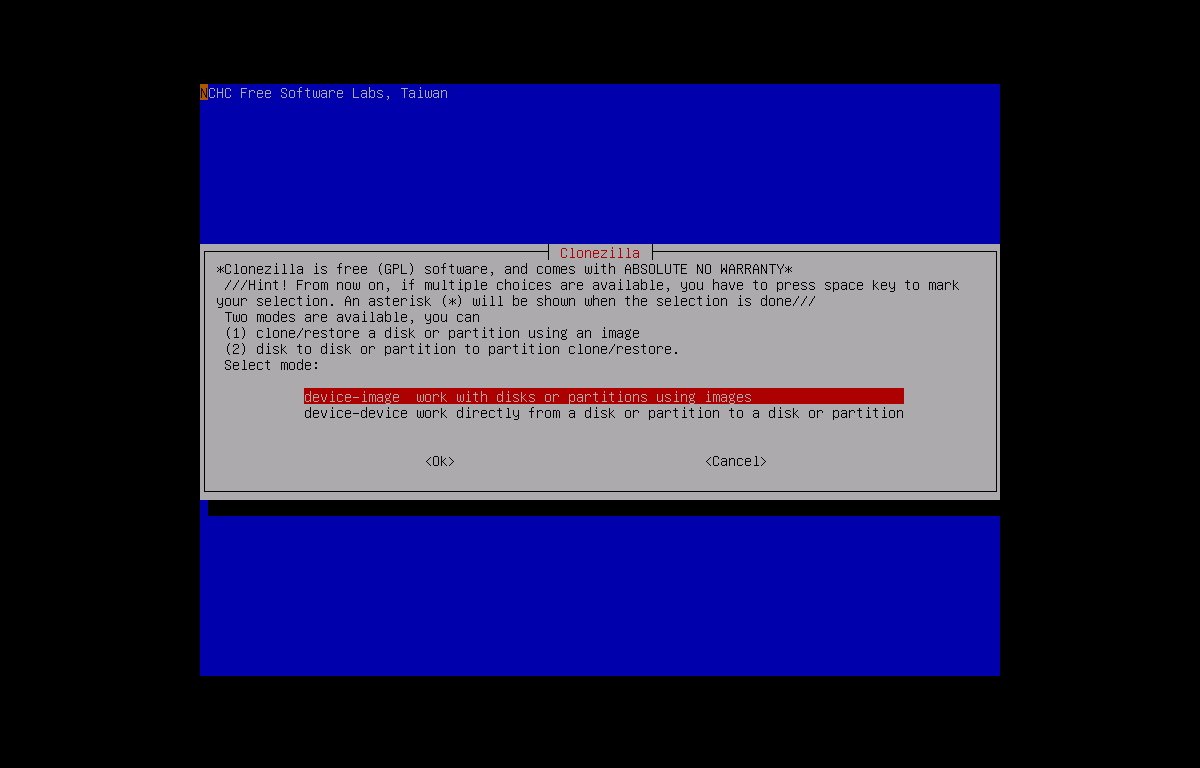
Full documentation is available including step-by-step examples and video tutorials, from the tool's website.
Clonezilla is a free download.
ChronoSync and ChronoSync Express
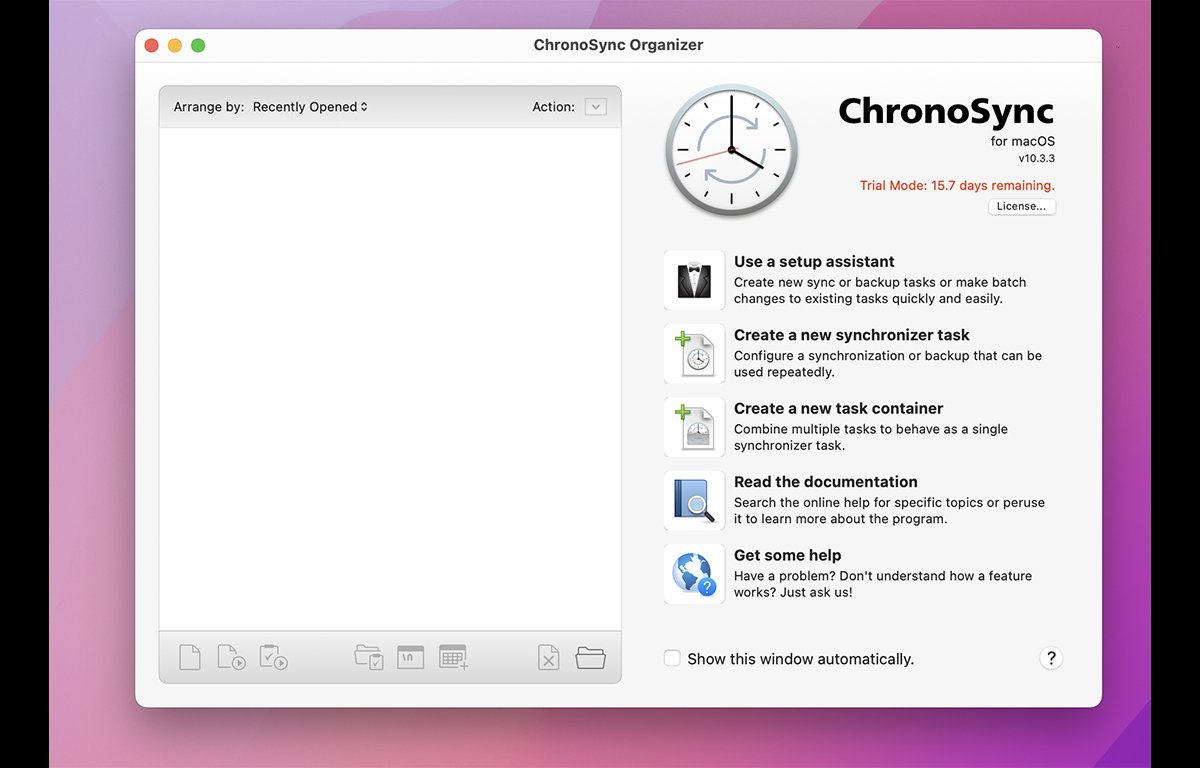
ChronoSyncfrom ECON Technologies, Inc. is a Swiss army knife of volume copiers, backup, and a host of other tasks.
Its main utility interface is centered around synchronizer tasks, which can be grouped into containers, and scheduled. There's also a setup assistant to make task creation easy, and the app's Ui is simple, easy to use, and polished.
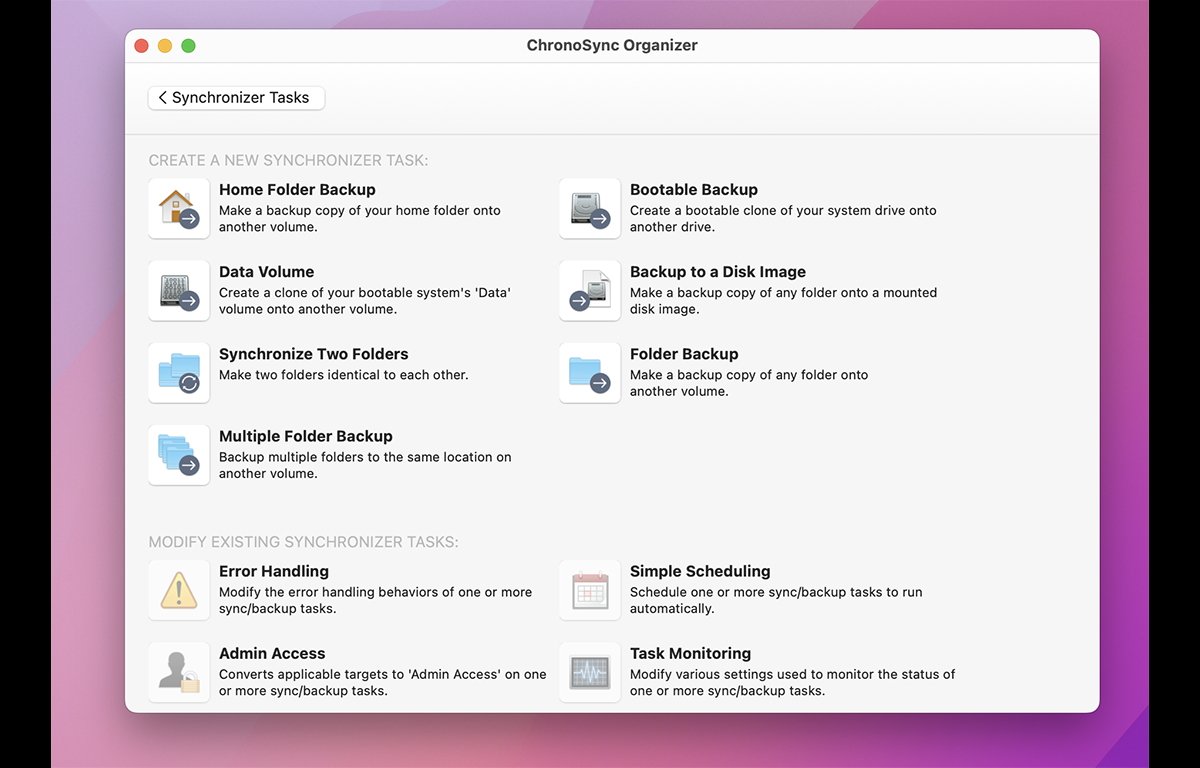
Once a task is created, you can configure and edit it by double-clicking from the list on the left in the main window.
You can set source and destination, reverse the direction of syncing, do bidirectional syncs, mirroring, make bootable volume copies, or just make and sync data volumes without any system files.
ChronoSync also supports syncing to and from iCloud in both directions, and on popular cloud storage locations such as Amazon S3, Google Cloud, Backblaze, SFTP servers, and others.
There's also extensive error and log handling, metadata, and special file handling, along with a Rules interface that can limit which files get synchronized.
ChronoSync includes a host of handy other features such as backing up to disk images, making bootable backups, folder backups, and the ability to back up your user's home folder.
Be aware that in order to use automatic scheduled backups, ChronoSync does have to install a background task as a Login Item which runs in the background. It also uses an installer for installation and comes with an uninstaller app for easy removal.
Even with its extensive interface, ChronoSync is smooth and easy to use. It takes no time to master and all the features are accessible and right where you would expect them to be. Most things are self-explanatory and easy to understand.
ChronoSync costs $50 from the ECON Technologies website, with a free trial also available.
There is also a lite version - ChronoSync Express available in the Mac App Store for $25.
ECON Technologies also has a YouTube channel with lots of tutorials.
Disk Drill
Disk Drill from CleverFiles is a data recovery app that also features backup and a disk clone utility, and which has the ability to do both backup and block cloning of drives.
It can also backup and clone to .dmg files.
Disk Drill has other features including deleted data recovery, partition recovery, Time Machine support, macOS bootable macOS installer volume creation, data shredder, cleanup and duplicate file scanning, S.M.A.R.T. monitoring, and Microsoft Windows FAT32 and NTFS volume support.
Android file recovery is also provided.
The best feature of Disk Drill is its simple interface and ease of device navigation. The main utility window shows all options on the left side, and you can easily see a list of devices and volumes on the right side simply by clicking an item from the list on the left.
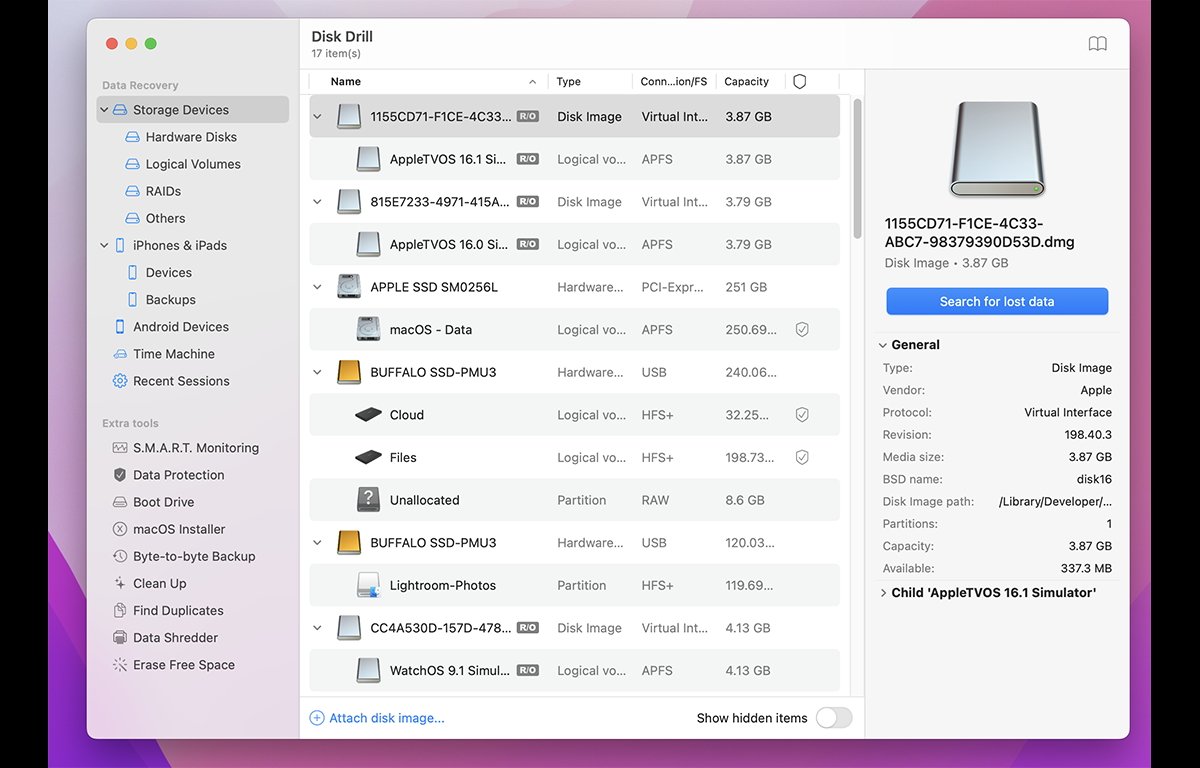
You can view by physical disks, logical volumes, RAID, free space, and disk images. There's also a switch for hidden items which allows you to see APFS container and storage volumes, and unknown volumes that macOS doesn't know how to mount.
Selecting "Storage Devices" on the left shows you all devices connected to your Mac in a hierarchical list, with collapsible arrows which reveal each device's volumes. Two other options, "Hardware Disks" and "Logical Volumes" let you toggle the list view between just physical devices, and all volumes in a single, simple list.
Selecting an item from the list of devices and volumes shows a get info-style legend on the right including model name, vendor, bus, capacity, BSD name, number of partitions, and free space. Additional info below that shows volumes and free space info, including physical volume offsets on the device.
The Byte-to-byte backup feature (block copy) makes exact clones of devices and volumes, and you can specify the start and end blocks within a device or volume before you initiate the backup. This allows you to copy just portions of devices and volumes at the block level.
There's also a bad block search feature to look for physical bad blocks on devices.
All said, Disk Drill is a slick disk utility that comes in handy for also making quick copies of storage connected to your Mac.
There's also a YouTube channel with tutorials.
Disk Drill is free for the standard version, while the Pro upgrade costs $89.
Get Backup Pro 3
Get Backup Pro from BeLight Software Ltd., is a minimalist but powerful disk clone and backup utility.
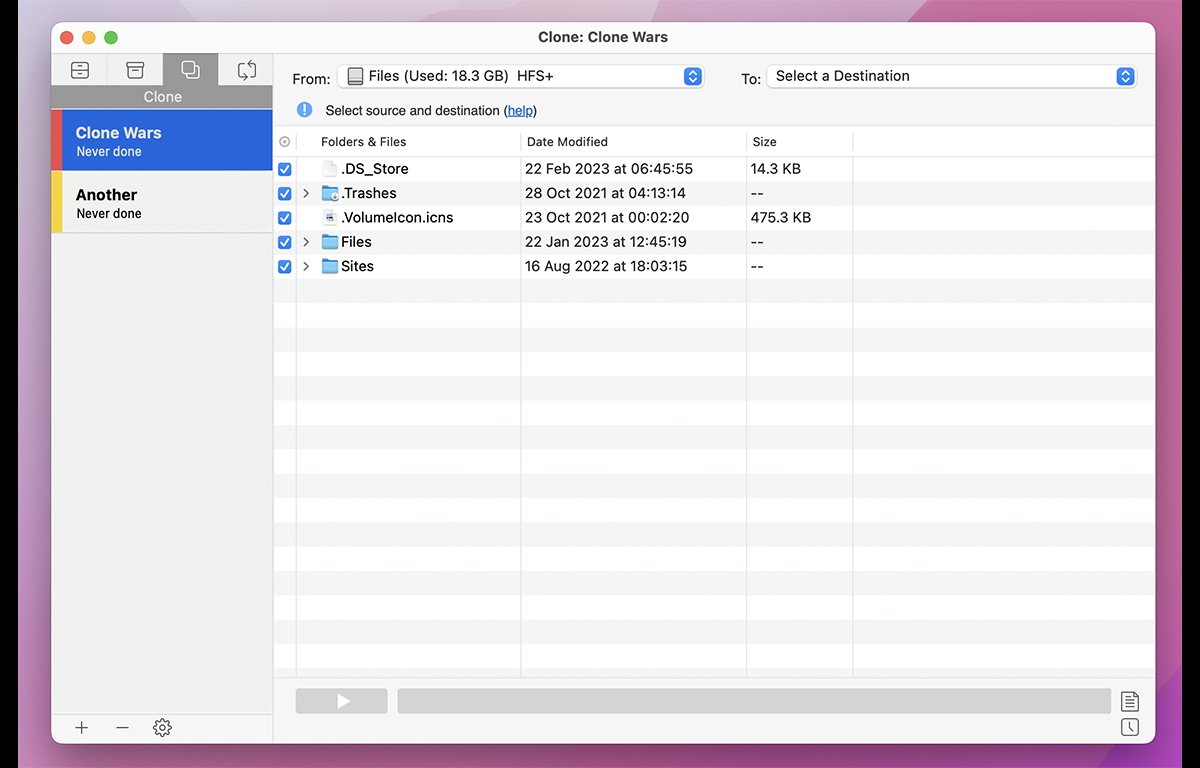
Its simple tabbed interface has four options: Backup, Archive, Clone, and Synchronize.
First, you select a tab to use, then click the "+" or "-" button to add or remove a project of the current type. Once a project is created or selected from the pane on the left, you can add or remove files and folders by dragging them in or out of the project window, or using the add and remove buttons at the bottom of the window.
There's also an interesting button at the bottom of the main window with a popup that allows you to add all your Photos, Contacts, Mail, or Documents to any project with a single click.
On the Clone pane, two simple popup menus at the top of the window allow you to set a source and destination to copy to.
The left side of the files pane has checkmarks and you can toggle which items in the list to include in a backup or archive simply by clicking the checkbox next to each item.
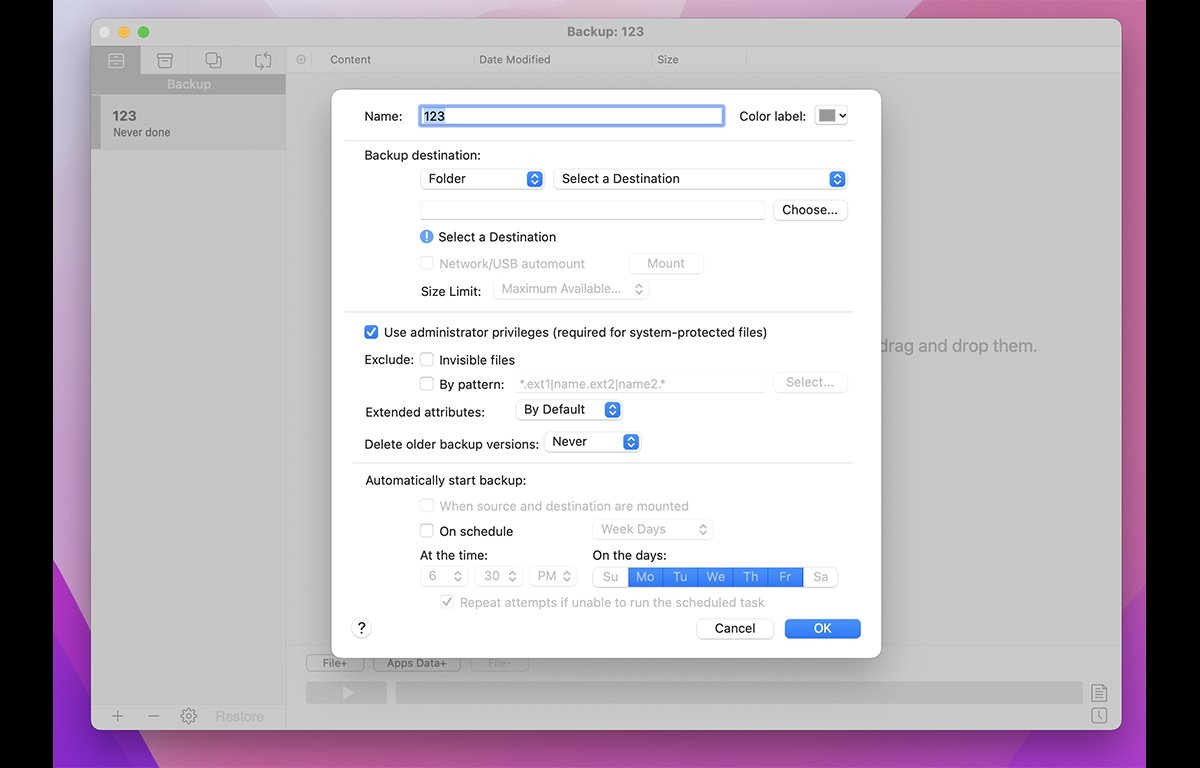
You can also set size limits, choose to copy extended file attributes or not, exclude hidden files and folders, schedule copies, and include or exclude files and folders based on filename pattern matching.
Another nice feature is the ability to duplicate any project at will simply by Control-clicking it and selecting "Duplicate" from the popup menu. You can then modify either project without affecting the other.
There are also color labels for projects which you can set by Control-clicking any project - an understated vertical color bar is added on the left side of the project in the main window's project list. A nice touch.
You can also change any project's name, color, and schedule simply by clicking the gear icon at the bottom of the projects list - a simple shortcut for editing just the most basic project properties.
Once your project is set up the way you want it, click the Play button and you're off. A progress bar at the bottom of the window shows copy or restore progress. There's also a detailed log window that records all actions.
While Get Backup Pro doesn't include features found in other products, its directness and price point make it compelling. It harkens back to the Mac's early days when software was simpler.
It's well thought-out, takes less than ten minutes to learn, has minimal menus, and navigation around the interface is quick and fun to use. It feels light and snappy. Nothing in Get Backup Pro ever gets in your way and you can accomplish most tasks with just a few clicks.
Weighing in at a mere 23 MB on disk, BeLight has shown that modern Mac software need not be bloatware.
As a final touch, Get Backup Pro includes a built-in Mac Help file in addition to online help. The help file is succinct and to the point - providing only the simplest information needed for each task.
BeLight also has another interesting disk product: Concealer - which allows you to hide and encrypt files on disk.
Get Backup Pro costs $29.99, with a 15-day free trial also available.
EaseUS Todo Backup
The oddly-named EaseUS Todo Backup from EaseUS is essentially a white-label licensed copy of Get Backup Pro 3 that also more expensive at $30, so we won't go into detail about it here.
UNIX dd command
dd is the UNIX disk duplicator command and can be used in the macOS Terminal to both create disk image files from drives and volumes, and to clone entire drives at the command line.
To get a full list of dd usage, see its man page in Terminal:
man dd
and press Return.
To use dd to clone a device, you essentially give it a source and destination device using the "if" and "of" options, which denote the input device and output device, respectively. The "f" stands for "file" - in keeping with the UNIX philosophy of "Everything is a file" (even devices).
So "if" indicates the input file (device) and "of" indicates the output file (device).
use the diskutil list command in Terminal to get a full list of every physical storage device connected to your Mac. You'll use these devices as the values to "if" and "of".
For example:
sudo dd if=/dev/disk0 of=/dev/disk2
tells dd to copy the entire contents of device disk0 onto device disk2.
Note that everything on the destination device will be destroyed once the copy begins - this includes all volumes of all types on the device.
Be careful when using dd because it's easy to misread the output from the diskutil list command and use the wrong disk number for the destination in the dd command. One mistake and you can destroy entire volumes with the press of a key.
Before issuing the dd command, you must also manually unmount all the destination device's volumes from the Desktop using the unmountDisk command:
diskutil unmountDisk followed by a space, then the /dev UNIX disk number as listed in diskutil list.
This is because the Finder and filesystem put a lock on each mounted volume at mount time so that other processes can't interfere with raw filesystem writes from the Finder.
There's a -status flag which you can set to "progress" to have dd output copy progress as it works. See the man page for more info.
There's also this short how-to-dd-on-mac page on GitHub from Vital Zanko.
UNIX rsync command
First released in 1996, and written in C for performance, rsync is another UNIX file copy and backup tool. It runs from the command line, and you can use it to make full and incremental backups or clones of any mountable disk volume or between folders.
rsync is intelligent and knows what has changed since it was last run between any source and destination by using Remote Differential Compression. Only changed files and folders are copied during sync. It can also make copies over LANs and the internet and knows how to interact with FTP servers in some configurations.
To get full info on rsync usage and commands, see its man page in Terminal:
man rsync
and press Return.
rsync knows how to preserve UNIX file metadata and permissions, and if you use the -E flag it will also copy macOS extended file attributes to the destination, and even preserve legacy Mac OS 9 resource forks.
rsync can also operate in a daemon mode (rsyncd), serving and receiving files using the native rsync:// protocol. When running in daemon mode, there's an rsyncd.conf file which configures the daemon.
The default UNIX port for rsync is 873.
Several other disk clone and backup products sit on top of rsync, including Rclone which uses rsync to backup, restore, and mirror to and from popular cloud servers. Rclone can also mount remote cloud storage over SFTP, HTTP, WebDAV, FTP and DLNA as local disks on the desktop in some cases.
There's also an Rclone forum and GitHub page.
rsync's author Andrew Tridgell is also author of the Samba file server and the now mostly obsolete learning chess engine, KnightCap.
rsync is currently maintained by Wayne Davison and is open-sourced at his GutHub page.
The rsync homepage is at samba.org.
Raspberry Pi Imager
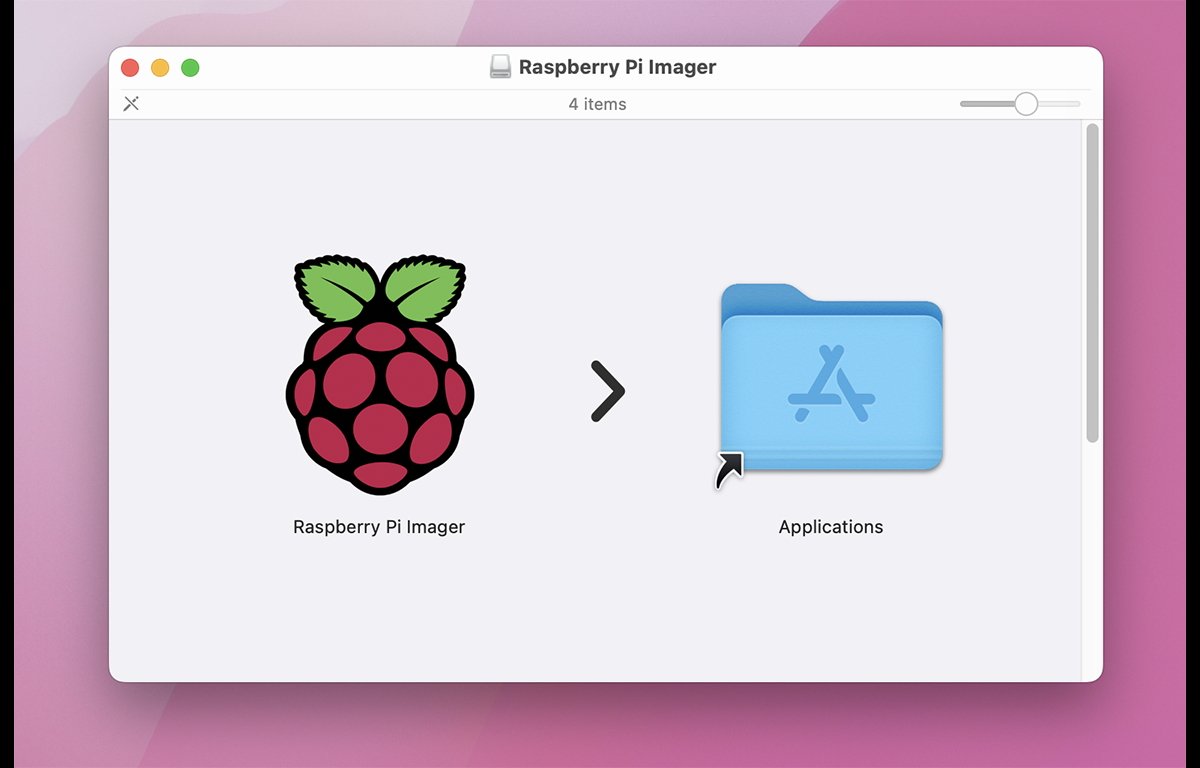
If you need to create a bootable SD card for your Raspberry Pi computer, the Raspberry Pi Foundation has created the Raspberry Pi Imager (free) available on their website.
Download the Mac version, mount the .dmg file by double-clicking it, and copy the Imager to your Mac's disk.
To select an OS to flash, click the Choose OS button, select either a built-in Raspberry Pi OS version, another Linux version, or any OS image file from the Use Custom item at the bottom of the list.
Once an OS is selected, click the Choose Storage button, and then select a physical storage device to flash the OS to (usually an SD card).
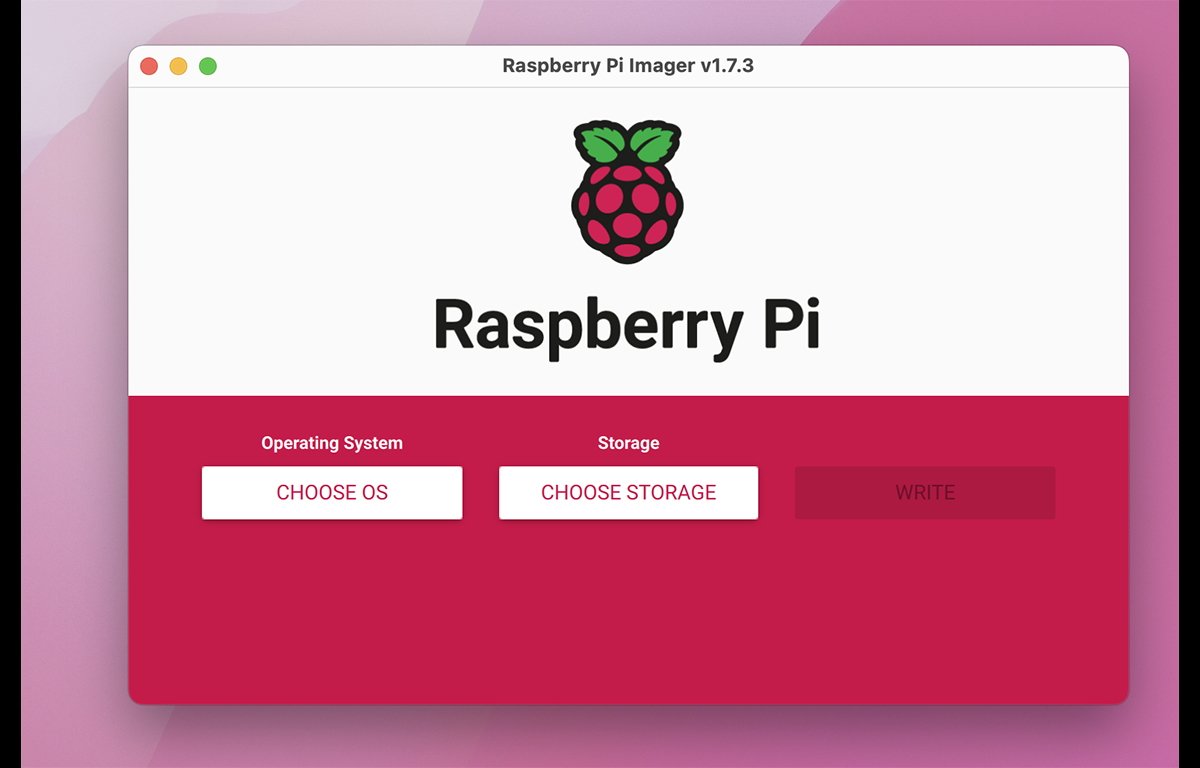
Once both source and destination are selected, click the Write button to flash the image onto the device. Be careful because as with balena Etcher, you're about to erase an entire physical storage device, including all volumes on it.
Once the OS is written to the SD card, you'll likely get a Finder notification that the disk is unreadable. Click the Eject button in the alert and remove the SD card from your Mac, insert it into your Raspberry Pi, and power it on.
There are plenty of options available to disk clone Mac storage devices or backup storage. Using cloning software can make the process easier and faster, and makes installing new drives or moving an OS to another Mac a lot less troublesome.


 Amber Neely
 Thomas Sibilly
 AppleInsider Staff
 William Gallagher
 Malcolm Owen
 Christine McKee