Getting started with Arduino on macOS Ventura
 Chip Loder
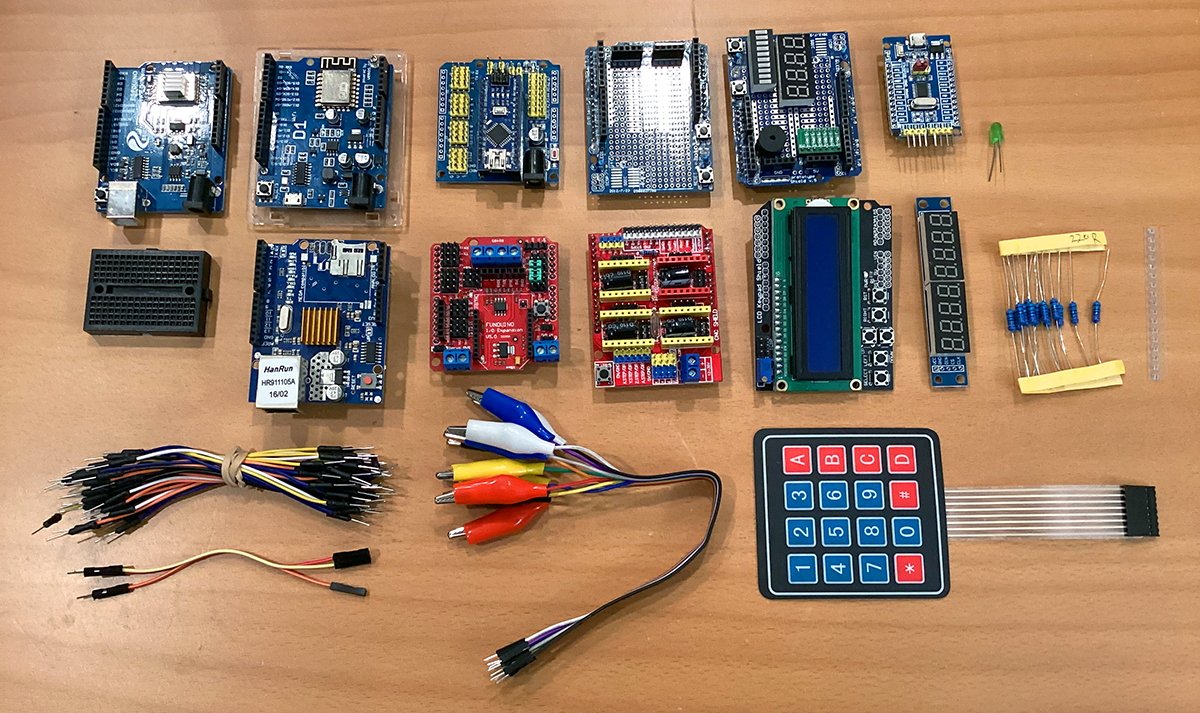
Arduino is an inexpensive, small electronics platform for makers. Here's how to get started with it on macOS.
When the small electronics platform Arduino exploded onto the electronics scene in 2005, it sent shockwaves through the maker community.
The brainchild of Massimo Banzi and his team of developers at the Interaction Design Institute Ivrea, Italy, the small microcontroller platform was designed to provide students and hobbyist electronics engineers with a small, simple, low-cost platform and tools to enable the development of electronics.
The platform underwent several iterations before becoming standardized. The design of the platform is open source, so anyone can make Arduino devices and components based on a single, open reference design.
Programming for Arduino is based on the Arduino Programming Language (APL), which itself is based on Processing, but APL is very similar to C.
The name Arduino itself is derived from the name of a bar in Italy where the development group met, which in turn derived its name from a king of Italy from the Middle Ages.
Similar to the older AVR platform, Arduino offers several advantages, namely lower cost, ubiquity, and more accessible component supply.
Since Arduino's introduction, an entire industry and ecosystem have sprung up around the platform, which now has an estimated thirty million users worldwide.
Anyone can get started with Arduino for around $25, assuming one has access to a computer. Most programming is done via Arduino's downloadable IDE.
However, the official site now has an online IDE (Integrated Development Environment), which can be used to program the devices on the web.
In 2017 Arduino.cc announced a partnership with ARM Holdings of the UK.
For a full introduction to Arduino, see What is Arduino on the official website.
Getting Started
There are now many models of Arduino boards available at varying price points. By far the most common is the Arduino Uno R3, which consists of a single small board with power and USB connections, input/output (I/O) connectors for both analog and digital sensors, and minimal onboard LEDs for power, and data communications.
The full line of boards includes Uno, Nano, Pro Micro, Pro Mini, Leonardo, Due, Mega, Yun, Yun Mini, Gemma, and others. Arduino.cc also recently introduced a newer, higher-end line of Arduinos (MKR Family), which include such features as LoRa networking, NodeMCU, NodeRed, and other features.
Some Arduino boards, such as Gemma, have been retired and are no longer supported but can still be found online at various sellers' sites. There is also a lower-power Nicla family designed for embedded systems and battery-only power.
Most of the boards are based on Atmel Microcontrollers, most notably the Atmel ATmega328, and others, but the Due is based on a 32-bit ARM processor, and the Yun runs a full version of the Linux operating system and has onboard WiFi. Yun is now retired and replaced by the much smaller Yun Mini and the MKR Family.
The Mega is a much larger board. Like the original Yun, it offers over 50 connections via its I/O headers.
There are also extremely small versions of Arduino such as Seeed Studio XIAO SAMD21 ($11) and Beetle ($11).
The basic idea behind Arduino is to plug one or more small electronic sensors into the board's analog or digital connection pins, usually labeled on the front of the board next to the pin headers. Communications to and from sensors are programmed and uploaded onto the Arduino using the IDE or web editor.
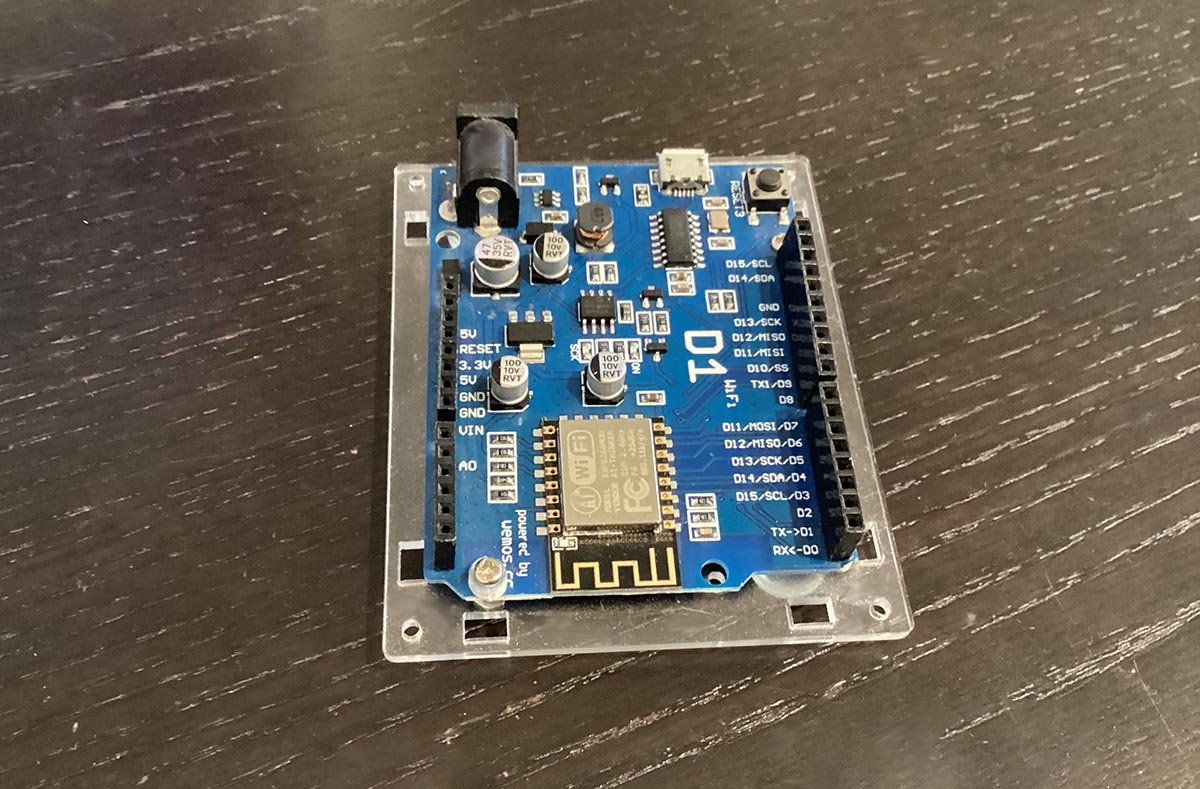
This photo shows a UNO R3 clone from WeMos, which includes WiFi, power, and analog pins on the left, digital and transmit/receive LED pins on the right:
Leonardo, similar to UNO is shown here:
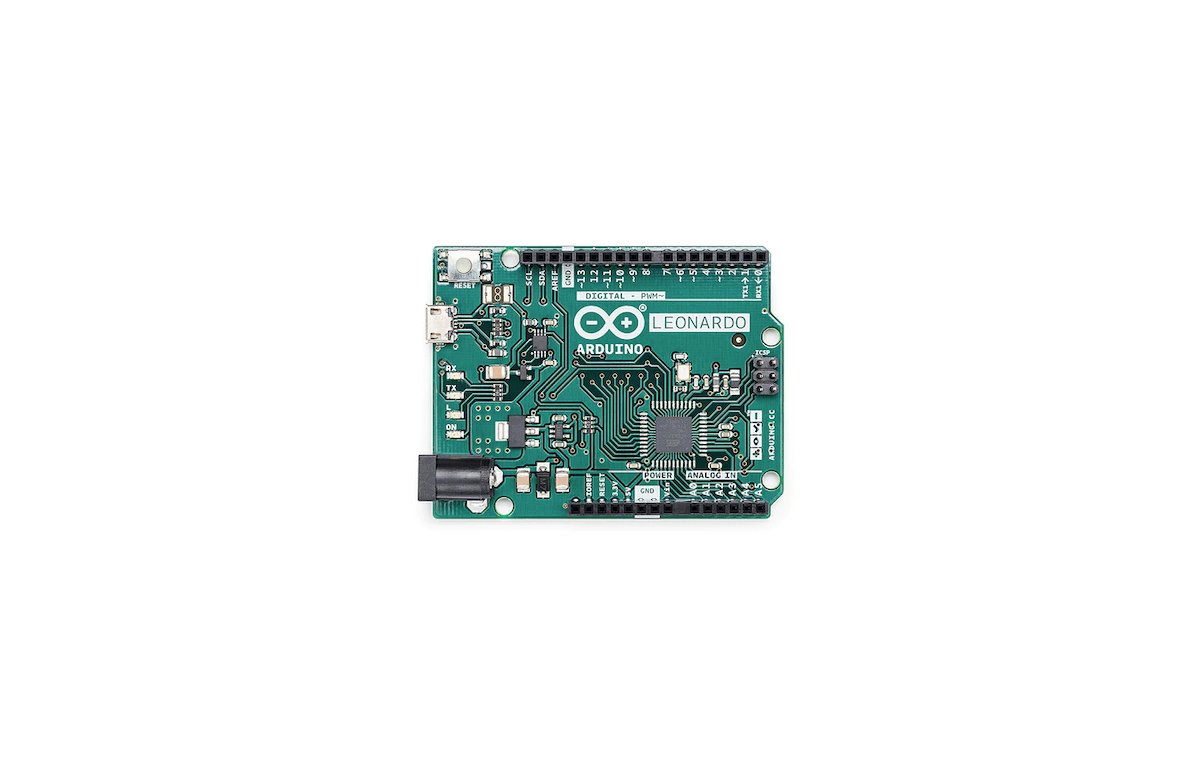
Most boards have 3.3V/5V power, ground (GND), three to 11 analog plus ten digital I/O, power, transmit (TX), and receive (RX) pins which mirror the onboard LEDs. Some boards have a single LED shared for TX/RX.
The Arduino board is connected to a computer via a USB cable or WiFi. Most boards have either a USB Type-B connector (like most USB printers have, or Micro-B USB), and some third-party boards also support Bluetooth.
Arduino.cc is also selling a much smaller UNO Mini Limited Edition ($55). It's about 1/2 the size of the UNO R3 and has a USB-C connector.
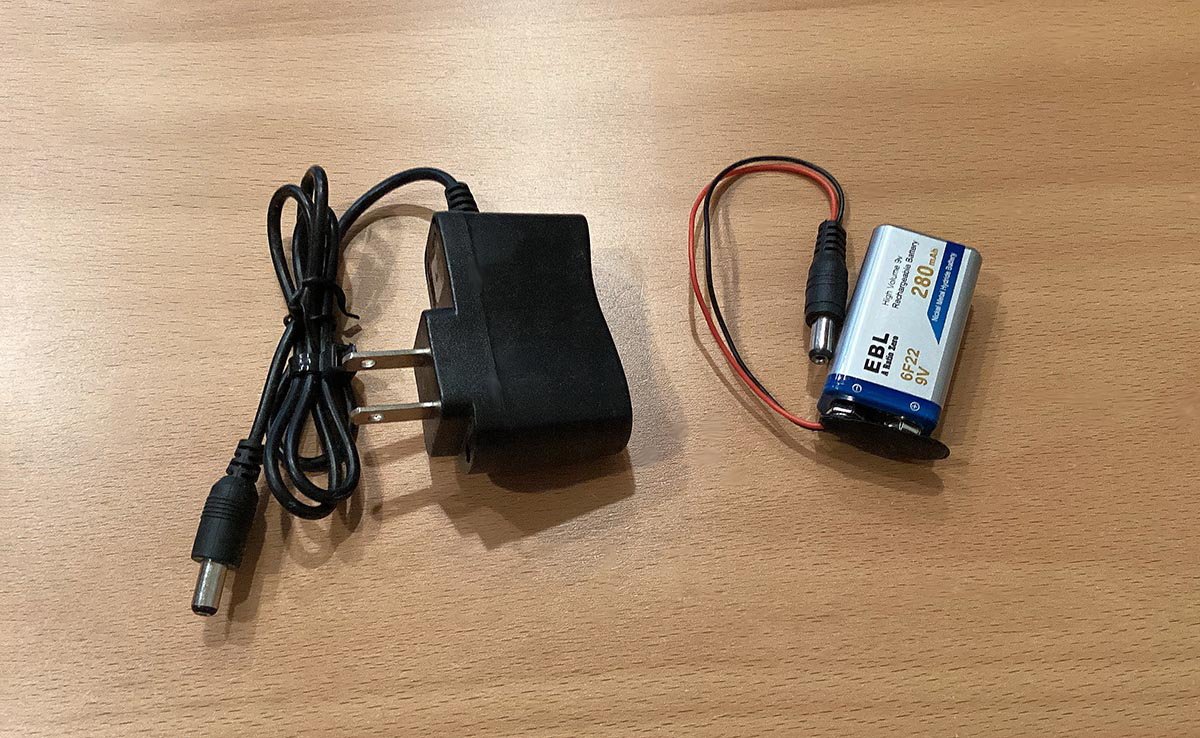
Most Arduino boards draw their power from the USB connection, but most also include a DC power jack for additional power. You can plug in a 5V USB DC power adapter or power the board off a standard 9V battery, assuming you have the correct cable:
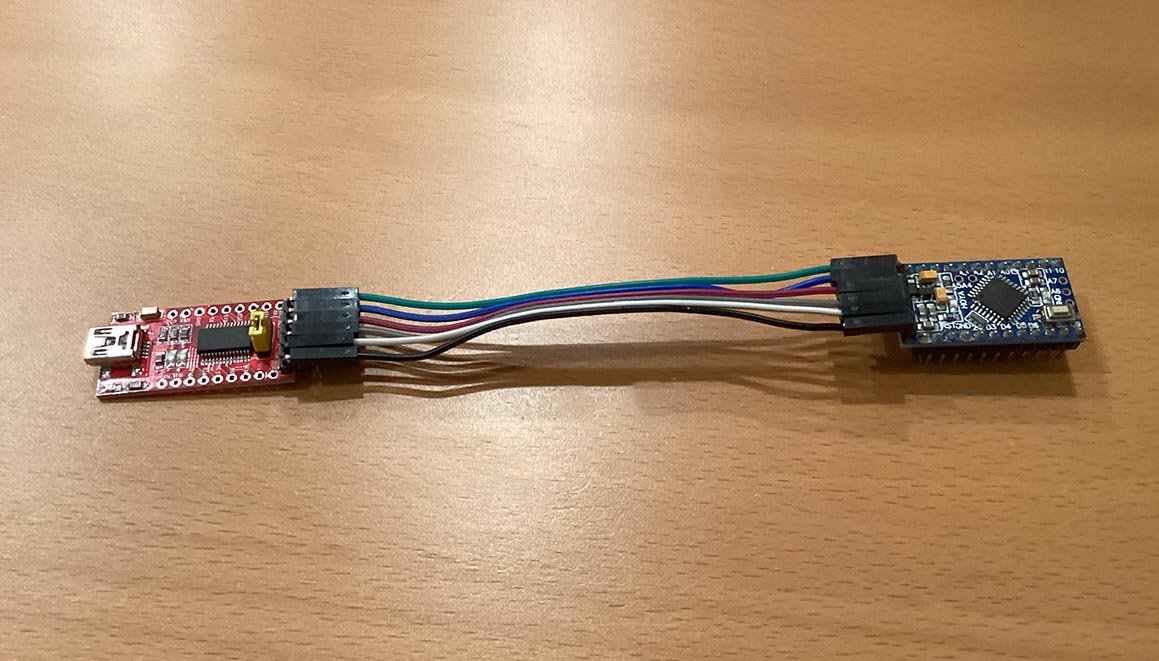
Some models, such as Pro Micro and Pro Mini, don't have USB connections but instead a set of five or six header pins. They must be programmed using a special serial adapter cable (usually based on UART).
Small UART adapter boards with a USB port are available for a few dollars online:
Many third-party board vendors have appeared, and a wide range of board variants are now available with various features.
Some sensors have only direct sensor pins, while others also include pins for microprocessor bus standards such as I2C, I3C, SPI, UART, and others. External bus connections allow more complicated systems design and more advanced use cases, such as building small Arduino-based robots.
Device sensors include, but aren't limited to:
Ecosystem and Companies
Dozens of Arduino-specific companies have sprung up offering additional Arduino-based products, tutorials, and books. Chief among them are Adafruit, Sparkfun, DFRobot, Funduino, Pixel Electric, Keystudio, SeedStudio, Seeduino, Hacktronics and others.
Some of the vendors, such as Adafruit, have created boards, such as Trinket and Flora, which, while not fully Arduino, are Arduino-compatible and can be programmed using the Arduino IDE or web editor.
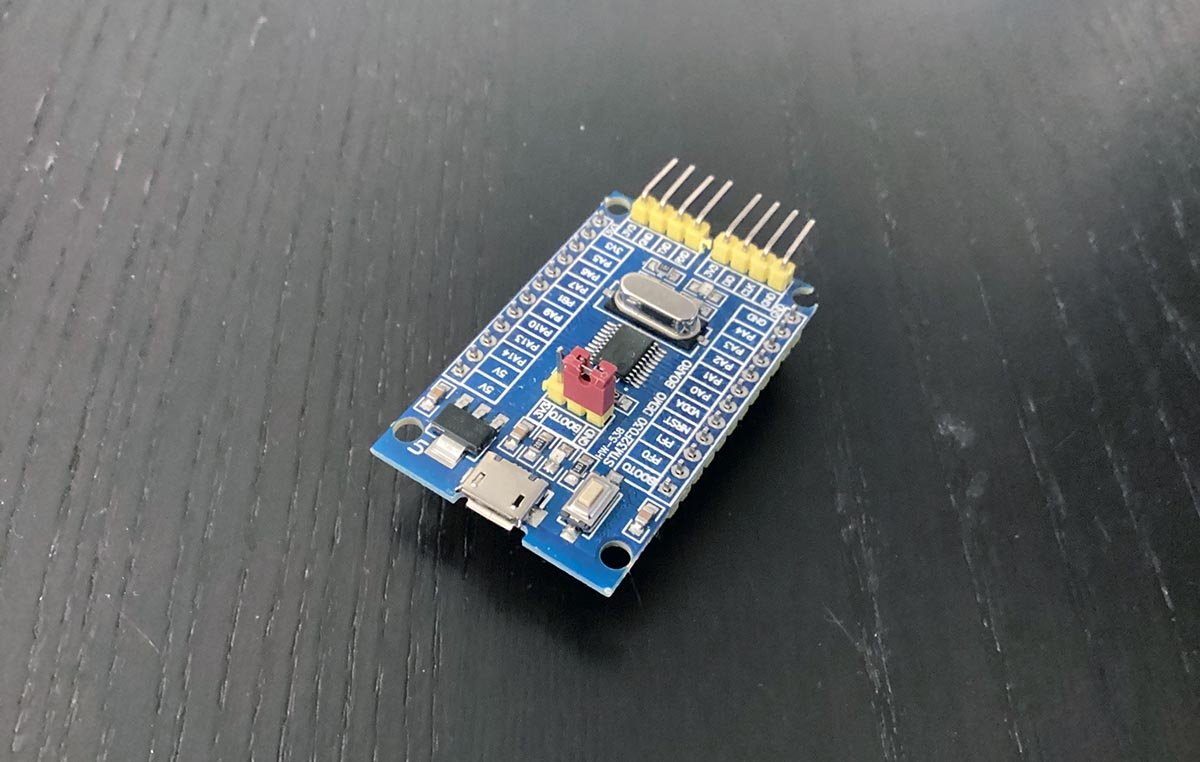
Similarly, ST Microelectronics has developed their own Arduino-like standard called STM32, which is a 32-bit standard based on ARM Cortex-M.
ST offers a tiny evaluation STM32 board at low cost. STM32 is mostly used for embedded circuit design and development, most notably for industrial robots:
ST also offers a line of STM32 learning boards called NUCLEO priced starting at around $30.
Several third-party companies offer small STM32 learning boards for under $10.
Other companies such as Ideaspark have taken Arduino one step further by including tiny integrated OLED displays directly on their boards, making displaying information being processed on an Arduino easy.
Other board vendors have included the ESP32 or ESP8266 networking modules directly on their boards, making them wireless.
Specialized Arduino camera companies include Charmed Labs and Arducam, among others. Most Arduino cameras use the SPI bus for data transfer.
Also check out the Seeed Arduino Sensor Kit ($36) available at Kiwi Electronics.
Shields
One of Arduino's biggest strengths is the ability to attach sensor shields to a board. Most shields fit the UNO, but some enterprising companies such as Keystudio make shields for larger boards such as the Mega.
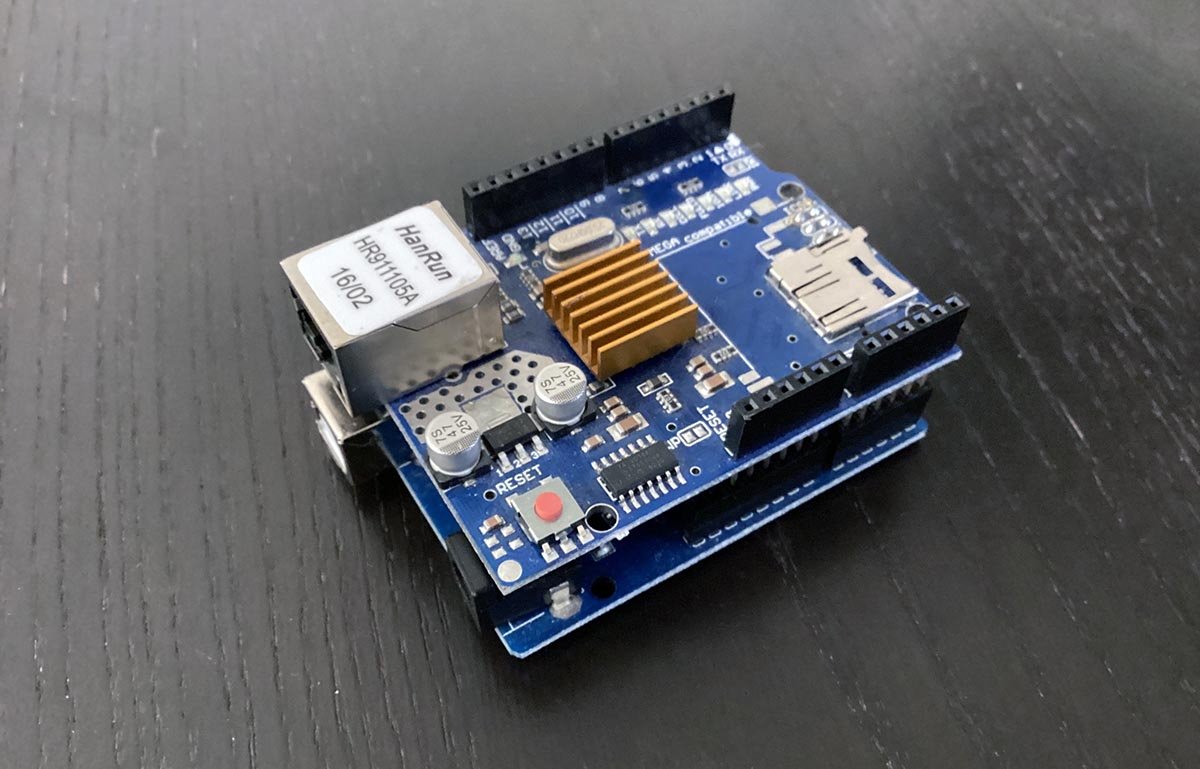
A shield is simply a second printed circuit board (PCB) containing one or more sensors or devices, with rows of pins on the bottom which plug directly into an Arduino's I/O pins. By snapping a shield on top of an Arduino, you instantly extend its functionality without wires or soldering.
A sample Ethernet shield is shown below:
Some shields, such as those for the Nano, are reverse shields. Since the Nano has no I/O or power headers, but only connection pins on the bottom, some companies have created Nano breakout boards which the Nano snaps into on the top.
The Nano's pins connect to the shield (instead of vice versa), which has a power port, a reset switch, and a host of male and female pins for jumper wire connections - effectively moving connections to the shield. This makes the Nano much easier to deal with:

Since the Nano does have a USB port, you can still program it directly and test your circuits, but once your design is complete, you can unplug the Nano from its shield and connect the sensors to its pins directly. You can easily fit a Nano inside an RC airplane, vehicle, or model rocket.
A wide array of shields are available, but the most common and popular ones are:
Hobby Components in the UK sells a multifunction learning shield (4.58) for the Uno and Leonardo, which includes a 4-digit LED display, a buzzer, three input switches, a reset switch, a 5V/GND header, a variable resistor for analog pin 0, and a header for an add-on Bluetooth voice recognition module (APC220).
Cohesive Computing has an online guide to multifunction shields.
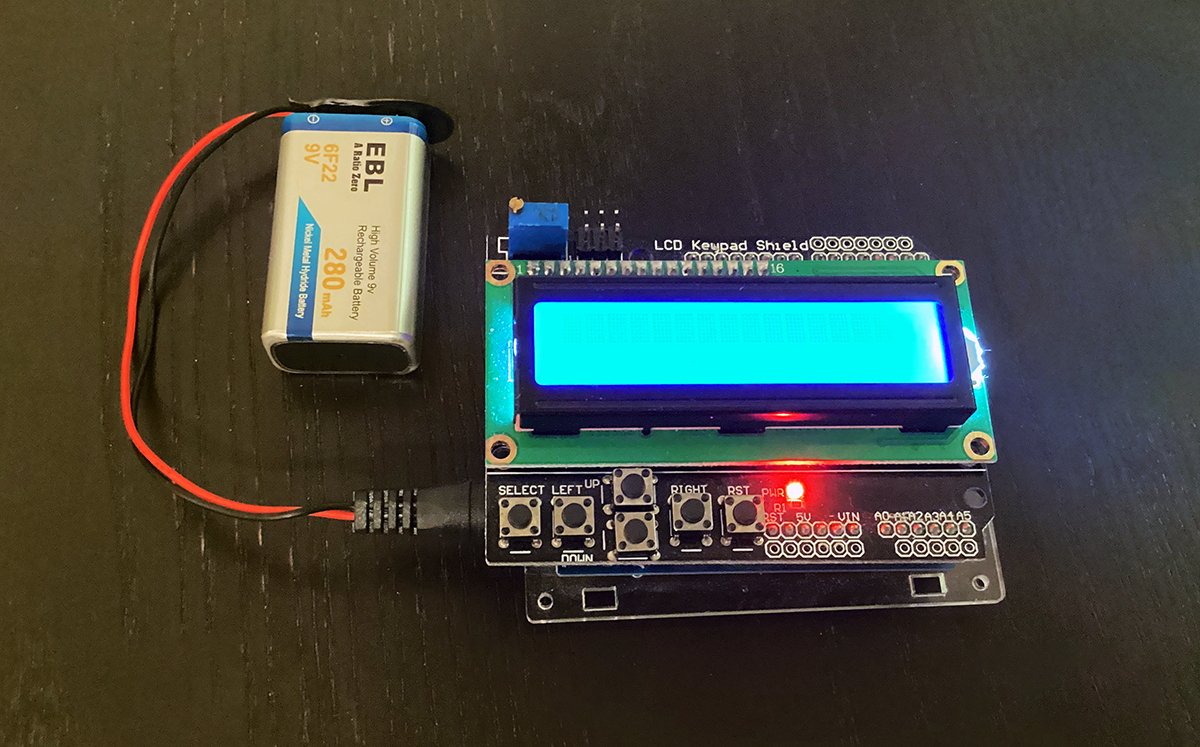
Here is an LCD shield on a UNO powered by a 9V battery:
Breadboards
If you want to create and test your custom circuits with Arduino, you're better off using breadboards instead of shields. A breadboard is simply a small plastic board containing rows of circuit connection holes that have metal rails underneath for connections.
You plug components into a breadboard, then connect it to your Arduino with jumper wires to the 3.3V/5V and GND I/O connectors. Most breadboards have two rows of power on the long sides: one for power that is usually marked "+" and is red, and one for ground that is generally labeled "-" and is blue.
You can plug the power connections into the breadboard at any point along the power rails. Additional jumper wires are then used to connect to and from power/ground to components in the center of the board to make a complete circuit.
Breadboards come in various sizes, but the most common are short and long white plastic breadboards of 5"-10". Additional huge breadboards with power terminals are available, as are tiny ones without dedicated power rails.
Some specialized breadboards have spaces to secure your Arduino boards with screws or standoffs.
Some companies make small USB/power shields that attach directly to breadboards and provide direct power to both side rows of power rails, a USB port, a DC power port, an on/off switch, a power LED, and jumpers for 3.3V/5V selection. Some, like the one shown below, provide two sets of power connections with jumpers - allowing you to connect 3.3V or 5V to the power rails:
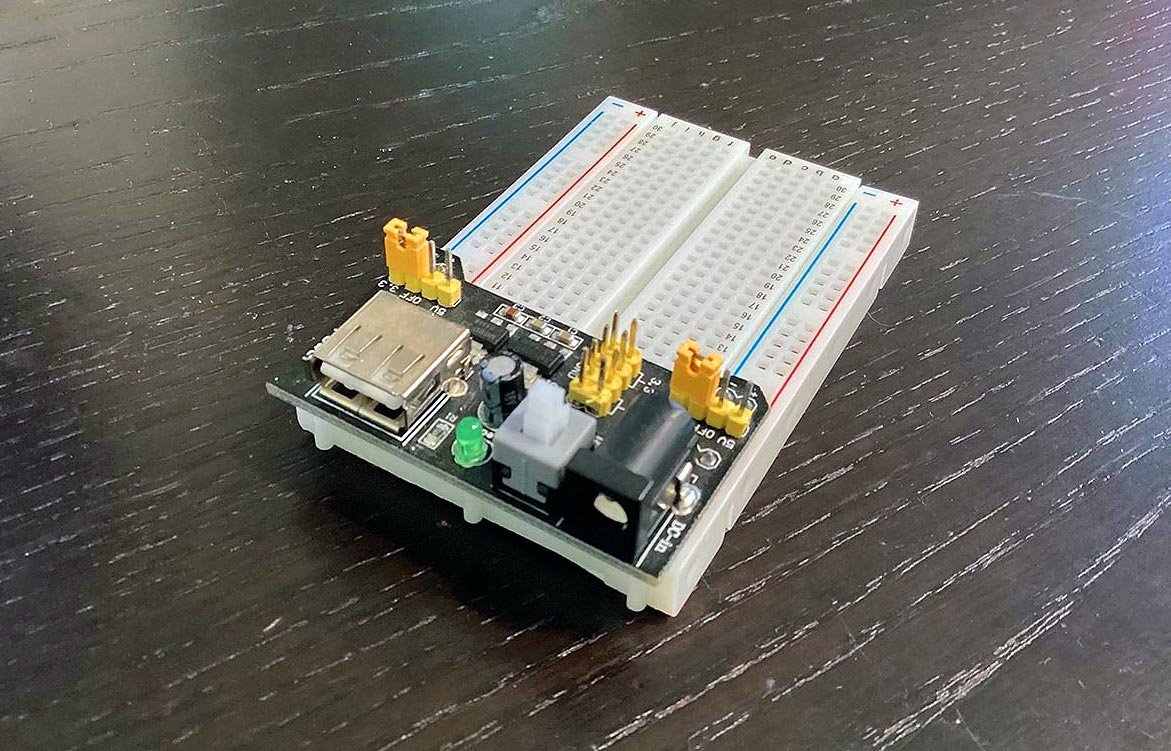
All you need for power with such boards is a second USB port, a 5V DC power adapter, or a 9V battery — eliminating the need to connect jumper wires to your Arduino for power.
Here is a view of a variety of Arduino hardware:
From top left, by row: ESPDuino UNO clone from DOIT.am, WeMos D1 WiFi UNO clone, Nano on reverse shield, prototyping shield, prototyping shield with components, STM32 eval board, LED, mini breadboard, Ethernet shield, Funduino breakout shield, CNC motor driver shield, LCD shield, 8-digit LED readout, 220 Ohm resistors, 1K SMD resistors, jumper wires, test clips, touch keypad.
IoT
The term Internet of Things has come to describe any small connected microcontroller-based device which can sense something, connect to the internet, and control or report back from the sensor(s).
While IoT encompasses a wide range of systems, including embedded systems and not just Arduino, when makers hear the term IoT, they have come to think of Arduino.
Installing software
To install the Arduino IDE on your Mac, go to arduino.cc, click on "Software", then under the Download Options section, click the link for the Mac version for either Intel or Apple Silicon.
Note that unless you want to play around with the current development version, you don't want the link under the section "Nightly Builds." Nightly builds may be unstable and contain bugs.
The downloads page also links to the Arduino online Web Editor, which allows you to save your programs to Arduino's cloud.
Connecting Your Arduino
To connect your Arduino to your Mac, find an appropriate USB cable. Depending on the type of USB port on your Arduino, this will likely be USB Type A to USB Type B, Type A to Micro-B USB, USB C to Type B, or USB C to Micro-B.
Arduino Nanos usually use an 8-pin Mini-B plug, which has a slightly larger connector than Micro-B. Note that there are two variants of Mini USB - the older 8-pin type and a slightly larger standard Mini-B type.
For most Nanos, you want the older 8-pin type. Surprisingly, the standard plug won't fit most Nanos.
You should see its onboard power LED light when you plug your Arduino into your Mac. If your Arduino has a built-in WiFi or Bluetooth chip, such as ESP8266, it may have a separate LED that starts blinking as soon as you plug in the Arduino.
Some Arduinos have two onboard power LEDs. Don't confuse these with the TX/RX LEDs, which flash only during data transfer.
Next, open the Arduino IDE you downloaded by double-clicking it on the Mac desktop:
A single Arduino window will open with a small amount of template code in it.
If any libraries need updating, a message will appear in the lower right corner of the IDE editor window:
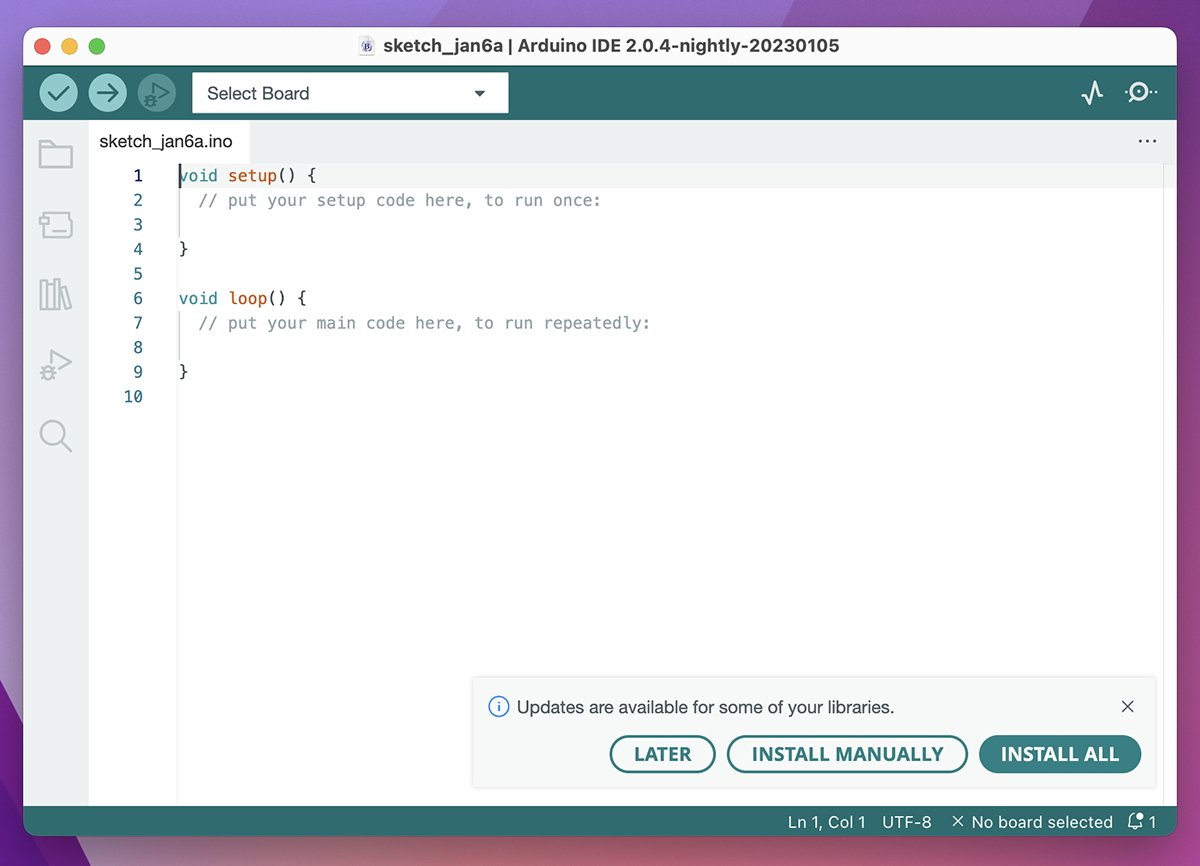
Click "Install All" to bring all the installed libraries up to date (we'll get to libraries in a minute). This message will appear from time to time when you run the IDE and libraries need updating.
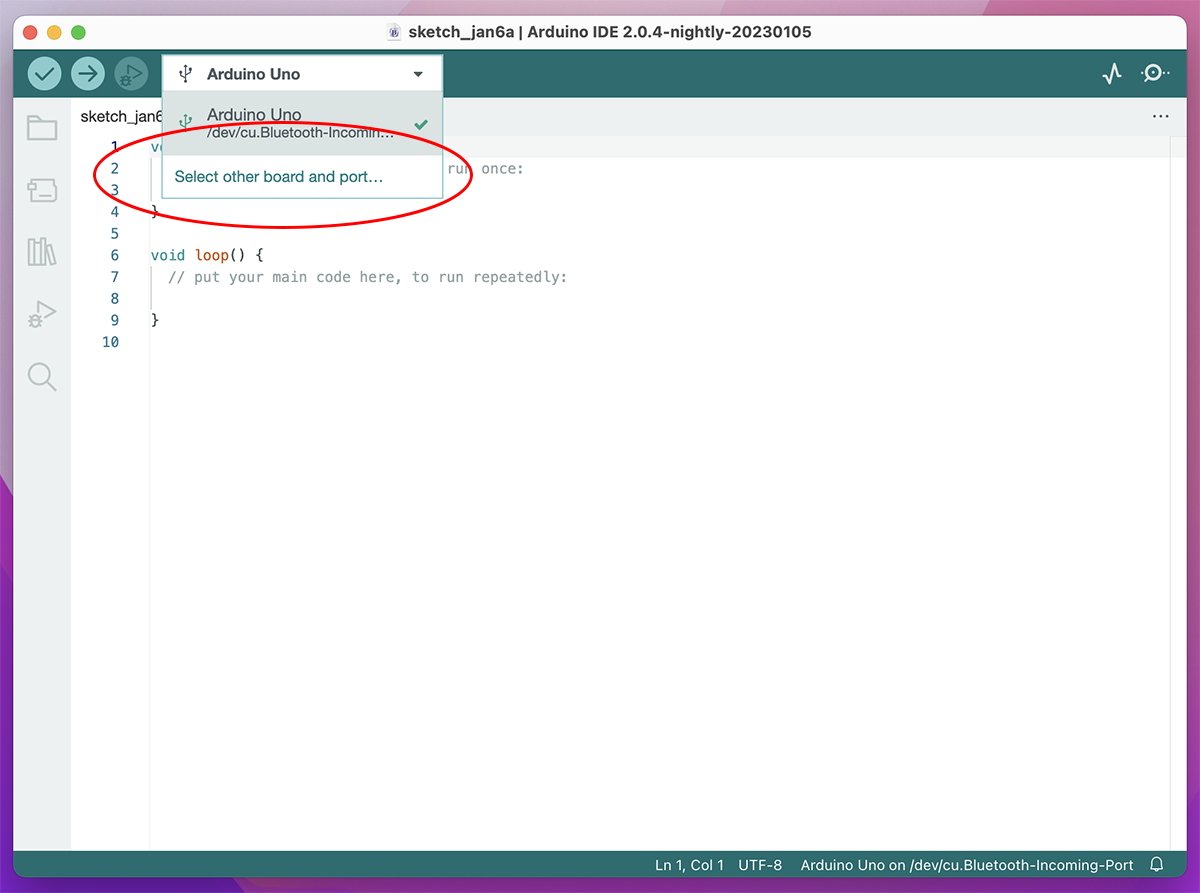
The first time you run the IDE, or if you have more than one Arduino connected, you have to tell the IDE which Arduino you want to use. The IDE knows about all Arduino types and all the possible ports on your Mac to which it can connect — but it doesn't initially know which one you want to use or where it is connected.
If your board isn't shown in the window's upper left-hand corner popup menu when you open the IDE, click the menu and select it. If it's not listed in the menu, click "Select other board and port" and then select it from the list provided:
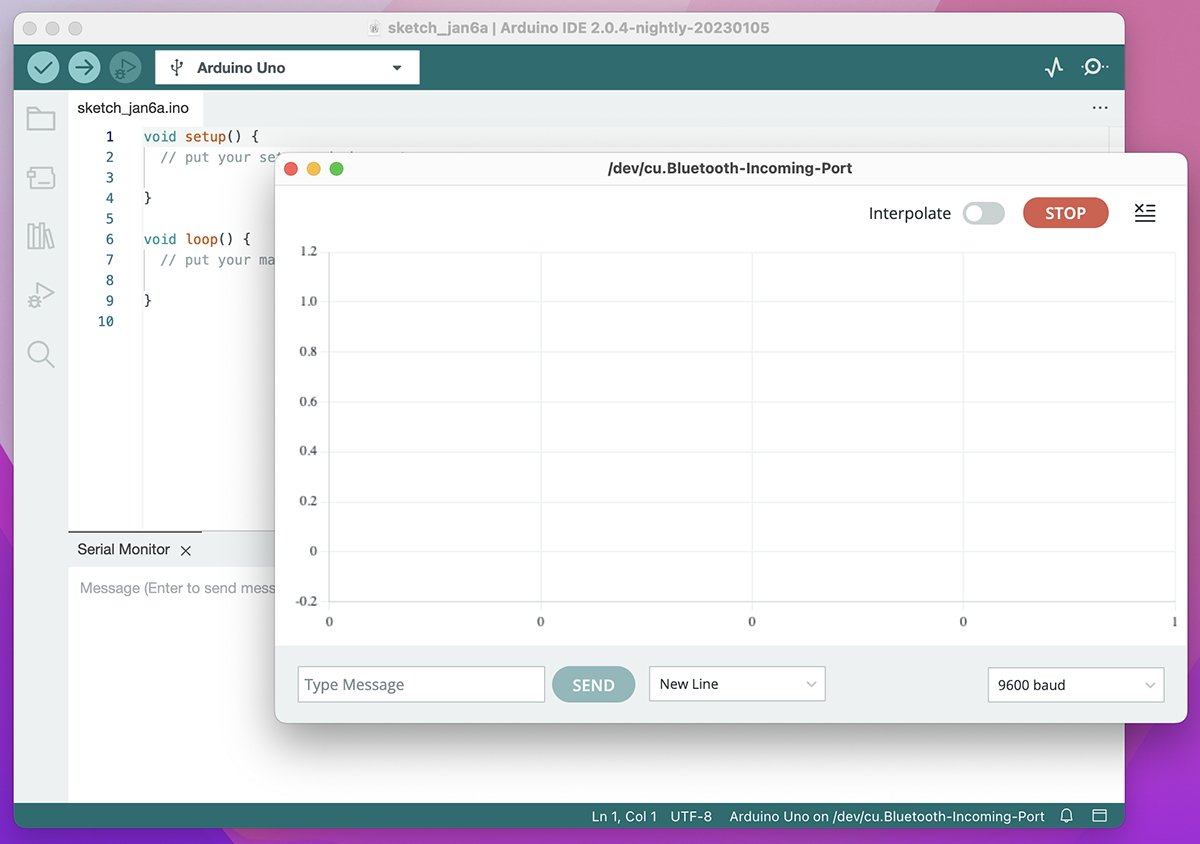
Typical ports are USB, WiFi, Bluetooth, or Serial. There is also a serial monitor window you can open to monitor communications between your Mac and your Arduino:
If your board has multiple network interfaces, they will be listed separately in the popup menu. In the example below, we're using the ESPDuino clone.
Even though the Bluetooth interface is listed first, the UNO is connected via a USB cable, which is listed second as "/dev/cu.usbserial-143110". Since we don't want to use the Bluetooth interface, we should select the USB connection (cu.usbserial-143110).
Note that in the "Select Other Board and Port" window, you must select a board type first. Since you know the board type already, this narrows down the list of possible connection ports once you select the board type.
If you enable the "Show all ports" checkbox, all possible port connections will be shown for the selected board:
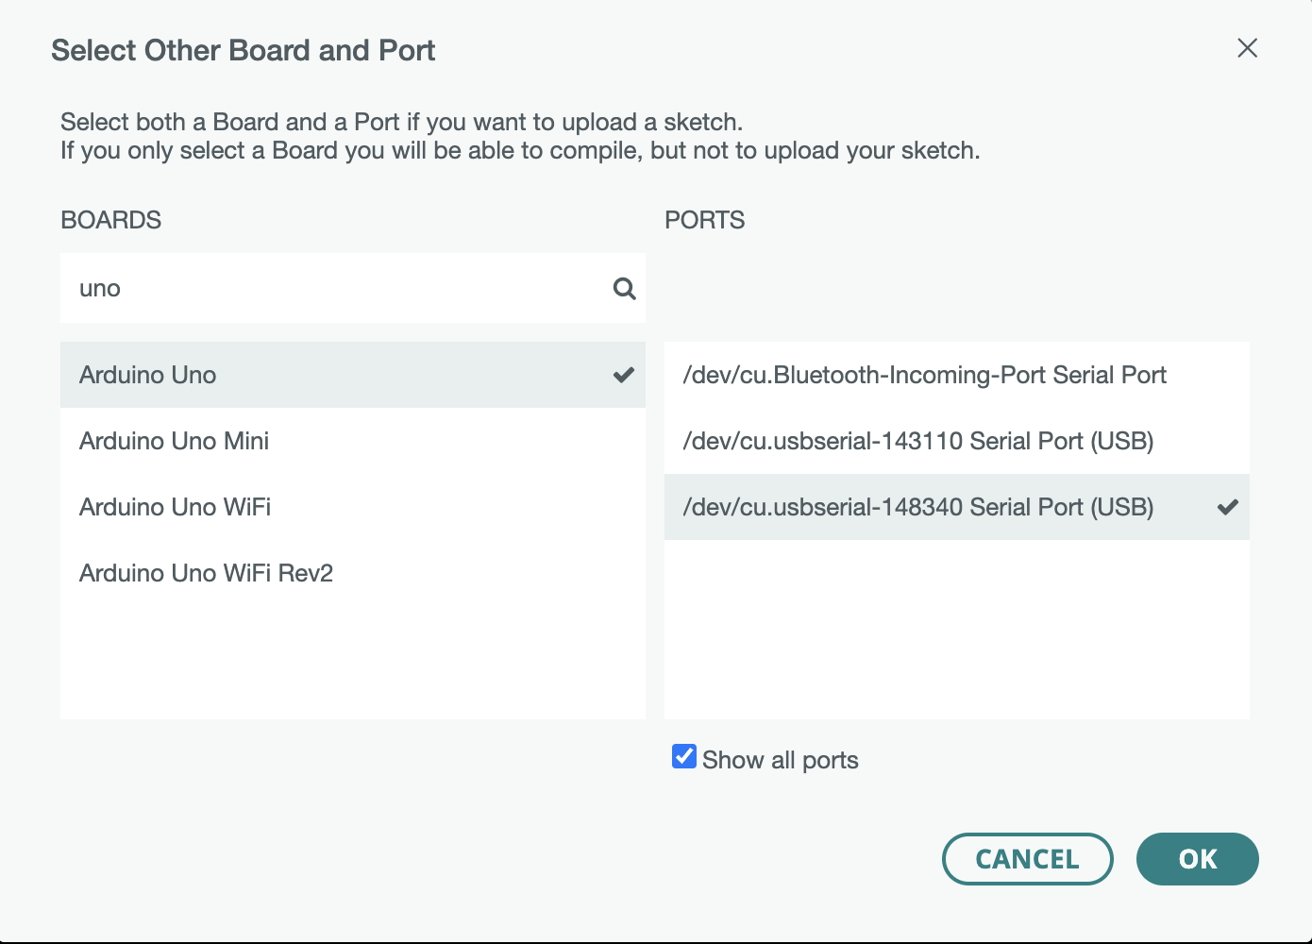
In the above example, there are two UNOs connected. The first two ports are on the ESPDuino, which has both Bluetooth and USB, and the third port is the USB port on a generic UNO clone which only has USB. So be careful - it's easy to get confused.
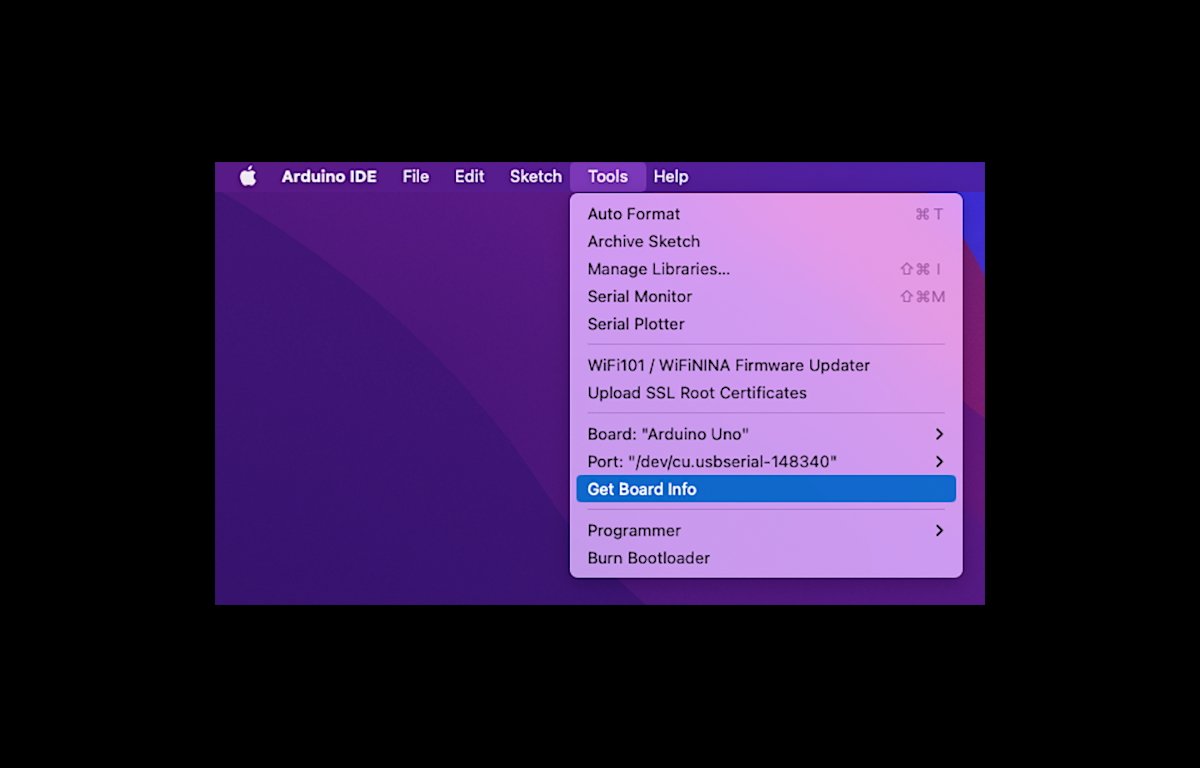
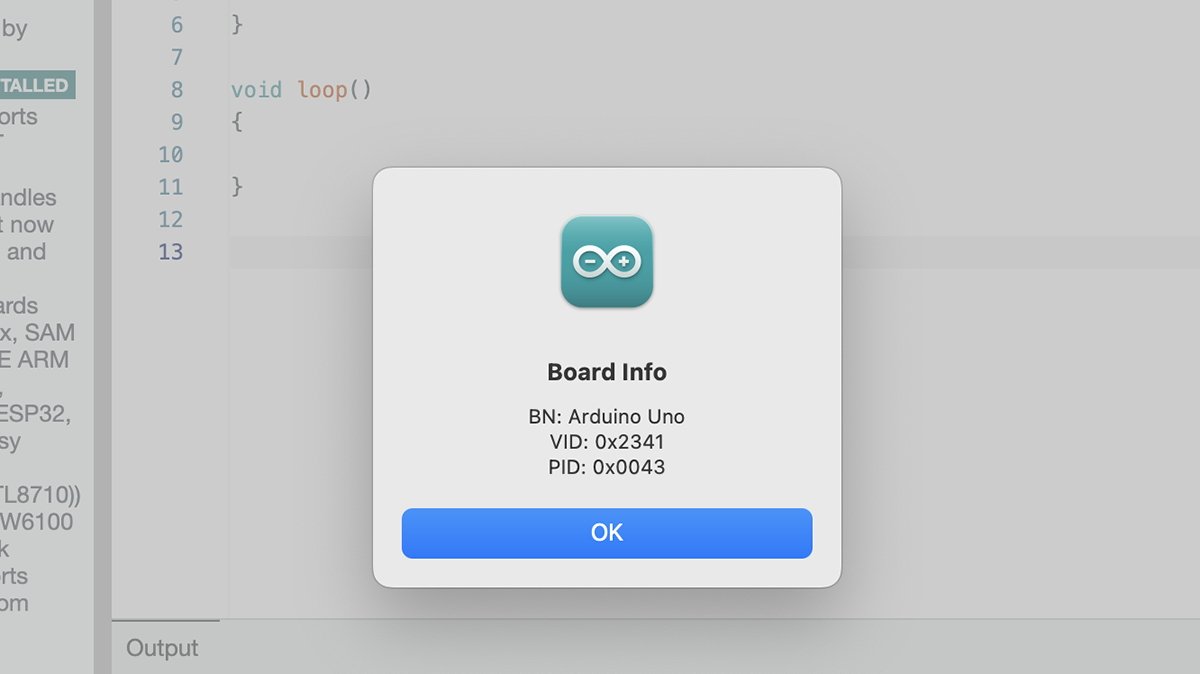
You can also select your board and port from the Tools menu under Tools->Board and Tools->Port. If you select Get Board Info just below, you'll be shown the board name, its unique USB vendor, and product IDs. (Every USB device maker has to register a USB vendor and product ID with USB.org):
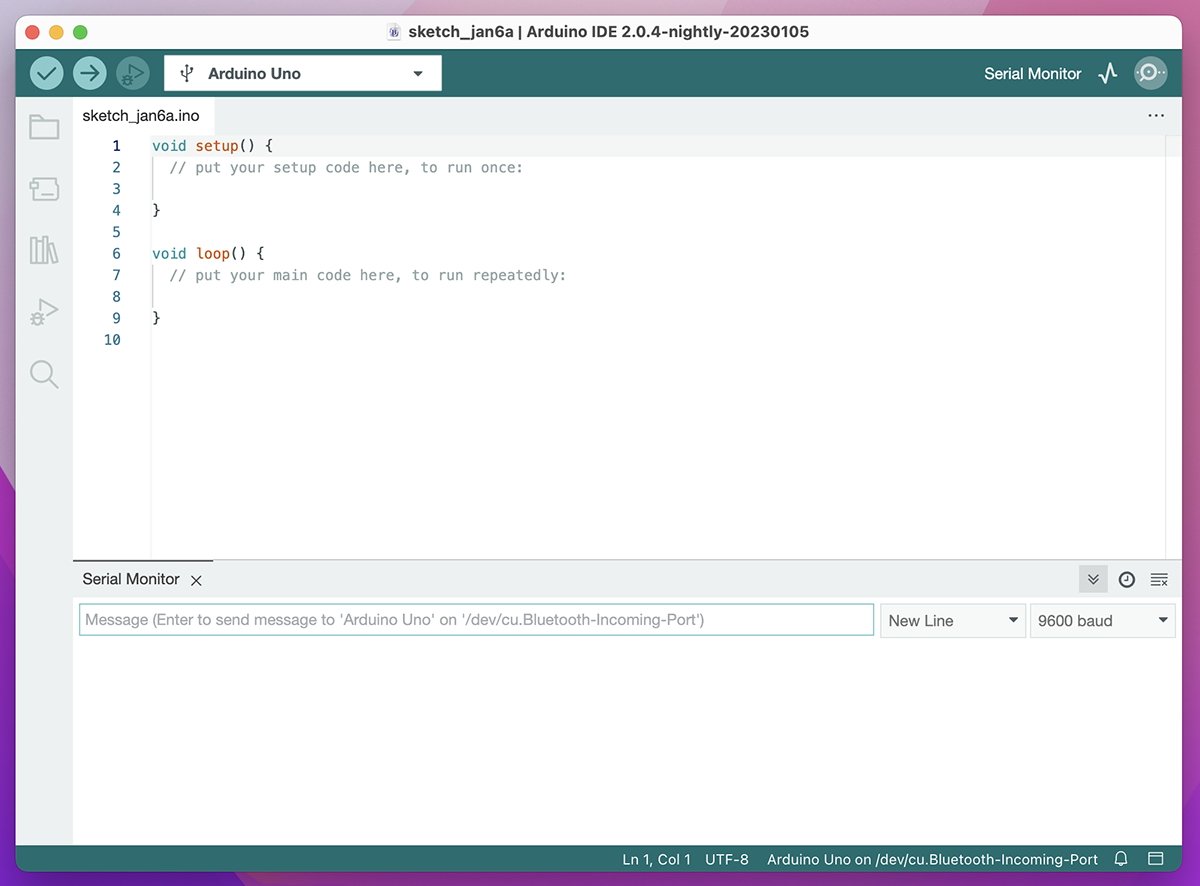
Now that the IDE is connected to your Arduino, let's take a quick tour around the IDE editor window:
Along the top of the window in the green bar from left to right are:
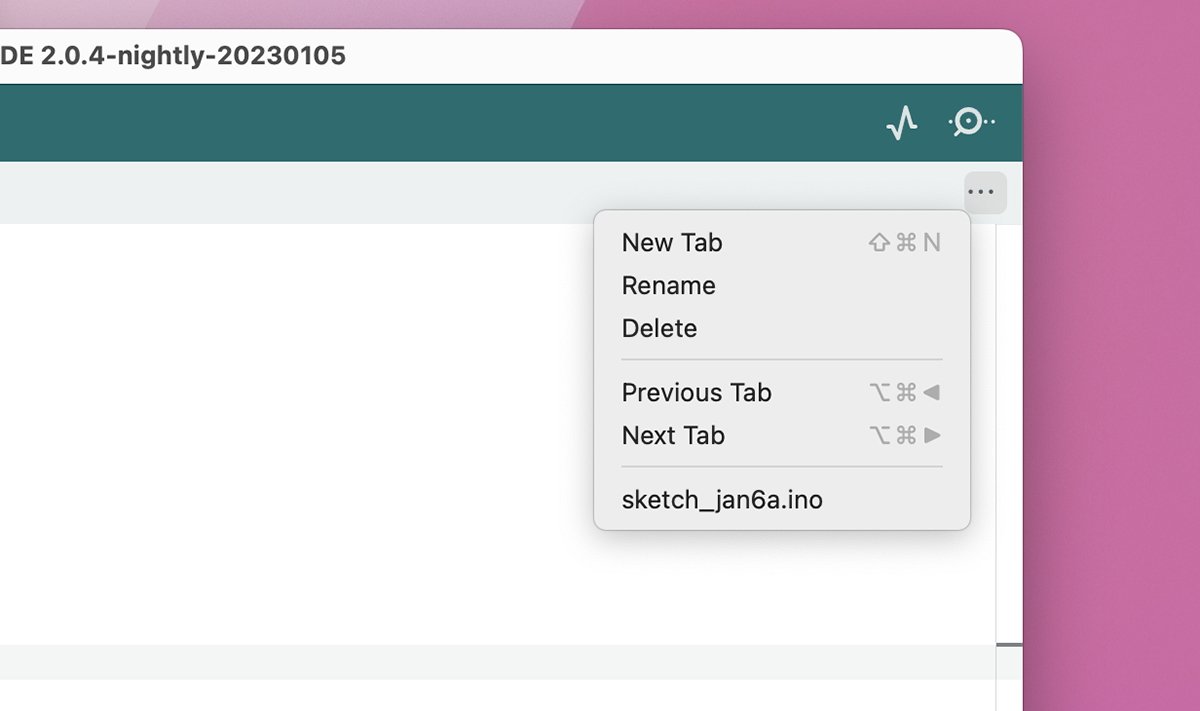
Just below the USB serial monitor pane button is the Editor tab button:
Along the lefthand side of the editor window are five buttons, which are, from top to bottom:
Once you get your board set up, the Arduino IDE is a breeze to use.
The Library Manager pane in sketch windows lets you download official and third-party libraries and update installed ones. Libraries are code bundles that add a specific functionality or device support to the IDE.
For example, if you use a particular brand of non-generic sensor, you'll need to download its library and install it first.
You can view different categories of libraries by clicking the "Topic" popup menu at the top of the Library Manager window.
Books
There are a few introductory books worth reading for learning Arduino:
There are also a number of good cheatsheets to keep handy with summaries of Arduino, including ones at MAKE:, and SparkFun.
The Arduino world is vast with virtually endless possibilities. Using Arduino and sensors, you can build a prototype of just about any system you like.
In future articles, we'll explore programming Arduino and more complex use such as home automation, cameras, weather monitoring, motor control, and various bus communications.

 Amber Neely
 Thomas Sibilly
 AppleInsider Staff
 William Gallagher
 Malcolm Owen
 Christine McKee