The ability to password-protect items in Notes is one of the key features of iOS 9.3. It may not be immediately obvious how to go about doing this, but ultimately, the process is a simple one.
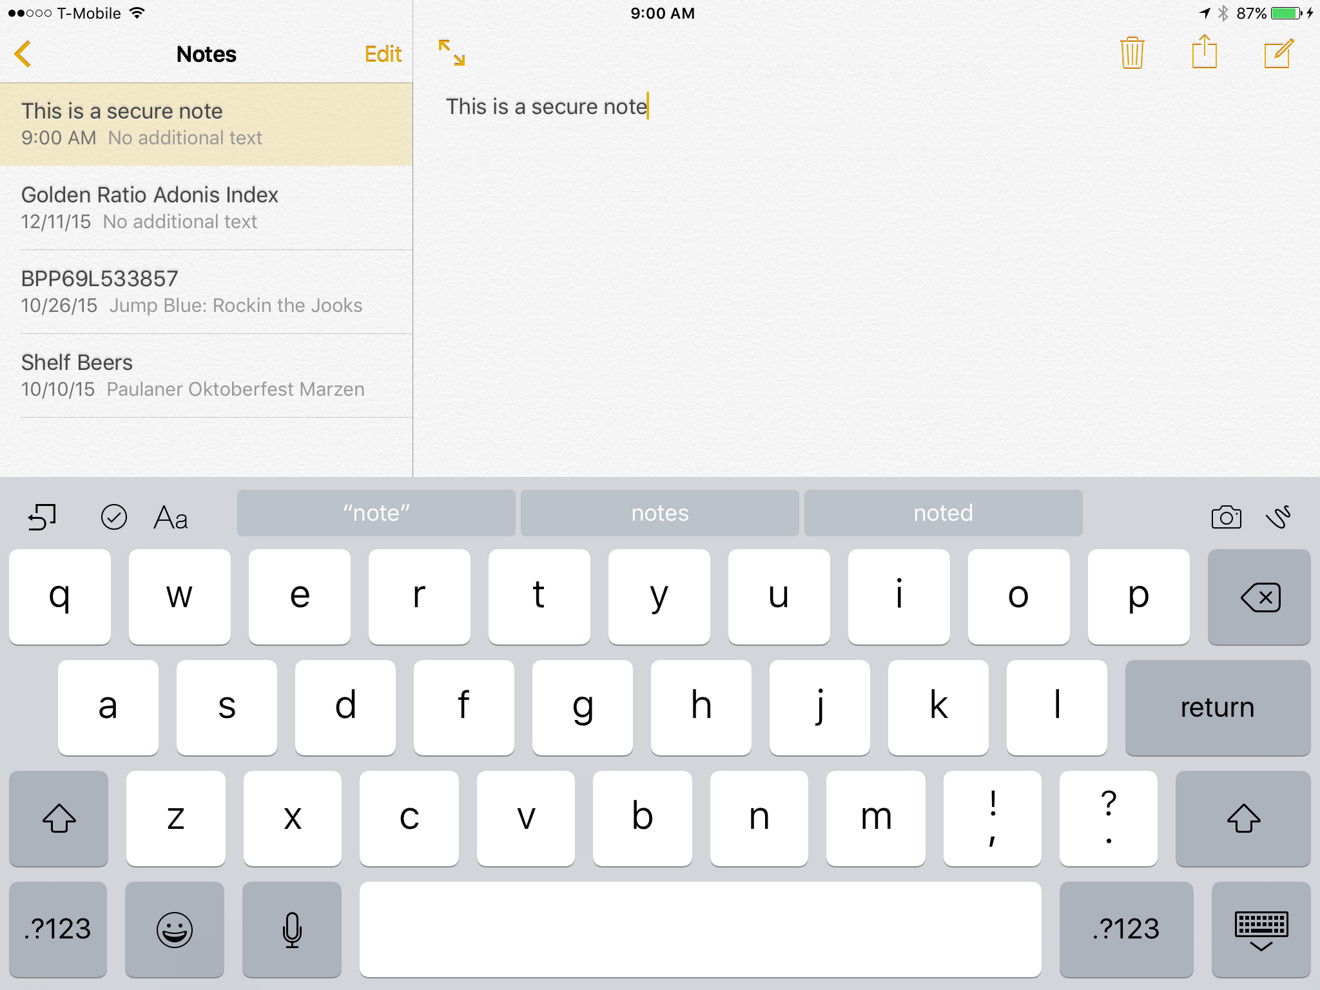
The first step is simply to create or select a regular, unsecured note in the app, since notes can only be secured after the fact.
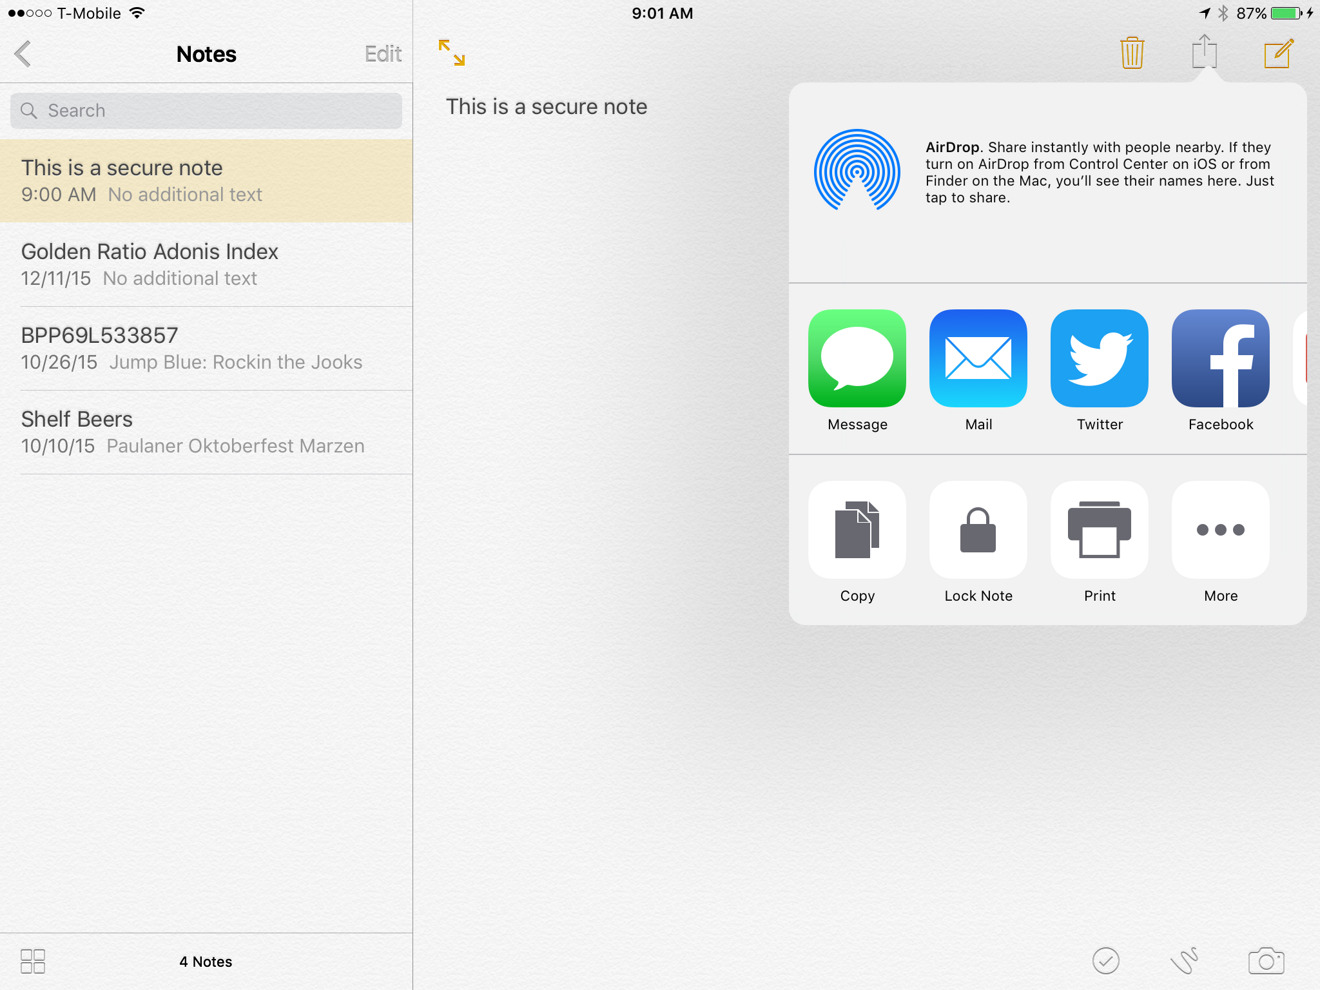
Once this is done, tap the Share icon in the upper-right corner of the screen — it should be in roughly the same place regardless of whether you're using an iPhone or an iPad. This is where the "Lock Note" option is hidden, alongside other choices like Copy and Print.
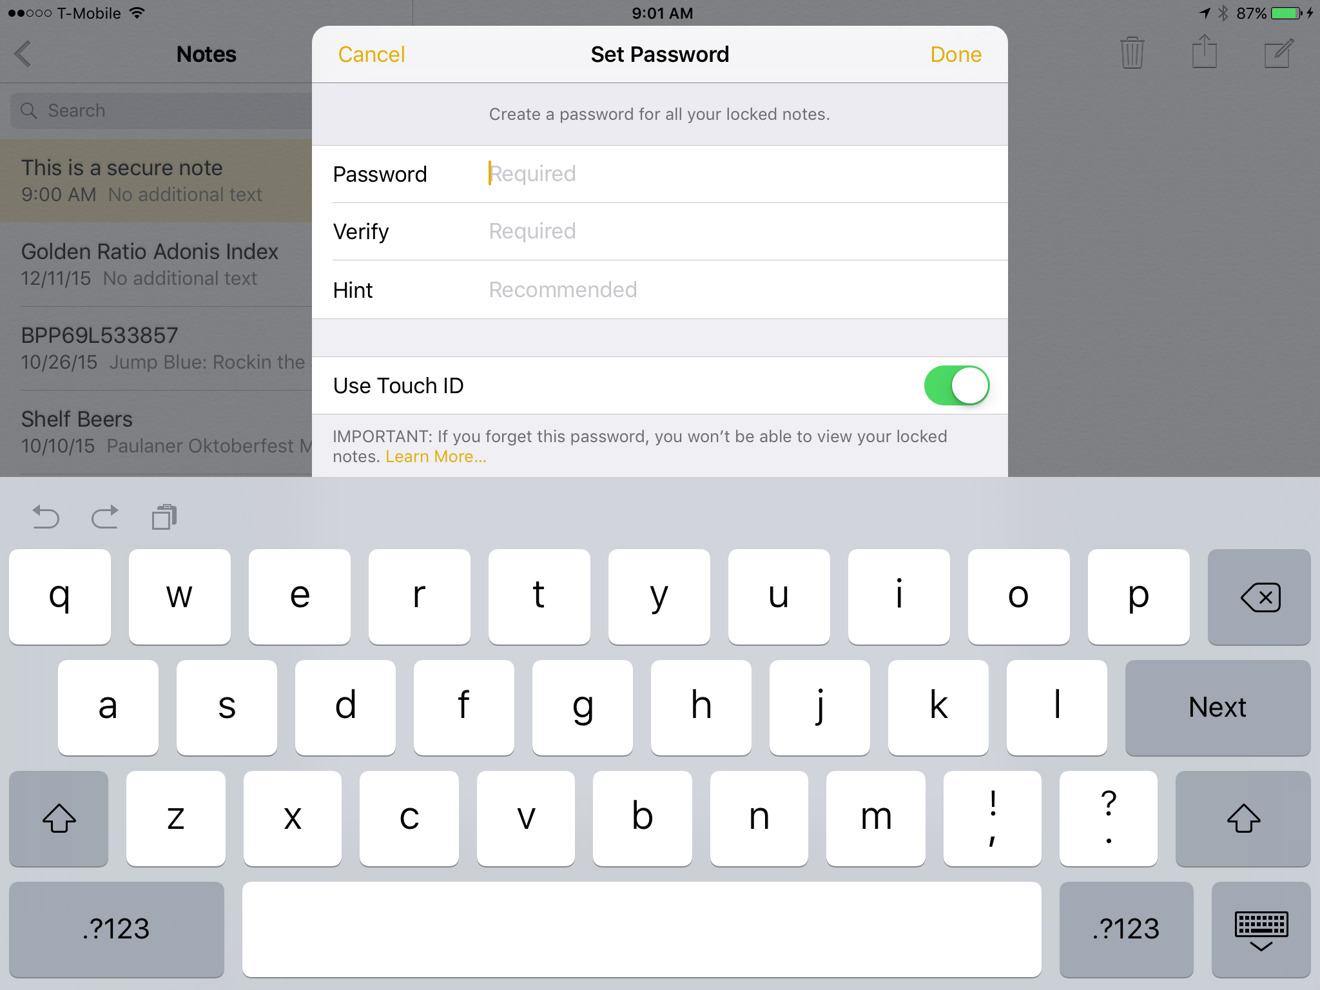
Selecting it brings up a panel asking you to create a password and retype it to verify. For the best security, avoid reusing an existing password, and make the new one either a phrase or a complex assortment of characters. Optionally you can enter a hint in case you forget, and/or use Touch ID to make logins faster.
At this point, a note's contents will still be visible to anyone able to unlock your device. Protection only takes effect once you tap the padlock icon, again in the upper-right corner.
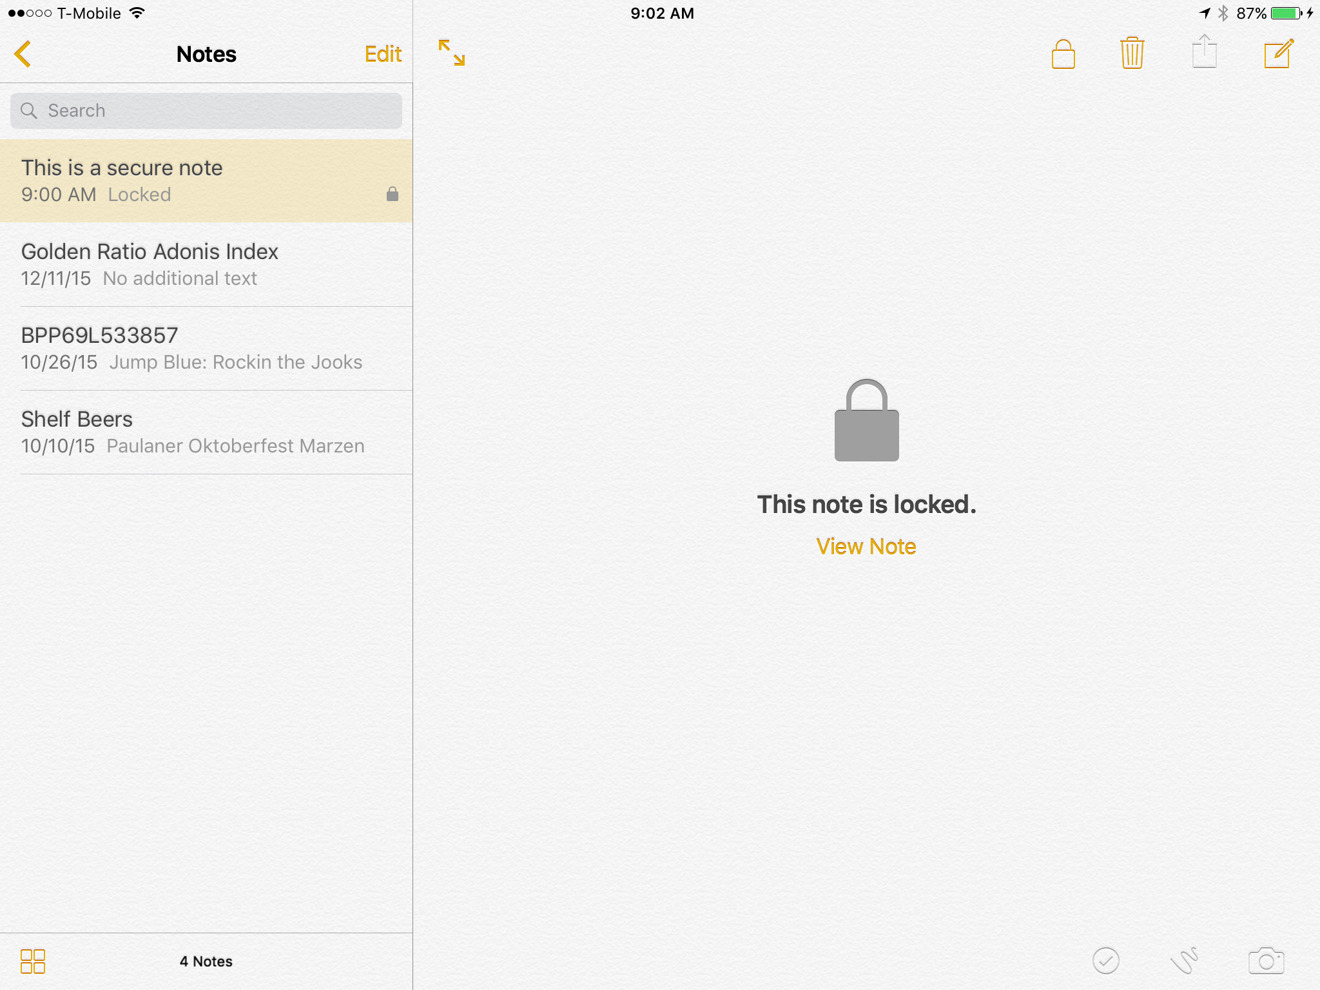
Finally, the note is secure. To see inside, you'll have to tap "View Note" or the padlock icon, and either enter your password or use Touch ID.
iOS 9.3 was released on Monday, and added several other features, such as a Night Shift mode, more 3D Touch commands, and a Classroom app for teachers.