AirDrop is a fast and easy way to share images, documents, and other files between Apple devices. But before you use it, you'll need to turn the feature on.
The AirDrop feature is often the quickest way to transfer content between iPhone, iPad, iPod touch, and Mac. And beyond sharing images and documents, users can also AirDrop website links, passes from Wallet, Apple Maps locations, and pretty much anything else that can be shared via Share sheet.
Here's how to enable AirDrop on your iPhone, iPad, iPod, or Mac.
Enabling AirDrop on iPhone and iPad
Enabling AirDrop on Apple's mobile devices is simple and only involves a few steps.
Before starting, make sure that Wi-Fi and Bluetooth are enabled on both the sending and receiving devices. Also, turn off Personal Hotspot.
Turning on AirDrop is best handled in the iOS Control Center on iPhone and iPad.
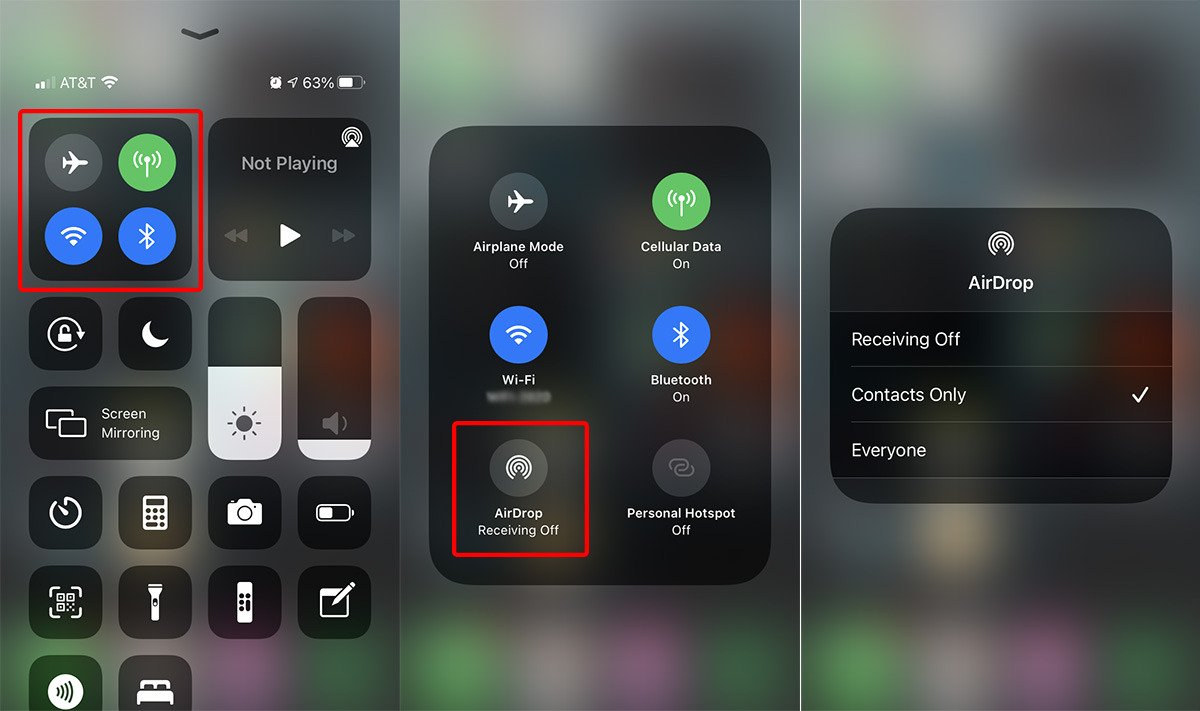
Turning on AirDrop in the iOS Control Center
- Open the Control Center on your device by swiping down from the upper-right corner, or swiping up from the bottom.
- Press and hold on the tray that contains the Airplane Mode, Wi-Fi, and Bluetooth buttons.
- In the expanded tray, tap on the AirDrop button.
- Select either "Contacts Only" or "Everyone."
- The AirDrop button should now be colored Blue, indicating that it's enabled.
You may not be able to send or receive content via AirDrop right away, depending on whether you selected "Contacts Only" or "Everyone."
For the first option, both devices will need to be signed into an iCloud account. The email addresses or phone numbers associated with the sending device must be in the Contacts app on the receiving device.
The "Everyone" setting, on the other hand, doesn't have any prerequisites. Because of that, it's a good idea to leave that off in most cases.
Enabling AirDrop on Mac
Turning on AirDrop on a Mac is equally as simple, but you'll need to make sure that both Wi-Fi and Bluetooth are enabled on your system.
You can enable Bluetooth and Wi-Fi from the Mac's top menu bar. Just click on the respective icon and make sure the toggle is switched on.
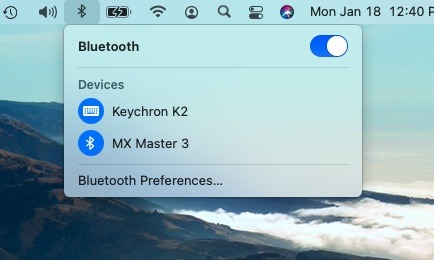
You can enable Bluetooth and Wi-Fi using their respective icons in the top menu bar.
Alternatively, if Bluetooth or Wi-Fi aren't in your menu bar, you can head into System Preferences and select Networks or Bluetooth to enable your connectivity settings.
Once Bluetooth and Wi-Fi are on, you can go ahead and enable AirDrop. On macOS Big Sur and later, you can do that from the Control Center.
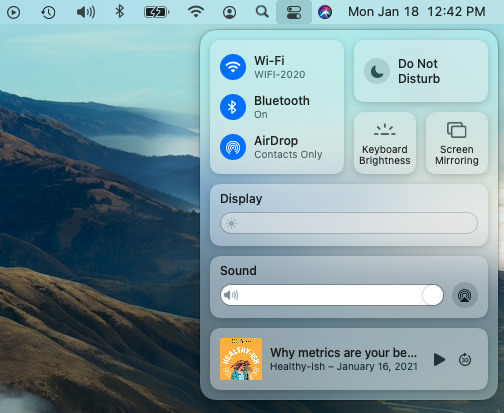
You can enable AirDrop in the macOS Big Sur Control Center.
Turning on AirDrop in the macOS Control Center
- Click on the Control Center icon in the top menu bar.
- Click on AirDrop.
- Make sure the toggle is set to on.
- You'll also need to specify your AirDrop setting to "Contacts Only" or "Everyone."
On older versions of macOS that don't feature the Control Center, the easiest way to enable AirDrop is in Finder.
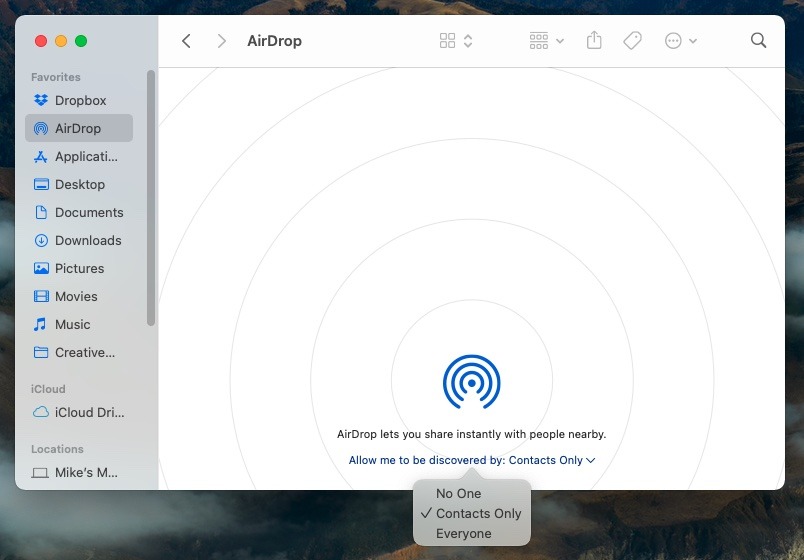
You can also enable AirDrop in Finder.
Turning on AirDrop in Finder
- Open a new Finder window.
- Click on the AirDrop folder.
- Click on the small dropdown menu next to "Allow me to be discovered by:"
- Select either "Contacts Only" or "Everyone."
Whether you used Control Center or Finder, you should now be able to send and receive files via AirDrop on your Mac. Keep in mind that the "Contacts Only" and "Everyone" settings on macOS function the same way they do on iOS.