Level up your Zoom meetings, Twitch streams, and even Skype calls by shifting away from the built-in webcam in favor of a better camera.
The COVID-19 pandemic has given everyone a new appreciation for video conferencing and live streaming. With a need to work from home and being seen via webcam becoming a regular chore for workers, students, and others, the webcam has become an essential tool.
At the same time, streaming live to the public via Twitch and YouTube has become a new form of entertainment to enjoy, both for the streamer and the viewer.
In both cases, you could use the webcam built into the 24-inch iMac display or the one included in the 14-inch MacBook Pro notch, or even a third-party webcam accessory.
However, these aren't going to give you the best image quality or high production values that you may want. For streamers, they may wish to appear to have a more professionally-produced video feed, while presenting yourself at your best is almost always a good thing for work prospects.
If looking better in online video is a thing you want to do, consider the possibility of using some other higher-end cameras. If you've got a relatively new DSLR, Mirrorless camera, or another type of compact camera, you've probably already got a good option available to use.
Here's what you should know about using photography-centric cameras for video conferencing and streaming to the public on your Mac.
What's the problem with webcams?
Apple's newest built-in webcams are pretty good, improving across the pandemic to offer 1080p resolutions and improved image signal processing via the M1 family of Apple Silicon chips.
In the case of the Studio Display, there's also support for Center Stage, a feature that Apple offers in its iPad family that can reframe the image. This keeps the image centered on the speaker wherever they move in the field of view.
However, even with these benefits, the result is an image you would refer to as more practical than cinematic.

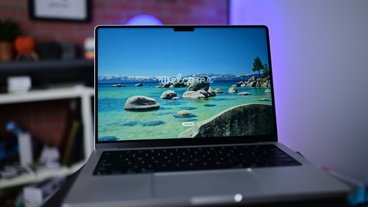
Left: A webcam on top of the display. Right: a side-on mirrorless camera's live video feed.
What's more, you're stuck ensuring that the display as a whole is pointed at whatever you're planning to stream since the camera is built-in and not independently movable.
Using a third-party webcam helps in that it can potentially include features that aren't usually included in Apple's webcam. For example, you can get an optical zoom with some webcam models, though others may be limited to offering a digital zoom instead.
Depending on the software included with the webcam, you may even be able to tweak the colors and introduce special effects. Again, the bar is relatively low here, so you can't expect much from an after-market webcam.
Then there are things like focal depth and bokeh, namely keeping the subject in focus while blurring out the background. Most basic webcams are set up to capture as much as possible in focus, which kills off any chance of doing it in-camera.
That said, various software tools can fake that blur to give you some privacy, but it's not that good an effect.
A third-party webcam does at least solve the independence problem, but we can still do better.
Going big with DSLRs, mirrorless, and other camera types
Since the pandemic, camera manufacturers such as Canon, Sony, Nikon, Fujifilm, and others all offer software that can work with their products to turn them into webcams. This fixed an early work-from-home issue where quality webcams suddenly became high-in-demand products.
While introducing software tools to enable cameras to connect to PCs and Macs alleviated an issue, it also had a byproduct of improving quality.
The nature of compact cameras, digital SLRs, mirrorless, and other cameras intended for photography, typically means they are built to capture the best image. The same systems used for photography were available to record video, but now they can be used for live video feeds.
That means bigger imaging sensors, better lens assemblies capable of greater zoom ranges, and more advanced levels of control over how the picture appears.
Just as you can create natural bokeh by changing the camera's aperture for a photograph, you can do the same blurry background trick for video. However, since it's all in-camera, it looks better than the computer-created version.
For cameras with interchangeable lenses, there are even more options available. For example, putting on a macro lens can enable you to live stream a close-up shot of an item for others to see.

With a good enough lens, you could zoom the camera in quite a bit, which may improve your stream depending on what it's shooting.
There are also the benefits of independently positioning the camera from the display.
A front-on shot is conventional but not necessarily flattering to the subject. Being able to place the camera to the side of the display can produce a more positive image. That's before you even consider pointing the camera at a background that is more visually appealing than an unkempt room.
For educators or anyone performing a physical demonstration, an independently-movable camera is also beneficial so they can offer the best possible angle for the stream. Sure, you could line up an iMac display to film an entire whiteboard, but the display itself may not be in a place that the subject can easily view.
Using photography-centric cameras for streaming video certainly isn't a new idea, but it's one that Twitch streamers have capitalized on for years. It's only since the pandemic pushed forward software development to make it easier for people to hook the cameras up for streaming that it's become a lot more commonplace.
If you have multiple cameras and can connect them up to a Mac simultaneously, it also opens up the door to offering multiple camera angles. This includes providing various simultaneous live views, such as the speaker and an over-desk view for unboxings, or simply switching from one camera angle of the speaker to a second one.
How do I hook a camera up to my Mac as a webcam?
For a start, you will need some form of camera. This is the most crucial element, but it can also be expensive, with quality camera setups starting from a few hundred and rising to thousands.
Don't worry, as there will undoubtedly be a camera to match your wallet, but you will have to research what you can use.
To help with this, check out the support pages for the camera's manufacturer. Specifically, support pages about the webcam software they provide for free, as there's usually a list of supported devices.
Once you have a camera on hand, download the manufacturer's webcam software and install it onto your Mac. The major vendors also offer Windows software, and that is usually the primary focus of the vendor, but many also offer macOS applications for the task.
You'll also have to physically connect the camera to the Mac, which is also quite simple. Most modern cameras include micro-USB or USB-C ports on the side, intended for offloading images to a host computer, but it also gets used for the webcam connection.
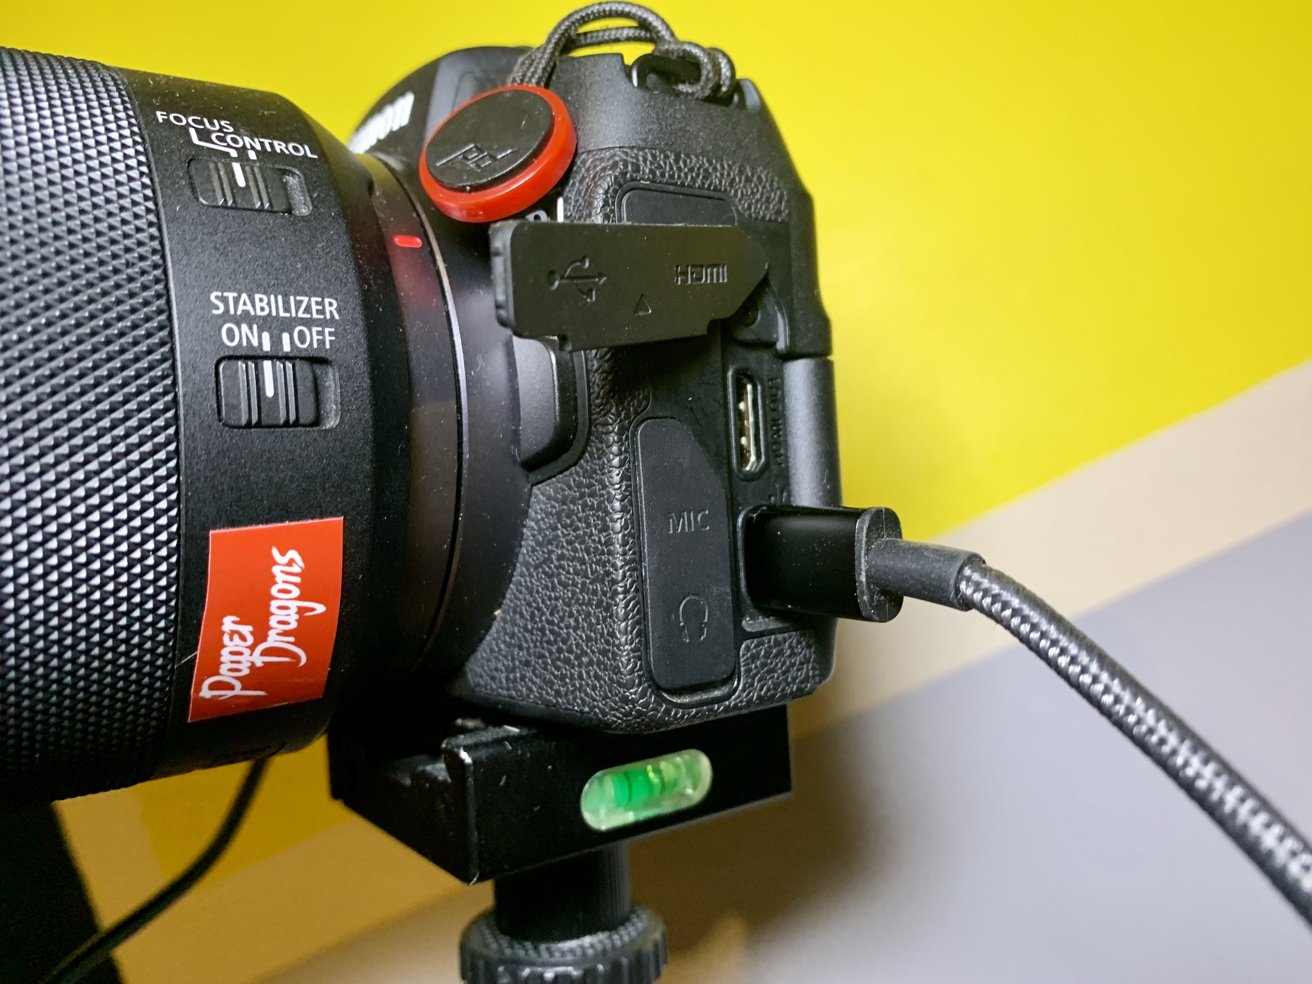
A USB-C or micro-USB connection could be used to turn your camera into a webcam.
Use a sufficient length cable with the right connections on the ends to connect to the camera and the Mac, and you're in business. It is recommended to go for as long a cable as you could reasonably want so that you have the flexibility to position the camera potentially many feet away from the Mac.
Depending on the camera and the associated software, you may have to set the camera to function in a specific mode. Make sure that is set up correctly if you're having trouble getting the camera and the Mac to communicate.
With the camera connected and the relevant software installed, all that's left to do is to set up your requisite communications or streaming software to work with the camera, and you're ready to go.
Do remember that not all software works with all applications, so you might not be able to use a particular camera for a specific streaming or communications app in some cases. Two years ago, camera producers scrambled to fix compatibility issues within weeks of release.
But, while the situation has improved considerably since then, there are still some combinations of apps that just won't talk to each other.
The picture resolution may also vary between manufacturers and cameras, so you might not necessarily see the same resolution video on your Mac's stream as the camera can actually film. The picture you end up with will usually be a lot better than the typical webcam.
My camera doesn't have a webcam app. What can I do?
Not every camera will be able to work directly as a webcam, but there's another way around the problem. If your camera has a video output option, such as HDMI, you could use some extra hardware to bridge the gap.
There are many video capture options on the market designed to take an HDMI or similar source as an input and then make it a computer-processable signal. One option built specifically with cameras in mind is the Elgato Cam Link 4K.
In the case of the Cam Link 4K, it is a compact dongle that has an HDMI connection on one end and a USB connection on the other. It creates a video feed that's usable like a regular USB webcam, except it's sourced from your higher-quality camera.
As the name suggests, it can also output a 4K-resolution stream at up to 30fps or a 1080p stream at 60fps. These are high-quality options, especially if you're streaming a presentation to the public.
More ambitious streamers with deeper pockets who want more control over their broadcasts may turn to more professional tools, such as the Blackmagicdesign Atem Mini. A broadcast switcher, it can handle multiple video inputs, such as cameras, handle switching between them, and other more advanced tasks.
In many cases, the switchers can output HDMI, but more helpful for streaming purposes, as if it's a USB webcam. Such a device can separate the live switching element from being handled by streaming software tools, but usually at a hefty cost.
Software: from meetings to streaming
If done correctly, you should have a good quality camera connected to your Mac using a USB cable, with software from the camera manufacturer turning it into a usable video feed. In most cases, this is all you need to hook it up to Zoom, Skype, Discord, or Microsoft Teams, and that's fine.
However, if you want to go one stage further, namely into the world of Twitch and live YouTube streaming, you will need some extra software. There are many paid options out there, such as Ecamm Live and Restream Studio, but there's a free option that you may want to look at — OBS (Open Broadcaster Studio).
A fully-featured streaming tool like OBS can combine live video feeds with animations, static images, shared displays, sound effects and music, and interactive elements into a fully-rounded broadcast.
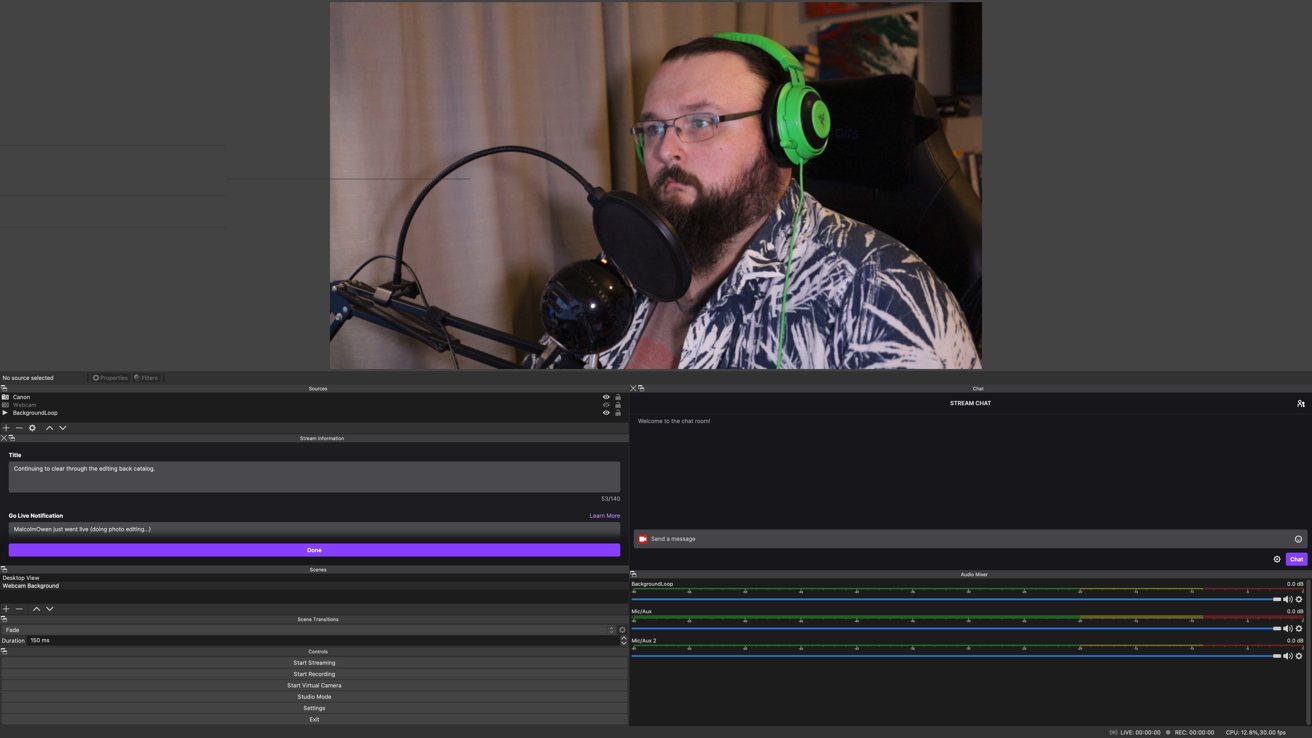
OBS streaming software is free, with others also available.
Though it has a bit of a learning curve, it doesn't take long to get a basic stream layout set up, along with some other screen layouts that you can switch between. For streamers, this can include just the webcam feed for one scene, and another could consist of a screen share with a webcam picture-in-picture, for example.
This makes OBS very powerful for Twitch streamers, but it has a bonus that makes it even more helpful for those not interested in public streaming. There is a virtual camera you can enable in OBS that turns the broadcast output of the software into a webcam feed, which can run through meeting software and other video tools.
For educators and presenters, this can give you a highly customizable way of sharing a screen with a class or a group.
Other considerations
This article only discusses using a camera as an alternative webcam, but there are other options out there.
Apps exist that enable an iPhone or iPad's cameras as the webcam in pretty much the same way. There are a few options available within the App Store, such as Camo and the Corsair-owned EpocCam, which can transmit an iPhone feed to a Mac or PC that's also running an app.
You get the benefit of the independently-movable webcam in that case as well, along with the possibility of working wire-free, depending on the app. Once ingested into your Mac, the video feed is again handled as if it's a typical USB webcam in various apps and services.
This could be an extra beneficial element to consider to have multiple camera angles available to you without paying for multiple cameras.
Apart from cameras and software, your backdrop, lighting, power, audio, mount, and bandwidth are the other real considerations.
A tidy room is preferable, but unless you plan on moving the camera, you must keep whatever's in the field of view of the camera presentable.
With tools like OBS and other streaming software, you might be able to take advantage of chromakey effects by purchasing a solid green or blue backdrop. This can not only hide the room, but it enables special effects like a tropical background or superimposing you on top of an image as if you're presenting a weather report.
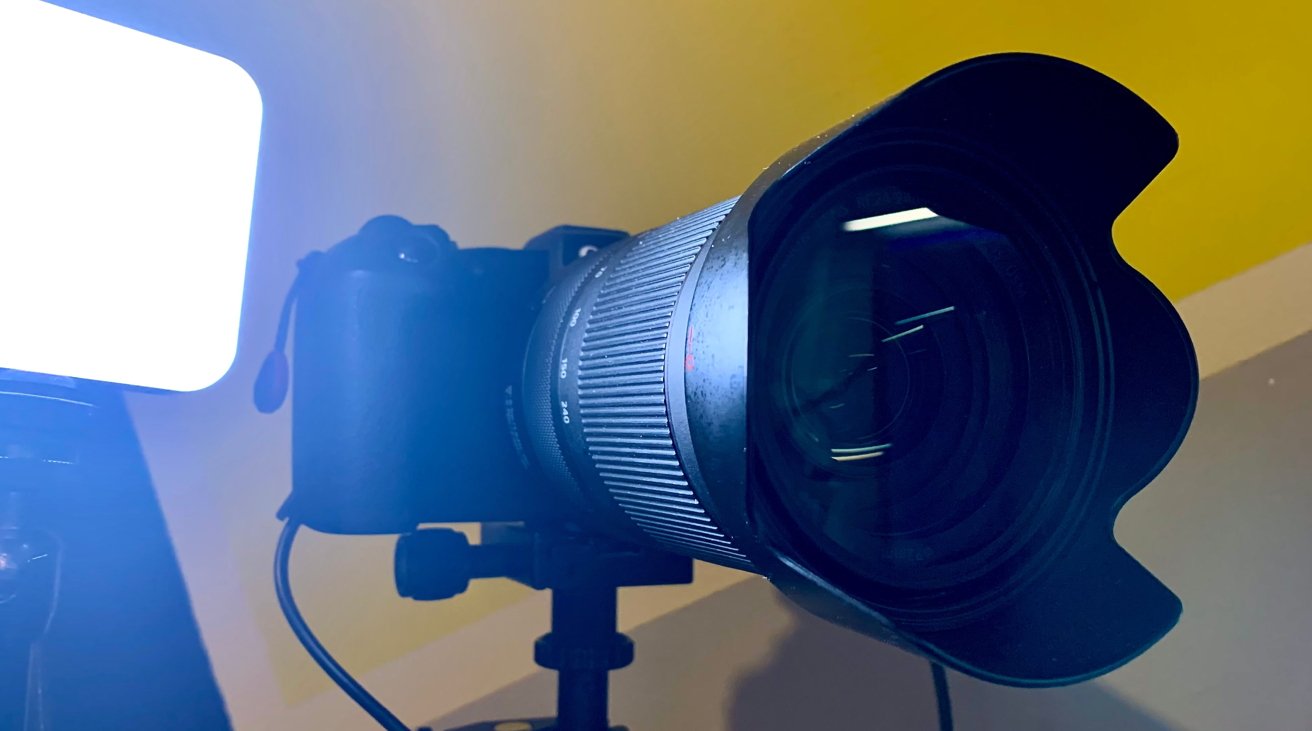
On lighting, it's advised not to simply go with a room's typical lighting for a stream. Invest in some video lighting to illuminate yourself better for the camera, and experiment with its positioning to make the light as flattering as possible.

Adding light can seriously improve how you look on camera.
While on the subject of things needing power, look into ways to keep the camera powered by an outlet rather than a battery. This could be USB-based charging, or more commonly, a dummy battery that plugs into an outlet.
Arguably more important than how you appear is how you sound. Invest in a good quality microphone for your setup, either as a desk-bound version or one you wear, like a lavalier clip-on mic.
You're also going to have to consider how to position the camera. Unlike a webcam, your camera and lens will be multiple times the cost and considerably heavier, and you can't simply place it on top of a monitor like normal.
The obvious answer to this is a tripod, but a more permanent solution could be a desk mount. This can take many forms, including movable arms to attach your camera for a wide range of positions, but the simplest is a clamp with an extending pole and a thread for the camera.
This sort of mount can cost as little as $15, but you will probably want to spend more on a higher-quality or branded version, given the weight and expense of the camera you'd be using with it. As an example, the SmallRig Selection Desk Mount clamps to the surface, has a height range of between 19 inches and 39 inches, and includes a ball head on the top for $34 on Amazon.
Also, remember that video needs a lot of bandwidth to work correctly. If you don't have enough upstream bandwidth, others may experience buffering or a reduction in the stream's resolution.
Many streaming tools also incorporate various features to help users fine-tune their streams to their Internet connection's capabilities. It's advisable to take advantage of this before you stream.
Lastly, in the case of streaming on Twitch or YouTube Live, remember to have fun. It may be intimidating to effectively perform in public via a video stream, but it's OK to make mistakes with a handful of viewers.
Not everyone becomes "Ninja" or "Pokimane" overnight, but getting a good camera and broadcasting system in place is a good first step.