After years of keeping Mac users waiting, Apple has finally brought the Weather app to the Mac with macOS Ventura. Here's how to get the best from it.
"[There are] beautiful animations, like gently moving clouds, heavy snowfall, and driving rain," said Craig Federighi, the senior vice president of Software Engineering at Apple, during the WWDC 2022 keynote.
Here is how to control Weather Notifications, understand Critical Alerts, know what is shown in the Weather app, navigate the Side Panel, add a new location, utilize the map in the application, and use Siri to tell you the weather in certain locations in macOS Ventura.
What Weather Notifications and Critical Alerts do
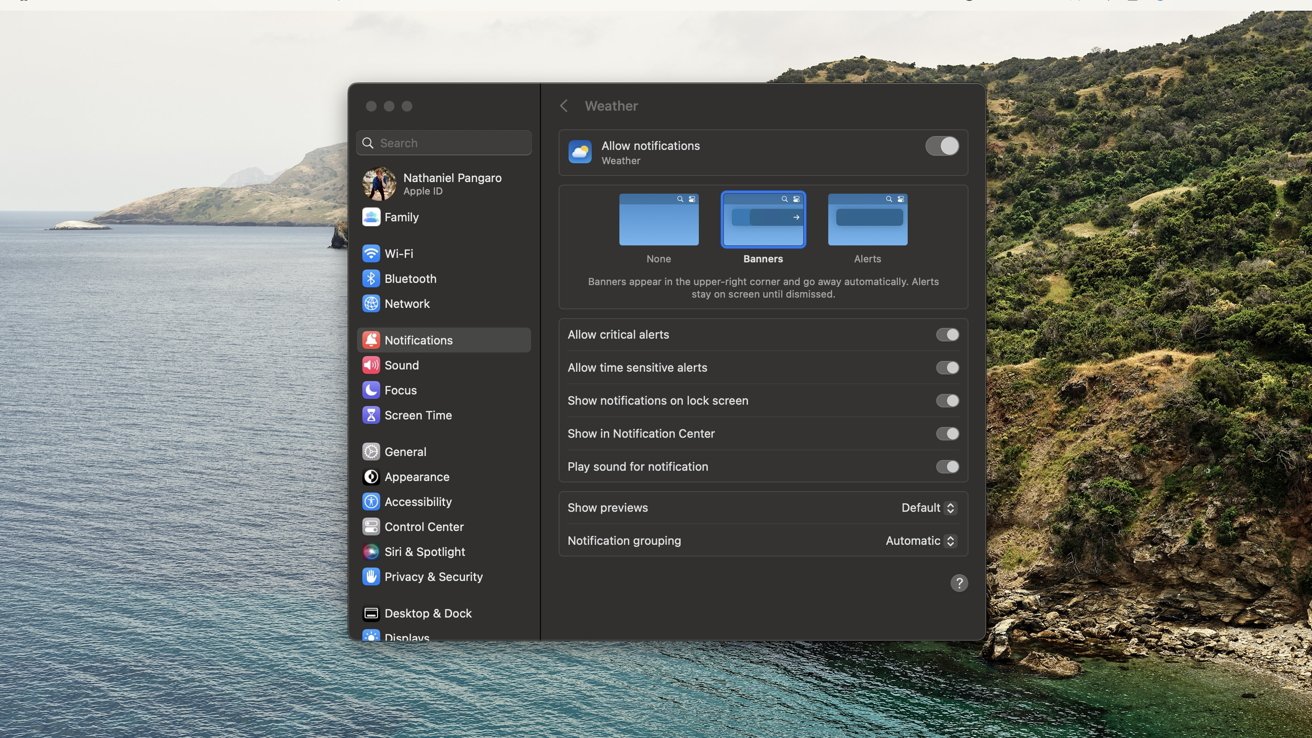
When first opening the Weather app, you may get a notification banner that asks you if you want to turn on Weather Notifications or not. These notifications come through when - for example - it starts or stops raining.
You can choose from the "Options" button on the notification if you want it to make alerts, sounds, and/or have an icon badge as well.
Critical Alerts are another form of notifications the Weather app can send you. These notifications should be taken more seriously and cautiously when received.
These notifications may be sent in the light of a heavy storm or natural disaster heading toward your current location.
Both notification types can be changed at any time in the Weather section of the Notifications settings.
How to navigate the Weather app
The weather app on macOS is very similar to the one on iOS and/or iPadOS. It details the same layout, has the same functionality, and offers the same information as on other platforms. They are nearly identical.
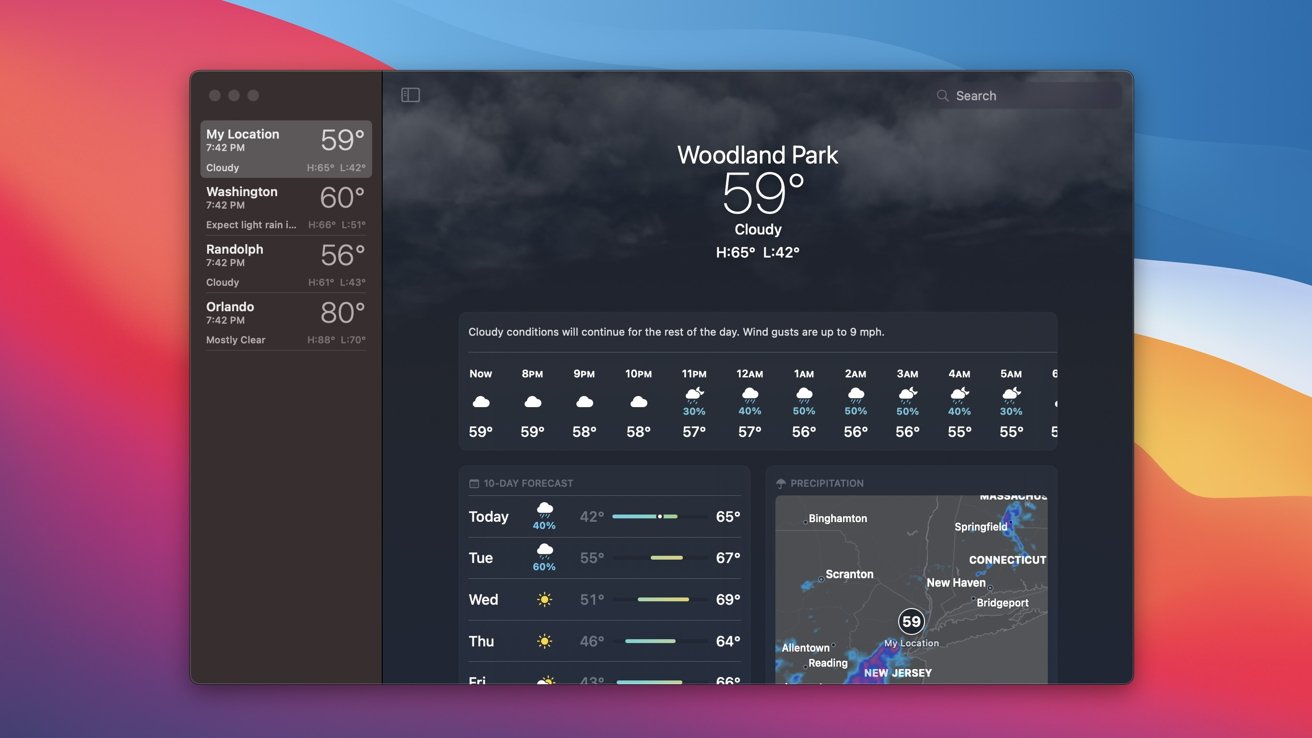
You can get information such as temperature, precipitation, hourly forecast, 10-day forecast, air quality, UV index, rainfall, wind, humidity, and other statistics offered on nearly all Apple devices.
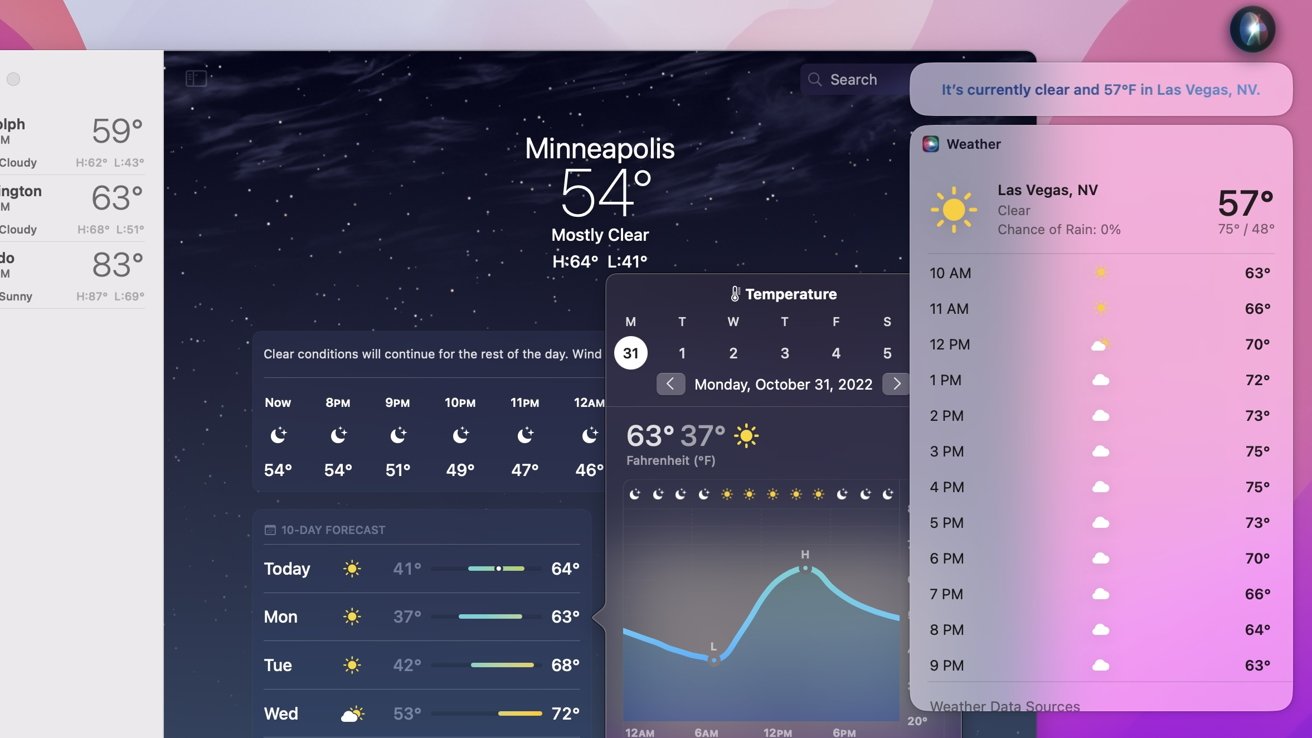
Clicking on a specific day within the 10-day forecast will give you more insight into the weather for that day. It will give you the date, the temperature high and low, and a line graph indicating how the temperature will be throughout the day, a visual representation of the weather conditions throughout the day, and a Daily Summary textually detailing the forecast during that day.
Clicking on nearly any weather widget within the application expands the information it provides and gives you a better understanding of what information is being presented to you.
Animated effects connected to the weather condition for the day also make an appearance in the app from the iOS Weather application as well. That was first introduced in iOS 7.
How to use the Side Panel
The Side Panel is visible throughout the app for easy access to seeing what locations you have saved and switching between them to see the weather in each.
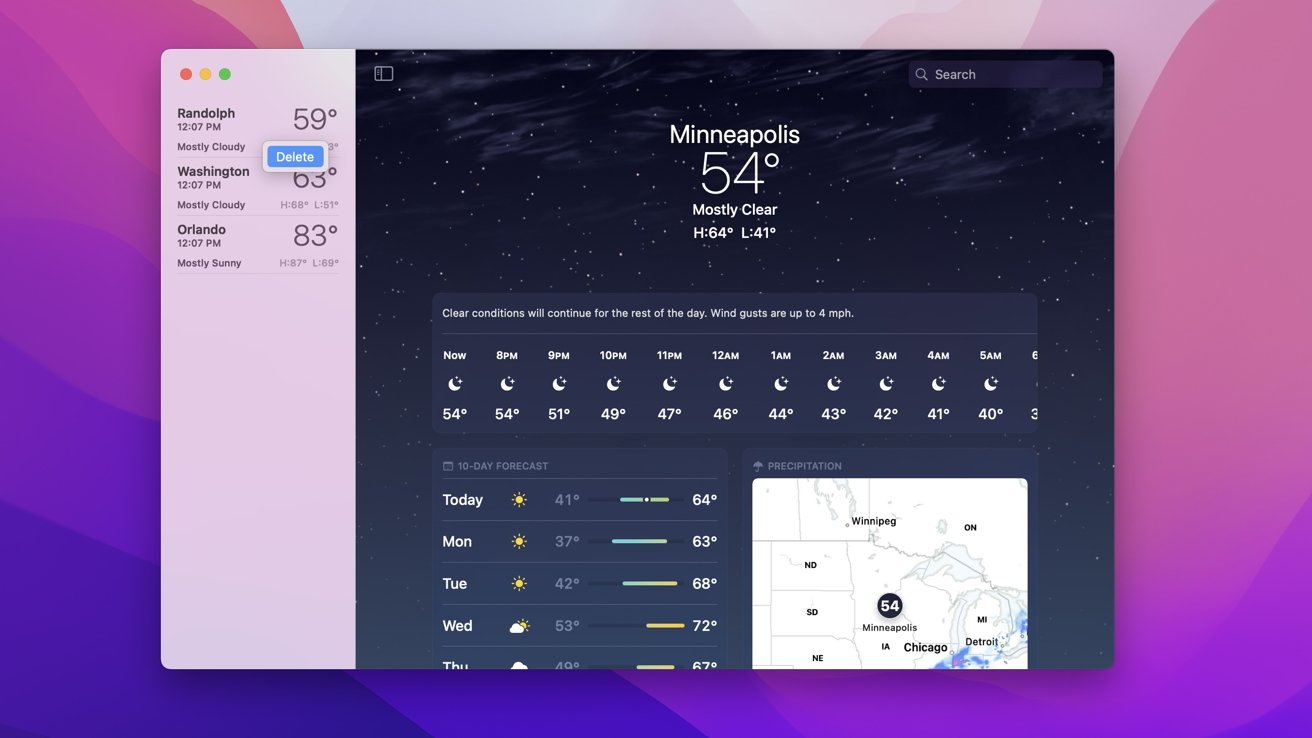
The Side Panel does not only hold the locations you have saved but also showcases - at a glance - the current temperature of each location, the temperature highs and lows of the current day, the current time in that location, and the weather condition there as well.
Two-finger clicking on a location will give you the option to delete the location you had previously saved. If you choose to delete it, then it will ask you to confirm the deletion before completing the action.
You can click on the Side Panel button - which is located on the upper left of the screen - to show or make the panel disappear.
How to add a new location
While you can delete locations, you can also add new ones as well. Here is how to add a new location in the Weather app.
- Open the Weather app
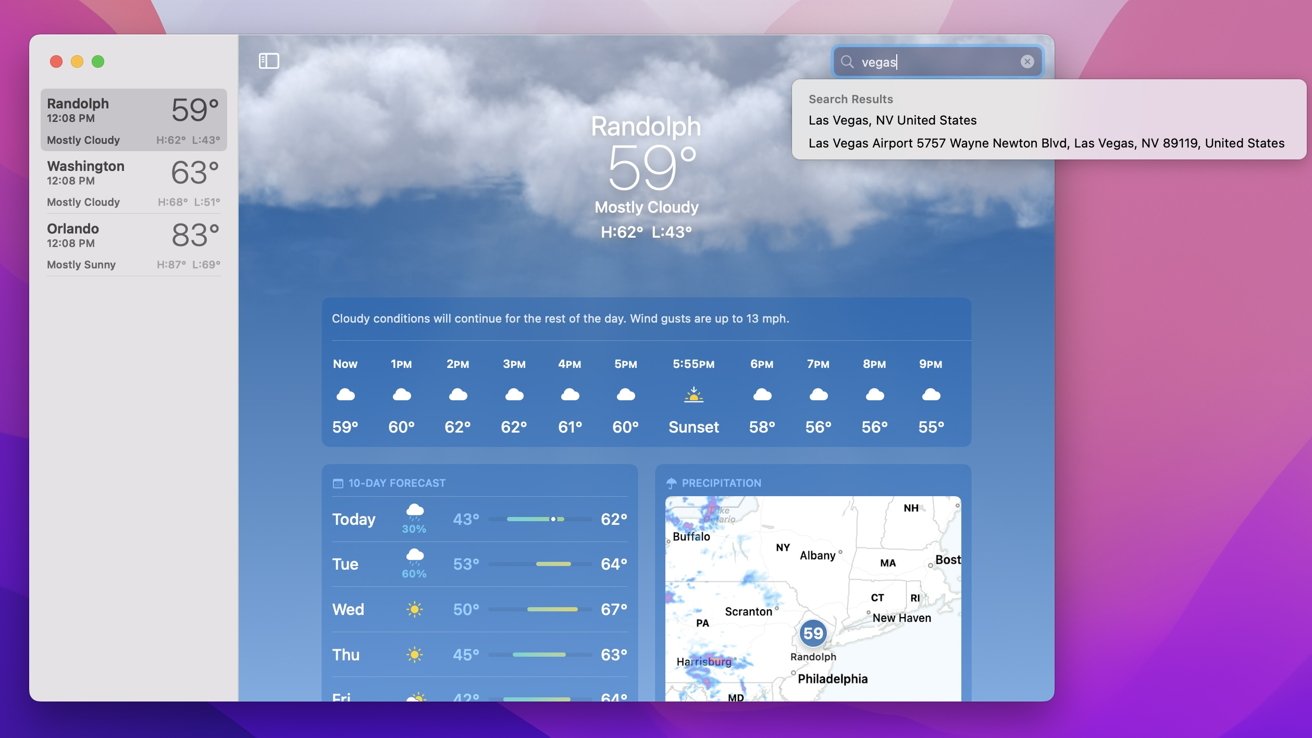
- Click on the Search box in the upper right of the application
- Type in which location you want to be added
- Click on the location from the search results dropped from the Search bar
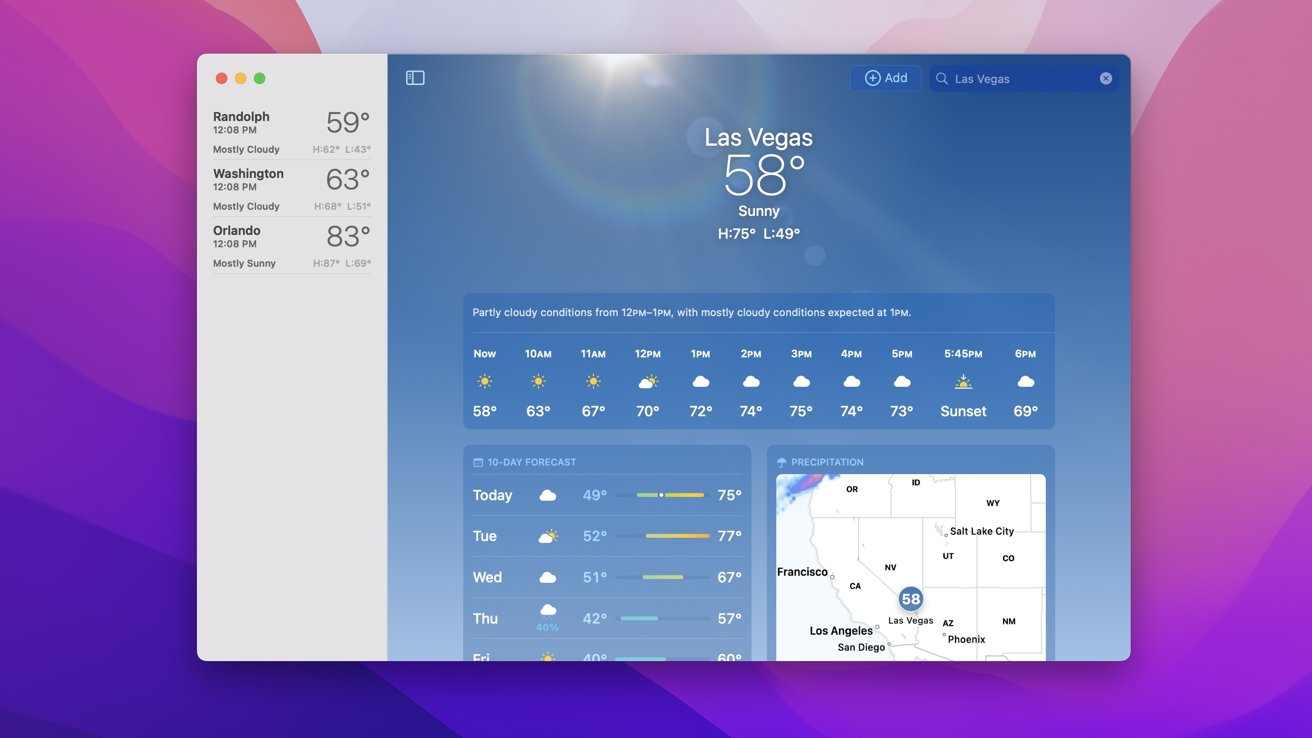
- The location will expand to fullscreen and showcase all the weather data from it
- Click Add (located next to the Search bar) to add the location to your list in the Side Panel
Locations can be saved and deleted at any time from within the Weather app.
How to use the map
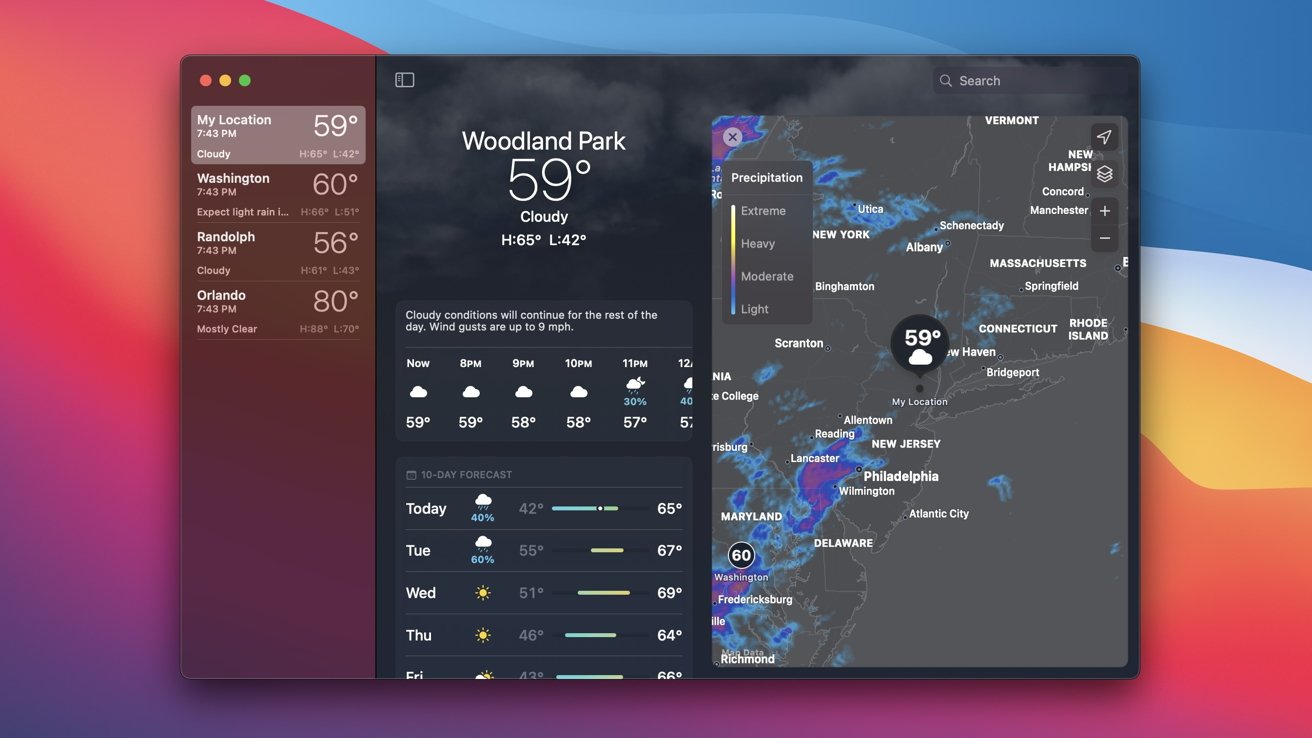
The Weather app includes an interactive map for you to click on and see different conditions in different areas. The map will show a 12-hour forecast for precipitation in the area you selected.
The map will signify which location you are looking at with a pin holding the current temperature of the area on top of it.
The map is not only for showcasing precipitation, but can also show other weather data as well. Clicking on the three squares under the button to bring you to your current location will allow you to choose the weather conditions you want to see.
You can choose from perception (which is on by default), temperature, or Air Quality. A colored indicator on the upper left of the map will detail the intensity level each color means.
How to get weather information from Siri
Getting weather information from Siri works the same on macOS as it does on iOS and/or iPadOS. Ask Siri what the weather is like in a current location and they will provide you with the answer.
If you click on the results, then they will launch the Weather app and show the full weather report in the application for the location you asked about. You can click on "Add" next to the Search bar to save the location for future use.
Make sure Weather is allowed in Location Services in Settings so Siri can tell you the current weather forecast in your current location when you ask.
Keep an eye on the forecast
The Weather app works nearly the same on macOS as on iOS and/or iPadOS. It features the same layout, animations, and information as the others do.
No longer does clicking on weather information bring you to the Weather Channel website, but now brings you to the native Weather app on your Mac. Or at least it does if you are running macOS Ventura.
The Weather app is available in macOS Ventura.
 Nathaniel Pangaro




 Malcolm Owen
 William Gallagher
 Thomas Sibilly

 Wesley Hilliard
 Marko Zivkovic


