How to add fonts in macOS Sonoma
 David Schloss
Font Book is the simple macOS tool for installing and managing fonts.
Installing fonts in macOS Sonoma is almost as easy as downloading them. Here's how you can add them to your Mac.
Fonts are the key to good-looking designs and documents; there are many ways to download free or paid fonts to use with your Mac. Apple also includes some fonts in macOS Sonoma that must be activated before they can be used.
There are several straightforward ways to install fonts in macOS Sonoma. The difference is where the fonts to be installed live on your Mac.
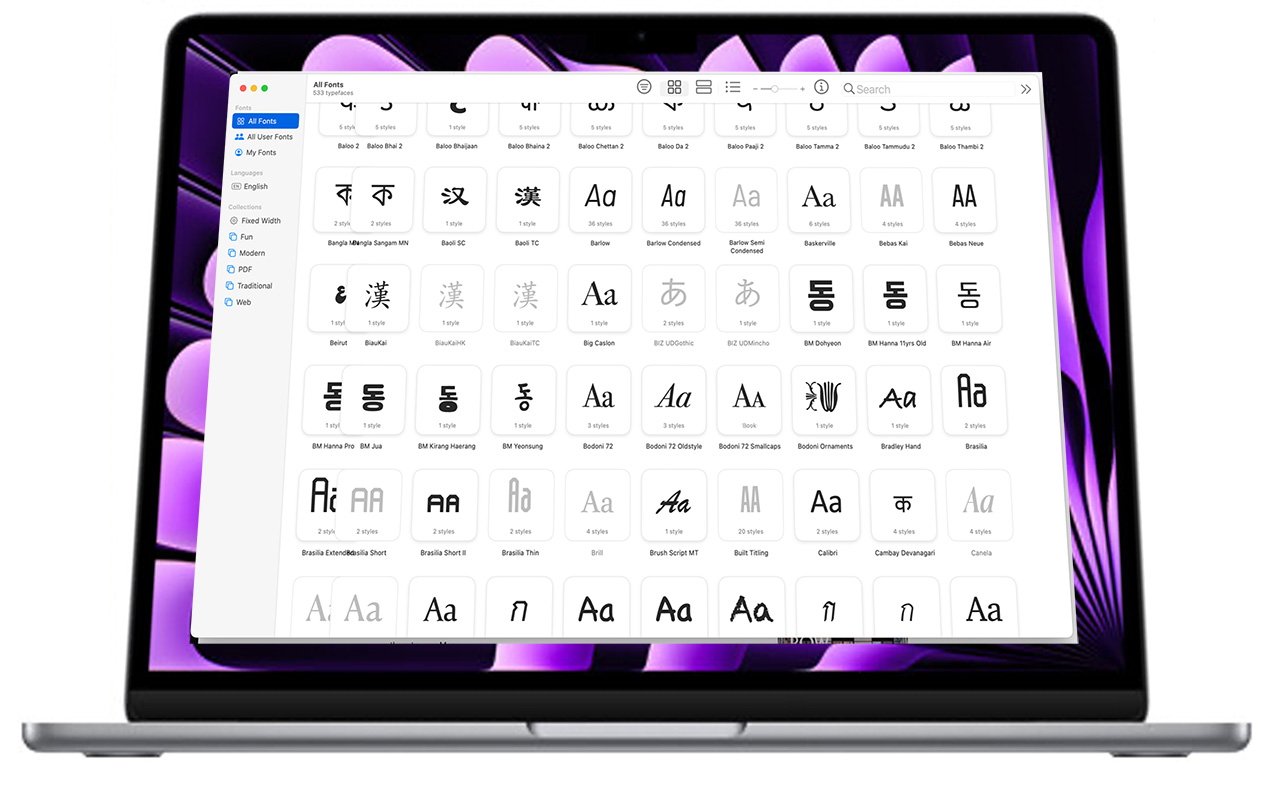
macOS has a built-in font management tool called Font Book. It is found in the Applications folder and is installed by default with macOS Sonoma.
There are several common file types for fonts: OTF, TTF, and WOFF. These steps will work for any of these file types.
How to install fonts on macOS Sonoma from Font Book
- Open Font Book
- From the File menu select Add Fonts to Current User or press Command+O
- Locate and select the font you want to install
- Click Open
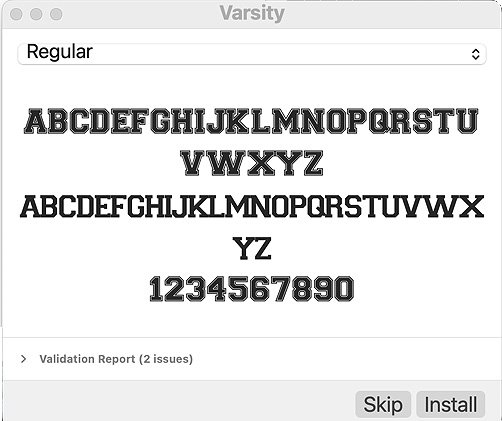
- Font Book will display a preview of the font. Click the Install button
- When installing multiple fonts, you must click Install for each font
If you already know where the fonts you want to install are located, you do not need to open them from inside Font Book. You can open them in the Finder, and they will automatically launch Font Book.
How to install fonts on macOS Sonoma from a folder
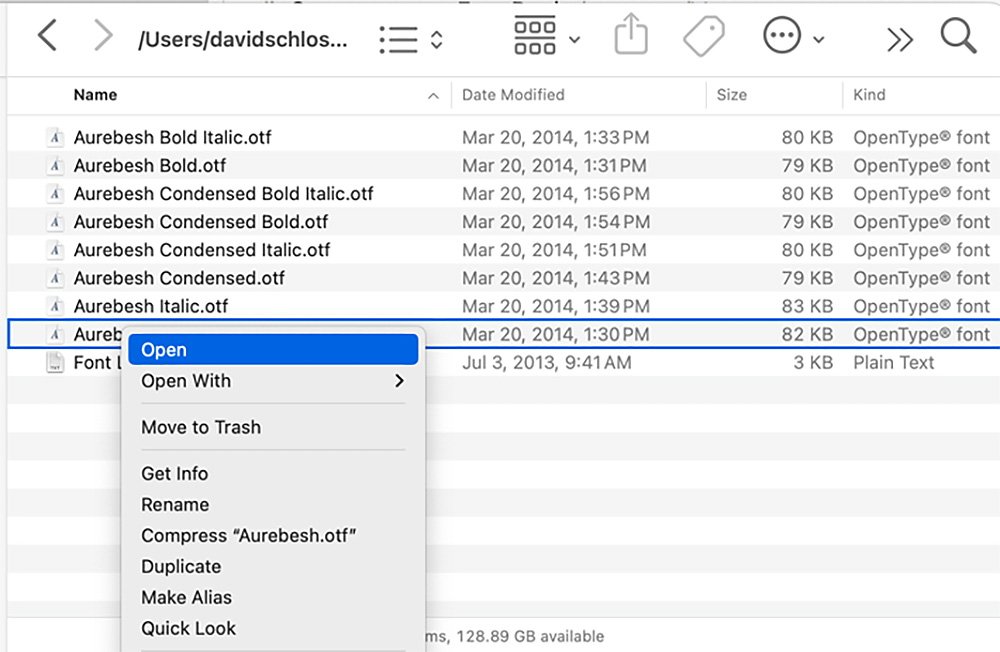
- Find the font you want to install
- Double-click on the file or click the file to select it and press Command+O to open it
- If you'd like to install multiple fonts instead of a single font, select them all first, then double-click any of the selected fonts
- Alternately you can press Command+O
- Font Book will display a preview of the font. Click the Install button
How to install the fonts on macOS Sonoma via drag-and-drop
- Select the font or fonts you want to install
- Drag them into Font Book
- Font Book will display a preview of the font. Click the Install button
- When installing multiple fonts, you must click Install for each font
Apple includes several fonts with Sonoma that, by default, are not installed. Many of these fonts are for non-latin alphabets like Japanese and Mandarin.These free fonts can be easily added to the available fonts used by your Mac.
How to install fonts that come with macOS Sonoma
- Open Font Book
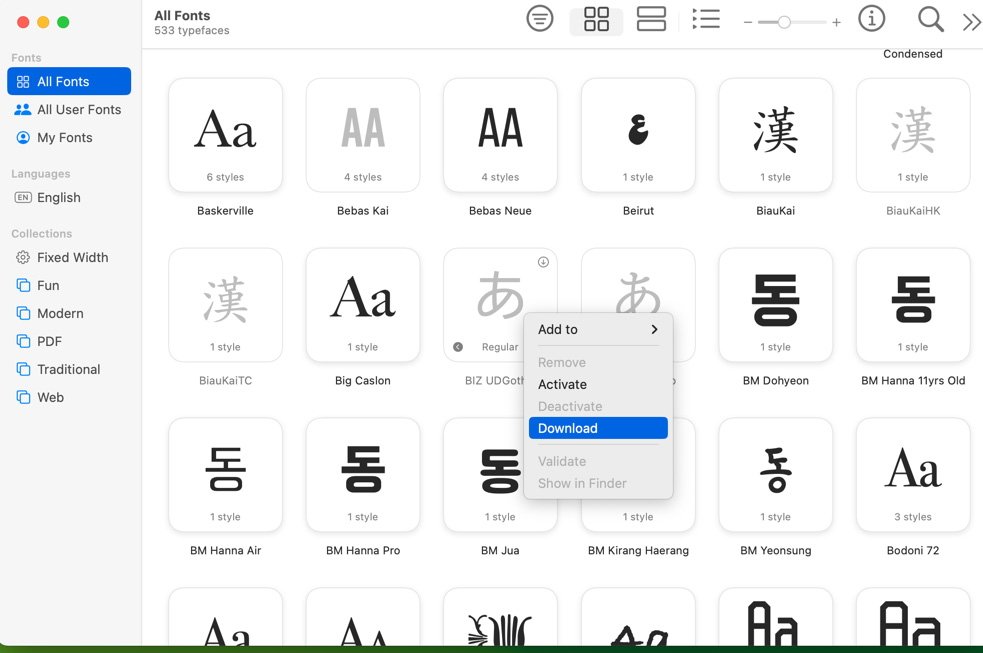
- Select All Fonts on the left pane of Font Book
- Browse the list for any grayed-out fonts. These are the fonts Apple includes with Sonoma
- Select a font you wish to install, or Command+click to select multiple fonts
- Right-click on the font and select Download
If you install many fonts, you may end up with duplicate fonts. While not harmful to your system, having duplicate fonts can be confusing when working in design or text editing applications.
Removing duplicate fonts is a simple process and only takes a few steps.
How to remove duplicate fonts in macOS Sonoma
- Open Font Book
- Click on All Fonts in the left panel
- Go to the File menu
- Select Resolve Duplicates Alternately, after you select All Fonts you can press Command+L
- Choose either Resolve Automatically, which will automatically move duplicates to the trash, or Resolve Manually, which allows you to review and remove duplicates one by one
- If you are removing duplicates manually, select the "Inactive" version of each font to remove and press Resolve This Duplicate
- If you start resolving fonts manually and then decide you want to switch to removing them automatically, select Resolve All Duplicates


 Amber Neely
 Thomas Sibilly
 AppleInsider Staff
 William Gallagher
 Malcolm Owen
 Christine McKee


There are no Comments Here, Yet
Be "First!" to Reply on Our Forums ->