 Nathaniel Pangaro
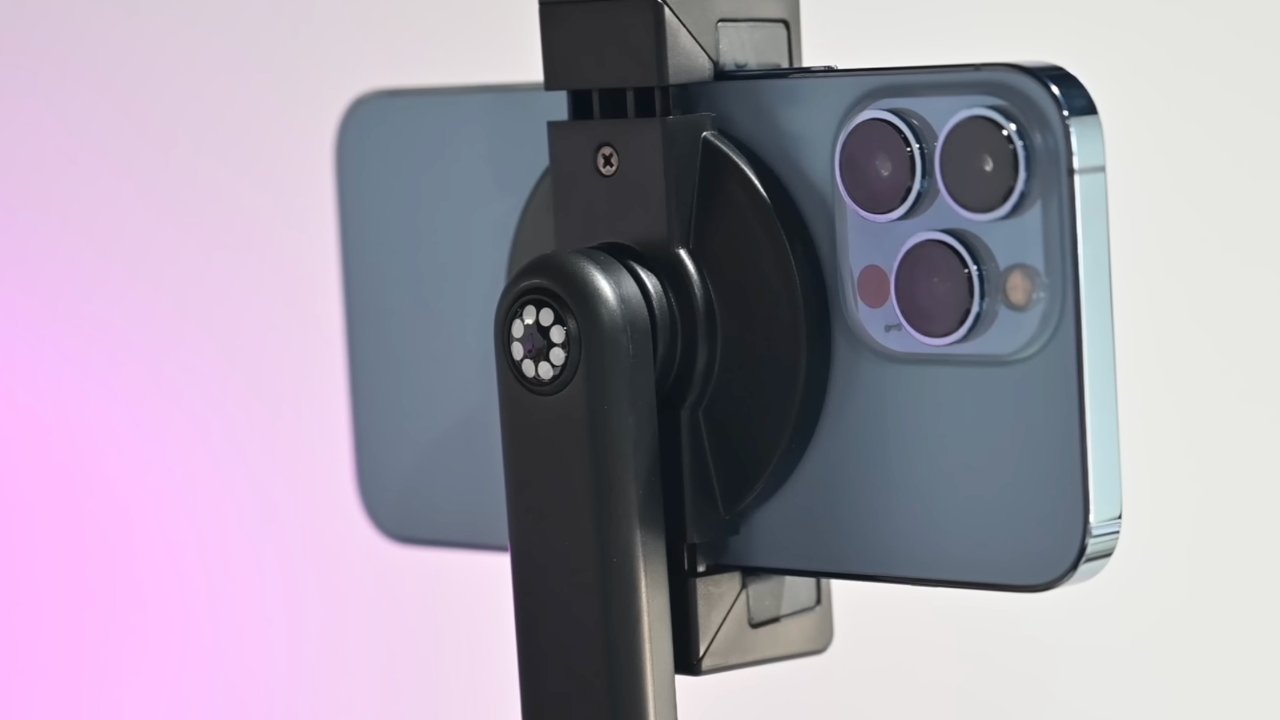
Continuity Camera allows you to use your iPhone's camera to insert photos or documents in your Mac and use it as a FaceTime camera as well. Here is how to use Continuity Camera in macOS Ventura.
"[Continuity Camera] is powered by the advanced capabilities of the iPhone's camera system," said Craig Federighi, the senior vice president of Software Engineering at Apple, during the WWDC 2022 keynote. "Letting you do things that were never before possible with a webcam."
Continuity Camera works seamlessly and wirelessly between your iPhone or iPad and Mac when wanting to insert photos and/or scan documents. You can also use your iPhone's rear camera system as an alternative to your Mac's webcam during video calls.
System requirements for Continuity Cameera to insert photos and scan documents
- Your Mac and iPhone or iPad must both have WiFi and Bluetooth turned on
- Your Mac and iPhone or iPad must be signed into the same iCloud account and have two-step authentication set up and turned on
- Your Mac is running macOS Mojave or later
- Your iPhone or iPad is running iOS 12 or later
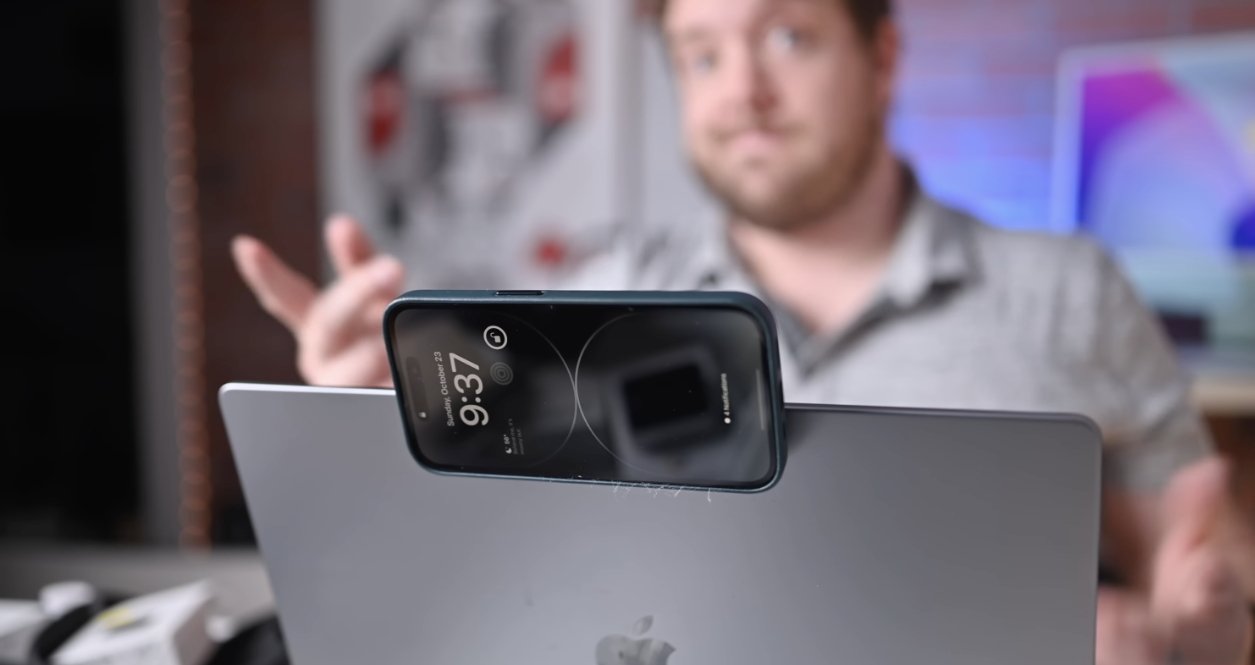
 Fitting a mount
Apple's Mac apps that work with inserting photos and scanning documents
- Finder
- Keynote 8.2 or later
- Messages
- Notes
- Numbers 5.2 or later
- Pages 7.2 or later
- TextEdit
System requirements to use the iPhone as the FaceTime camera
- Your iPhone is running iOS 16 and must be an iPhone XR or later
- Your Mac is running macOS Ventura
- You have a stand to place on top of your Mac's screen
Studio Lighting is only available with the iPhone 12 series and later. Center Stage is available with iPhone 11 series and later. Portrait Mode is available on iPhone XR and later.
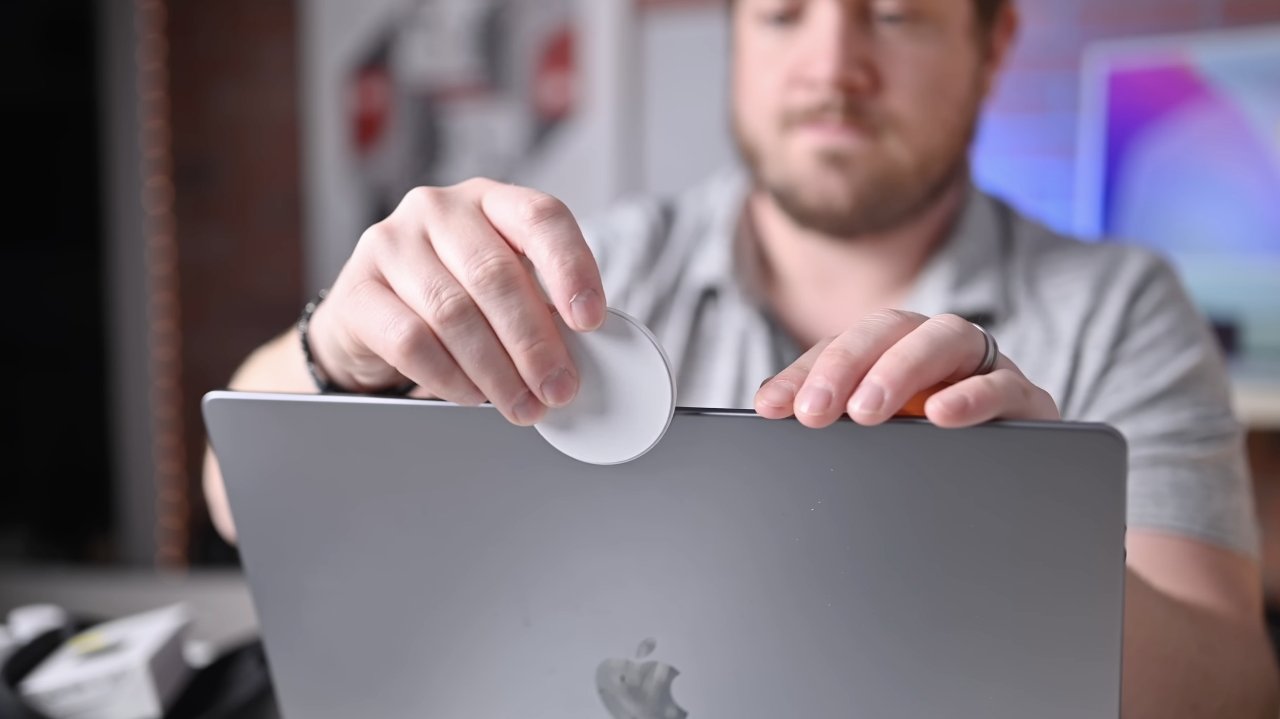
 Once connected, the Mac can control the camera's settings
Mac apps that work with FaceTime Continuity Camera
- FaceTime
- Zoom
- Microsoft Teams
- Webex
Continuity Camera works wirelessly with no need to connect via any cables.
How to insert a photo
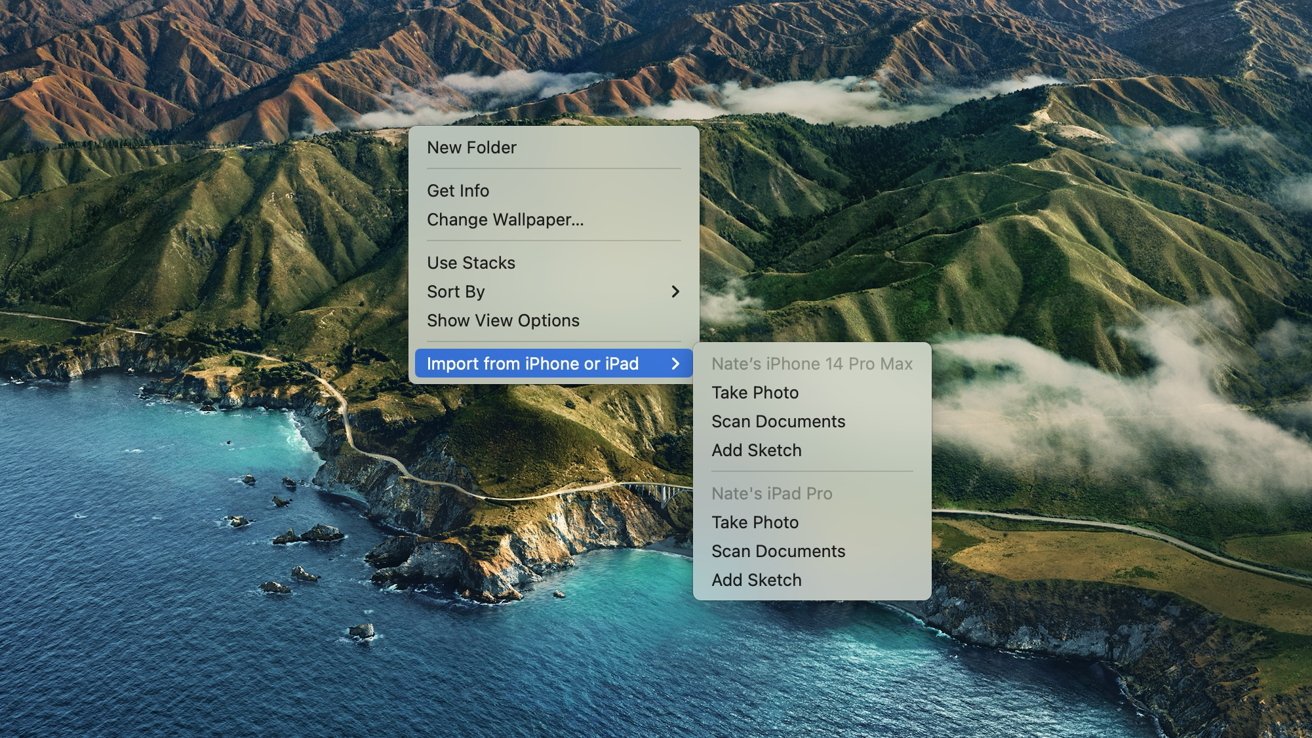
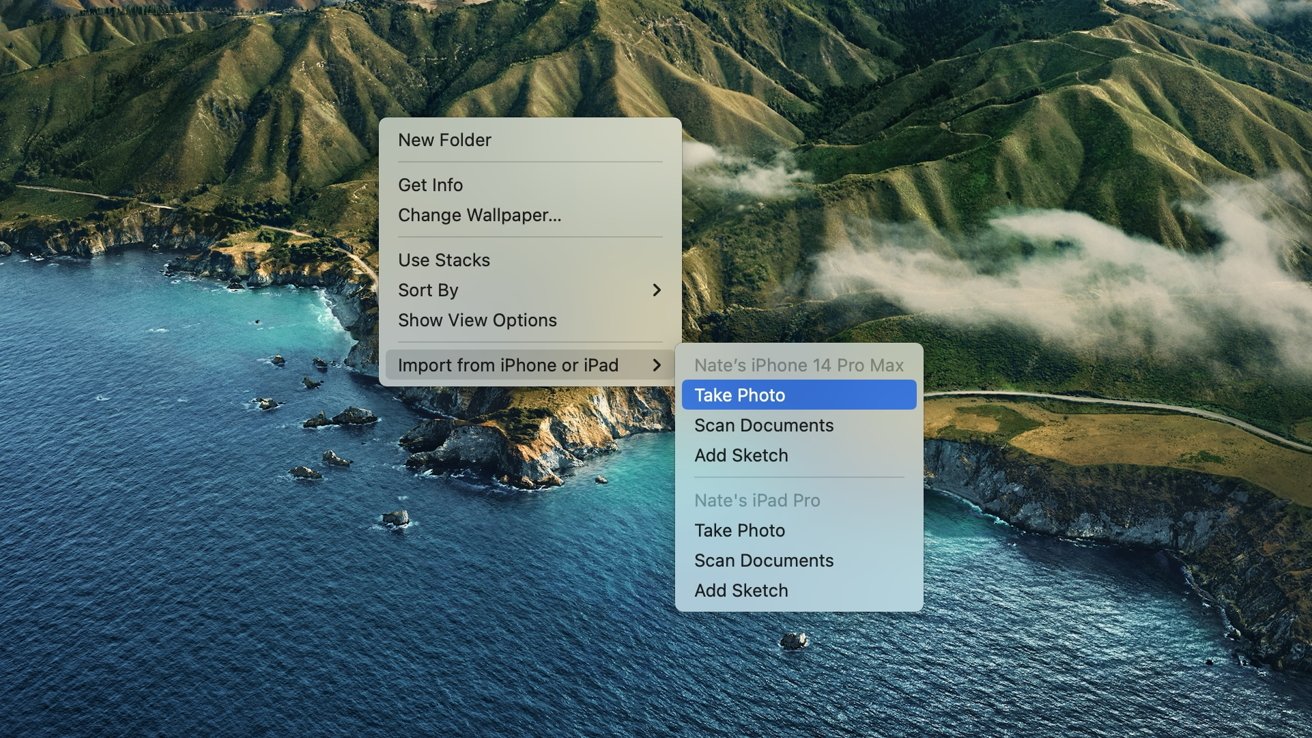
- Open a supported app on your Mac
- Control-click (two-finger click) on the area you want the photo to be inserted, or (in the toolbar) select File or Insert
- Choose Import from iPhone or iPad from the menu and then select Take Photo
- The camera app will launch on your iPhone or iPad
- Capture the picture you want to insert on your Mac and it will show up on your computer
Photos will usually show up nearly instantly on your Mac from your iPhone or iPad. From there, you can resize and reposition where you want the photo to be.
How to scan a document
Scanning a document onto your Mac is nearly the same process as inserting a photo from your iPhone or iPad.
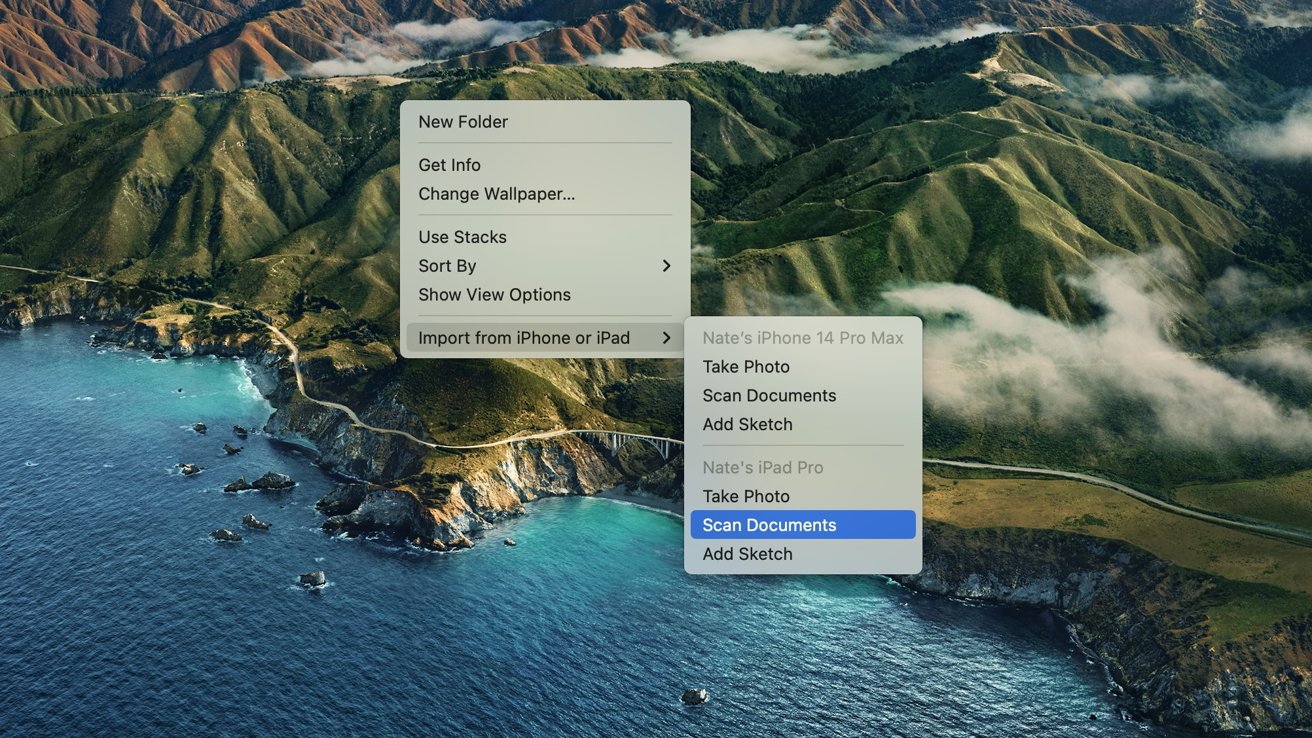
- Open a supported app on your Mac
- Control-click (two-finger click) on the area you want the photo to be inserted, or (in the toolbar) select File or Insert
- Choose Import from iPhone or iPad from the menu and then select Scan Documents
- The camera app will launch on your iPhone or iPad
- Capture the document you want to scan onto your Mac
- Drag the corners to adjust your scan once you have captured the document
- You can scan additional documents if you want to
- Tap Save when done and then the document(s) will transfer to your Mac
Documents will usually show up nearly instantly on your Mac from your iPhone or iPad. From there, you can resize and reposition where you want the document to be.
How to use your iPhone as the FaceTime camera
Your iPhone can be used as the main camera during a FaceTime call on your Mac. Before you do though, you will need to purchase a stand to place on top or very near your Mac.
- Bring your iPhone close to your Mac
- Your Mac will automatically switch to your iPhone's camera input
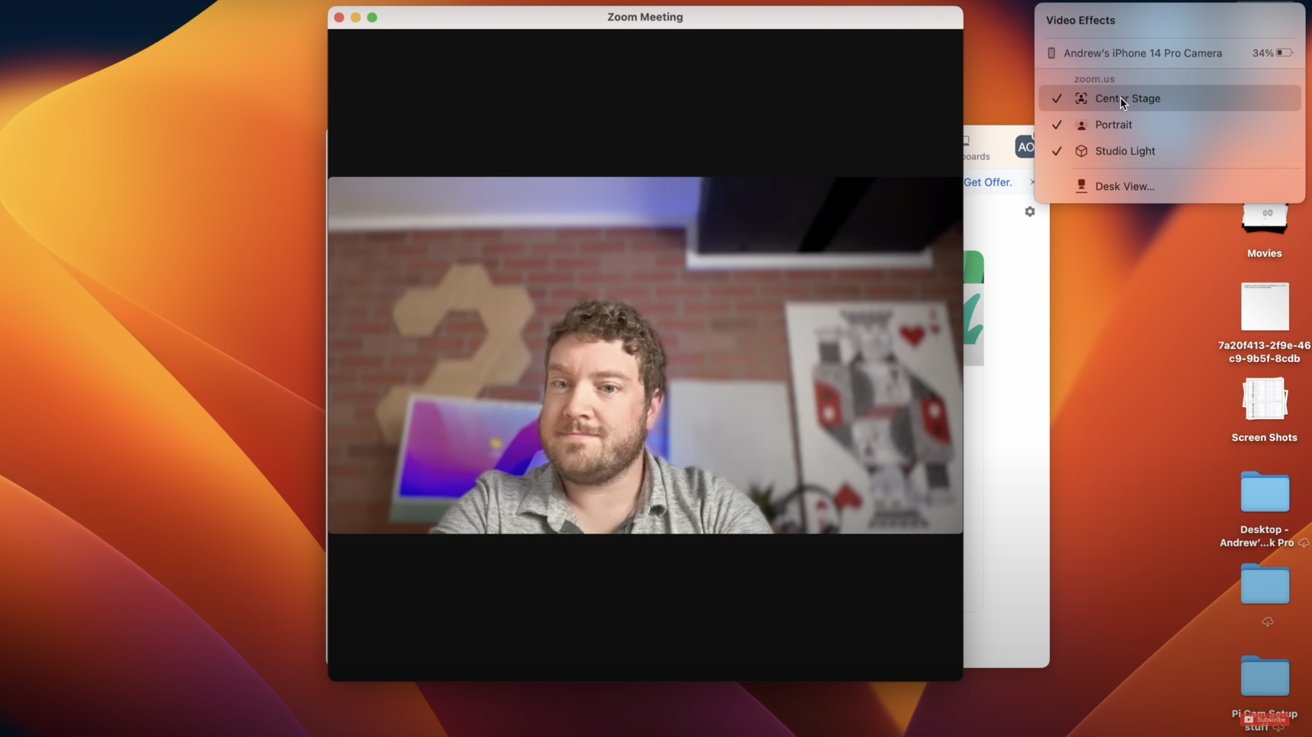
- Click on Control Center
- Click on Video Effects
- Select which effect(s) you want to use during your call
Center Stage allows your camera to follow you when you move out of frame or pinpoint the main subject currently talking. Portrait Mode blurs the background around the subject and Studio Light adds a brighter shade of light to the subject's face.
Once connected, the Mac can control the camera's settingsAssuming you've got the phone on top of your monitor, Desk View is another option that is available with using your iPhone as your video call camera while using your Mac. It mimics an overhead camera and shows your desk and face at the same time.
It uses the ultra-wide camera and your iPhone's ability to perform very powerful image processing. You do not need to adjust your phone when using Desk View.
How to use Desk View with your iPhone and Mac
- Click on Control Center
- Click on Video Effects
- Select Desk View
- Another window will open up
- Align how you want Desk View to be set
- Click on Start Desk View when everything is to your liking
 Mount with iPhone connected
To disconnect your iPhone as the main camera, you can either end the video call or take your iPhone off your Mac and select Pause or Disconnect from your iPhone's screen.
Lights, camera, action
Continuity Camera is a great way to insert photos, scan documents, and use your iPhone as the main camera while on video calls. It helps you be more proactive and look your best when talking with others.
Regardless which Mac you have, you're going to get better results using the rear camera on an iPhone to get the job done.


-xl-m.jpg)


 Malcolm Owen
 William Gallagher

 Amber Neely
 Andrew Orr