How to combine images using Shortcuts
 Charles Martin
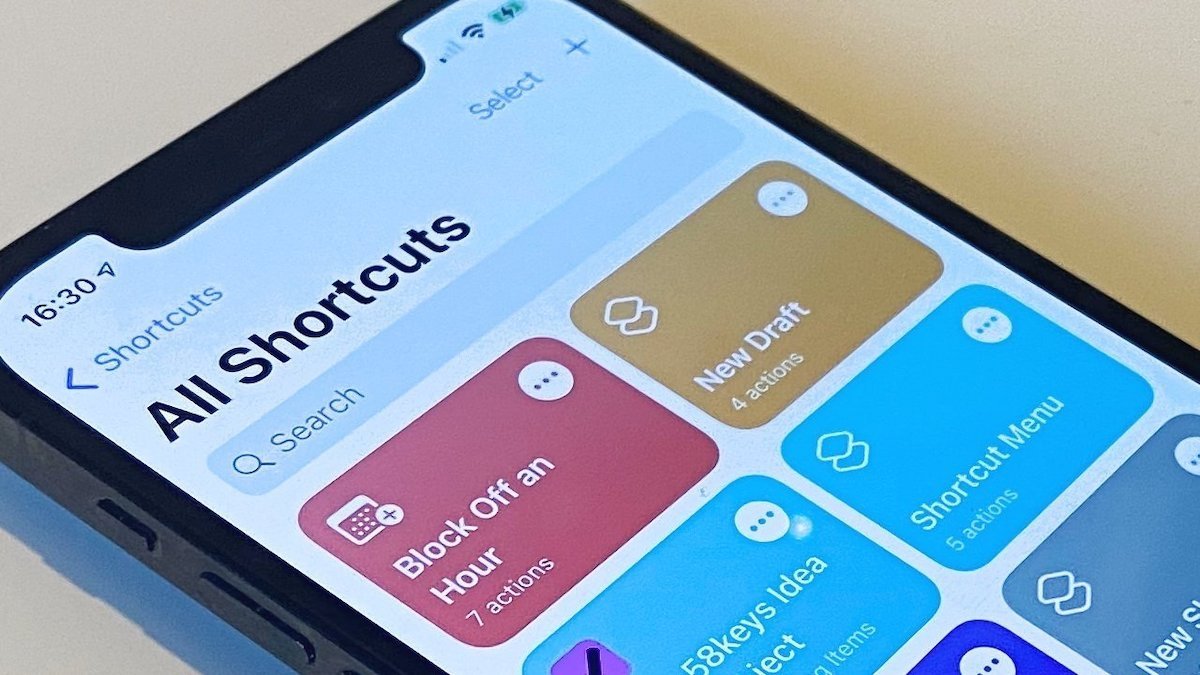
Built into macOS, iOS, and iPadOS is a handy way to take multiple images and make them into one image, without having to use an image editor. Here's how to use Shortcuts to get it done.
When posting to social media, writing an email, sending a message, creating a meme, or just AirDropping to a colleague — it can sometimes be quite handy to combine two more more images into a single file. While various image editors can help you combine images, you can use the Shortcuts app and the following shortcut to cut down the time required to a few seconds.
If you've not used the app before, Shortcuts is an app for Mac, iOS. and iPadOS that enables users to more simply automate a set of actions. It doesn't take the place of more powerful tools like AppleScript, but it is intended for users that want to automate a procedure but don't want to learn a scripting language or programming.
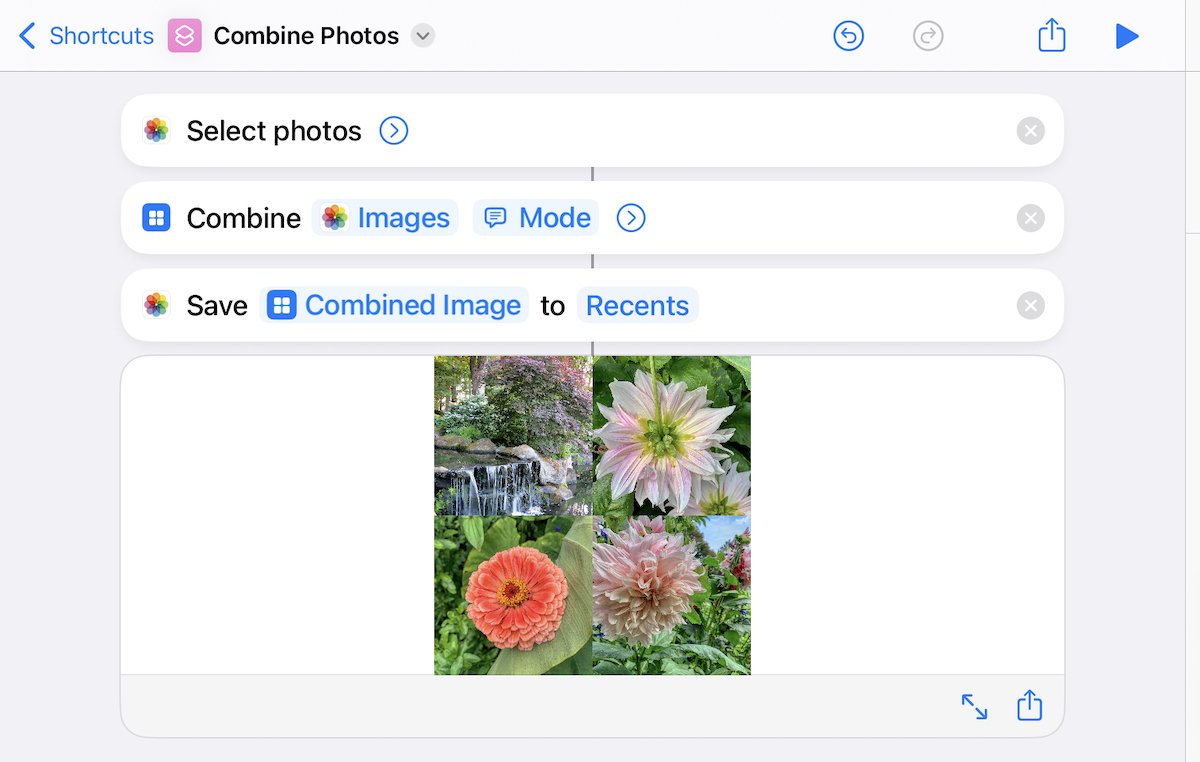
This shortcut opens your Photos library in a window, allows you to select the images you want to combine, then saves the result as a new image. The original images chosen are not altered in any way.
Our version gives users the option to choose whether the images are to be combined horizontally (best for pairs of portrait/vertical images), vertically (best for pairs of landscape/horizontal images), or in a grid (best for multiple images).
How to use Shortcuts to combine images on your Mac, iPhone, or iPad
Open the Shortcuts app on your Mac, iPhone. or iPad, and you'll see a collection of existing shortcuts. Click the "+" icon in the top right to create a new shortcut.
You'll see the work area where you will be adding actions on the left, and to the right (on a Mac or iPad) a listing of possible next commands (and a search bar for more). On an iPhone, your work area takes up the majority of the screen, with just a search bar to find new actions.
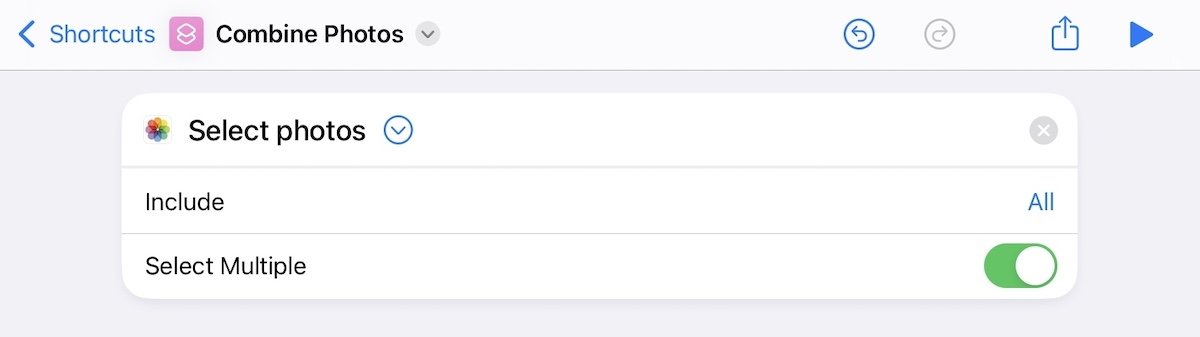
When creating a shortcut, one needs to have already broken down the steps that we need to automate. In this case, the first step is to select pictures from the Photos library. Type "select" in the search bar, and you should see "Select Photos" as an option. On the iPhone, you may have to scroll down a bit to see it.
You'll now see this action in the work area, with a small arrow in a circle next to it. Click that, and switch on "Select Multiple" so you can choose however many images you want.
Above the "Select Photos" action, you can also give your new shortcut a name. Tap on the title, choose "rename," and give it your preferred name.
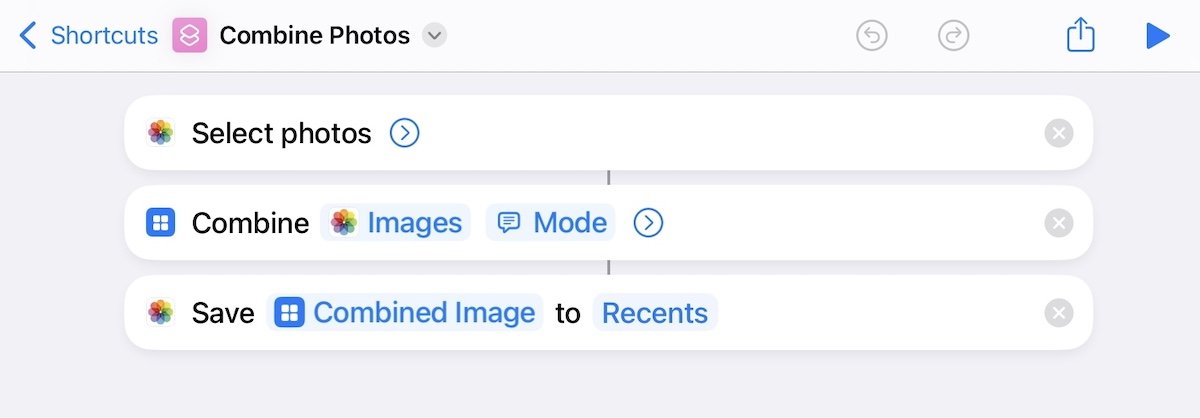
Next, use the search to locate "Combine Images," and add that by dragging it underneath the first action, or tap it on an iPhone. Then, tap on the word "Horizontally" and instead choose "Ask Each Time."
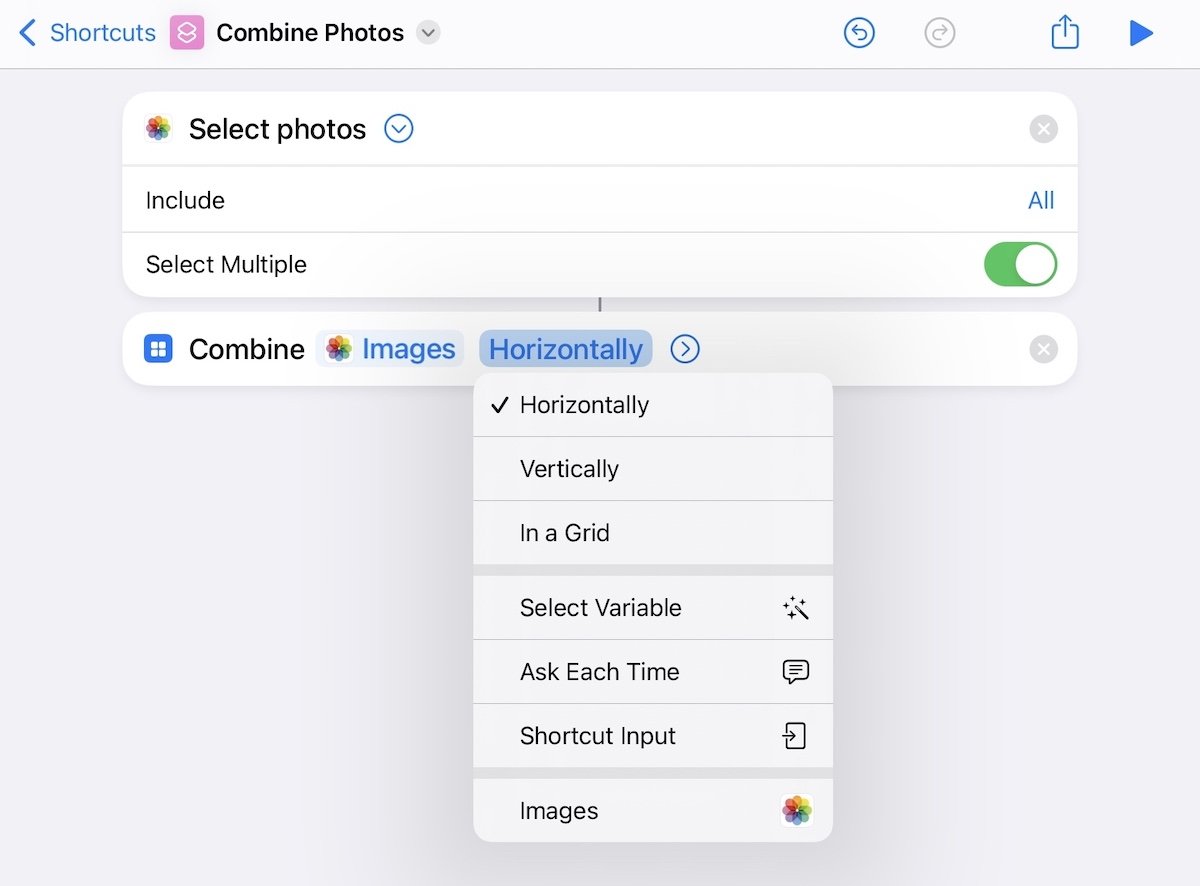
Changing this means you can choose between "Horizonally," "Vertically," or "In a Grid" when you have some images you are going to combine. If you tap the small arrow in this command, you will see "Spacing" where you can set the number of pixels of "white space" between each photo — in our case, we've set it to five pixels.
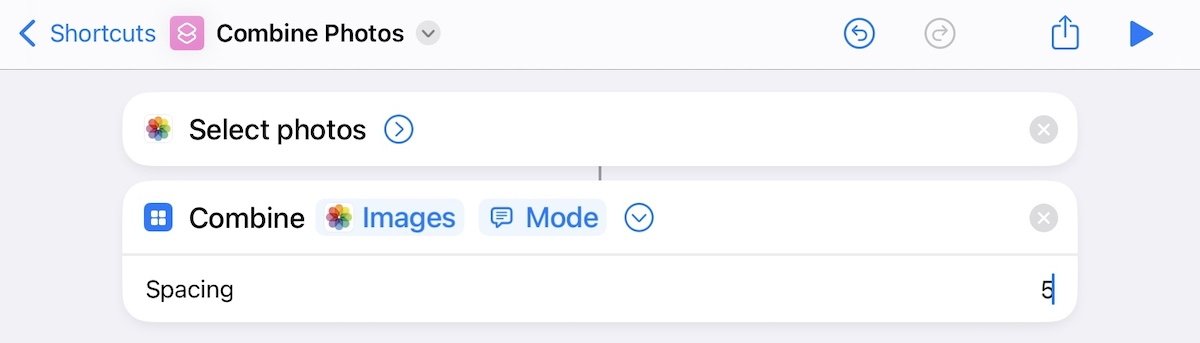
The last step is to search for an add the action "Save to Photo Album." By default, this will put your combined image into the "Recents" section of your Photos library, but you can tap on the word "Recents" to change the destination to another existing album in Photos if you prefer.
Doing a test run
On an iPad or Mac, you can check to see if everything is working right by tapping the "play" button at the top right of the work area. For iPhones, press the "Done" button, and the shortcut will be added to your Shortcuts app — you can just restart the app to see it, and tap on it to test it.
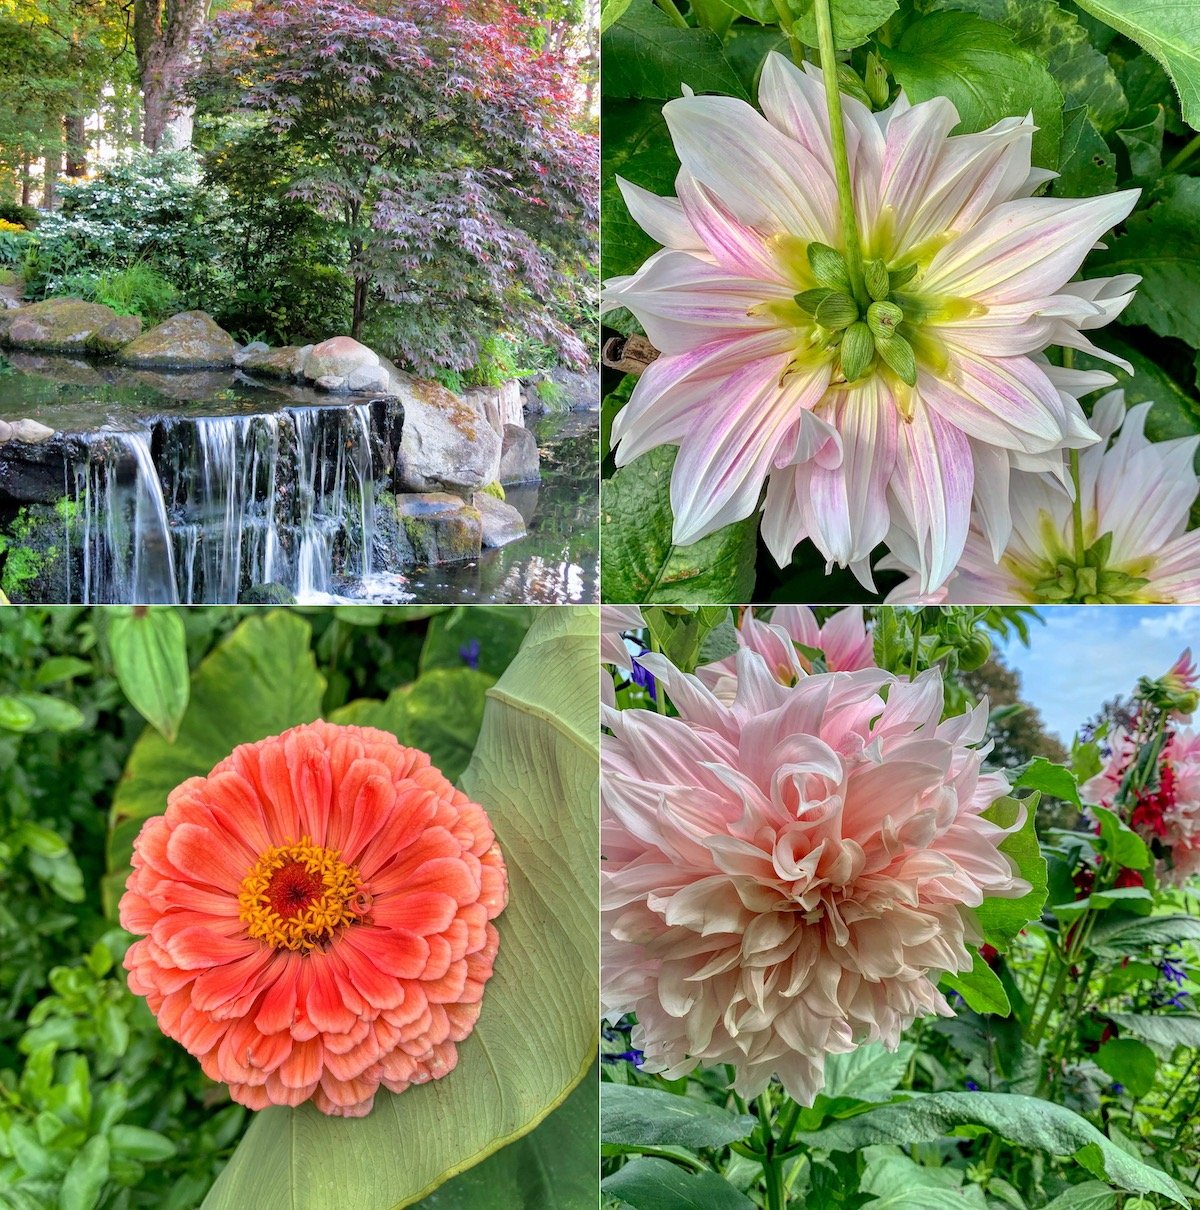
As the shortcut runs, it will open to your Photo Library, where you select the photos you want to use. For this test run, let's just select a few.
If you're on a Mac or iPad in Shortcuts, the steps will then show you what the combined image looks like — it has already been added to the album you chose earlier. On the iPhone, you'll see the shortcut finish running and produce a check mark to show it has completed.
You'll then need to open the Photos app and scroll to the most recent image to see the combined result. From Photos, you can email, AirDrop, or message the combined image immediately, or take it into your choice of image editors if you want to add captions, "word balloons," filters, or other decoration.
If you plan on using this shortcut often, you can add it directly to your Home Screen on iPad or iPhone. Open Shortcuts, tap on the three dots button for your shortcut, tap on the name of the shortcut, and choose "Save to Home Screen."
On the Mac, you have several other options to save a shortcut outside of the Shortcuts Gallery. In the work area, you can tap on the "i" in a circle icon at the top right, and choose to pin the shortcut to the menu bar, add it to the share sheet, or save it as a "Quick Action" in the Finder, Touch Bar, or Services Menu.
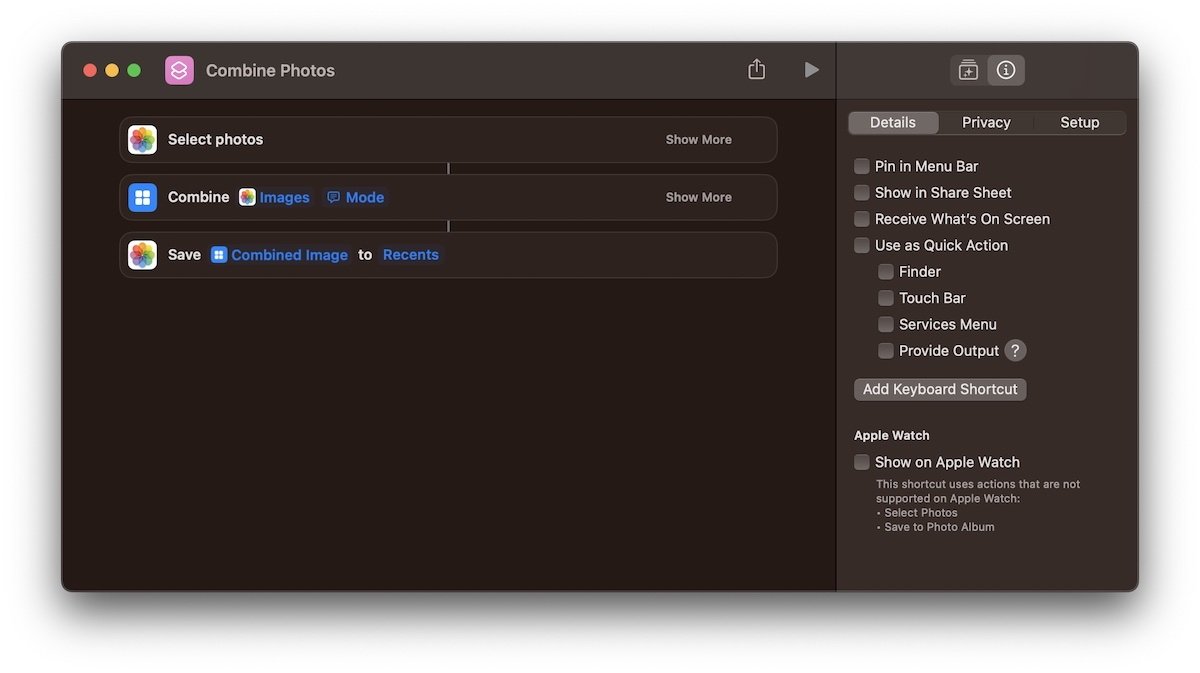
In addition, you can add a keyboard shortcut to trigger a Shortcut, and even add it to the Apple Watch. You'll get a warning if the actions you've used, such as those in this Shortcut, aren't supported on the Watch.
Your shortcut will still be available as part of the Shortcut app's gallery, but putting a copy on your Home Screen — or one of the many options to save it elsewhere on a Mac — will save a step and a bit of time in getting your images combined.


 Amber Neely
 Thomas Sibilly
 AppleInsider Staff
 William Gallagher
 Malcolm Owen
 Christine McKee