 Chip Loder
There are several utilities you can use on your Mac to secure it at startup. Here's how to use them to keep your Mac and data safe.
Computer security is an important topic in today's digital world and most electronic devices are at risk to one degree or another.
Apple has gone to great lengths to make its platforms secure, but there are still ways attackers can break in, steal data, and compromise Apple systems.
Always keep in mind there is no such thing as perfect security.
The best you can do is minimize a device's or system's attack surface to make it as difficult as possible for a threat actor to gain access to your systems.
From the very beginning, Apple has made macOS very secure. It''s one of the most secure operating systems in the world.
iOS and tvOS devices are even more secure since they can only load software from Apple's curated App Store. That is, unless the devices' security is circumvented using illegal jailbreak software.
Also keep in mind that in the US at least, jailbreaking a computing device is a violation of the Digital Millennium Copyright Act. That makes it a Federal crime.
Startup vectors
One of the most vulnerable points for an attack on a computing device is when the device first starts.
Most computers, including smartphones and tablets, go through a process during power-on known as boot-strapping. During this process, the operating system hasn't been loaded yet - and very little software is running on the device.
It is at this point an attacker can perform various attacks to circumvent the OS. They could also install malicious software such as viruses, trojan horse programs, and firmware to allow custom code to run, or even to damage the device.
In newer iOS devices, Apple solves this problem with the Secure Enclave or a T2 Security chip.
The Secure Enclave is a protected area of hardware in the device that uses both hardware and encryption to secure the device.
Macs aren't quite as secure as iOS devices for historical reasons, so threat actors can install software on earlier Macs which can compromise their security.
Later Macs that contain Intel CPUs include a T2 security chip to avoid these problems. M2-based Apple Silicon Macs and later have a Secure Enclave built in.
The storage device of a Mac containing a T2 chip is encrypted with keys tied to its hardware to provide extra levels of security.
This means recovering lost or corrupted files on a T2-based Mac is difficult. Any utility trying to recover an encrypted storage volume must know how to use the secure keys tied to the Mac's hardware.
That's something Apple doesn't publish documentation about for obvious reasons.
On Apple Silicon Macs, all macOS Startup Disk volumes are encrypted. Apple calls them Signed System Volumes.
Apple Silicon Macs won't execute any system files on Signed System Volumes that don't have a valid cryptographic signature from Apple.
This makes it harder to tamper with macOS system files and still have them run on Apple Silicon Macs.
The Startup Disk
However, one of the biggest attack vectors on Macs is the Startup Disk itself.
When your Mac starts, it first loads a bit of firmware, the Boot ROM, to power up all its internal systems. Then it runs some firmware to initialize things, such as the display and networking.
Most of this code is contained in the hardware of the Mac itself.
The Mac Boot ROM then hands off to two more pieces of firmware: LLB andiBoot.
iBoot actually has two parts, and if the second part confirms everything is fine, it looks for an internal or attached storage device to load the macOS kernel from.
This is where security problems can arise.
Perhaps the biggest security risk during startup is the fact that additional storage devices can be connected to a Mac at will - via the USB, Thunderbolt, or network ports.
Signed System Volumes ensure that only valid versions of macOS can be booted. But there is still the possibility of threat actors injecting malicious code at this point.
But always keep in mind that unless your Mac's startup sequence is protected, any threat actor can simply attach an external device to it, restart the Mac, and force it to boot into that device.
There are ways to password-protect your Startup Disk and your Mac in general, which will discuss in a moment.
Once booted to an external device, actors can copy and steal files, plant malicious code on your Mac, and even use it as a remote terminal to carry out cyber warfare over the internet.
Many a company, including Apple, has had trade secrets stolen by industrial spies merely by copying files to external devices.
Even Apple's Car project secrets were stolen this way.
Securing your Mac
There are several ways in which you can secure your Mac. Using built-in Apple software, you can:
- Use the Startups Security Utility
- Use Secure Boot and External Boot
- Disallow booting from external devices
- Password protect your Mac on startup
- Restrict users and login passwords
- Password protect one or more storage devices
- Start up in Safe Mode
- Use Lockdown Mode
- Remotely lock a Mac using MDM
The Startup Security Utility is an app Apple added to macOS starting with Macs that include a T2 Security chip and later models.
On Macs with or without a T2 chip, you can set a firmware password, if the Mac supports it.
A firmware password stops the boot process and prompts the user for a password before loading the operating system.
Using the Startup Security Utility you can set a firmware password, enable Secure Boot, or enable/disable External Boot. The last two options require a T2 chip.
To run Startup Security Utility on an Intel Mac, power on your Mac and hold down Command ()-R on the keyboard. This enters macOS Recovery.
macOS Recovery is a special app that lives in your Mac's firmware and allows access to parts of macOS such as the installer, Disk Utility, Terminal, and Startup Security Utility.
When you hold down Command ()-R on the keyboard, the Mac's bootloader diverts booting into macOS Recovery instead of the copy of macOS on your Startup Disk.
Once in macOS Recovery, you can't do anything other than run one of the available programs, or Quit or Restart.
In macOS Recovery, enter your user admin password, then choose Utilities->Startup Security Utility from the menu bar.
In Startup Security Utility, you can set a firmware password, set the security level to use at boot (Secure Boot) and set whether or not to allow booting from external media (External Boot).
The Full Security option in Startup Security Utility causes the Mac's firmware to remotely verify the installed version of macOS by contacting Apple's servers.
Hence you'll need a network connection if you choose to set that option.
You can also turn off Secure Boot entirely - allowing any installed version of macOS to boot.
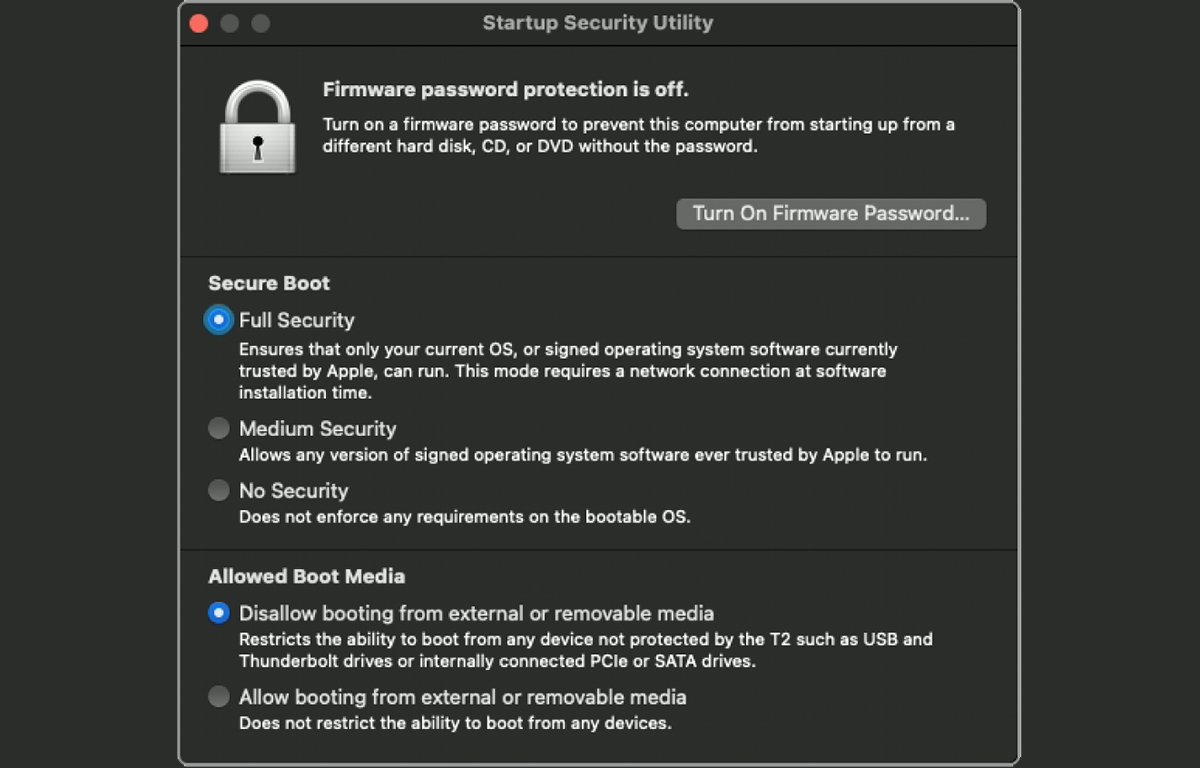 Startup Security Utility.
Apple Silicon Macs
On Apple Silicon Macs, the process is only slightly different.
When booting on an Apple Silicon Mac, press and hold the Mac's power button until "Loading startup options" appears.
Click Options, then click Continue. Next, select a Startup Disk and click Next.
Enter an admin password, then click Continue.
In the Recovery app, choose Utilities->Startup Security Utility. Next, select the system you want to use to set the security policy.
If the storage volume selected has FileVault turned on, you'll need to unlock it first by entering its password.
Once in the Security Policy section of the Startup Security Utility, you only have two choices: Full Security or Reduced Security.
Full Security only allows your current version of macOS to run. This requires a network connection as well.
Reduced Security allows any trusted, signed version of macOS to run if the Mac supports it.
Under Reduced Security you can also set options for allowing and managing legacy Kernel Extensions, you you wish to allow them to run.
Once you've set all the options you want, click OK, then Restart your Mac. Changes don't take effect until you Restart.
User login passwords
User login passwords are another security risk.
By default, the macOS installer and setup app require a user to enter a username and password when a Mac is first set up.
But assuming the user in question is an admin user, it's possible to turn user login off entirely in System Settings by not requiring a password at user login.
Doing so is totally insecure since the Mac will boot into the Finder after powering on without any intervention.
Hence, you should always require user passwords to be set for all users.
Under System Settings->Users & Groups it's also possible to turn on "Automatically log in as" - and set it to log in as any user listed on the machine.
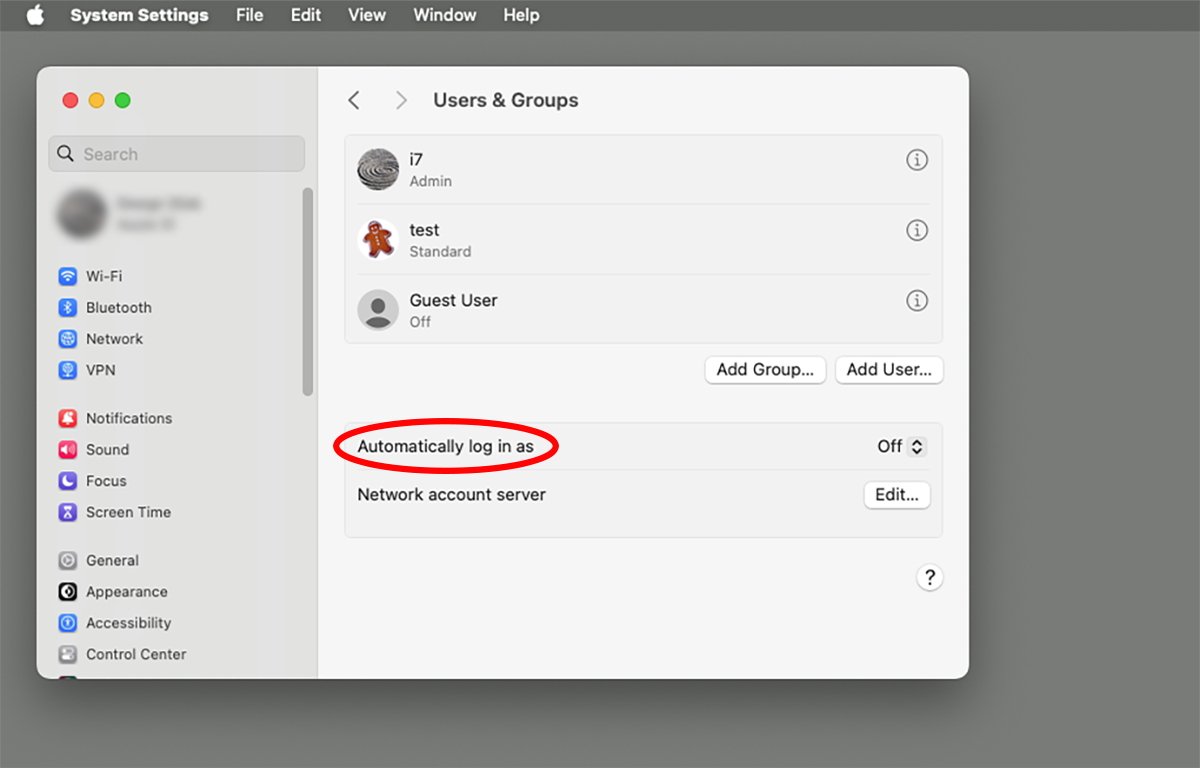 Automatically login as pane in the Users & Groups pane.
Under Users & Groups, Guest Users can also be enabled - which don't require a password to log in.
If you're in an environment that uses Active Directory (AD) to manage users, you can allow users to log in by adding their AD credentials stored on an AD server (or in Microsoft's Entry ID cloud service).
You can open macOS's hidden Directory Utility app from this pane as well (in the Network Account Server pane).
Password protecting volumes
In macOS, you can also password-protect individual storage volumes so that they can't mount without the user entering a password.
This makes it much more difficult to access files on a volume if the user doesn't know the password.
However, be aware that to do this you must first erase and encrypt the storage volume first using Apple's Disk Utility app.
To do this, first backup the volume's files for later restoration, then run Apple's Disk Utility app in the /Applications/Utilities folder.
In Disk Utility select the volume you want to encrypt, click Erase in the toolbar, enter a volume name, select GUID Partition Map, and choose an encrypted file system format from the popup menu.
Enter and verify a password for the encrypted volume, then click Choose. Click Erase, then Done.
Disk Utility will erase the volume, encrypt it, and secure it with the password you entered.
The next time you restart your Mac or plug the device containing the volume into your Mac, you'll be prompted to enter the password in order to mount it on the Finder's Desktop.
You can also encrypt volumes in any Finder window in the sidebar without erasing them by Control-clicking it, then selecting Encrypt from the popup menu.
Booting into Safe Mode
macOS allows legacy Kernel extensions (KEXTs) which are software components that can extend the functionality of the macOS Kernel with custom code.
In macOS 11 and later, Apple deprecated KEXTs in favor of System Extensions, which are considered more secure and less prone to crash macOS if code doesn't execute properly.
At boot time, macOS merges all KEXTs into an Auxiliary Kernel Collection (AuxKC), then runs some of the firmware mentioned above.
Only after most of the firmware boot process is completed is the AuxKC then loaded into the Kernel where KEXTs are allowed to run.
Using Safe Mode in macOS, it's possible to boot into macOS but exclude the AuxKC in order to prevent KEXTs from loading.
To boot your Mac into Safe Mode, boot into Recovery mode as mentioned above. When you select the storage volume you want to use hold down the Shift key, then continue with the steps listed above.
When your Mac reboots, it will load macOS from the volume indicated but will tell iBoot not to load the AuxKC.
Lockdown Mode
According to Apple, Lockdown Mode "helps protect devices against extremely rare and highly sophisticated cyber attacks."
Lockdown Mode essentially limits the features available in macOS in order to reduce the attack surface (ways in which attackers can break in).
Lockdown Mode is available in macOS Ventura and later.
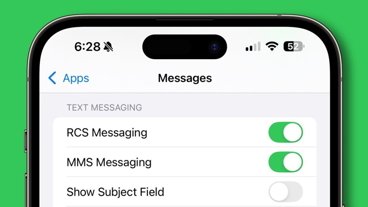
When Lockdown Mode is on, macOS doesn't include all the features it does under normal operation. Lockdown Mode restricts certain networking activities such as attachments in Message and FaceTime, some web technologies, device connections, and configuration profiles.
See Apple's technote for a full list of Lockdown Mode's restrictions.
You can turn on Lockdown Mode in macOS in System Settings->Privacy & Security->Lockdown Mode.
MDM
Apple's Mobile Device Management (MDM) technology allows Macintosh system administrators to remotely lock a Mac using MDM servers.
In order to use MDM to remotely lock a Mac, the Mac must be enrolled in MDM on an MDM server, and the administrator must have set MDM conditions under which the Mac will be locked.
Once enrolled in MDM, remote locking is controlled by the server and the server's administrator.
MDM is used by admins to remotely disable Apple devices which have possibly become threats to an organization's networks.
Security is a complex topic and there are numerous ways you can increase the security of your Macs.
We haven't covered FileVault security, nor the Mac's System Integrity Protection in this article, which we'll get to in a future article.


 William Gallagher
 Malcolm Owen


 Oliver Haslam
 Amber Neely
 Marko Zivkovic and Mike Wuerthele


1 Comment