How to use QuickTime Player in macOS Ventura
 Chip Loder
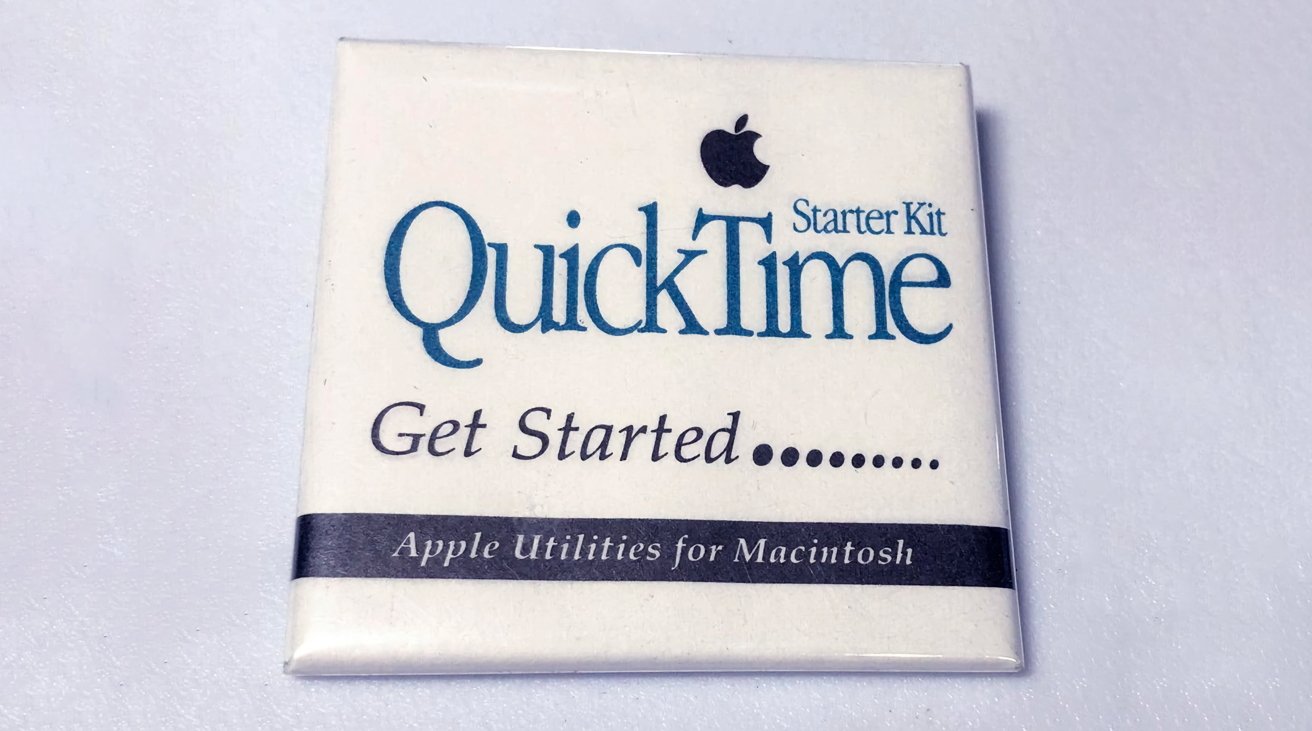
QuickTime Starter Kit
Last updated
Apple's QuickTime is a 30-year-old technology but is still supported by Apple. Here's how to use the QuickTime Player included with macOS.
History
Before the internet, and long before streaming, there was QuickTime. Released by Apple in 1992, it was a revolutionary technology at the time that provided timed recording and playback of audio-visual data. QuickTime (or ".mov") files were used to transport videos across computers.
The early QuickTime player was rudimentary - black and white controls, tiny playback windows, and limited color depth. AV compression was provided by plug-in QuickTime components. Each codec has an identifying 4-character code, and the original Apple QuickTime codec had (and still has) a code of '.mov'.
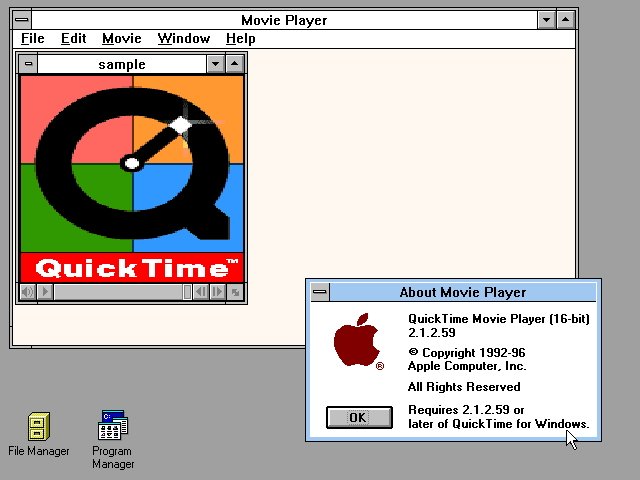
A few years later, Apple released a version for Windows.
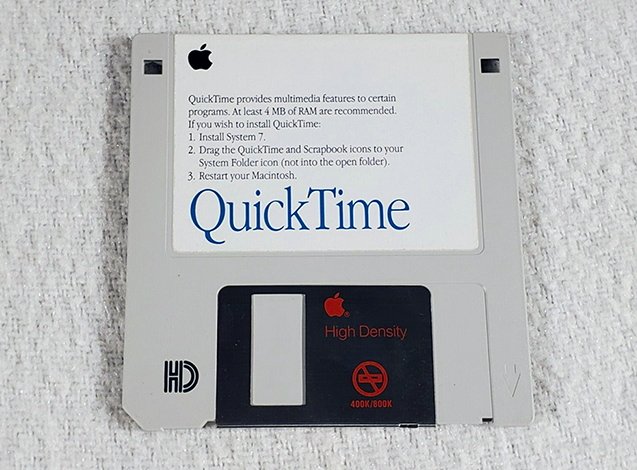
Early versions of QuickTime for Mac were also released on 3.5" floppy disk.
A host of third-party QuickTime-based editing apps appeared, with the most notable being Adobe Premiere. Premiere lives on today in Premiere Pro from Adobe's Creative Cloud.
When Apple released Mac OS X in 2000, it included a new, modernized player app with a larger window, more features, and improved codecs. It also released a streaming server that allowed the dedicated streaming of QuickTime movies over the internet.
Using Today's QuickTime Player
Today, Apple still ships QuickTime Player with macOS, although the .mov file format is no longer being actively developed at Apple - it has been superseded by the MP4, H.264, and H.265/HEVC formats.
The QuickTime file format is a container format. It can contain a virtually unlimited number of other formats depending on codecs — and can even include third-party formats as mentioned above. So while Apple no longer actively develops the original QuickTime codec, there is support for modern codecs and formats.
QuickTime Player follows Apple's minimalist design sense and allows basic video/audio editing functions in the main player window. It also enables exporting files to some other AV formats and the sharing of files. There's also a screen recording feature - a relatively new addition to the player.
You can also full-screen a player window and use it to watch movies and TV shows. If your Mac has an internal camera, or you have an attached camera capable of video recording, you can also record new movies and save them to files.
If you plug in an iOS device such as iPhone or iPad via a USB cable, you can also use it as a camera to record movies from.
Basic Use
The player's basic features are opening, saving, exporting, and copy-and-paste. There are also the usual standard file commands: Open, Close, and Save.
If you hold down the Option key while the File menu is open, Close changes to Close All, which closes all open movie windows. There is also an Open Location... option (from a URL), Open Image Sequence... (for QuickTime Image formats), and Open Recent.
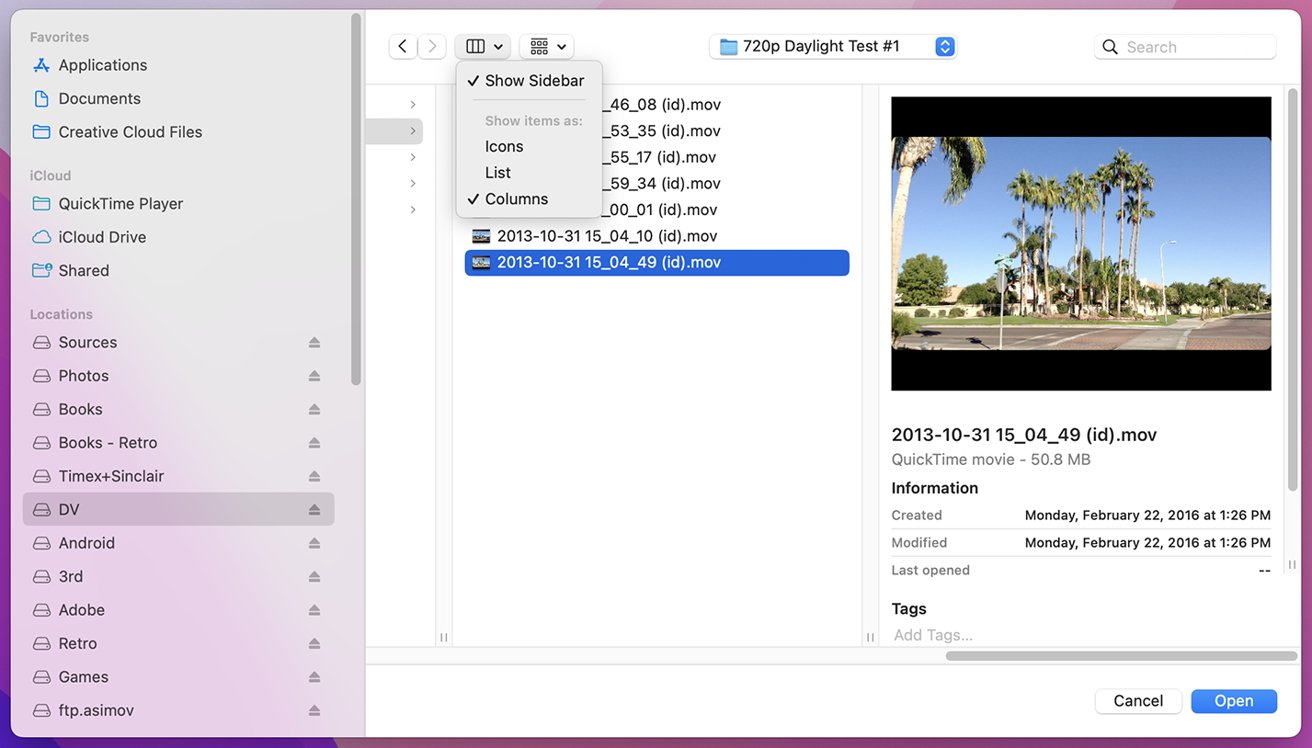
Selecting Open... displays the standard macOS Open dialog, but if you click on the small button in the upper left corner with 4 squares on it and select "Columns" from the popup menu, the window switches to NeXT-style Columns mode, which displays a still movie preview on the right for the selected movie.
You can also Duplicate, Rename, and Move To from the File menu. Duplicate opens an identical unsaved window which you can name in the window's title bar. If you select Rename from the File menu on an existing movie window, you can rename a saved file in the same manner.
Move To... provides a small window with a list of storage destinations where you can move a file. However, only top-level destinations are available - it's not a standard open or save window.
Export As... allows you to export to a small number of formats such as 480p, 720p, 1080p, 4K, or audio only. The Share... menu item below lets you send a movie to AirDrop, Notes, Messages, or to YouTube if you have an account.
On the View menu, there are commands for:
- Making a movie window fullscreen
- Making it float above all other windows
- Zooming in or out
- Changing movie speed
- Switching language audio tracks
- Turning subtitles on and off
- Changing the time format display
- Jumping forward or back a chapter
- Display optional audio tracks (if any)
- and loop
The time format options allow you to display time in SMPTE timecode format - the standard used by professional video editors and most video editing software. You can also jump to a specific SMPTE time in a movie, if it contains a timecode track.
If you are using a modern Apple keyboard, you can also make the frontmost movie window Enter Fullscreen by pressing the "fn"+F keys at once. The "fn", or function key is on the lower left corner of the Apple keyboard with a globe symbol on it. Pressing fn+F again exits fullscreen mode.
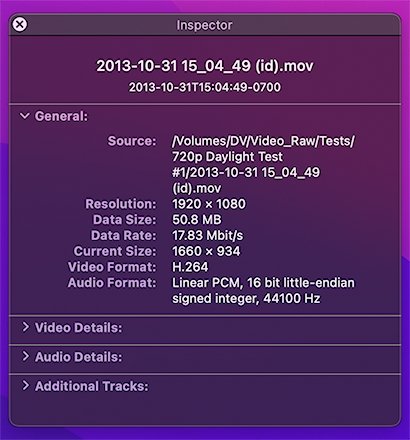
On the Window menu are a variety of commands, including usual Window menu commands such as Minimize, Zoom, Move To Built-In Retina Display if you are using an external display, There's also Fit to Screen, Fill Screen, Panoramic, Increase and Decrease Size (Command-[, Command-] respectively), and Show Movie Inspector and Show Export Progress.
Selecting "Show Movie Inspector" brings up a small inspector window containing 4 panes of info about the frontmost movie:
Player Window Controls
Note that to display window controls, you must hover the Mac's cursor over a QuickTime player window. If you mouse out of the window's boundaries, the controls are hidden.
Basic player window controls include a scrubber at the bottom, a volume slider, play and seek forward/back controls, time counters, an AirPlay sharing control, Picture-In-Picture button, and a sharing and playback speed popup menu control:
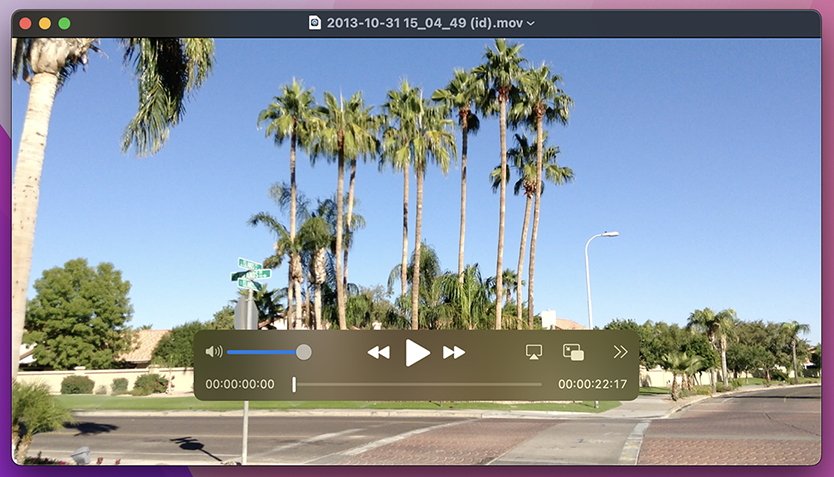
You can also scrub forward or backward 1 second at a time by pressing the right or left arrow on the keyboard.
Clicking the AirPlay button shows a popup menu of all TV devices within range that support wireless AirPlay sharing. These can include some 3rd-party TVs as well as the Apple TV.
To the right of the AirPlay control is Picture-In-Picture (PiP), and clicking it sends the frontmost movie window to the upper right corner of the screen, where it will hover above all other windows. If you hover the mouse over the PiP window, 3 controls are displayed: a close button, a Play button, and another PiP button which exits PiP mode when clicked.

Clicking the far right control (with 2 right-pointing arrows) pops up the Share and Playback Speed menus.
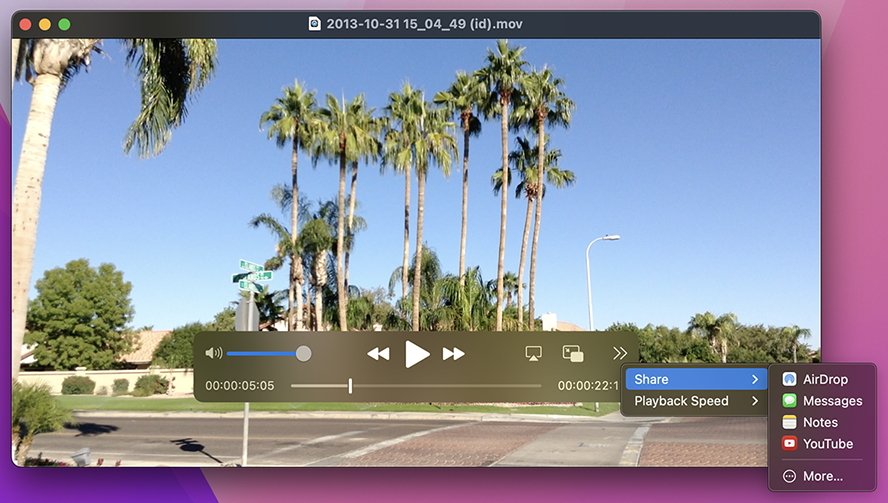
The Share menu items are essentially the same as on the File menu's Share... menu, but with a "More..." option which opens a window to share content with any sharing extensions, if installed.
Clicking a movie window's green (3rd) button in the upper left corner also toggles Fullscreen mode. Once in fullscreen, to exit, you'll need to hover the cursor to the upper left corner of the display to show the window titlebar again to get access to the control.
Recording
Apple has a page in the QuickTime Player User Guide named Record a movie in QuickTime Player on Mac. It's a very simple overview of the basic recording functionality in QuickTime Player. You can also view it in QuickTime Player by selecting "QuickTime Player Help" from the Help menu.
You can also make an audio-only recording.
To start recording, select File then New Movie Recording or File then New Audio Recording. A recording window will appear with a live stream from the default camera (usually the built-in "iSight" camera for Macs). The record button is in the center of the window.
If you click the small down-pointing arrow next to the Record button, a host of recording options will be displayed on a popup. The top section is which attached camera you want to record from, the next section is which audio input to record from, and the next section is for screen recording, which we'll get to next.
Note that iOS devices on Apple's unsupported legacy device list will not be listed under the Camera or Microphone sections, although screen recording from them may still be available. As of macOS 13 Ventura, only iPhone 7 and later models are supported.
Also note that you can record video and audio input independently from different devices. This allows you to capture video from an iPhone or iPad, for example, while using an external mic such as a USB podcasting mic or an external Bluetooth wireless mic.
At the bottom of the popup menu is a capture quality menu section which has options depending on what kind of device you're recording from.
Click the Record button to start recording, and click it again to stop recording. After recording stops, the record window will close and your new movie will open in a standard movie playback window.
Be sure to save the movie to a file right away to avoid data loss.
Screen Recording
You can also record an Apple device screen, although in QuickTime Player, doing so is a little more fragmented depending on which device you want to record from. If you want to record from an external device such as iPhone/iPad or from a nearby Apple TV, the recording options are listed on the same record popup menu as shown above.
To start a screen recording from an iPhone/iPad or Apple TV, follow the sample steps mentioned above, but instead of selecting a "Camera" at the top of the popup menu, select a device from the "Screen" section below it. If the device is an iOS device it must be connected to your Mac via a USB cable.
On selecting the device from the "Screen" list, the recording window will change to show the device's screen instead of camera input.
If you select an Apple TV from the Screen list on the recording popup, it will first display a 4-character code on the Apple TV's display and then prompt you to enter it on your Mac.
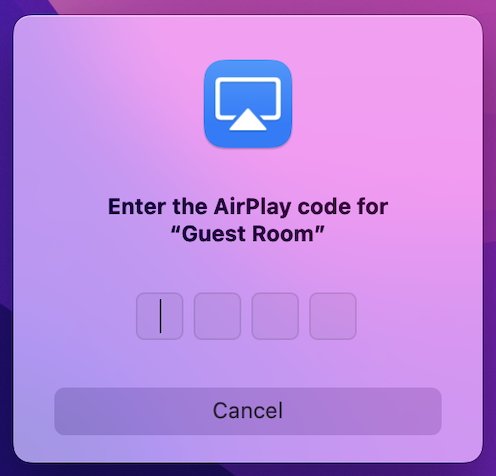
This is to prevent unauthorized people from recording from your Apple TV without your knowledge. All AppleTV recording is done over AirPlay, so you must have AirPlay turned on in your Apple TV's Settings app.
Recording Your Mac's Desktop
If you want to make a screen recording of your Mac's desktop in QuickTime Player, select New Screen Recording from the File menu. A resizeable marquee region will appear on your Mac's desktop along with a small control panel below it.
You can resize/move the marquee area to capture any region of your screen you wish by dragging the resize handles at the marquee edges or by dragging the marquee by clicking and dragging in its center.
In the record control panel which appears, there are 5 buttons on the left: Capture Entire Screen, Capture Window, Capture Selected Portion, Record Entire Screen, and Record Selected Portion.
There's also an Options button with Save To, Timer, Microphone, and Options sections. At the far right is the Record button.
The 3 "Capture" options are really from the Mac's screenshot feature, which allows you to capture stills of your Mac's screen.
To exit marquee mode and return to the Mac desktop, hit the Escape key on your Mac keyboard, or click the record control panel's close button on the left.
After the recording has stopped, the new recording will be sent to whatever menu item you selected in the Save To section of the Options menu.
Editing
Most editing in QuickTime Player is controlled from the Edit menu or in the player window itself.
There are 2 main ways to start editing: select either the "Trim" (Command-T) or Add Clip To End menu options from the Edit menu.
You can rotate the movie in 90-degree increments or flip it horizontally or vertically. You can also remove either all video tracks or all audio tracks using the "Remove Video" and "Remove Audio" menu items.
Once you select "Trim" from the Edit menu, a simple Trim pane with "Trim" and "Cancel" buttons appears. You can trim the start or end of the clip by dragging the trim control's ends, then clicking the Trim Button.
Once the Trim control has been resized, you can slide it forward or back across the movie by holding down the Command key and dragging either of its handles on either side:
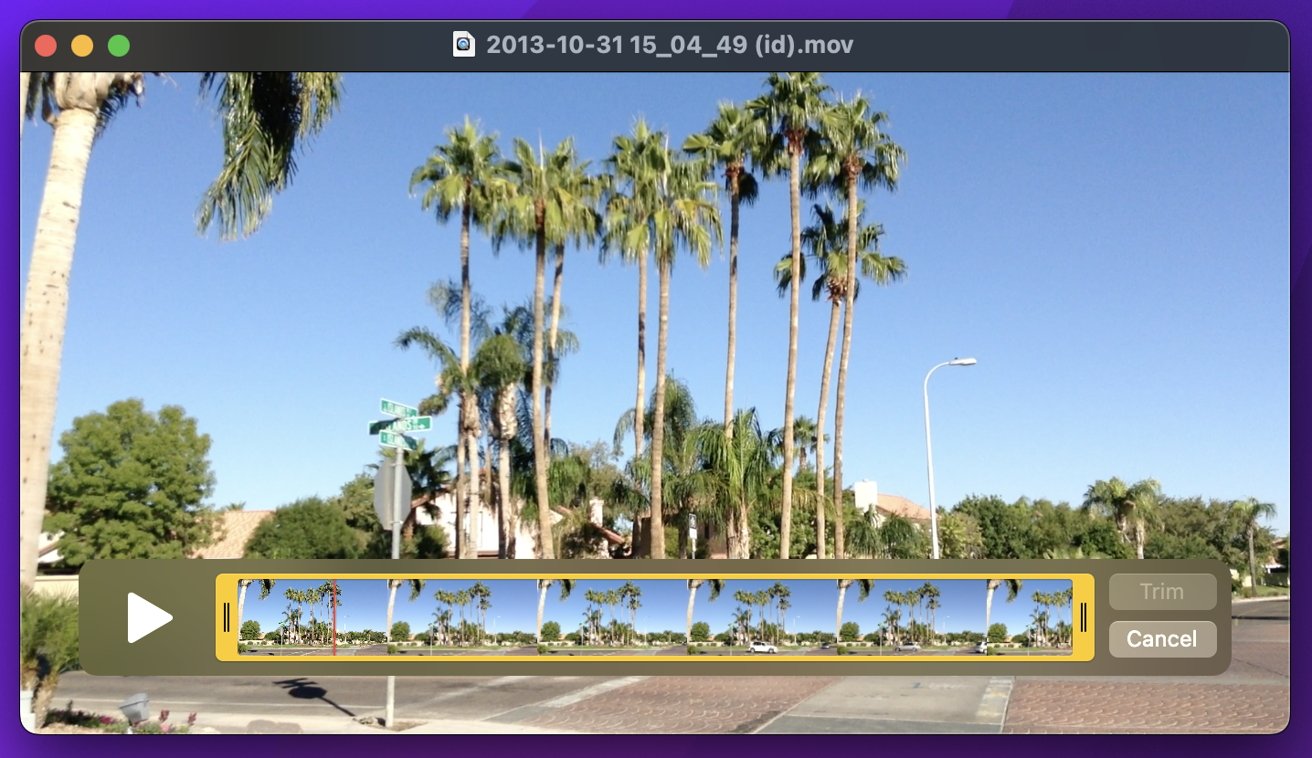
If you click anywhere inside a clip while using the Trim control, a playback head position control appears. If you click the Play button, playback begins from the head's current position.
To exit the Trim control, press the Cancel button.
Selecting Split Clip (Command-Y) from the Edit menu splits the clip for editing into multiple segments - one each time you select the menu item. Once split, double-click any one segment in the Split control to re-enter the Trim control.
If you click the Trim or Cancel button, you're returned to the Split control. If you click the Done button from the Split control, you're taken back to the main movie window.
While in Split mode, if you select one of the split movie segments, the "Insert Clip at End" command turns to Insert Clip After Selection - which allows you to insert an entirely different movie from another file.
Note that the Split Clip command only allows you to cut, copy, paste or delete while in Split mode: it doesn't actually create a new clip or movie window after splitting.
Streaming
Originally Apple had a standard called QuickTime for the Web, which was later replaced by Darwin Streaming Server in 1999, then QuickTime Streaming Server (QSS).
Apple also released a desktop Mac OS X app called QuickTime Broadcaster which allowed users to easily broadcast QuickTime movies on the web:

But when internet standard RFC 8216 (HTTP Live Streaming) was released by the IETF in 2009, Apple quickly adopted it and dropped support for QSS and Darwin Streaming Server.
Today Apple fully supports HTTP Live Streaming (HLS), but the encoding tools and server setup require the use of the Terminal.
Although QuickTime Player goes way back, it still provides simple manipulation of modern and legacy media. Along with Apple's HLS technology, it's fairly easy to play, record, and edit media and set up a basic streaming server.
We may explore setting up an HLS server in a future article. Also see Using HEIF or HEVC media on Apple devices.
If you're interested in checking out legacy versions, the Apple Support downloads page has older players dating back to 2003.


 Amber Neely
 Thomas Sibilly
 AppleInsider Staff
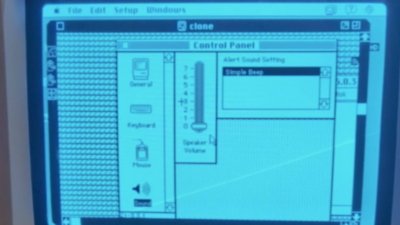
 William Gallagher
 Malcolm Owen
 Christine McKee