How to find your lost cursor by making it bigger in macOS
 Malcolm Owen
If you can't find the pointer, maybe you need to make it bigger.
If you keep losing track of where your cursor is on a high-resolution display, here's how you can increase its size in macOS to make it easier to find.
Over the years, monitors have been getting larger, as well as increasing in resolution. With Apple's 24-inch iMac having a 4.5K Retina display and the 32-inch Pro Display XDR equipped with a 6,016 by 3,384 resolution, that results in a considerable amount of digital workspace for use in macOS.
The increase in resolution also means that, at a native resolution without any modifications, the icons and other elements can become very small. This also applies to the cursor, which is naturally small and sometimes tricky to find on the best of days, but it can become tough to track down on a busy desktop at very high resolutions.
The simple answer to the problem is to increase the size of the cursor to make it easier to see. This can be accomplished in a few ways.
Increasing the Cursor size
The obvious thing to do if you can't find the cursor is to make it bigger. Unfortunately, while you would expect the controls to be included within mouse-related settings in System Preferences, it's actually hidden in Accessibility.
How to change the size of the cursor in macOS
Click the Apple logo in the Menu and select System Preferences.
Click Accessibility.
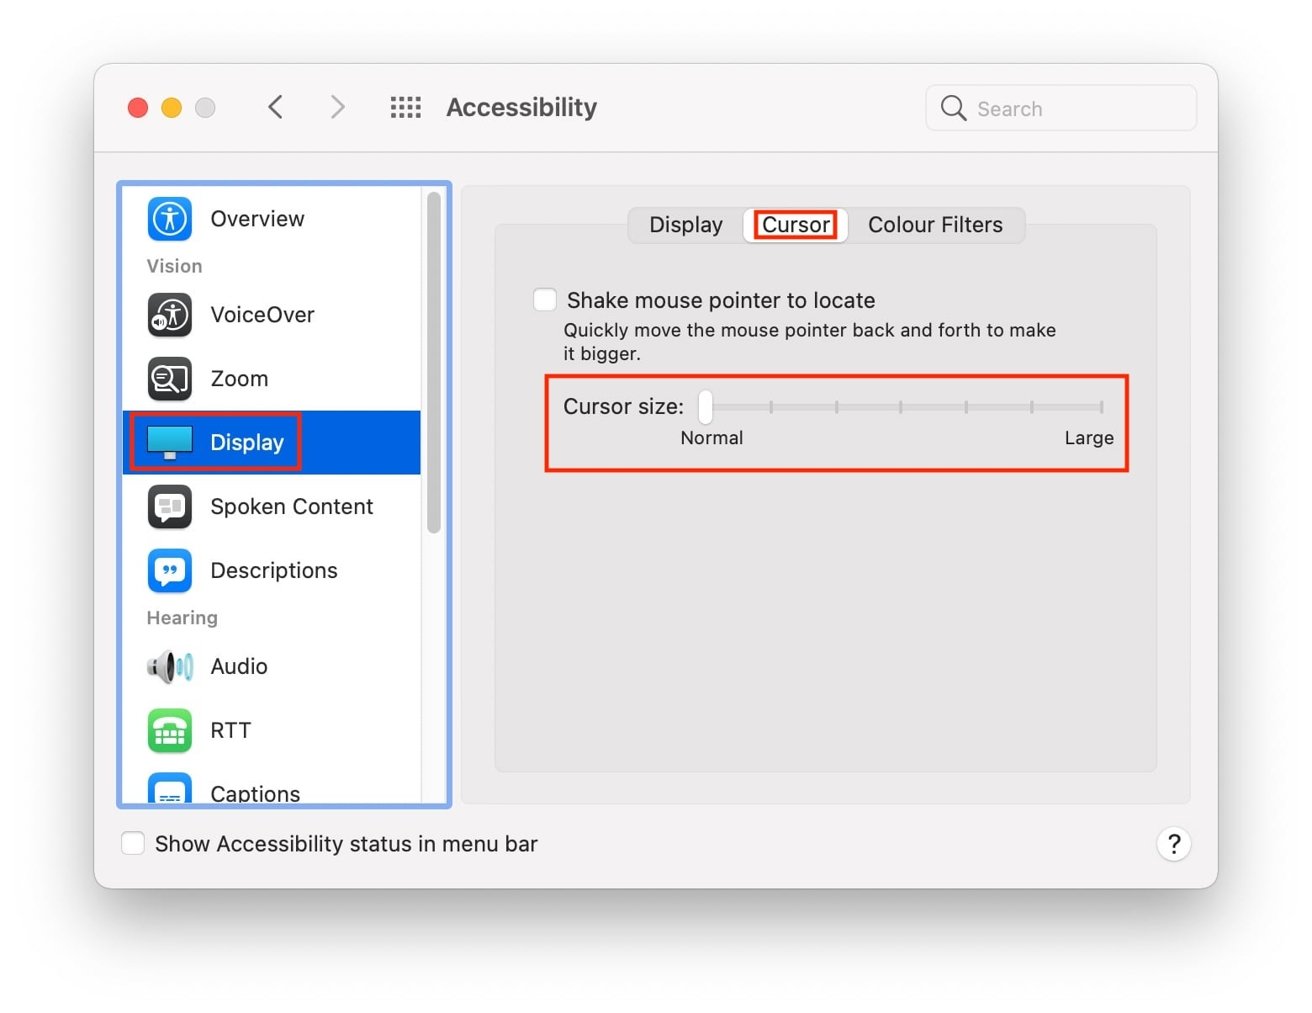
In the left-hand column, select Display.
Click Cursor.
Adjust the Cursor Size slider to your preference.
The range of size goes from normal, which is quite small, to large. The largest option is roughly four times the size of the normal version, making it a considerable step up in terms of visibility.
The change also impacts the appearance of the cursor when used for tasks, such as when it changes to different shapes for text entry. Despite the large size, it still works with the same level of precision as its normal-sized counterpart.
You can also ask Siri on your Mac to "Increase the size of the cursor." This will bring up a slider for Pointer Size, which you can then adjust without necessarily opening System Preferences entirely.

Shake to locate
While permanently increasing the size of the cursor may be useful for some, others may prefer the cursor to be at the usual small size the vast majority of the time, but still to be easier to find when searching for it.
Many will be all-too-familiar with the action of moving the mouse from side to side and watching the screen for movement to show where the pointer is located. This same motion can be used to trigger the "Shake mouse pointer to locate" function.
As the name suggests, moving the mouse quickly back and forth will make the cursor increase in size temporarily. Then, once the shaking stops, the cursor shrinks back down to its normal and useful size.
This action may not be enabled, but it can be easily turned on with a single checkbox.
How to enable shaking the mouse to increase the cursor size in macOS
Click the Apple logo in the Menu and select System Preferences.
Click Accessibility.
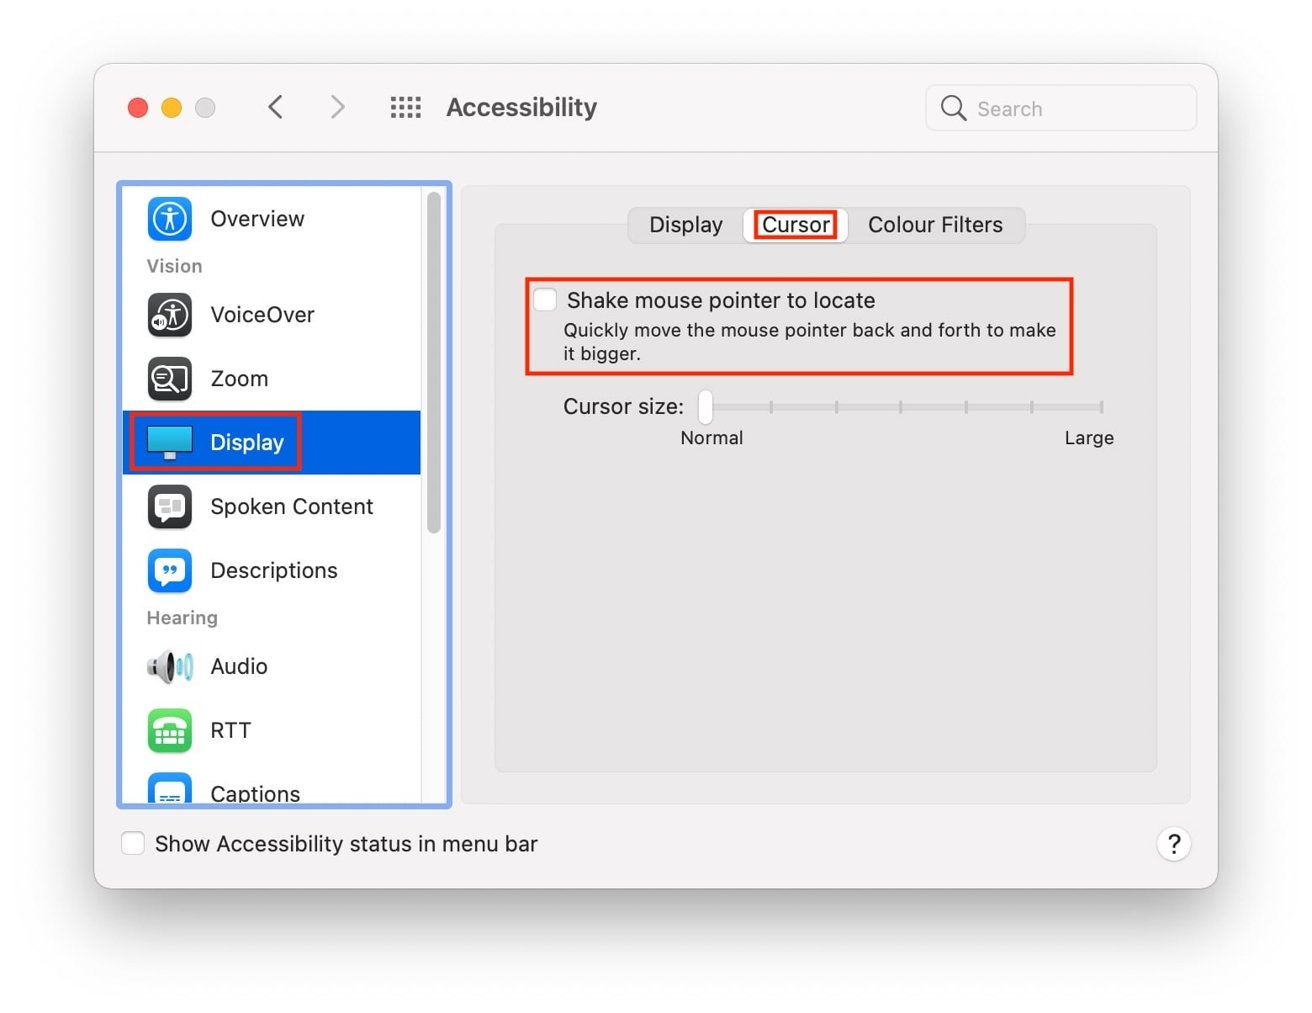
In the left-hand column, select Display.
Click Cursor.
Check the box next to Shake mouse pointer to locate.
Scaling the macOS UI
If you're having trouble seeing many things on your Mac's high-resolution display, it may be worth making everything larger, not just the mouse pointer. Of course, you could change the resolution so the desktop is much bigger in general, but you will lose out on the benefits of having a high-resolution screen in the process.
Apple solves this by providing scaling options. Rather than changing the resolution of the video output to the monitor, the scaling options change the relative size of the user interface elements while retaining the resolution.
How to change macOS user interface scaling for a high-resolution display
Click the Apple logo in the Menu and select System Preferences.
Click Displays.
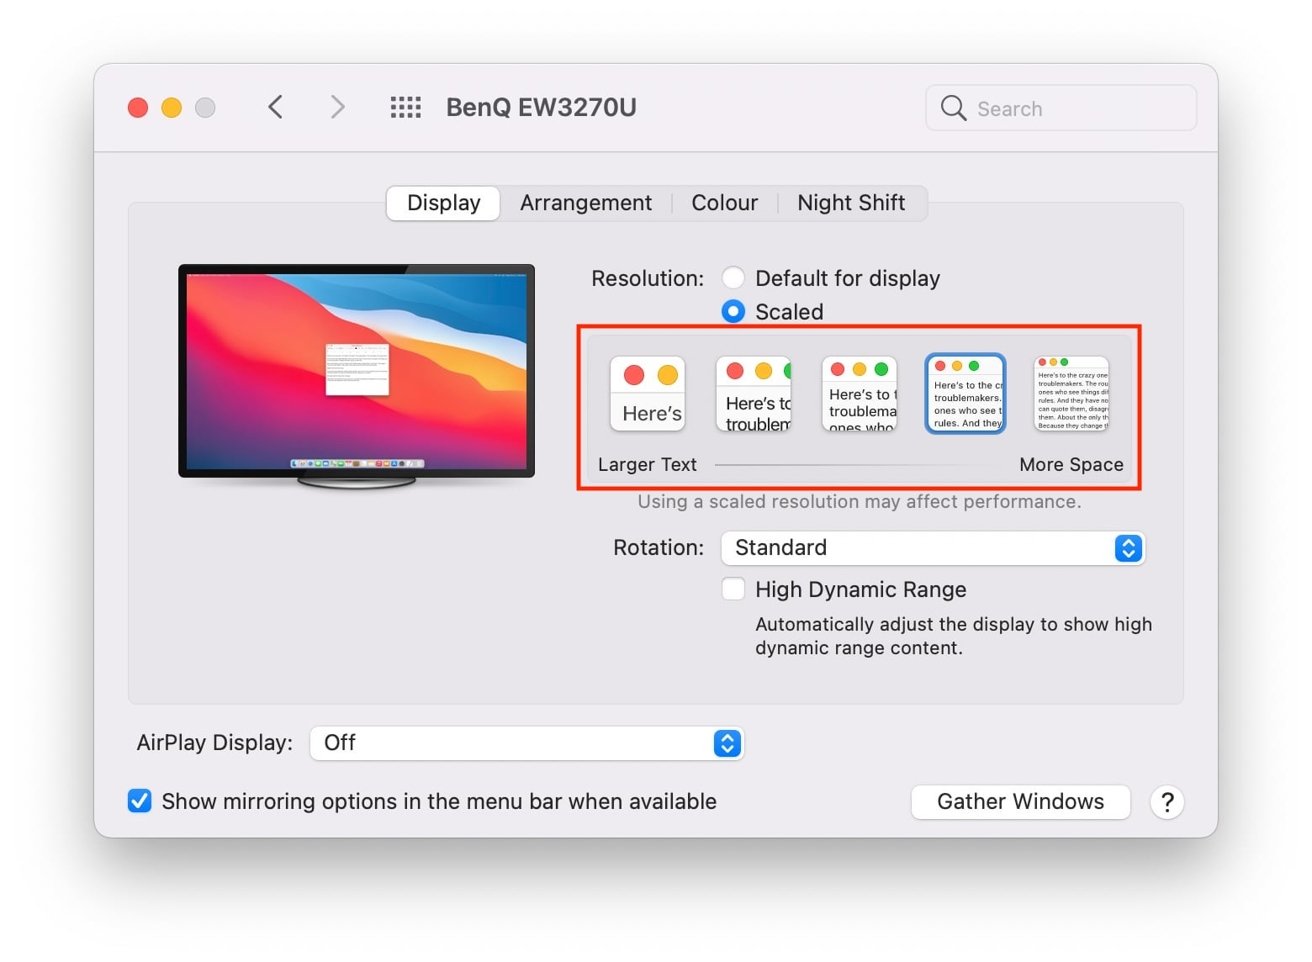
On the Display tab, click the dot next to Scaled.
If the display is high-resolution enough, macOS will offer a selection of images representing scaling options, from a version with larger text to more space. Click each option to see if it suits you.
Keep up with everything Apple in the weekly AppleInsider Podcast — and get a fast news update from AppleInsider Daily. Just say, "Hey, Siri," to your HomePod mini and ask for these podcasts, and our latest HomeKit Insider episode too. If you want an ad-free main AppleInsider Podcast experience, you can support the AppleInsider podcast by subscribing for $5 per month through Apple's Podcasts app, or via Patreon if you prefer any other podcast player.


 Charles Martin
 Amber Neely

 Andrew Orr