William Gallagher
It's handy to have an external, bootable macOS Ventura installer, but you practically have to fight Apple to make one. Here's what you have to do.
In Apple's ideal world, you let your Mac update itself with macOS Ventura, and never have to think about it. In reality, though, Macs go wrong and having a bootable external installer pre-loads download time, and makes it faster to reinstall Ventura when you're in a bind.
Plus if you're the one responsible for installing Ventura on a dozen Macs, you have better things to do with your time than wait for it to download on each one separately if you don't have Content Caching on somewhere on your network.
So as it has always been, it is handy and practical to have an external drive that you can use to install a fresh copy of macOS.
But Apple thinks that allowing external boot drives is a security risk. For longtime Mac users, the risk of allowing a boot drive is low, and the inconvenience of blocking them is high.
What you need
- An external drive
- A macOS installer
In theory, the external drive can be just about any hard drive, SSD, or USB flash drive — and you probably want it to be USB-C. The best results come from NVMe USB-C or Thunderbolt drives, and speed is good on those. While you can use a hard drive, it will be intolerably slow.
Whereas with a USB drive, speed may not be what makes you pull hairs out. Many USB flash drives simply will not boot and there's nothing you can do about it but try a different one.
Drives in a RAID will not work either and nor will any network-connected drives.
Whatever drive you have, it must be formatted as Mac OS Extended, and it must have enough available storage for the macOS installer.
Apple has said before that this means it must have at least 14GB of space, but that was for the installers for macOS Monterey or earlier. More is better.
Get the macOS installer
Speaking of installers, Apple keeps the current and several previous ones available in the App Store. Launch the App Store app on your Mac and search for "macOS Ventura" when it's available.
Download it. The app you've downloaded will be called "Install macOS Ventura," and will be at least 12GB in size.
By default, the Mac will try to launch this installer as soon as it's downloaded. Quit the installer right away, because once it's installed, it will delete the installer app.
It if the app is in your Downloads folder, move it to the Applications one.
Prepare the external drive
Connect the external drive to your Mac. These next steps are going to erase the drive so be certain to copy off any data you have on it.
With the drive plugged in, launch the Terminal app. Copy this line, replacing the final "BootDrive" part with the name of your external drive:
sudo /Applications/Install\ macOS\ Ventura.app/Contents/Resources/createinstallmedia — volume /Volumes/BootDrive
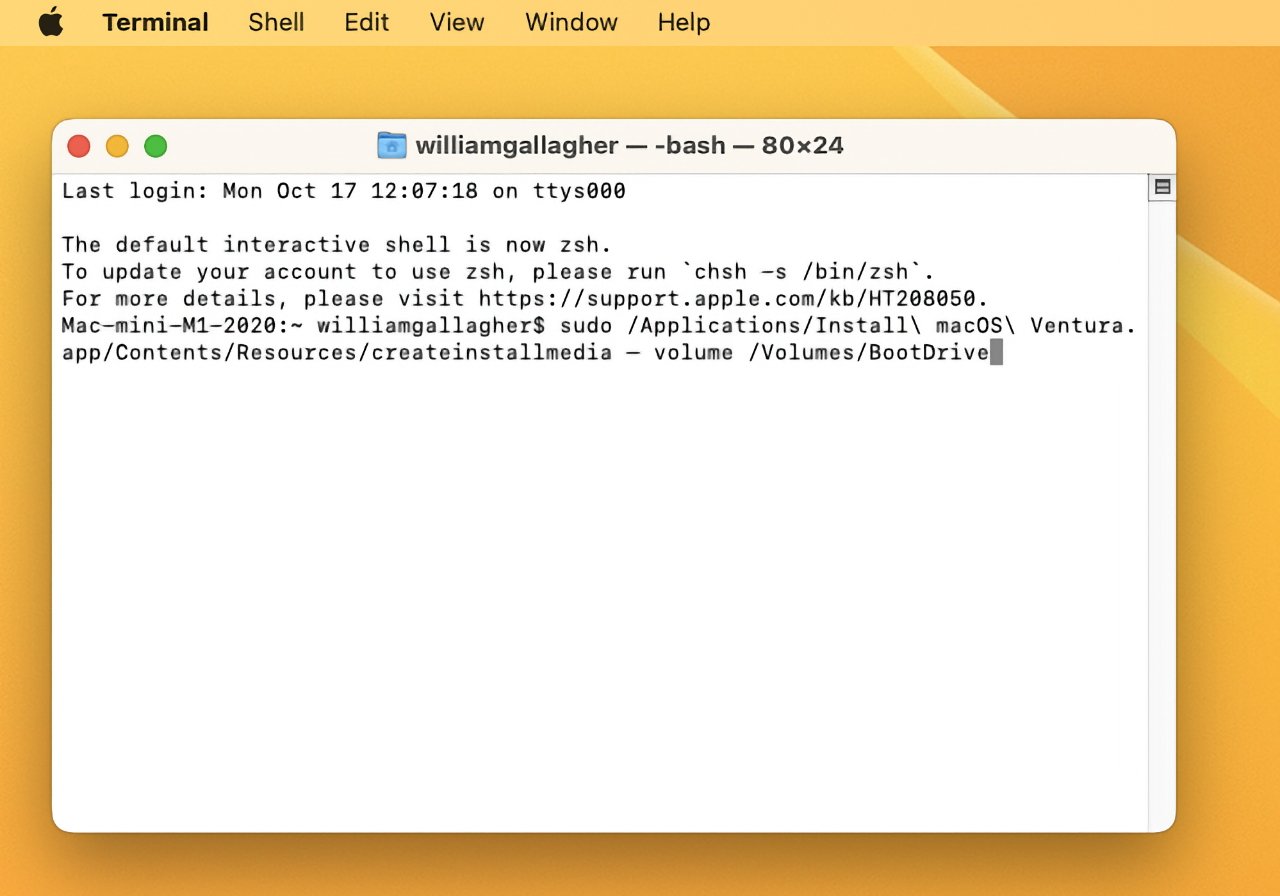 Replace the final term "BootDrive" with the name of your external drive
Terminal will then prompt you through making a bootable drive with macOS Ventura on it. You will be asked for your administrator password, and you will have to confirm that you want the drive erased.
It's likely that Terminal will pop up an alert saying it wants to access files on a removable volume. Click OK.
When you see "Install media now available at" and the name of your external drive you can quit Terminal.
We cannot stress this enough — test the drive you've made before you need to rely on it.
Using the external drive
So far, most of this is as it always has been, but it's when you actually want to boot from the external drive that things have changed. It's changed more since the move to Apple Silicon, too, and enough so that the process for using an external drive is quite different on that and on Intel Macs.
Intel Macs have a T2 security chip which will block what could be unauthorized access to your Mac. To allow yourself to use an external drive on an Intel Mac, you have to:
- Restart your Intel Mac
- Hold down Command-R the moment you see the Apple logo
- When prompted, choose your username from the list shown
- Enter your admin password for that user
- From the menu bar, choose Utilities, Startup Security Utility
- Log in
- Click to select Allow booting from external or removable media
That's simple enough, but there is a catch.
If your only reason to have an external boot drive is in case of problems with the Mac's own drive, then you still have to have gone through this process first. You won't be able to do this if your Mac's internal drive is seriously damaged.
Having done it, though, now the process for booting an Intel Mac from an external drive is straightforward.
Using external boot drives on Intel Macs
- Shut down your Mac
- Connect the external drive
- Power up the Mac and immediately hold down the Option key
- Let go of the Option key when you're shown a list of bootable volumes
Using external boot drives on Apple Silicon Macs
Allowing external drives to boot at all requires a slightly different process on Apple Silicon. You are still telling the Mac to stop blocking external drives, and you still have to do this before Mac's drive goes wrong.
- Shut down the Mac
- Press the power button and keep it pressed
- Let go when you see one or more drives and an Options section
- Select Options and click Continue
- When the Mac boots into Recovery Mode, select a Mac user you know the password for
- Log in as that user
- Ignore all of the options in the pop-up list and instead choose Startup Security Utility from the Utilities menu
- Click to select the Mac's internal drive and then click Unlock
- Follow the prompts concerning passwords, and select Security Policy
- In the Security Policy window that appears, click to select Reduced Security
- Then click OK
- Under the Recovery menu, choose Shut Down
You've now set this Mac — or rather, this user of this Mac — to boot from external drives. To actually do that, you next need to:
- Shut down your Mac
- Plug in the external drive
- Press the Mac's power button and keep it pressed
- Release the power button when you're shown a list of bootable volumes
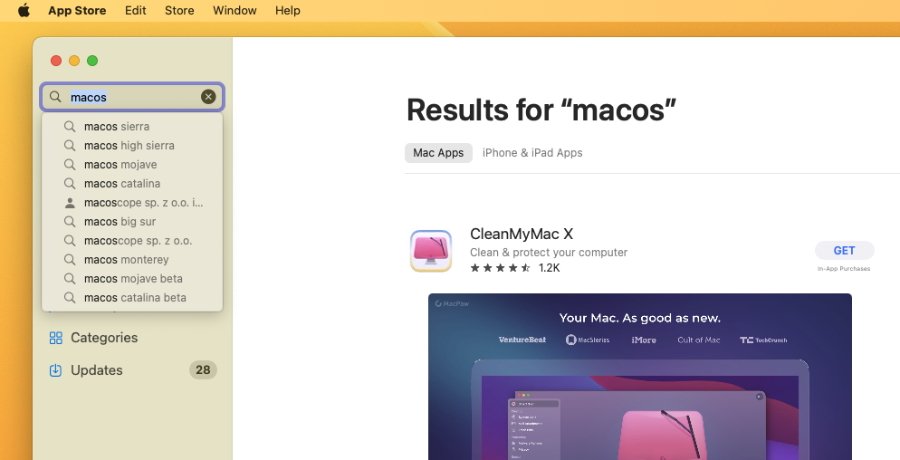 Apple surfaces other apps rather than its own macOS, especially the older ones. But many recent versions of macOS can be found with an App Store search
Using different versions of macOS
If your Mac can't run macOS Ventura, putting it on an external drive won't help. The App Store listing for Ventura, though, will tell you if it's compatible with your Mac.
Right now when Ventura is new, this isn't going to be an issue but over time, there is one more aspect to all of this that will come up. You can't get your Mac to boot from an external volume with an older macOS than that machine is able to run.
Over time, then, it's not only good to make an external boot drive, it's important to keep making them every few years.
We'll be discussing how to make an external working drive shortly.


 Christine McKee
 Stephen Silver
 Charles Martin


 Malcolm Owen