Preview can do more than just show you a file in macOS, and is especially handy for annotating images and editing PDFs. Here's everything you need to know about Preview in macOS 26 Tahoe.
Preview is one of the long-standing apps on macOS, having been included with the operating system for decades. In 2025, Preview finally moved over to iOS 26 and iPadOS 26, with a version tailored for mobile devices.
It is also a severely underrated app, as it is chiefly used as a way to view images and PDFs on the Mac. It's a lightweight viewer that saves you from needing to open other heavier applications, like Photoshop or Adobe Acrobat.
However, while the name indicates it is an app designed for viewing files, it can also make some quick changes and edits to them as well.
This guide will explain the main important points of Preview in macOS Tahoe, so you can become a lot more productive by using the tool instead of others.
Preview: Viewing files
By default, macOS sets Preview to be the default program to open a variety of file types. Chiefly, this includes support for the core file types, including:
- Windows BMP
- DNG
- GIF
- HDR
- JPEG
- PNG
- RAW
- ICO and ICNS files
The tool is not limited only to these, as it is capable of opening other proprietary file formats as well. This includes:
- Adobe Illustrator AI files that contain PDF content
- Canon RAW files
- Powerpoint PPT
- Adobe Photoshop PSD
When set as the default viewer, opening a supported file will typically bring it up in Preview, unless another app is set up to open it instead. You can also specifically open the file in Preview by right-clicking and selecting Open With, then Preview if it is available.
If Preview is open, you can select File, then Open, then select the file to open it in the same way.
Clipboard Content
Preview also allows you to view what's currently in the Mac's clipboard or the Continuity Clipboard. With Preview open, select File, then New from Clipboard, and it will create a new untitled file containing the image or document you copied.
The content in the clipboard could be a file, but also part of an image. If you select and copy part of an image and elect to create a New from Clipboard file, it will create an untitled image of whatever you copied.
Do remember that the files created using New from Clipboard will be lost if you close them without saving. To make the file permanent, either use File the Save in the menu, or click the Untitled title in the toolbar and then fill in the name and where you want it saved.
Preview: PDF
One of the lesser-known but really handy elements of Preview is its handling of PDFs. These files are often tricky to edit unless you happen to own an editing tool, but you can make some changes to the files just fine within Preview.
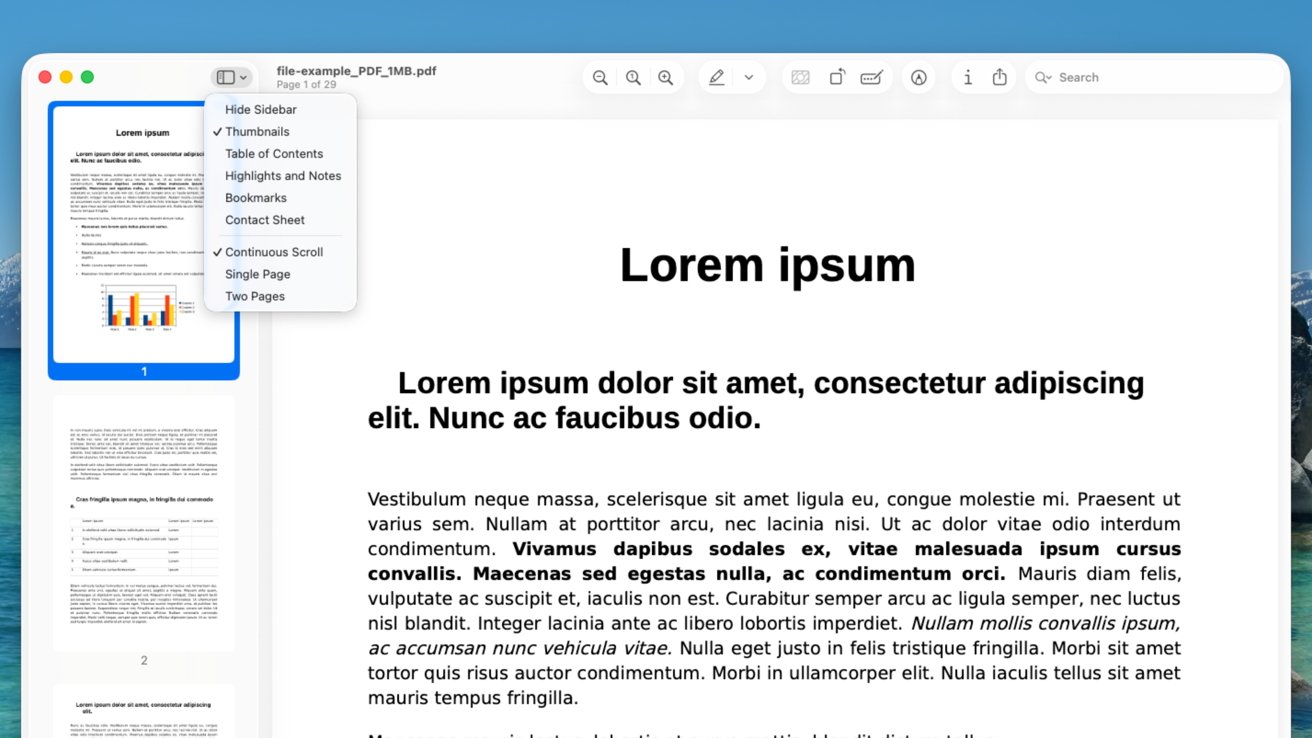
Preview 101: The main view when looking at a PDF, and the open Sidebar menu
To be clear, Preview is not a full-blown editor for PDF files, but it does allow you to make adjustments and combine files in various ways.
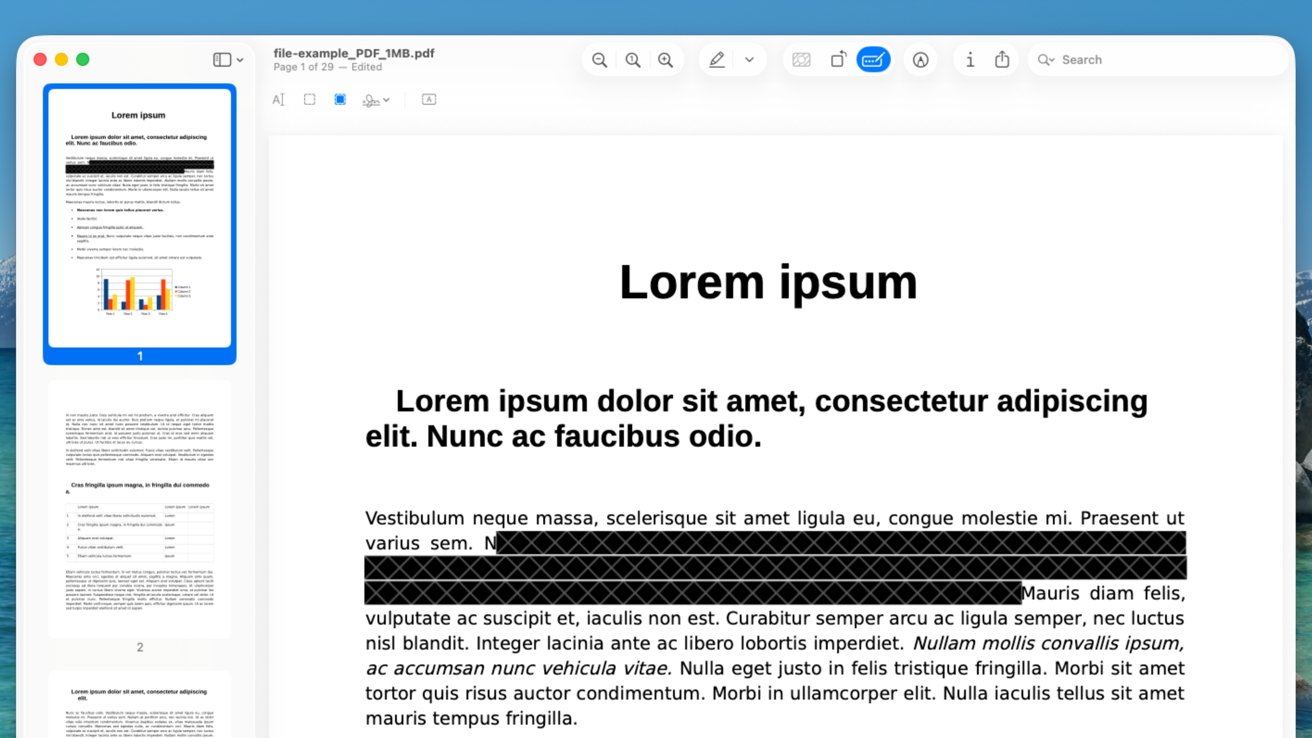
PDF Taskbar
Opening a PDF brings up a bar of icons at the top of the window specifically for the viewing and annotation of the file. Starting from the left:
Sidebar and Scroll
The left-most taskbar button has two duties. Primarily, it handles and hides the sidebar, which can be used to navigate a lengthy document quickly.
The options include:
- Hide Sidebar - Hides the sidebar.
- Thumbnails - Shows thumbnails of every page in the PDF. Click a thumbnail to view it, instead of scrolling to it.
- Table of Contents - If the PDF has one, it will show the headers and subheaders from the PDF in a list.
- Highlights and Notes - If there are any highlights or notes in the document, they will be listed here.
- Bookmarks - If there are any bookmarked elements of the PDF, they will be listed in this section.
- Contact Sheet - A full-window view of the thumbnails in the document, so you can see more of them at a time instead of scrolling the sidebar.
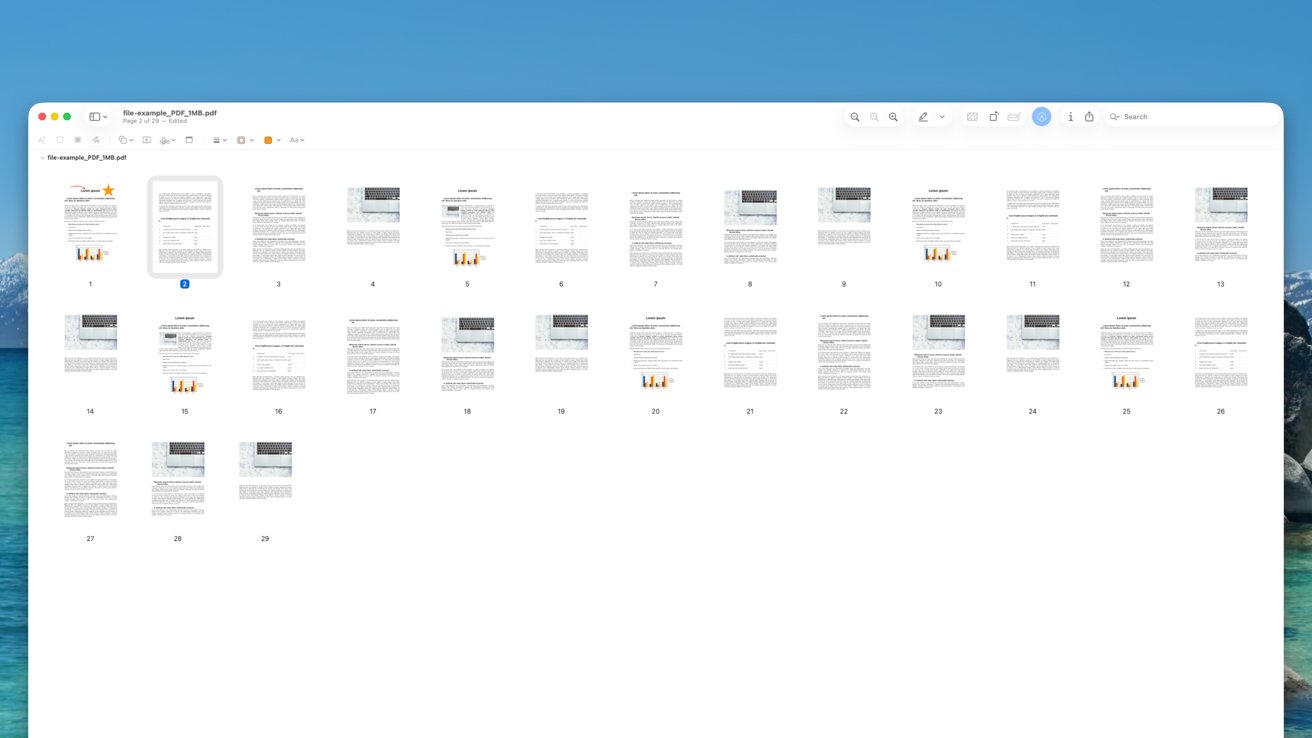
Preview 101: Contact Sheet view.
At the bottom of the button are three other options, which dictate how you view PDF pages within Preview:
- Continuous Scroll - Will place the next page below the current page, turning it into a long column of pages.
- Single Page - One page at a time. Scrolling will take you through each page in sequence.
- Two Pages - With the exception of the first page, it displays two pages at a time, how it would appear if it were a book. Scrolling takes you between page pairs.
Name and File Management
At first glance, this consists of the PDF name and an indicator of what page you're on in the document.
Click the name to bring up a dropdown box, allowing you to change the filename. It also lets you select where the file is to be saved on your Mac.
If you use tags to organize files on your Mac, use this section to add some to the PDF.
Zoom Controls
The three buttons with magnifying glasses control the level of zoom of the document:
- Minus - Zooms out.
- 1 - Changes the zoom to the "actual size" of the document, regardless of the window size.
- Plus - Zooms in.
You can also zoom in and out using the Command-Minus and Command-Plus keyboard shortcuts.
Highlights and Notes
The Highlighter tool can be used to highlight sections of the document for later reading. You can view the highlighted sections under Highlights and Notes under the Sidebar menu.
To highlight, click the Pen icon, then drag across the text you want to highlight. You are also able to highlight sections of tables.
You can disable a highlighted section by right-clicking the highlighted element and selecting Remove Highlight. Alternatively, from the Sidebar under Highlights and Notes, select a highlight and press Delete on the keyboard.
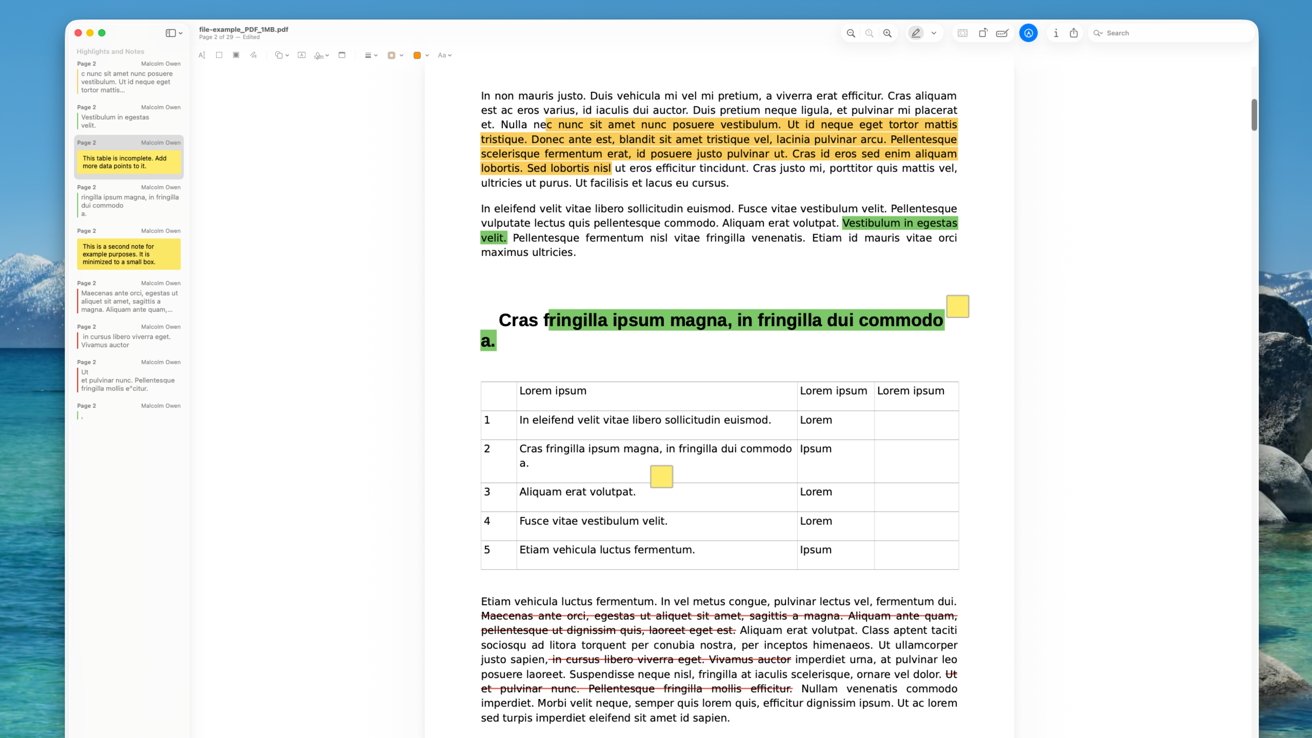
Preview 101: Highlights, Notes, and Strike-throughs in a PDF file.
If you have highlighted a section, you can also right-click it to Add Note. This creates a sticky note that you can type notes into, which can be saved in the document.
Again, right-click and select Remove Note to take it off a highlighted element.
While the default is to create a dark yellow highlight, you can change the color. This can be done by right-clicking and selecting a color from the context menu, or the dropdown arrow next to the Highlighter tool.
You don't have to actually highlight the text. There are also options to use underlines and to strike through text.
Remove Background and Rotate
The next section of the toolbar consists of three icons.
Remove Background is a tool that removes the background of an image. This is commonly performed on images rather than PDF documents specifically, but if the option is available, you can use it.
Simply click Remove Background, and the selected image's subject will be detected and the background removed.
The second icon, Rotate Left, will rotate the current page of a document by 90 degrees counter-clockwise. If it's a single-page document or an image, it rotates the entire document one quarter turn to the left.
Form Filling
The third icon is the Form Filling Toolbar, which actually does a lot of functions. As the name implies, it is to help you add information to a PDF form.
In some PDF forms, you have to click on defined editable sections to change them. However, these tools also work with other non-editable PDFs too.
Preview 101: The Form Filling toolbar and redacting a PDF
The first item in this toolbar is the Text Selection tool. You normally are able to select text in a PDF, so this is a little redundant, but useful if you want to purposefully reset from a different option on the toolbar.
The Rectangular Selection tool lets you draw a rectangle to select a region. You can then do things like copy the selected content for use elsewhere, for example.
With the Rectangular Selection tool in use and an area selected, a new Crop icon will appear on the far right. Use it to crop the current page of a document down to the selected area.
The third icon is for redactions, which allows you to select text to remove. A black bar is placed over the text, making it unreadable and deleted completely when you save the document.
You can, however, remove a redaction and not harm the document by right-clicking and selecting to Remove Redaction before you save. After saving, the content is permanently gone.
The Sign option lets you add your signature to a document. If one is already set up, select it and drag it into position.
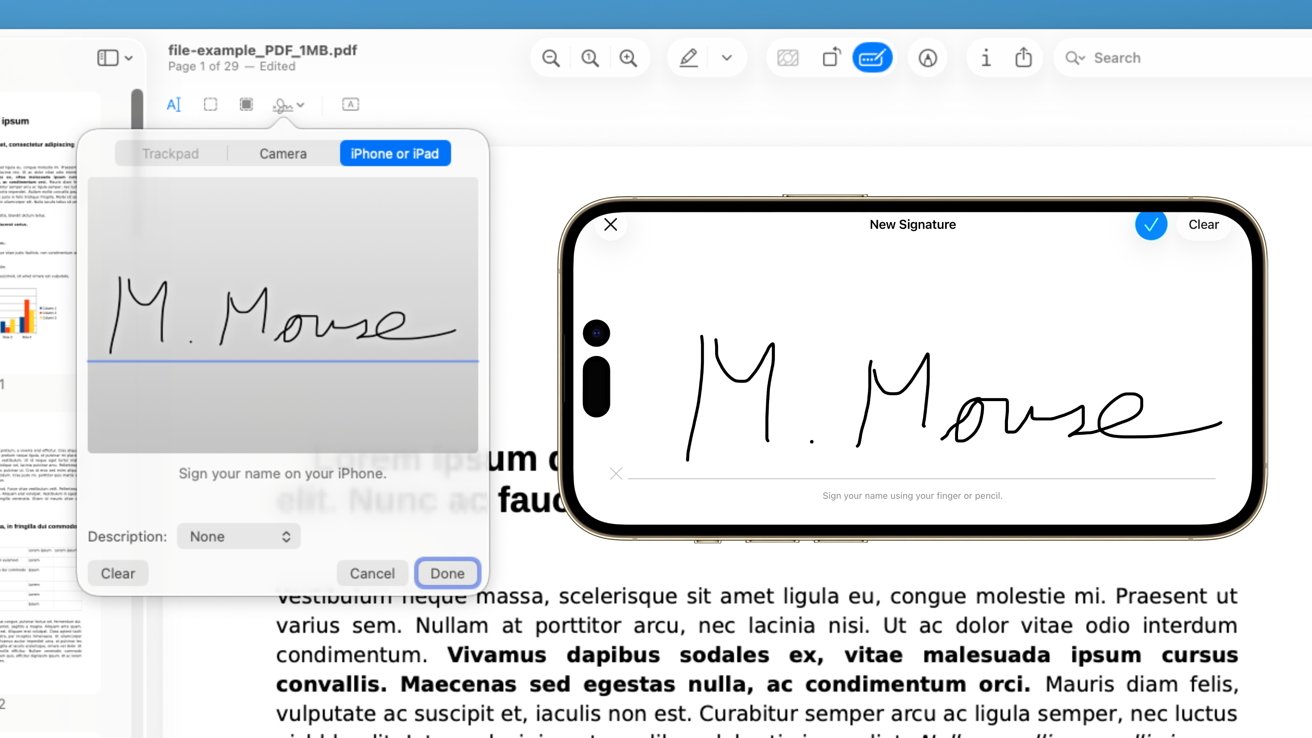
Preview 101: You can add your signature by using an iPhone
If you don't have a signature set up, you can create one in a few ways by selecting the option and following the instructions:
- Use the trackpad on a MacBook Air or MacBook Pro.
- Use a built-in or connected camera to take a photo of your signature on a piece of paper.
- Use an iPhone or iPad. Selecting this will bring up an option on your mobile device to make a signature. This is really useful if you have an iPad and Apple Pencil.
Once created, the signature can be added to documents in the future.
The last item is the Text box. If you don't have any editable sections in the form, you can add text by selecting the icon then moving the textbox into position, as well as resizing to fit the space.
You can then add text to this textbox.
Markup Toolbar
The Markup Toolbar contains a lot more annotation options, but some are duplicates from the Form Filling section. Focusing on the new icons in this section:
Sketch is a simple pen tool. It draws a line on the document using your cursor, making it good for simple drawings and arrows.
Shapes lets you place simple shapes and arrows on the document, in case your mouse-drawing skills aren't good enough for professional documents. It's a good way to add arrows, circles, squares, and other iconography to a document.
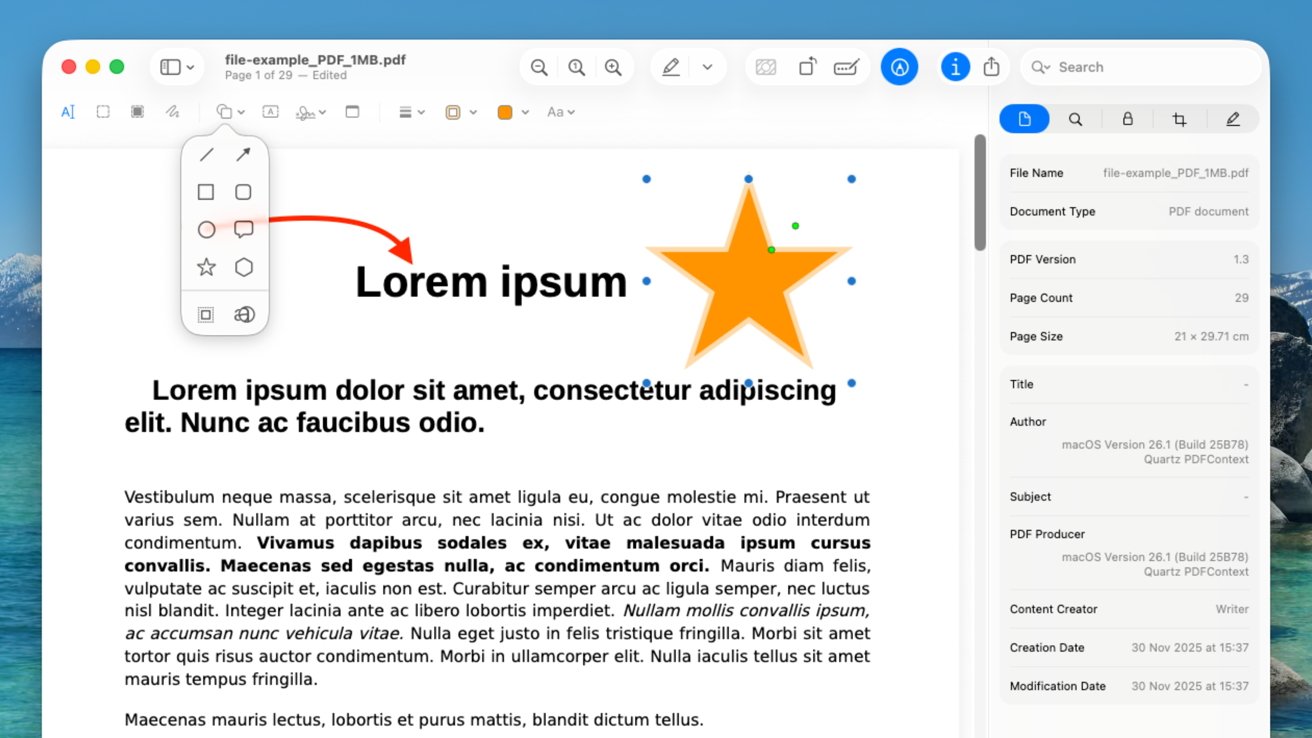
Preview 101: Marking up a PDF file
Note creates sticky notes on the document, just like the previous Highlight and Notes section, except without highlighting beforehand.
Further right are formatting tools, used to define the line width and colors of lines and shapes, as well as the fill color if required.
Lastly, a Font picker can be used to change the font for any text-entry elements, including size, bold, italics, underlines, and alignment.
Inspector
The Inspector is used to show the basic details about a document. It has multiple sections, including a General Info section containing the file name, page count, document type, page sizes, date, and author details.
The second tab lists keywords for a document, if applicable. The third covers whether the document is encrypted, and what permissions have been granted to the reader by the author.
The fourth tab is for Size options, which generally covers how big a selected part of a document is. This is handy to use if you intend to use the selected section elsewhere, especially if you're cropping a document page.
Lastly Annotations Inspector lists where annotations have been made in the document.
Share Sheet
The Share Sheet is a very well-known part of the general Apple interface. It's used to share documents with others, such as over iMessage, or to bring it to other apps like Notes or Freeform.
This box also includes options to copy the file, as well as to Edit Extensions. The latter brings up System Settings, which will show different extensions you can activate or turn off for sharing items with others.
Search
Search, unsurprisingly, allows you to search a document for a term or phrase. It will highlight all instances of the term, and will report back how many times it appears on each page in the document.
It will also attempt to rank the instances by "Search Rank" or by "Page Order." This means that Preview will either take you through the results in an order that it believes to be most important or sequentially.
Preview: Combining and Managing PDFs
Not only can you annotate a PDF, but you can also do some interesting things to the files in general.
To add a new page to a PDF, select the page before where you want the blank page to appear, then select Edit and Insert, then Page from File or Blank Page. When using Page from File, you can select another document or image, and it will be inserted into position.
You can also do this within the Sidebar, by clicking the Plus icon at the bottom of the screen, then selecting Insert from File or Insert Blank Page.
This is a very good way to combine multiple PDF documents together, such as segmented manuals or to compile important documentation together into one tome.
It is also possible to delete individual pages. Within the Thumbnails view in the Sidebar or the Contact Sheet, you can select pages to remove and then press Delete on the keyboard. Alternatively, select Edit, then Delete.
The Thumbnails and Contact Sheet views also allow you to drag pages to different positions in a PDF file. If you have two Preview PDF documents open, you can even drag one page from one document into another.
Preview: Images
Viewing images in Preview is pretty similar to the experience of using PDFs, though there are some elements that are a bit different.
Text in Images
One very handy feature of Preview is the ability to use Live Text, meaning you can use numbers and text within an image. You can select text just as you would a character in a standard text-based document and then copy it to another application.
Preview 101: Selecting text to copy from a screenshot
If this is not working, you may need to enable it by going to the Menu and selecting Tools, then Text Selection.
Selected text can also be handled in a few other ways, such as using it for translations or looking up terms, by right-clicking and selecting options like Translate text or Look Up text.
If Preview detects a phone number, an email address, or a website address, it will put a box around the data point when you mouse over it, and show a dropdown box. From there, you can call phone numbers, add them to contacts, send emails, or visit websites in the browser.
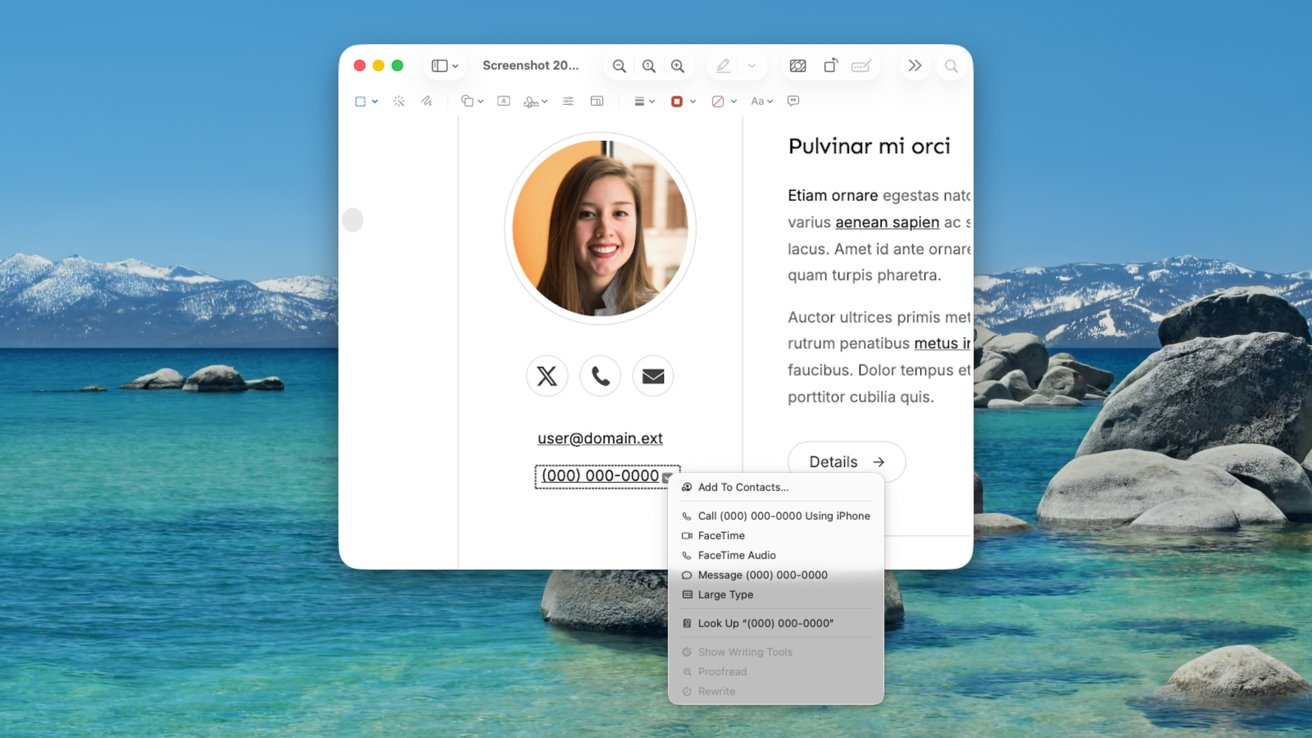
Preview 101: Preview can detect phone numbers and email addresses automatically.
This is an extremely useful element if you use your iPhone camera to quickly capture information for later access. Viewing it in Preview makes it easy to extract the data points you need.
Sidebar and Scroll
While you may only be dealing with one single image, you still have the Sidebar dropdown available. However, the utility of this is poor since it just shows the one image.
You can, however, add more image "pages" to the document by importing from the camera or files stored on your iPhone or iPad. This second page, however, will replace the first if you save the file, so be careful if you go down this route.
Remove Background and Rotate Image
Removing the background is a one-click affair. Simply click the button and it will detect all subjects, then remove the background.
The new background is transparent, making it great for quickly adding to documents. This will also convert JPEG images to PNG due to JPEG not supporting transparency.
Rotate Image will turn the entire image 90 degrees counter-clockwise. Four clicks equate to a full rotation, while two clicks will turn the image upside down.
Markup Toolbar
The Markup Toolbar has a few new tools to play with when dealing with an image rather than a PDF.
The first difference is that the Selector tool has a dropdown, so you can make elliptical, lasso, and smart selections alongside the standard rectangular.
You also have an Instant Alpha tool, namely a selector that selects based on color. This can be useful for selecting entire regions of color within an image.
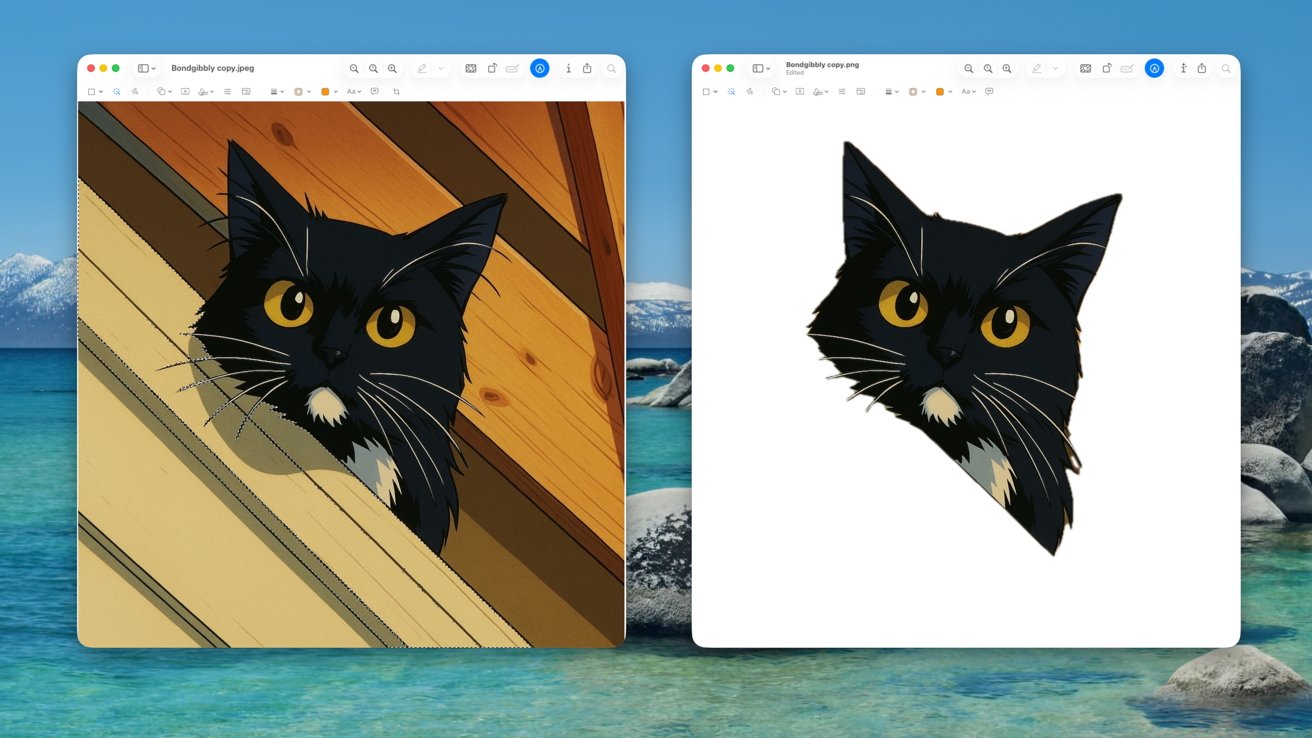
Preview 101: Instant Alpha selection and Background Removal in practice.
The next new icon is the Adjust Color tool, which provides simple color adjustments without going through a full edit in Photos or similar tools.
It can be used to adjust the general color levels of an image, as well as the exposure, contrast, highlights, shadows, saturation, temperature, tint, add a sepia tone, and change the sharpness.
The last is Image Description, which is used to manually enter a description of the image. This is used by screen readers to describe the image to anyone with difficulty seeing images online, such as users of VoiceOver.
Inspector
There is an inspector tool available, but it is slightly different for images than for PDFs.
For a start, General Info provides more details pertinent to an image, including the file size, creation and modification dates, the image size, the dots per inch, the color model, and the ColorSync Profile in use. A second General tab provides even more, including depth, DPI height and width, pixel heights and widths, and Exif and TIFF data.
Keywords is the same as before, as is the Annotations Inspector.
However, you do not get the Encryption Inspector nor the Crop Inspector as you would see for PDFs.
Not Available
Some features are not available when looking at an image. For example, Highlights and Notes cannot be made, in part because there is no text to edit.
Also, form filling is not available for an image. There's also no ability to search an image, because there's no native text.
Preview: Image color profiles
If you're a photographer, you can use Preview to see how an edited shot looks on other devices or if printed out onto paper.
Open the image in Preview, then select View, then Soft Proof with Profile, and select a ColorSync profile. These color profiles are handled by the ColorSync Utility in macOS.
You can also assign a new color profile to an image. In the Menu, select Tools, then Assign Profile, and select a new color profile.
Preview: Change Image File Types
You can convert an image file from one type into another using Preview.
Open the file in Preview, then in the Menu, select File, then Export. Select the file format you want to use for the image.
The choice includes:
- HEIC
- JPEG
- JPEG-2000
- OpenEXR
- PNG
- TIFF
The conversion process also includes other older formats, accessible by holding Option before clicking to bring up the Format window.
Preview: More To Look At
This guide covers the vast majority of the main functions and features within Preview in macOS 26 Tahoe, but there are many other features in the app left to discover.
For example, you can print documents and images from the File menu, change the window's background color, or see where a photograph was taken.
The bottom line is that Preview has a lot more utility beyond simply looking at a PDF or image without opening an editor. For some tasks, you don't need to even consider opening that editor at all.