There is still a perception that iMovie for Mac is for amateurs, but if it is, that's only in the sense that it is deliberately easy to use and its power features do not get in the way.
To be fair, iMovie for the Mac earned its reputation as being basic because it really used to be. To be unfair, it's also sometimes considered inferior to other video editing apps because it is free.
It is still the case that if you need professional video editing features — because you're making broadcast TV or movies — then Apple's Final Cut Pro is the better bet. But, unlike with the iPad version of iMovie and Final Cut Pro, it is startling how similar Apple's free and paid video editing apps are on the Mac.
On the Mac, you can see iMovie as a on-ramp to the more powerful Final Cut Pro. The basic concepts are the same, for one thing.
Then, at least when you first open the two apps, their layout and design are so similar that it can take a moment to be sure which one you're in. And although that similarity rapidly changes as you get into an edit, even the keystroke shortcuts for most steps is the same in both apps.
iMovie — what it's good for
The short answer is that iMovie is best for short videos. So it's ideal for YouTube ones, at least basic ones, plus home movies, and video essays.
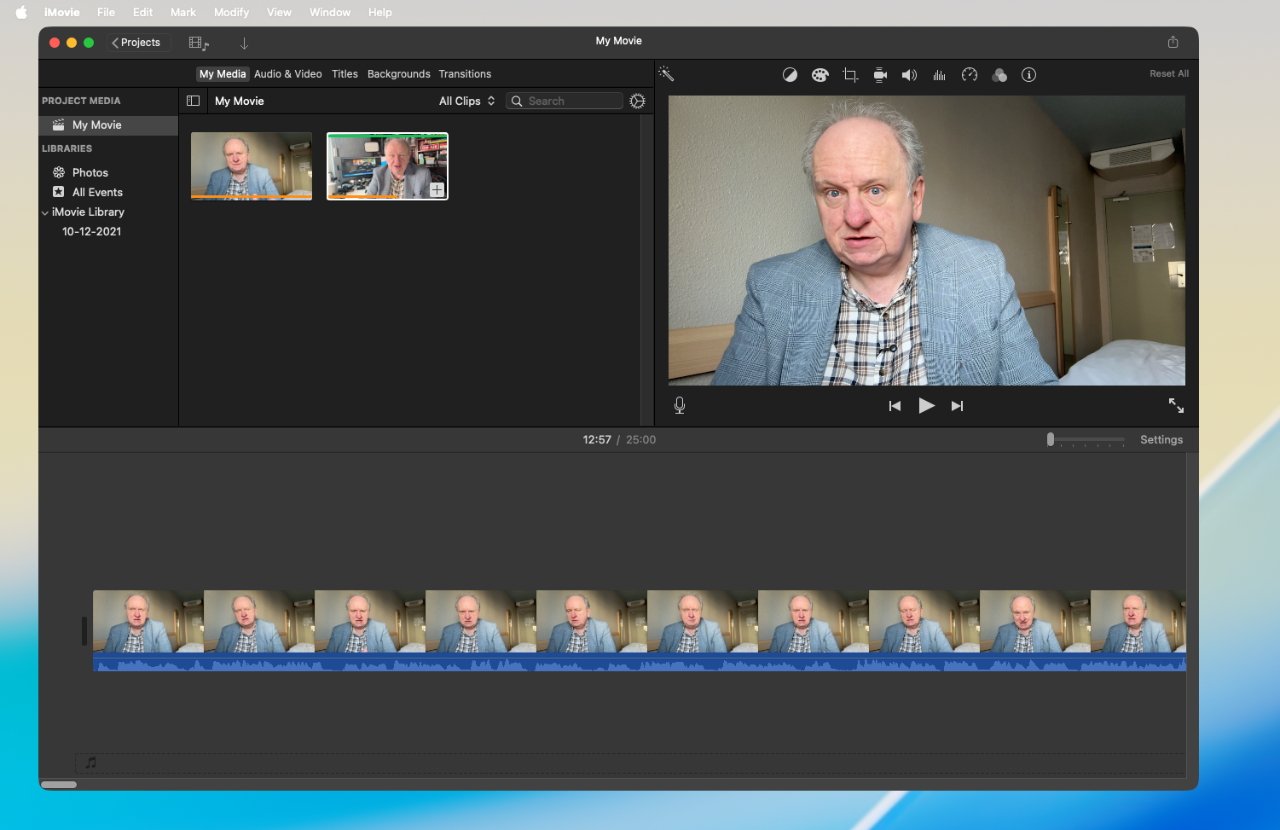
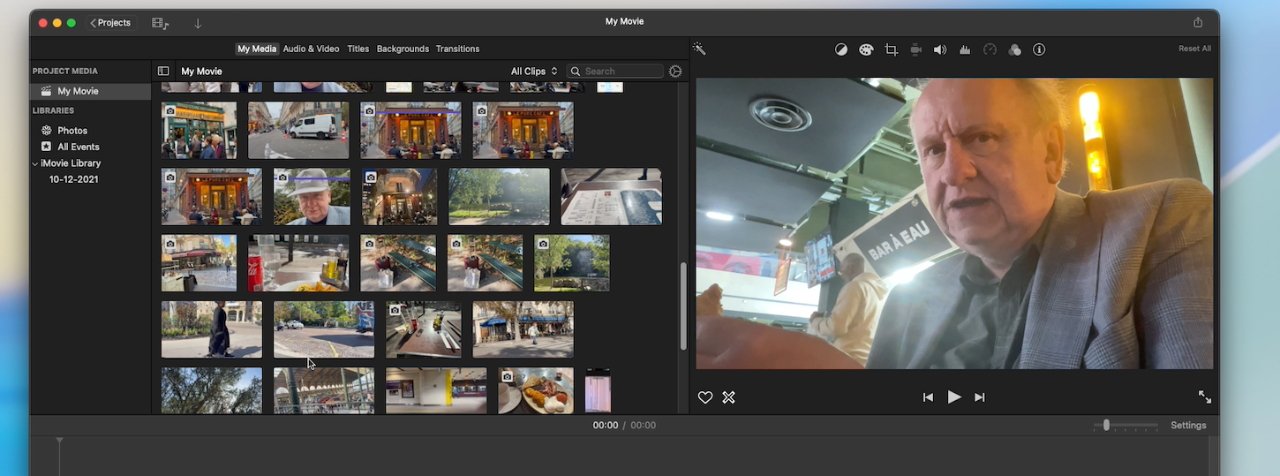
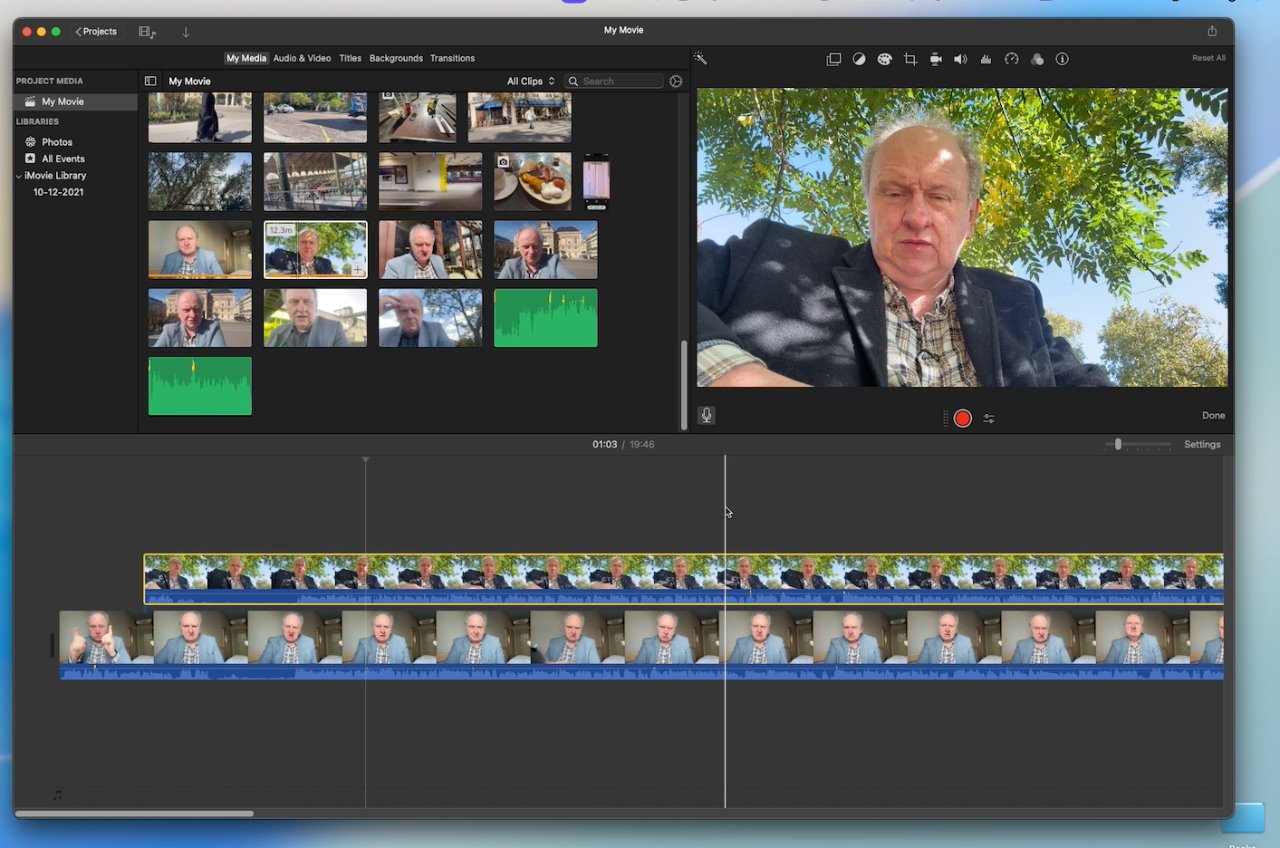
The basic iMovie layout: Footage library (top left), Preview window (top right), and timeline (bottom)
Theoretically, there isn't anything to stop you using iMovie for much longer and more involved projects. In practice, there are specific limitations that tend to prevent that, but iMovie does not stop you making five-hour videos.
Do note, though, that there's a reason why every time Apple brings out a powerful new Mac, all reviewers try it out on video editing. Part of that is how this happens to be what those reviewers happen to do all day, but it is also one task that hammers a Mac's performance.
So especially if you're on an Intel Mac, you will see the Mac strain if you're doing a very long iMovie video.
Even before you actually get into editing your videos, this performance is something to consider — and so, very much, is the question of storage space.
Storage constraints
Videos also take up a lot of space. It's impossible to be very specific but as a fast test, I just saved a one-minute video at 4K resolution and it took up 390MB.
You can choose the resolution of the final movie, with the choice of 4K, HD (1080p), 720p, and 540p. If you're just making a short video to go on your iPhone, pick any resolution you like, and get a smaller file size — the same film at 1080p took 153MB.
But in practice, it's almost always the case that the higher the resolution, the better. Videos just look better, for one thing, but there's also future-proofing.
Your library (left) can get very full and iMovie only has limited ways to sort it
There used to be no logical reason, for instance, that YouTube videos with someone talking to camera, be shot in 4K. But now as so many more videos are in 4K, lower-resolution ones stand out for being noticeably poorer.
However, the amount of space that a finished video takes up is not the only hit on your storage capacity. While you are working on the video, iMovie stores its working files in a library.
It's difficult to give definite figures for how big that iMovie library grows. It does obviously increase with the more videos you make and the more footage you use.
However, deleting video when you're done does not seem to help as much as you'd expect. Both iMovie and Final Cut Pro create very large working documents called render files, and these can balloon up.
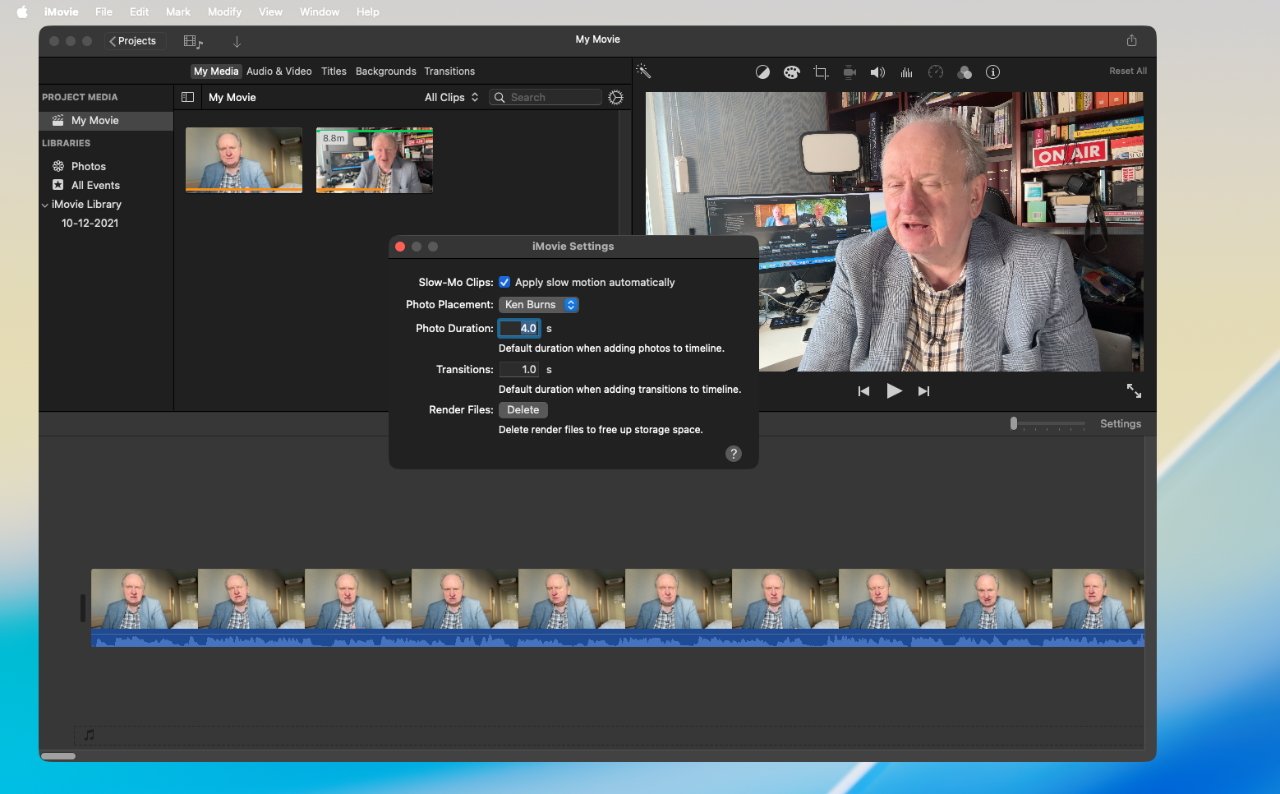
Final Cut Pro seems to be worse for this, but it offers more options for reclaiming the space. In iMovie, the only option is in the app's very sparse Settings panel where there is a Render Files section. Clicking on Delete next to that will cut down the size of the iMovie library. A little.
Apple's iMovie also has only sparse options for settings
Nonetheless, with all footage deleted except for what was needed for the one-minute test video, little space was saved. It's currently taking up 15GB, I presume because of remnants of previous videos I've made.
So preferably you should work on an Apple Silicon Mac, and definitely don't edit when you've very little space left.
Getting started in iMovie and importing video
To make any video, you have to have some footage or some still photos already taken. Assuming you've shot to your heart's content on your iPhone or anything else, once that footage is on your Mac, there are three ways to get it into iMovie:
- Via the Photos app
- Directly import into iMovie
- Drag to the iMovie timeline
The timeline is where you do all of your editing work in iMovie, and it is the app's major strength. The timeline is a horizontal representation of your video, and everything to know about editing will center on rearranging segments along that line.

You can play back a clip using this menu, or a Play button, or just by tapping the space bar
That timeline is absolutely superb for when you are editing, but it isn't a good idea to drag videos onto it directly — because the alternatives are better.
When you do drag, the video file you've got goes onto the timeline and it stays there. If you want to move it later, you have to scroll — it's called scrubbing — through the whole project until you find it.
With Photos, the footage is in your Photos library and you could drag the same clip out onto the timeline twenty times. If you decide it really belongs in a complicated sequence toward the end of the video, for instance, you can concentrate on that sequence now and remove the earlier copy later.
The last option is importing directly into iMovie from your Mac. When you first start the app and begin a new project, there is a very prominent Import Media button.
Once you have imported any, that large button disappears but there is still an Import Media option in the app's title bar.
What happens when you Import Media is that, just like with any app's Open dialog, you find the file you want. The dialog defaults to having an Import All button, or you can select one or more, and the button becomes Import Selected.
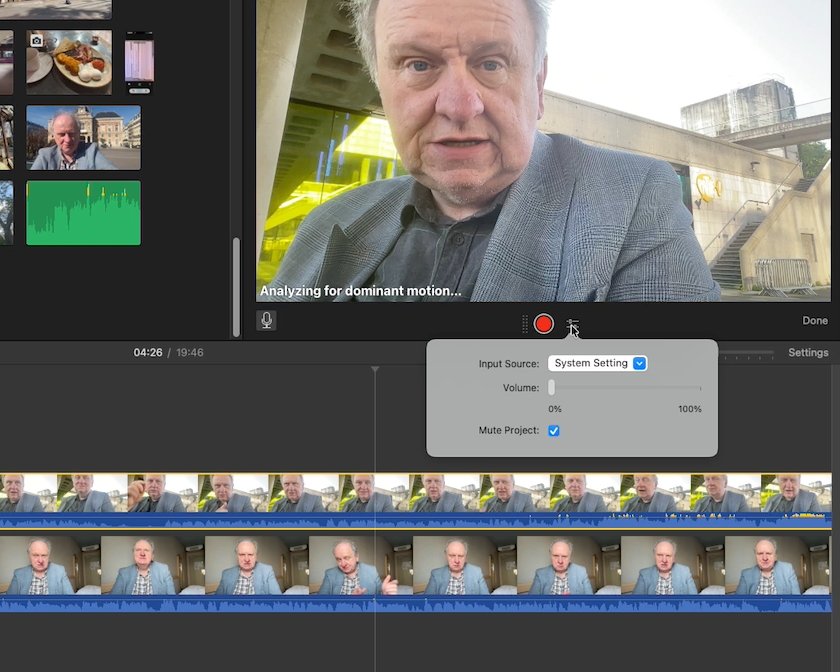
Apple's iMovie includes a Record button so you can add a new voiceover to your video
In either case, what this does is copy that video footage into iMovie's library. You have no options here, and that's a shame because there are pros and cons to having the footage in your library, specifically:
- Pro: all your footage is always available
- Con: iMovie has just doubled how much storage you need
Final Cut Pro offers an extra option, which is effectively to pretend you've imported the video. You do everything the same as you do in iMovie, but you can change a setting so that the video isn't actually copied into the Final Cut Pro library.
Instead, Final Cut Pro maintains a link to that footage on your drive. As you edit, everything is the same — selecting clips, arranging them on the timeline — but you haven't duplicated what might be many gigabytes of storage.
No question, this is the better option and it would be great to see it added to iMovie — but it isn't without problems. The obvious one is that if your footage is on an external drive or an SD card, then when you remove that storage, the video is gone.
Final Cut Pro users do get distressingly used to video being replaced by a red banner saying Missing Clip.

Final Cut Pro allows you to layer video and audio on top of each other where iMovie allows only two tracks
The less obvious reason why iMovie's sole approach has an advantage, is simply that you never have to think about where the footage is. It's just there in your iMovie library.
So for smaller projects, or just when you are first starting out, iMovie's approach is more straightforward.
Starting editing at last
Making videos is at least as much about preparation as it is the editing, but the editing is where the fun is. Using iMovie is absolutely absorbing, and it is absolutely enjoyable.
That's because of the magnetic timeline. Apple introduced this with Final Cut Pro and it's become a polarizing feature among video editors. A enormous proportion of professional video editors actively despise the magnetic timeline — and every one of them is simply wrong.
Say you have an hour-long video and you decide that there's a bit around five minutes in that is just rubbish. On any video editing app, you can mark that segment and delete it.
Drag the line — the playhead — to where you want to cut and press Command-B
On most video editing apps, what you then end up with is a big gap in the video. You have to then select every part that follows this excision and manually drag it back to close the gap.
The argument for this is that it's hardly complex. But the argument against it is firstly that you shouldn't have to do what your Mac can do for you. Let iMovie close up the gap automatically.
When you are deep into video editing, there are more reasons to thank Apple for the magnetic timeline. But that's specifically when you are juggling very complex sequences of overlapping video and audio, and that is something that you need Final Cut Pro for.
Making the video
With all of your footage in iMovie, the app can have many windows but the three crucial ones are:
- Footage library at top left
- Preview window at top right
- Timeline across the bottom
You drag footage from the library to the timeline, and then you can see how it all looks in the preview window.
Drag a clip from the library onto the timeline. Then drag another clip and drop it after the first.
You can then click on any clip and:
- Take the Drag it to somewhere else in the timeline
- Drag its start or end to show less or more
- Make a cut in the middle of the clip
As you drag a clip around, other clips on the timeline move out of the way. You can drop any clip in between any other two.
You can play back a clip using this menu, or a Play button, or just by tapping the space bar
And if you instead want it slap in the middle of one of those other clips, you make a cut. Drag your playhead to where you want to cut a clip, then press Command-B.
You can also right-click and choose Split Clip, or through the menus choose Modify, Split Clip. But Command-B — it's B for Blade — is not only handier, it's a standard in all video editing apps.
It's also how you remove whole sections of clips once you've decided you don't need them. You just make a cut at the start and end of what you want to remove, then click to select that segment and press Delete.
This is your life now for what might be hours of editing — and you'll enjoy it all.
Mechanically, all you're doing is dragging, cutting, deleting, over and over again. But what you're really doing is shaping your whole video and it is deeply satisfying.
So much so that you will lose a lot of time just relishing how well you've made a cut. It is extremely tempting to keep playing back a sequence you've just made.
You do need to play back the video to see what you've got, though. Press the space bar or click the Play button and you can play back the video on the timeline to see what you've done so far.
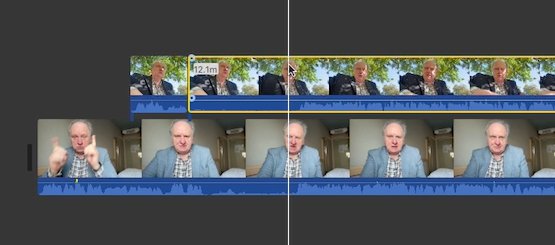
Two layers are the most you can have in iMovie
Note, though, that the video starts from wherever the playhead — the cursor — is. So if you've just added a clip then the cursor might be right at the end of your video and there's nothing more to play.
Also, if you click on a clip in the library and press Play or the spacebar, it is that clip that will show in the Preview window.
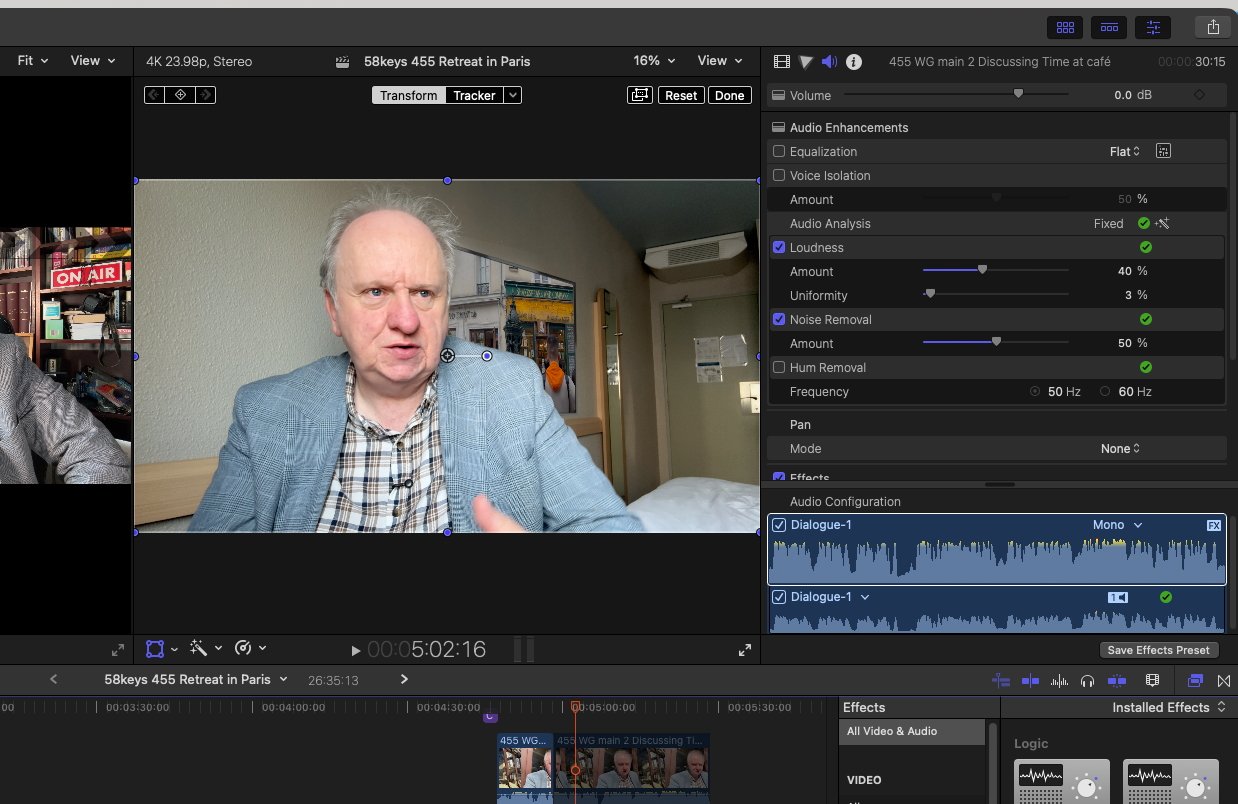
Just above the Preview window, there is a whole series of tools for adjusting your video. You can make basic adjustments like cropping, doing some color work, or a limited range of options for improving audio.
As long as your original video footage is good — nicely framed, well lit and with clear audio — then these tools are not necessary. But they are useful when you want to make changes to the look of the video, so while they are limited, they're worth exploring.
Even more preparation
Doing this dragging, rearranging, and cutting, is how you edit a video and broadly the job never changes. It's all about selection and positioning, it's all about your sense of pacing and storytelling.
However, you can speed things up. Because most of the time you're going to have more video footage than you need and iMovie gives you some ways to sort it out to make your final selection faster.
Just as an example of the problem of having a lot of footage, there's a sequence in "Mission: Impossible: The Final Reckoning" that runs for 20 minutes in the final version. It's a chase sequence involving two biplanes, and according to editor Eddie Hamilton, those 20 minutes were chosen from just over 400 hours of footage.
Hamilton does not use iMovie — he edits on Avid Media Composer — but then few people are going to have over a thousand times more footage than they finally use.
In iMovie, Apple shows you all of your footage as a series of clips in the library. It shows each one as a thumbnail image, and you can click into them to play them back in the preview window.
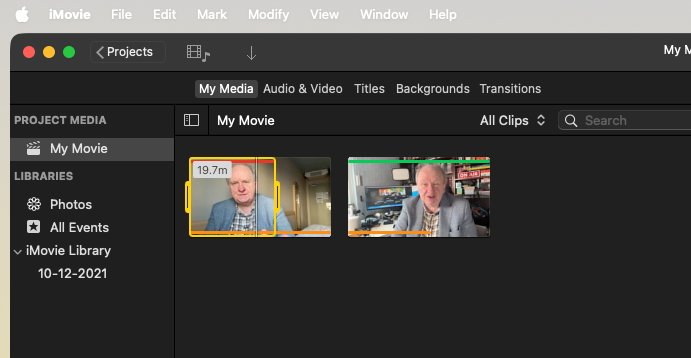
Notice the green line across the top of the clip on the left — that means you've marked it as a Favorite. The redline over the other clip says you've rejected it.
When you click on a clip, iMovie selects it with a yellow border and gives you grab handles at the start and end. You can drag those handles so that only the good bit is highlighted, making it easier later to just drag that section out to the timeline.
Final Cut Pro lets you do more complex work like adding that fake TV in the background
So you can watch through all of your footage and use these drag handles to mark out the one good part of each clip. Hopefully you'll have more than one good part, though, so you will want to mark more than one section:
- Move the drag handles around the first good part
- Press F on the keyboard
- Move the drag handles to the next part
- Press F again
It's F for Favorite. Once you tap F, that section of the clip gets a green bar across the top. Or you can press the Delete key and that does not remove the clip, it puts a red bar across that section.
When you've done this for every clip you've got, you can click on the All Clips dropdown in the library window. From there, you have several options, including being shown only your favorite clips.
Now as you edit, only the good bits are there waiting for you to drag to the timeline.
Note that if you do this a lot, then dragging of the handles becomes a pain — and you don't need them at all. Instead:
- Play the video - or drag your cursor
- Stop at where the good part begins
- Press I
- Play or drag to the end of that section
- Press O
In this case, that's I for In and O for Out. This is how you do this selection in every video app — including Final Cut Pro.
So it's true that learning iMovie's keyboard shortcuts means you're also learning those for Final Cut Pro. Equally, it's true both that learning iMovie can be all you ever need — and that it's a way of starting to learn Final Cut Pro.
Export options are limited in iMovie
But then video editing is not about the app you use, it's about the video you make. And that video can't just live in iMovie, you have to get it out to people so they can see it too.
Exporting a finished video
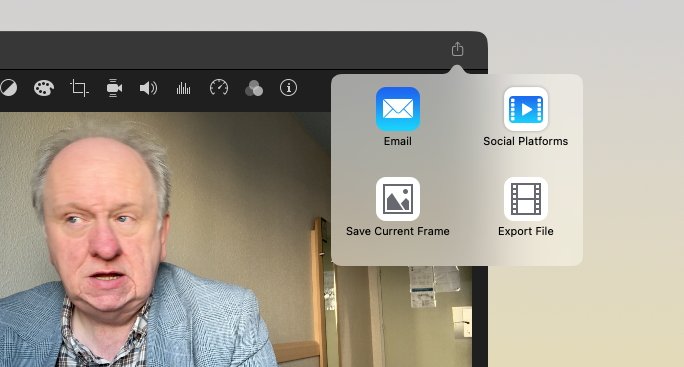
When you're happy with your video, you can either choose File, Share, or click on the practically invisible Share icon at top right of the iMovie screen.
In either case, you get four further options:
- Social Platforms
- Save Current Frame
- Export File
Save Current Frame does exactly that, it exports a still JPEG image of whatever is now visible in your Preview window. I use this when I want to prepare some kind of overlay for the video, like an arrow pointing to something:
- Open the image in an editor
- Erase everything so you're left with just the right size
- Draw the arrow
- Export the image in PNG format
- Import the new image back into the video
- Drag that new image to where you want
Note that if you do this, you have to export the image as PNG. That format allows for transparent backgrounds, while JPEG does not.
The other three options export the entire video, just in different resolutions. Email is likely to be the least used because, as the Mac will warn you, only very small videos can be sent that way.
Of the three, Social Platforms is the most disappointing. Previously, Apple has made it simple to choose, say, YouTube, and have the right format video sent to that service.
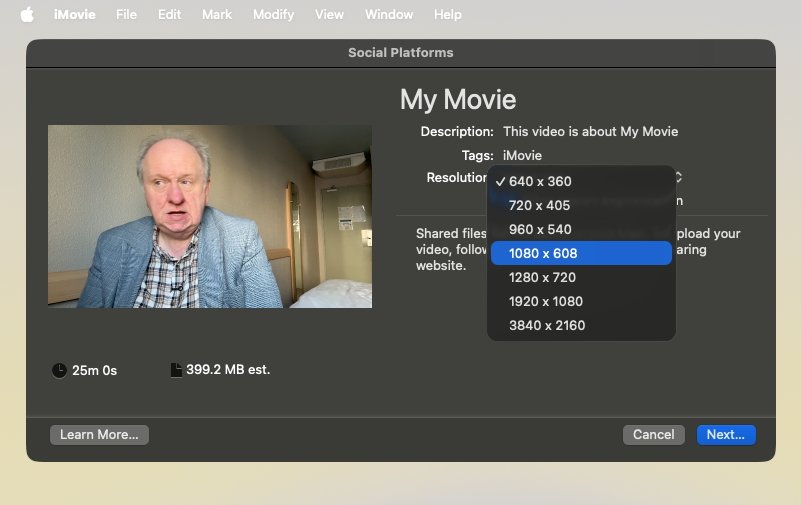
The "Social Platforms" export option is only a series of resolutions — and doesn't include any square ones
Now all you get is a series of options to do with the resolution of the video. Notably, there is no square option so iMovie can't directly make the best format videos for Instagram.
What iMovie can't do
That's an example of a surprising failing in iMovie, but of course there are other things it cannot do. Arguably, though, everything else concerns features and options you don't need for basic video editing.
There will come a point when you want more than iMovie can do, however, and really there are myriad reasons to move up to Final Cut Pro.
Those range from improving audio to altering image quality. But absolutely the main reason to leave iMovie concerns a major difference in the timeline.
In both apps, your timeline is that horizontal representation of your video. In iMovie, instead of inserting a new clip somewhere in the middle of the timeline, you can place it on top of what's already there.
But you can only place one thing. Try to add a third layer and it instead cuts into the second one, moving or deleting footage.
With Final Cut Pro, you can have as many layers of video — or audio — as you want.
So in my 58keys YouTube videos for instance, I just made one in Paris where I shot the same script in five different locations. One of them was a very dull hotel room, so I also added a fake TV set to the room's wall and inserted footage of Paris into it.
Each of these elements — my scripted footage, the Paris shots and even the fake TV border — were all different layers on the timeline. Final Cut Pro let me stack them, rearrange them, and also turn them on and off as I looked for the best options.
That said, iMovie does have a handier fade than Final Cut Pro. In iMovie, you get drag handles that let you set how sharply a track fades in, whereas with Final Cut Pro it's a multi-step process.
But then when you have made adjustments like fading, Final Cut Pro lets you copy all of them and paste the lot onto any other clip. So when I did that fake TV, for instance, it took me a time to make the first video clip fit the shape of the television, but then no time at all for every subsequent clip.
iMovie is at least a starting point
The fact that iMovie lacks certain features is a reason to upgrade, but it's also a reason why the app enables you to start editing quickly. I've worked with people doing YouTube videos solely in iMovie and for what they wanted, I couldn't recommend moving to Final Cut Pro.
So at the very least, iMovie is a great introduction to editing. But while that is entirely, true, it also undersells iMovie.
Right out of the box, right there for free on every Mac, iMovie is a simply superb video editing app.