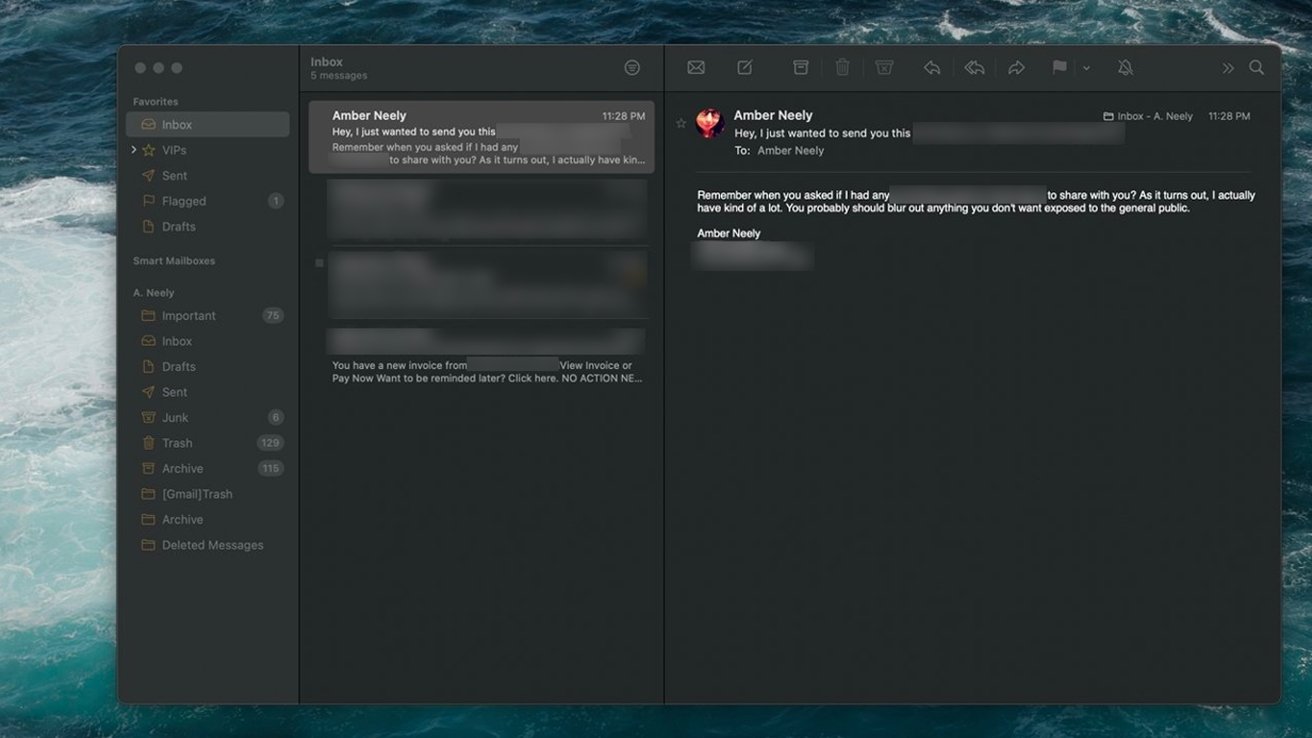
If you're looking to share a screenshot or photo, but you don't want to expose anything too personal, here's how you can blur or otherwise censor them on your Mac, iPhone, or iPad.
Learning how to blur sensitive information in your photos and screenshots is an extremely useful trick to keep handy. After all, the last thing you want to do is expose someone's personal information without their consent — and this includes your info.
There are several ways to hide sensitive information on an Apple device, but we'll show you some of the easiest.
If you have access to an image editing program, you can quickly and easily blur out just about anything you want. It varies a little from program to program, so we'll show you how to do it on Photoshop, one of the most widely available image editors.
How to blur parts of images using Adobe Photoshop on the Mac
- Open your image in Photoshop
- In the left toolbar, select the Marquee tool by tapping the letter M on your keyboard
- Click and drag a box around the sensitive image you wish to hide
- In the top menu, click Filter
- Click Blur
- Click Gaussian Blur
- Slide the Radius slider to adequately blur your selection
- When finished, click OK
However, if you don't have Photoshop, you can hide information behind a box using the Preview app's Markup tool, too.
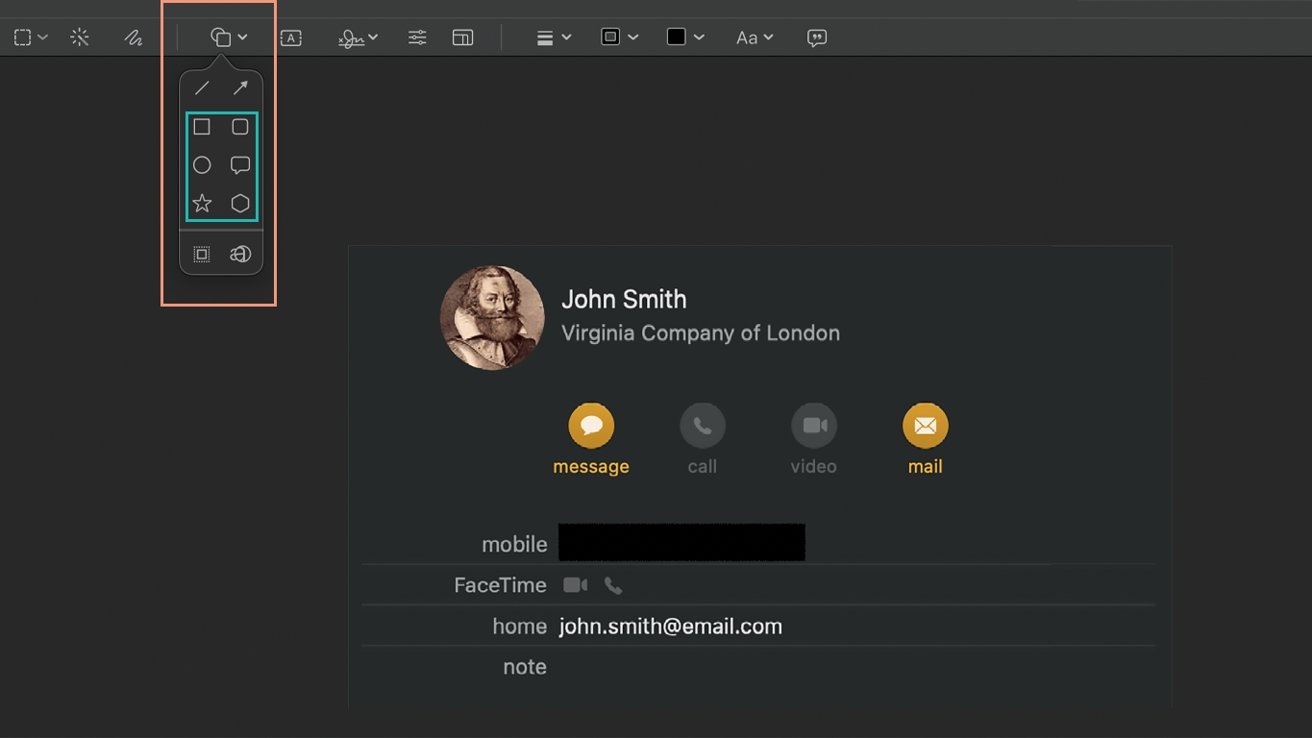
How to censor parts of images using Markup on Mac
- On your Mac, double click the image you wish to censor
- In Preview, next to the Search bar in the upper right corner, Markup icon— it looks like a pen tip
- In the Markup toolbar, click the icon Square/Circle Shape icon— it's the fourth from the left
- Select a Shape Fill— such as the rectangle or circle
- Using the blue toggles, move your shape over the sensitive information
- When finished, close your image
If you don't want to take an image to your Mac — or if you don't have a Mac — you can censor details directly from the Photos app.
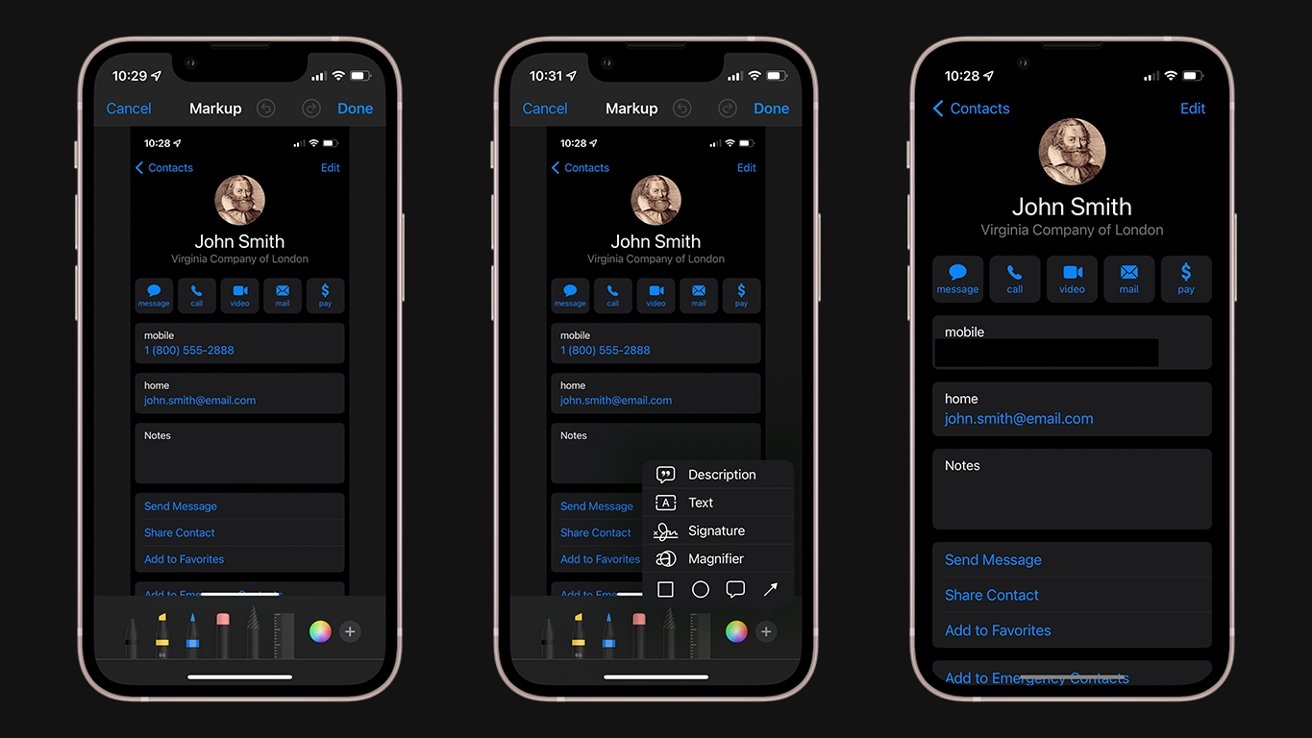
How to censor sensitive information in iPhone or iPad screenshots with Markup
- Open the screenshot or photo you would like to censor in the iPhone or iPad Photos app
- Tap Edit
- In the upper right corner, tap the Markup icon — it looks like a pen tip
- In the lower left corner, tap the + button
- Tap the Square icon, next to the circle
- In the lower left corner, tap the Square/Circle Shape icon
- Tap the left-most Filled-In Square
- Using the blue toggles, move and stretch the square over the sensitive information you wish to hide
- When finished, tap Done